But we have good news for you: Editing photos well on Instagram doesn't take a whole lot of time, and it doesn't require you using a fancy camera or software. It's all about taking great photos and learning which filters work for which types of photos -- all within the Instagram app.
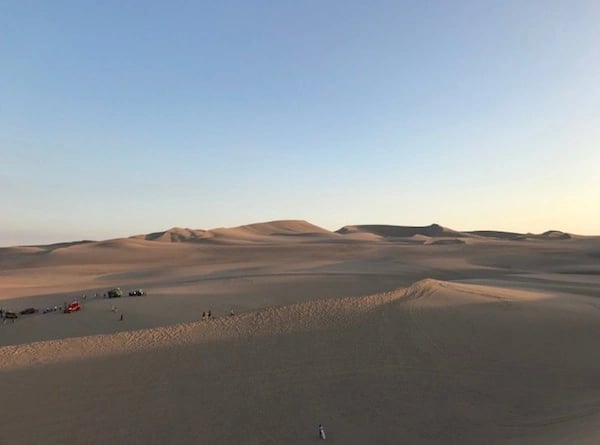
In this post, we'll help you turn unedited photos -- like the one on top of a Peruvian desert -- into ones that are much more compelling, like the one below:

How To Edit Instagram Photos: A Step-by-Step Guide
1) Start with a great photo.
No amount of editing will fix a photo that wasn't shot well in the first place. When it comes to posting something awesome on Instagram, it's all about photo quality -- and that starts with a photo that's great even before you adjust it in the app.
You don't need to be a photographer to take great photos for Instagram. All you really need is a smartphone and the willingness to learn some key tips for how to use it. Start by reading through these 18 tips for taking great photos with your smartphone. This blog post will teach you how to line up your shots using the rule of thirds, find perspective, and take advantage of symmetry, patterns, and more.
2) Upload your photo to Instagram.
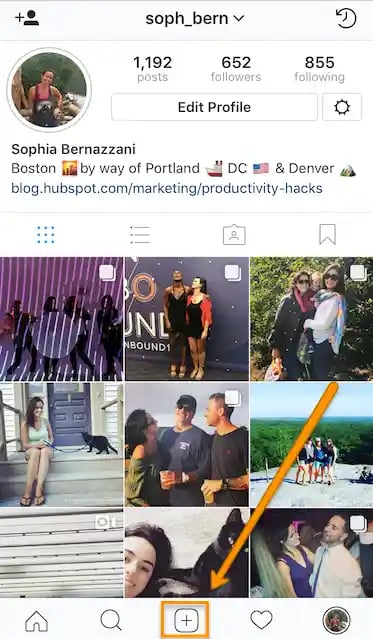
Now that we have a photo we're ready to work with, it's time to upload your photo to the Instagram app. To do this, open the Instagram app and click the plus sign at the bottom center of your screen.
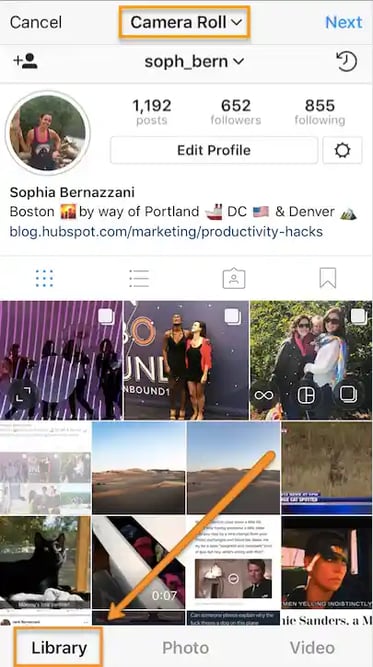
From there, select the photo you'd like to edit from your photo album. By default, it'll go into "All Photos," but you can click the downward arrow next to "All Photos" at the top of your screen to open a particular album if your photo is located somewhere specific.
Pro Tip: Instagram will crop your photo as a square by default, but if you want to change it to its original width, simply press the "Expand" icon (two outward facing arrows) in the bottom left-hand corner of the photo once you've selected it.
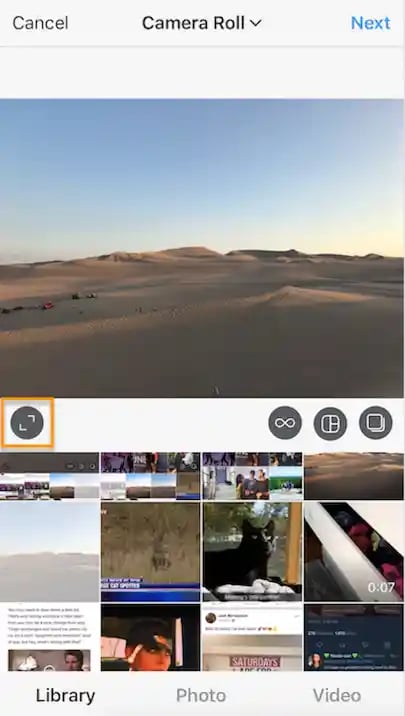
Click "Next" to begin editing the photo.
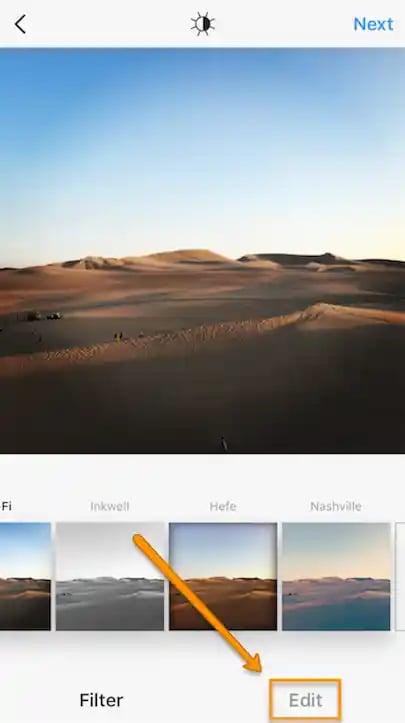
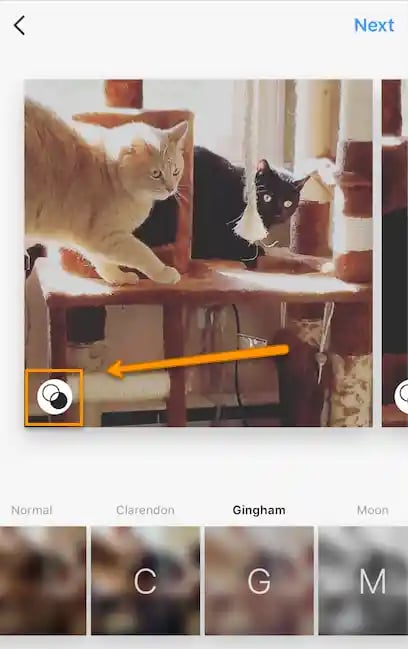
4) Pick a filter.
Here's where it gets fun. Now that you're in editing mode in the Instagram app, the first thing you should do is pick a filter. Usually, I click through onto each and every filter, in order, and take note of which ones I like. Then, I'll go back and forth between the ones I like until I settle on one of them. How's that for scientific?
While slapping on a filter because it looks good is one way to do it, it is helpful to play around with each filter and get an idea of its specific purpose. From Lark to Crema to Valencia to Nashville, each filter has its own personality and hues that drastically changes the photo -- not only how it looks, but how it feels. Take a look at these examples to see what I mean:

.webp?width=405&height=720&name=editinstagramphotos_21%20(1).webp)
Here are a few of my favorite Instagram filters and how they change the look and feel of a photo:
- Lark: A filter that desaturates reds while pulling out the blues and greens in your photos, thereby intensifying it. Great for landscapes.
- Moon: A black-and-white filter with intense shadows that'll give your photos a vivid, vintage look.
- Crema: A desaturated filter that gives your photos a
creamy , vintage look. - Valencia: A filter that warms the colors of your photo, giving it kind of an antique look without washing out color completely.
- X Pro II: A high contrast filter that makes colors pop and adds vignette edges, giving photos sort of a dramatic effect.
- Lo-Fi: This filter adds high saturation, rich colors, and strong shadows to your photo. Great for photos of food.
- Hefe: This filter adds a vintage look to your photos with a darker border, and the yellow tone makes landscapes appear dramatic and other-worldly.
Everyone has their favorites, so as you use Instagram for marketing more and more, keep experimenting and learning about your own filter preferences for every type of photo you take, whether they're landscapes, close-ups, portraits, or something else.
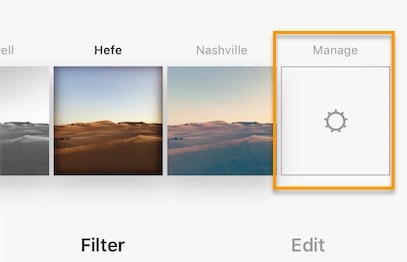
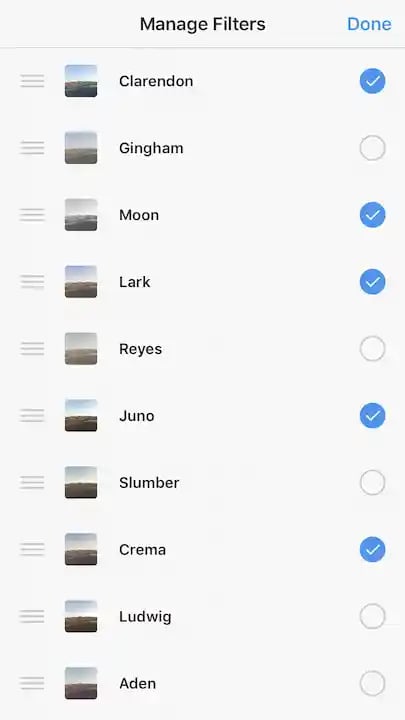
Pro Tip: As you begin learning your filter preferences, you can reorder your filters and even hide the ones you don't use. To do either of these things, scroll to the very far right of your filters options and click "Manage."
To reorder your filters, simply hold your finger down on the three grey lines on the far right of the filter you'd like to move, and drag it to reorder.
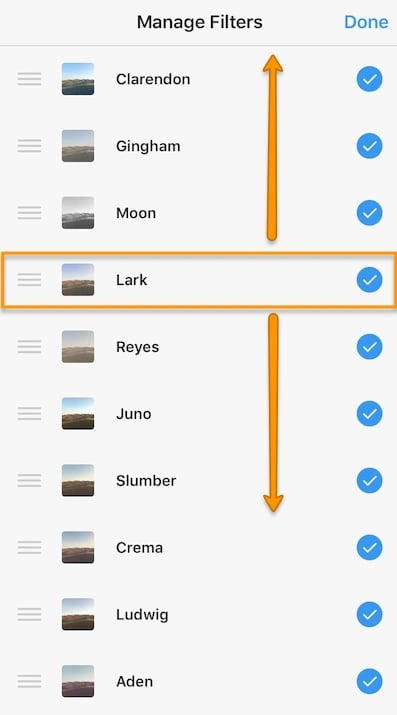
To hide filters you don't use, deselect them by tapping on the white check mark to the right of the filter.
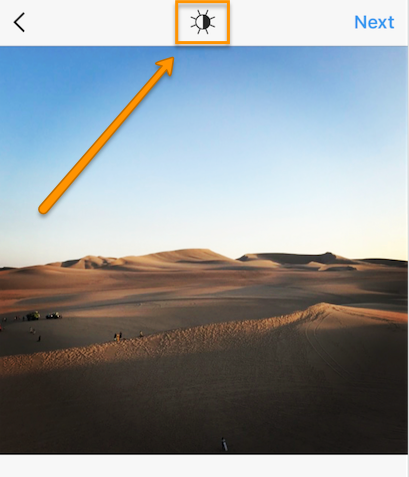
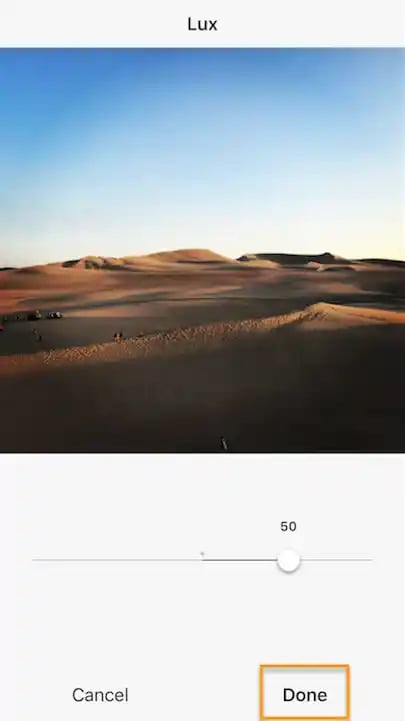
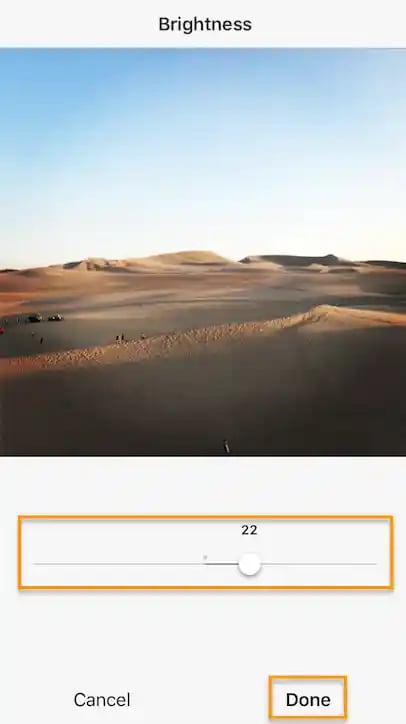
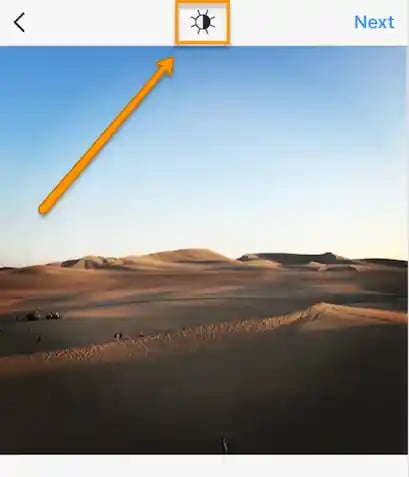
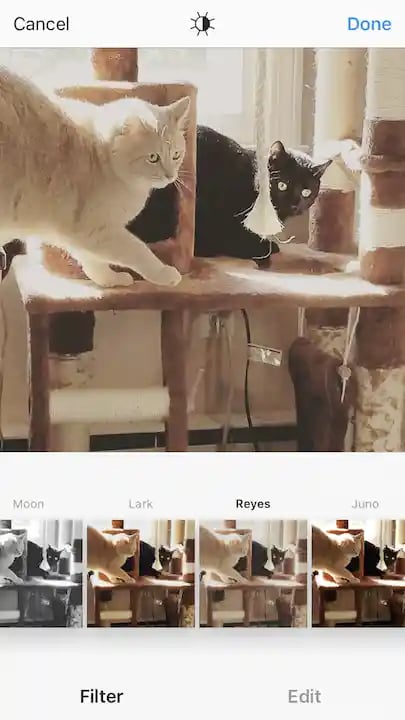
5) Adjust the lux.
The what? If you've ever edited a photo on Instagram, you've likely used the lux feature before, even if you weren't sure what it's called. It's a feature that makes your photos more vibrant and brings out the smaller details.
Once you've selected a filter, turn lux on by tapping the sun icon above your photo:
Then, use the slider to adjust the lux, which will adjust the contrast and saturation of your photo. I usually slide it up and down until I settle on what looks best. Tap "Done" when you're finished and it'll take you back to the filters page.
6) Use the simple editing tools.
Next, open up Instagram's simple editing tools by tapping the wrench icon below your photo on the right-hand side.
From here, you can adjust a number of settings, including alignment, brightness, contrast, structure, warmth, saturation, highlights, shadows, and sharpness. I usually go through each setting one by one until I've adjusted the photo to my liking.
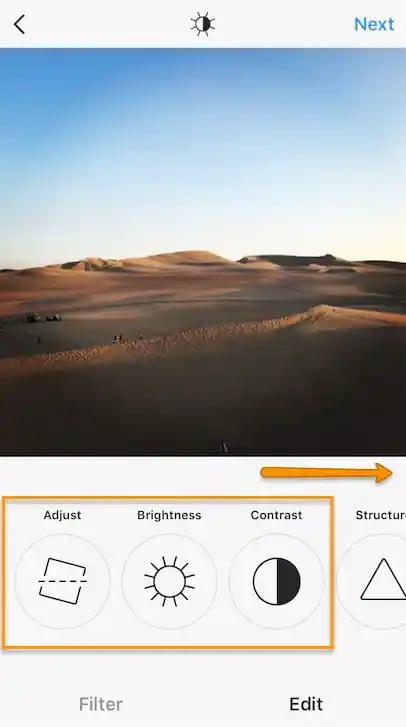
To adjust each of these settings, click on the icon at the bottom of your screen, use the slider to find a "sweet spot," and then tap "Done" when you're done. If you adjust the slider and realize you don't want to make any changes, simply tap "Cancel" and it'll exit from that setting without saving any changes.
Once you've made all the changes in Instagram's tools that you'd like, click "Next" in the top right-hand corner of your screen.
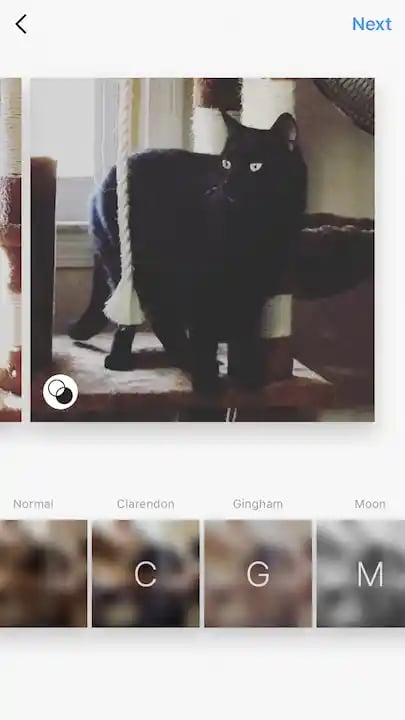
7) If you're uploading an album on Instagram, edit each photo individually.
If you're using Instagram's handy new feature that allows you to upload up to 10 photos in a single album, make sure to be aware of a quirk that can come up when you start editing your photos.
Say I wanted to post not one, not two, but three photos of my adorable cat. I'd select one to upload to Instagram as usual, and then tap the album icon to select multiple photos at once:
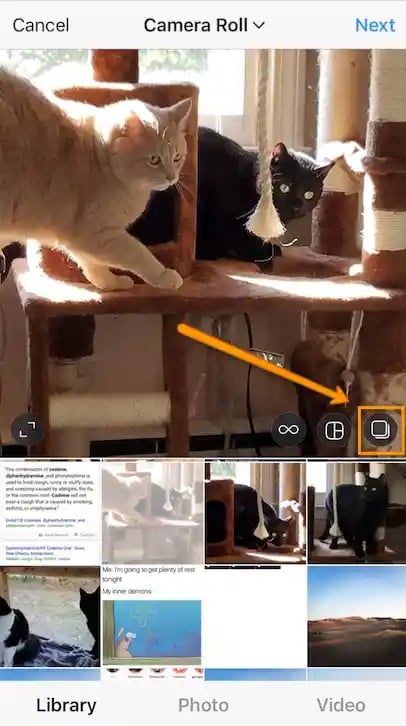
Choose the photos you want to use, then tap "Next:"
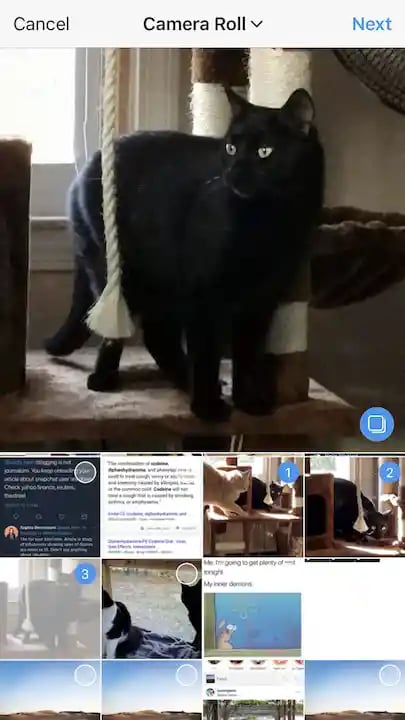
You might be tempted to dive in and start picking a filter and editing from the list of filters at the bottom, but wait just a moment -- because if you pick a filter from the menu below, you'll apply it to all of your photos (shown below), and if you've learned anything in this blog post, it's the importance of editing photos individually.
Tap the Venn-diagram icon in the corner of each photo to edit it individually.
From there, you can choose a filter and edit your individual photos using the tools detailed above.
When you're done with one photo, tap "Done," and you can choose another photo in your album to edit.
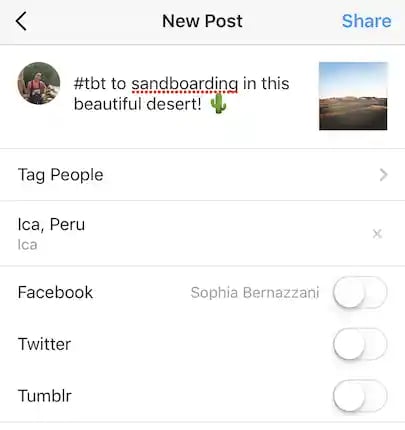
8) Either post your photo immediately, or save it to post later.
At this point, you have two options.
Option 1: Post your photo immediately.
If you're ready to post your photo now, then go ahead and post it by adding a caption, a geotag, tagging any relevant Instagram users, and clicking "Share."
Option 2: Save it to post later.
If you're not ready to post it now, but you wanted to get a head start on editing it so you could post it in a pinch, then you can save the photo with the edits you made in Instagram without posting it -- thanks to a little hack.
Ready? To use Instagram as a photo editor without posting anything, all you need to do is publish a picture while your phone is on airplane mode.
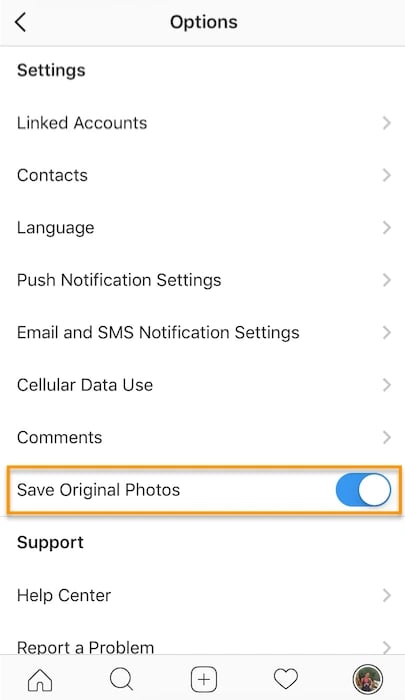
First, you'll have to be sure you have "Save Original Photos" turned on in your settings.
Then, turn on airplane mode. Here's how to do that:
- To turn on airplane mode on an Android device: Swipe down from the top of the screen. Then, swipe from right to left until you see "Settings," and then touch it. Touch "Airplane Mode" to turn it on.
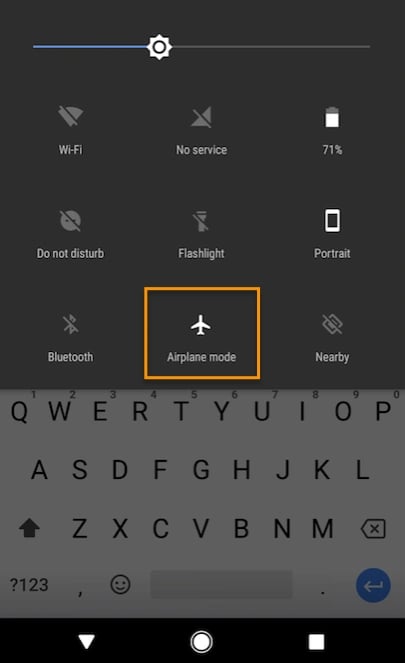
- To turn on airplane mode on an iPhone/iPad: Swipe up from the bottom of the screen and click the airplane icon. Or, go to "Settings" and then "Wi-Fi," and switch "Airplane Mode" on.

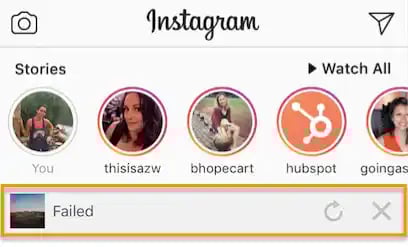
Then, go back to your editing screen and press the "Share" button at the bottom. An error message will appear saying the upload failed, but rest assured the photo will be saved automatically to your phone's photo gallery.
Pro tip: If you want to edit a whole bunch of photos ahead of time so you can upload them later without much effort, one way to organize your edited photos so you can find them easily later is to add them to your "Favorites" folder on your iPhone.
To add photos to "Favorites," you'll need to "heart" the photo. Here's how it works: When you're scrolling through your photos, tap the heart icon at the bottom of your screen.
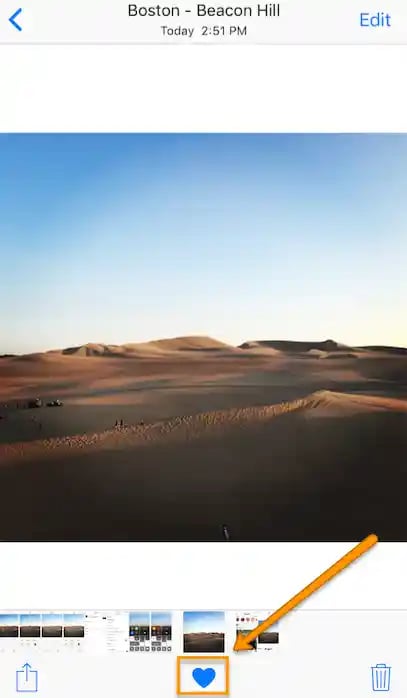
The photo will be added to a photo album called "Favorites" in your iPhone's folders, which you can access easily and at any time. Since Instagram doesn't let you schedule posts in advance, this is a great place to store edited photos so you can upload them when you need them.

And there you have it! By now, you should be able to edit your Instagram photos on a pretty basic level. For more tips and tricks to take your Instagram game to the next level, check out these 15 hidden hacks and features.
Instagram Marketing

![41 Instagram features, hacks, & tips everyone should know about [new data]](https://53.fs1.hubspotusercontent-na1.net/hubfs/53/Instagram-hacks-1-20240916-2633447.webp)
![How to Use Instagram: A Beginner's Guide [Expert Insights + New Data]](https://53.fs1.hubspotusercontent-na1.net/hubfs/53/how-to-use-instagram_0.webp)
![The Pros and Cons of Instagram Marketing, According to an Expert [+ Research]](https://53.fs1.hubspotusercontent-na1.net/hubfs/53/Untitled%20design%20-%202024-11-15T195221.458.jpg)
![How to Use Instagram for Business [Data & Insights From 650+ Marketers]](https://53.fs1.hubspotusercontent-na1.net/hubfs/53/instagram-for-business.webp)
![601 Most Popular Instagram Hashtags in 2024 [+ Trends & Data]](https://53.fs1.hubspotusercontent-na1.net/hubfs/53/instagram-hashtags_2.webp)