If you have more than one salesperson at your company, chances are you have some form of territory division. At the very least, you’d probably like to have some way of making sure your salespeople aren’t tripping over each other--double-hitting some leads and entirely overlooking others. It just makes sense.

Creating Lead Rotation in HubSpot for Territories
Unfortunately, making this happen is an entirely different matter. Depending on how you define your territories, it can be very difficult to organize your CRM data around those definitions.
Not to worry—HubSpot’s automation tool is here to help! Using workflows, you can sort records into territories and, if you have more than one person working a territory, you can also divvy up those leads equally between those reps.
![]()
To develop lead rotation based on territories you will need to:
- Define your territories
- Create your workflows
- Quality leads and rotate
Creating Territories in HubSpot
There are many different ways to think about territories, but geographic boundaries is usually at least a component of a territory, if not the full definition. You might define those boundaries using states or regions, countries, or even postal codes. Whatever the case, pulling together a list of everyone within a given territory can get messy pretty quickly.
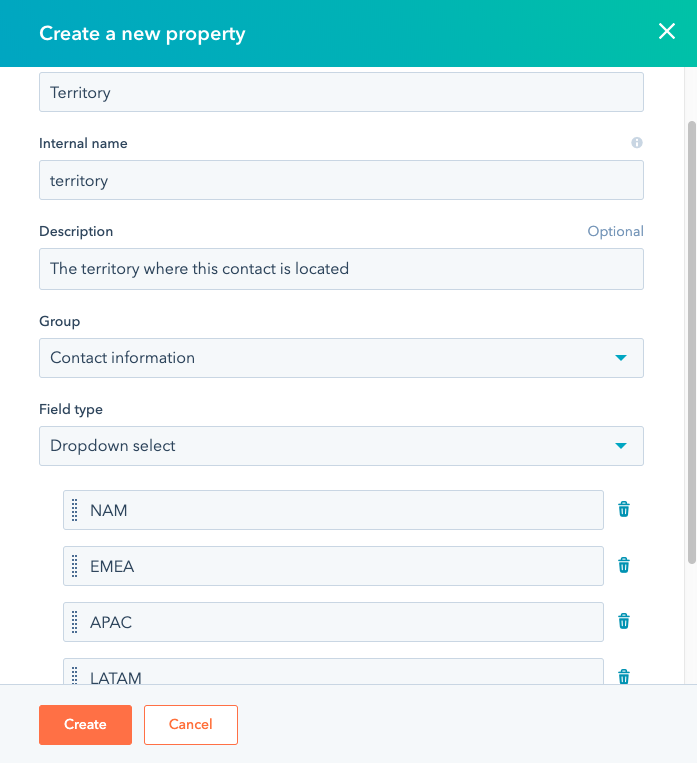
To simplify things, you’ll first need to create a custom property. You can call it “Territory” or whatever makes the most sense to you. The most important thing is that you make it a dropdown property with pre-set options--one for each of your territories:
Once you’ve done that, you can create a workflow that will update that property based on your territory definitions.
Creating a Workflow in HubSpot
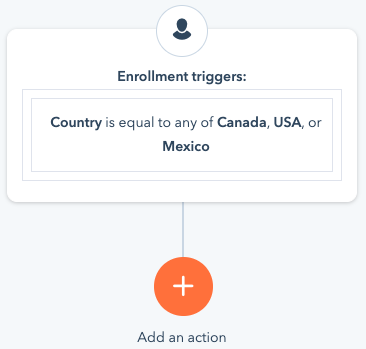
Every workflow is made of two main elements: enrollment criteria and actions. Enrollment criteria define what records will get pulled into the workflow. So let’s say you have a territory for North America that includes any leads based in Canada, the U.S., or Mexico. Your enrollment criteria would be any records that have one of those countries in their “Country” property. That would look like this:
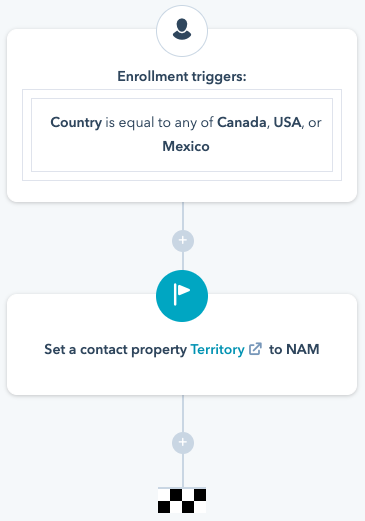
The second half of a workflow is the actions. Actions are the things you want the workflow to do. In this case, we want our workflow to take those records and updated the “Territory” property for each one of them to say “North America.” To do this, we would use an “Update Property” action, like this:
Now, instead of having to search for three things (“Country is Canada” or “Country is U.S.” or “Country is Mexico”), you only have to search for one thing: “Territory is North America.”
Qualifying and Rotating Leads in HubSpot
Great, but what if you have more than one salesperson in that territory? That’s where the lead rotator comes in. The lead rotator is a workflow action that divvies out leads to a particular group of people.
But before you start ladling out leads to your salespeople, you need a way to qualify those leads. After all, sales people don't need to talk to every single person in their territory, just the ones who might be interested in buying from you. To make this distinction, you'll need a lead qualification workflow.
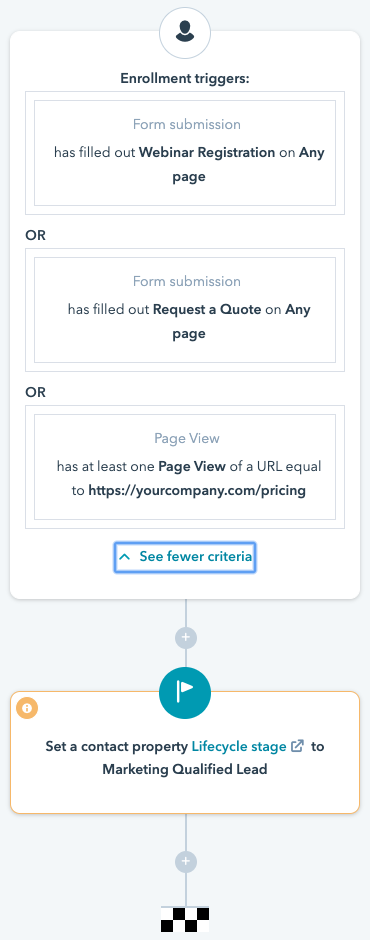
There are many different actions a lead can take that might demonstrate their interest. They might view your pricing page or request a quote or attend a particular event your company hosts. Whatever the case, you can use these actions to trigger a workflow that updates the leads “Lifecycle Stage” property to “Marketing Qualified Lead.” That might look like this:
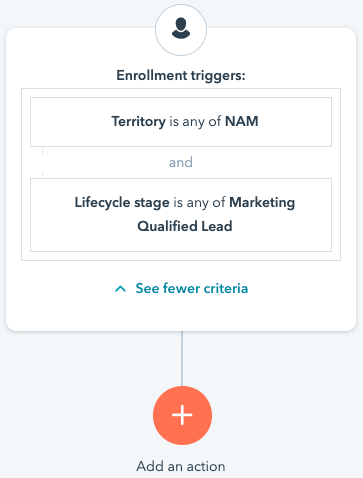
This is where different workflows start to support each other. If you have one workflow that’s automatically stamping records with the appropriate territory, and if you have another workflow that automatically flags leads as qualified when they’ve taken certain actions, then you can have a third workflow that uses the “Territory” and “Lifecycle Stage” properties to rotate leads to the appropriate sales rep. The enrollment criteria for that workflow would look like this:
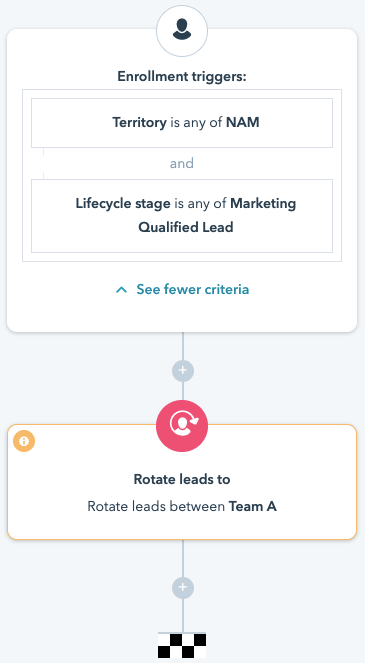
Now for the lead rotator action. There are a couple of different ways you can set it up. One is to choose the individual people you want the leads rotated to. But if you’re using the team function in HubSpot, a more elegant solution is to have the leads rotated to a team, like this.
The advantage of using a team is that, as you add and remove user from the team, the workflow keeps up with those changes. If you manually select the people you’re rotating leads to, then you’ll need to update the workflow whenever someone joins or leads the team.
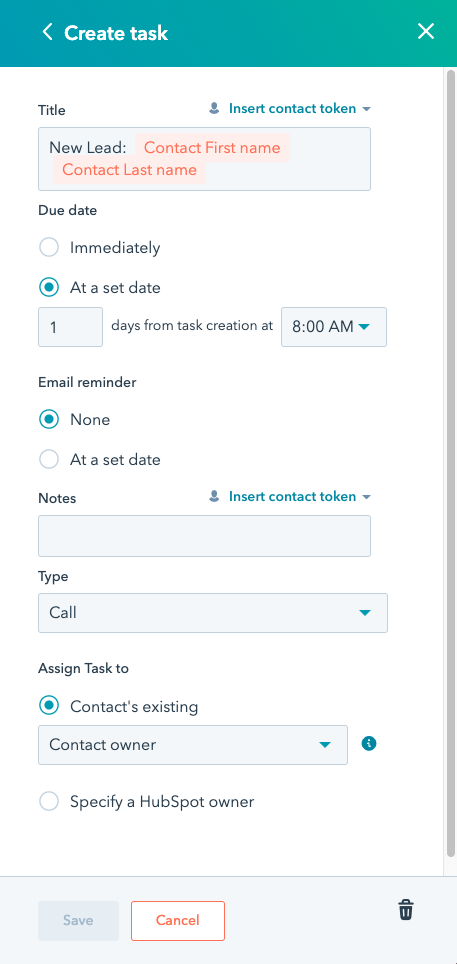
Either way, when a record gets assigned to one of your reps, they’ll receive a notification about their new lead. Notifications are great because they immediately alert the the rep that the record has been assigned to them, but it’s a good idea to take an additional step and also have the workflow assign a task to the rep. Unlike notifications, which can be dismissed and forgotten, a task remains until it’s been marked complete. Additionally, you can have the workflow assign a due date to the task if you want your reps to contact their leads within a certain timeframe.
Here’s an example of a workflow action that assigns a task to the rep with a due date one day later:
Bringing together your Territory Rotation
To bring together and create these workflows in your HubSpot account, take the following steps:
- Create a dropdown property with all of your territories in it.
- Create a workflow for each of your territories that updates your custom property based on your territory definitions.
- Create a workflow that updates the “Lifecycle Stage” property to “Marketing Qualified Lead” whenever a person takes an action that indicates they’re ready to talk to sales.
- Create a workflow for each of your sales teams that rotates the marketing qualified leads in their territory to the reps on that team. Make sure this workflow also assigns a task to the rep that receives the rotated lead.
Want to know more? Check out HubSpot Academy’s lessons on workflows!