When building and maintaining a website, you’re bound to encounter some unexpected HTTP errors here and there. Problems like these are tough to avoid, and some are trickier to resolve than others.

If you’re experiencing a "413 Request Entity Too Large" error, the good news is that this issue is quick and simple to address — you just need to do a bit of server reconfiguration. And no, you don’t need to be a technical expert. Let’s learn how.
![Get Inspired: 77 Examples of Exceptional Web Design [Free Download]](https://no-cache.hubspot.com/cta/default/53/c791aced-6180-48a5-916d-b2d76cec1836.png)
What does “413 Request Entity Too Large” mean?
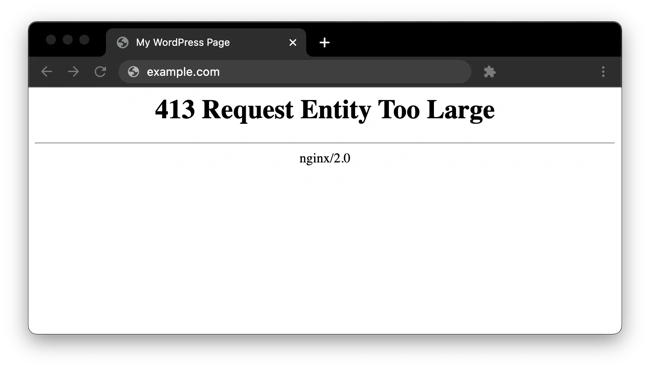
A 413 HTTP error code occurs when the size of a client’s request exceeds the server’s file size limit. This typically happens when a client attempts to upload a large file to a web server, and the server responds with a 413 error to alert the client.
Web servers place size limits on uploads to prevent users from overwhelming the server and exceeding storage permissions. This limit usually isn’t an issue, and common website files should stay well under it. However, especially large file uploads may occasionally exceed the limit, resulting in a message like this:
While you can reduce the size of your upload to get around the error, it’s also possible to change your file size limit with some server-side modification.
Why does the "413 request entity too large" error happen?
The "413 Request Entity Too Large" error occurs when the size of a client's request exceeds the server's file size limit. This error typically happens if you attempt to upload an overly large file. The server responds with a 413 error message to indicate that the entity being sent is too large.
Here are a few examples:
- Uploading large media files, such as images, videos, or audio files
- Submitting form data with large file attachments
- Making API requests with large payloads
- Using content management systems like WordPress with default size limits
The "413 Request Entity Too Large" error is also known by different names, such as:
- Status Code 413
- Error 413
- HTTP Error Code: 413
- 413 Request Entity Too Large
- 413 Payload Too Large
- Entity Too Large 413
- 413 Request Entity Too Big
- HTTP Error 413
Keep in mind that you can only fix this error if you own the website where the error happened. If it happened on an external website or app you’re using, you should try to reduce your file size or reach out to their owner or customer support team.
.png)
Free Website Design Inspiration Guide
77 Brilliant Examples of Homepages, Blogs & Landing Pages to Inspire You
- Agency Pages
- Ecommerce Pages
- Tech Company Pages
- And More!
How to Fix a “413 Request Entity Too Large” Error
Let’s go over some ways you can resolve HTTP error 413. First, we’ll go over some device-agnostic, server-agnostic, and hosting-agnostic methods. We’ll then walk you through how to fix a 413 error on your WordPress website and on Nginx and Apache servers specifically.
1. Reset File permissions
In some cases, the "413 Request Entity Too Large" error can be caused by incorrect file permissions on your server, so resetting these permissions could help. Here’s how to do it (some technical expertise recommended):
- Access your server files: Depending on your hosting provider, you can access your server files in different ways. Common methods include using an FTP client or accessing the file manager through your hosting control panel (such as cPanel).
- Locate the root directory: Navigate to the root directory of your website where the server files are stored. This is typically named public_html or www.
- Select the files and folders: Select all the files and folders within the root directory.
- Change permissions: Right-click on the selected files and folders and choose the "Permissions" or "Properties" option. This may open a dialog box where you can modify the permissions, depending on your specific server.
- Set permissions: Set the permissions to the appropriate values. You can either manually enter these values (like 644 or 755) or use checkboxes or dropdown menus depending on your file manager.
After resetting the file permissions, try uploading the file again. If the permissions were the cause of the issue, the error should no longer occur.
Word of warning: Be careful when modifying file permissions, as setting incorrect permissions can potentially compromise the security and functionality of your website. This is especially critical if you’re running a WordPress website, because WordPress is known to have some security vulnerabilities.
2. Manually Upload the File through FTP
Uploading the file via FTP (File Transfer Protocol) can be a good approach, but I recommend it as a last resort if you’re running a WordPress website, or if you have access to your Apache and Nginx servers. I offer several solutions below for those use cases.
But if those don’t apply to you, or you’ve already tried various methods, FTP is worth trying. It’ll allow you to circumvent restrictions imposed by web interfaces or form submissions. Plus, it will allow you to transfer the file to the server and manually control the upload. That said, this method won’t work if uploads are subject to server-imposed limits.
Otherwise, let’s try it. Here's how:
- Obtain your FTP credentials: This will probably be the hardest part, but it’s also the most important. First, you need your server address, username, password, and port number, which will allow you to transfer files later.
- Install an FTP client: Then, choose an FTP client that best suits your needs. Popular options include FileZilla, Cyberduck, or WinSCP.
- Launch the FTP client: Open your FTP client and enter the FTP server address, username, password, and port number you obtained earlier.
- Connect to the FTP server: Click on the "Connect" or "Quick Connect" button to connect to the FTP server. The FTP client will connect to your website's server if you’ve provided the correct credentials.
- Navigate to the target directory: Once connected, the FTP client will display the directories and files on your server. Navigate to the folder where you want to upload the file. This could be the root directory or a specific folder.
- Upload the file: Drag and drop the file from your computer into the FTP client's remote server directory. The file transfer will begin.
I also recommend setting file permissions, if it’s not done automatically. Right-click on the uploaded file in the FTP client and select "Properties" or "Permissions." Make sure the file permissions are correct to allow access only to the right users.
If you’re running on an Unix-like system, permissions are typically number 644 for files. "644" is a common default permission that allows you, the owner, to read and modify the file, while group members and other users can read it. (Here’s what the numbers mean, if you’re curious.)
Once the file is uploaded via FTP, access your website and see if the uploaded file works as intended without triggering the "413 Request Entity Too Large" error.
3. Contact Your Hosting Provider
If you’ve tried several methods or you’d prefer to not mess with server files or FTPs, reach out to your hosting provider. They have control over the server settings that may be causing the error. They also have the technical expertise to make changes without harming your website, a huge plus.
If you’ve exceeded the file size limit imposed by your hosting plan without realizing it, they can confirm the limits or increase the size limit if necessary (by upgrading your plan, for instance).
Your hosting provider may also be using a content delivery network (CDN) to enhance your website's performance. The problem is that CDN servers may have their own file size limits, which could trigger a 413 error. Your website host could help you navigate these limitations or even adjust the CDN settings for you.
Next, we’ll show you how to fix a 413 error by increasing your size limit with a WordPress setup, as well as with an Apache or Nginx server configuration.
All methods require some edits to your server files, so we recommend creating a backup before attempting the steps below.
Free Website Design Inspiration Guide
77 Brilliant Examples of Homepages, Blogs & Landing Pages to Inspire You
- Agency Pages
- Ecommerce Pages
- Tech Company Pages
- And More!
How to Fix Error 413 in WordPress
Themes and plugins are common causes of the 413 error with the WordPress content management system. Fortunately, there are several ways to increase your WordPress upload size limit enough to let these larger files through. As long as you do not exceed the limits of your hosting plan, you can try any of the following:
Method 1: Modify PHP.ini
The easiest method to increase your upload limit is by modifying your server’s PHP.ini file. Here, you can change your limit through the cPanel interface without any coding. To do this:
1. In your cPanel menu, select MultiPHP INI Editor under Software.

2. In the window that appears, choose your domain from the dropdown menu.
3. Change the values of the following parameters to your preference:
- max_execution_time (maximum time to upload, in seconds)
- upload_max_filesize (maximum upload size, in megabytes)
- post_max_size (maximum post size, in megabytes)
4. When finished, click Apply.
Method 2: Modify .htaccess
If your WordPress site is hosted on an Apache server, it’s also possible to increase your server’s limit via .htaccess, a file that contains many directives for the server. See the solution below.
Method 3: Modify functions.php
You can also try increasing your size limit via the functions.php file of your current WordPress theme.
If you want to make this change permanent, we recommend trying the above approaches first. With this approach, you’ll need to update functions.php whenever you update or change your current theme.
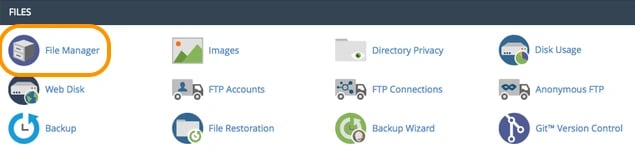
1. In your cPanel menu, select File Manager under Files.
2. Navigate to the folder of your current theme inside your root WordPress directory (public_html by default). Open this theme file.
3. Select functions.php and click the Edit icon.
4. Copy the code below and paste it at the end of the file
@ini_set( ‘upload_max_size’ , ’64M’ );
@ini_set( ‘post_max_size’, ’64M’);
@ini_set( ‘max_execution_time’, ‘300’ );
5. Click Save.
This code sets the maximum allowed size of your WordPress uploads and posts to 64 megabytes. You can change this number to something larger or smaller if you need, as long as you do not exceed your hosting plan's storage limit.
It also sets the maximum period your uploads can take to 300 seconds. Feel free to change this as well.
How to Fix 413 Request Entity Too Large in Nginx
Nginx server settings can be modified inside the file nginx.conf. Open this file and check for the directive client_max_body_size. Then, change the value (in megabytes) to your maximum file size preference.
If you do not see this directive in nginx.conf, you can add it to the end of a server, location, or http block like so:
server {
...
client_max_body_size 64M;
}
This allows for a 64-megabyte upload. Set this number to your preference, save the file, then reload Nginx for the change to take effect.
How to Fix Error 413 in Apache
Change the size limit on an Apache server by updating your .htaccess file like so:
1. In your cPanel menu, select File Manager under Files.
2. In your root WordPress directory (public_html by default), locate .htaccess. Depending on your settings, the .htaccess file may be hidden.
3. Select .htaccess and click the Edit icon.
4. Copy and paste the code below at the bottom of your .htaccess file:
php_value upload_max_filesize 64M
php_value post_max_size 64M
php_value max_execution_time 300
php_value max_input_time 300
5. Click Save and reload Apache.
Doing this sets the maximum allowed size of your WordPress uploads and posts to 64 megabytes and sets the maximum file upload time to 300 seconds. You can change both of these values to your preference.
Still getting a 413?
After trying one or more of the solutions above, you still may encounter a 413 error when uploading large files, even if these files are below your new size limit.
In this case, the issue may stem from your CDN's servers or some other restriction set by your hosting provider. As mentioned, reach out to your hosting support, detailing the problem and the steps you've taken so far to resolve it. It may be that you've exceeded your plan's file size limit without realizing. Or, your configurations may have inadvertently caused another error.
If you use a CDN to improve your site's performance, this may also be the cause of your issue — the CDN servers you're using may impose file size limits that are too small. Since you probably can't modify these servers' files directly, you should consult the documentation for your CDN provider or contact product support to resolve the error.
If all else fails, consider uploading alternative files, reducing the size of your current file, or upgrading your storage plan. If you find yourself needing to upload a massive amount of data, more likely than not there's a workaround.
Fixing a 413 Error
While HTTP errors can be frustrating, many are quickly solvable including a 413. By finding and tackling this issue now, you’ll have one less thing to worry about while building out your website. If your site allows users to upload their own content, changing your upload size limit solves this problem too — just make sure you’re not exceeding the limits set by your hosting plan.
As for the best option, we recommend WordPress users modify their server’s PHP.ini file first if possible, since this can easily be done through your hosting panel. Otherwise, choose the option that matches your server software.
This post was originally published in January 2021 and has been updated for comprehensiveness.
This article was written by a human, but our team uses AI in our editorial process. Check out our full disclosure to learn more about how we use AI.
Free Website Design Inspiration Guide
77 Brilliant Examples of Homepages, Blogs & Landing Pages to Inspire You
- Agency Pages
- Ecommerce Pages
- Tech Company Pages
- And More!