Whether you want to include a contact form for visitors to get in touch with you, a signup form for a newsletter, or a survey to evaluate the user experience, a form builder is a must-have for many WordPress sites. The Gravity Forms WordPress plugin is one you might have heard of, and one that we highly recommend.

There are many free form plugins for WordPress, but these are often simple and limited in their functionality. Meanwhile, premium form plugins like Gravity Forms allow you to do much more with customizing your forms and handling the data you receive from completed forms.

What is Gravity Forms?
Gravity Forms is a premium WordPress plugin that lets you create forms to place on your website. With this plugin, you can add contact forms, quizzes, and surveys to your website with ease. It is popular for features like conditional formatting, which automatically shows or hides certain questions based on users' answers to previous questions, and routing, which directs form submissions to email addresses specified in the contents in the form submission.
Gravity Forms has been around for more than a decade, and it has become a trusted, go-to name in the WordPress form plugin space. In this post, we’ll learn how to install Gravity Forms on your website and get the most from its features.
How to Use Gravity Forms
- Download Gravity Forms.
- Upload the Gravity Forms plugin to WordPress.
- Install and activate the plugin.
- Add the license key.
- Configure general plugin settings.
- Create a form.
- Add the form to your site.
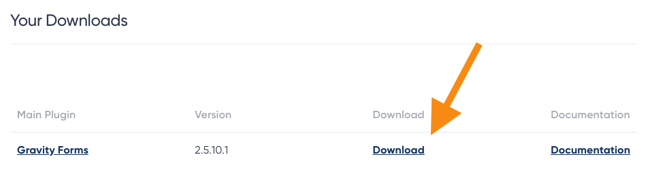
1. Download Gravity Forms.
After purchasing a Gravity Forms annual license, you will be able to download the plugin as a .zip file. Save this .zip file to your desktop.
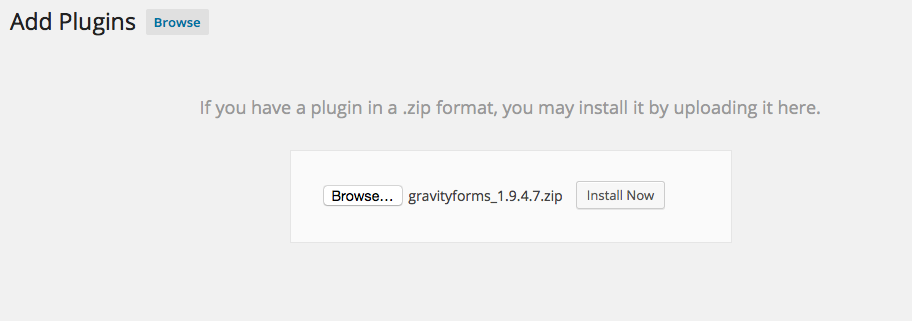
2. Upload the Gravity Forms plugin to WordPress.
In your WordPress dashboard, select Plugins > Add New. Click Upload Plugin, then locate the Gravity Forms .zip file on your computer to upload.
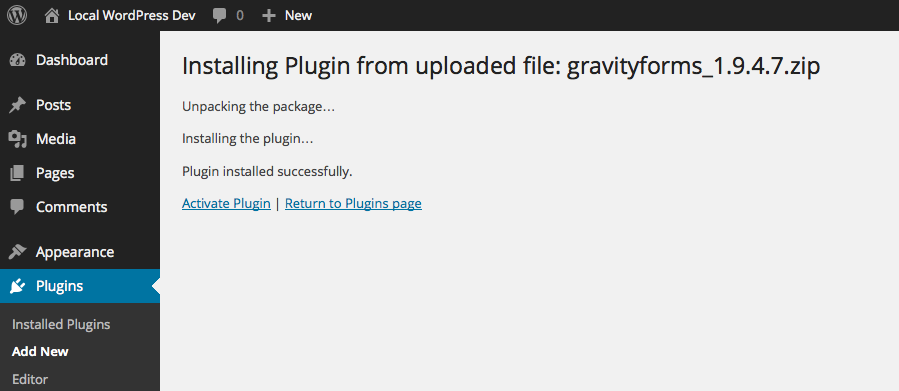
3. Install and activate the plugin.
After you have uploaded the .zip file, select Install Now then Activate Plugin.
4. Add the license key.
Gravity Forms provides a license key upon purchase that grants access to the full plugin functionality, including support, automatic updates, and add-ons. To find your license key, log into your account on the Gravity Forms website and select Your Licenses.
Copy the license key, then return to your WordPress dashboard. In your dashboard, choose Forms > Settings. Under the general Settings tab, paste in your key in the Support License Key section, then click Save Settings at the bottom of the page.

5. Configure general plugin settings.
Once your key has been validated, you can configure several general plugin settings on the same page.
These settings include preferred currency for payments, error logging, and automatic background updates. Automatic background updates are convenient, as they ensure your installation of Gravity Forms is the latest, safest version.
Toggle these settings to your liking, then click Save Settings at the bottom of the page.

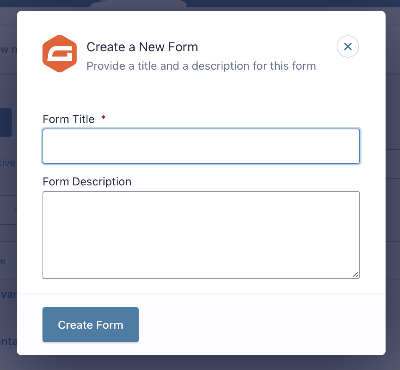
6. Create a form.
Once you've successfully installed the plugin and chosen your settings, you’re ready to create your first form.
In your dashboard, choose Forms > New Form. From here, you'll add a title and optional description to your form.
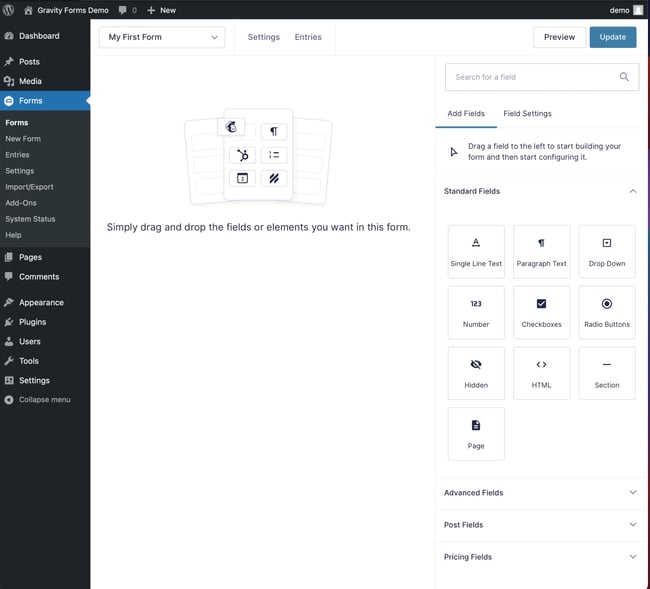
Then, you'll enter the form editor, where you can use the drag-and-drop builder, fields, and customization tools to create the form you want.
7. Add the form to your site.
When your first form is complete, you can add it to your website. Navigate to Pages on your WordPress dashboard, then either select Add New or choose an existing page.
In the page editor, there is an Add Form button above the visual editor. Selecting this button reveals a drop-down menu with your forms. Select the form you just created and click Insert Form.

Click Update for the page, then visit your website to view the new form on the page.
Gravity Forms Plugin Features
The Gravity Forms plugin offers many features to make your WordPress lead forms easy and convenient to use. Here are some standout features to elevate your forms and better capture user submissions:
Form Editor
The Gravity Forms builder functions as a user-friendly drag-and-drop interface. In the form editor, you can easily add new fields, select types of fields, and rearrange the fields as needed. The plugin offers dozens of form field types, from simple text input to captchas to pricing fields, so you can gather just about any info you need.
Email Forwarding
Once visitors start filling out your forms, Gravity Forms can send the submissions to specified team members depending on the content filled out in the form.
Say you have a pet grooming business with different employees specializing in different animals. You may offer a form that asks interested customers to select the size of the pet that needs grooming (e.g., dog, cat, rabbit). Customers who select “rabbit” will have their submission sent to the email of the employee who specializes in grooming pet bunnies. Your application might be less adorable, but just as practical.
Conditional Logic
Gravity Forms' conditional formatting function — perhaps its most popular feature — allows you to reveal or hide specific fields depending on a user's answer to or selection of a certain field in the form.
For example, if one field asks, "Do you have a pet?" and the user selects "Yes," a new question appears prompting the user to select what types of pets they own from a list. If the user selects "No," the list field remains hidden.
Payments
Another popular Gravity Forms feature allows you to insert pricing fields to accept payments. Gravity Forms is integrated with PayPal, Stripe, Square, and more, so you can easily and securely collect payments straight from your form.
Data Export
If you need to save form responses, you can also export from data as an Excel spreadsheet. This is especially handy if you are collecting data from your forms over a long period of time.
Gravity Forms also offers conversion data, so you can quickly compare the number of submissions you are receiving compared to the number of people viewing the form in order to make changes and increase sales.
File Uploads
A notable advanced feature of Gravity Forms is the ability of users to upload files, including images or documents, in form submissions. If you accept user-generated content, Gravity Forms can handle that, too. You can make a form for visitors to submit WordPress posts for your website.
Integrations
Finally, Gravity Forms integrates with leading marketing automation, cloud storage, payment processing, analytics, and messaging software. Notable integrations include HubSpot, Slack, Mailchimp, Stripe, and Constant Contact. Users integrate applications using paid Gravity Forms add-ons — search the add-ons library to see if it's compatible with your preferred tools.
Use Gravity Forms to engage your audience.
To build trust with and effectively market to your visitors, forms are essential to consider when building your WordPress website. It’s worth the investment in a high-quality plugin to ensure your data collection is seamless and pleasant for users.
That’s why we recommend Gravity Forms — this powerful plugin will take your forms to the next level. With it, you can highly customize each form, from what the user sees, to what the user can submit, to who receives the responses. Whether you need simple contact forms, email sign-ups, or even plan to make sales forms, Gravity Forms can help you do all of this and more for your WordPress site.
Editor's note: This post was originally published in October 2020 and has been updated for comprehensiveness.