Over the years, the social media giant has evolved at breakneck speed and likely will continue to adapt swiftly for as long as it exists.
If you need a refresher on how to use Facebook for marketing your business or you want to sign up for a personal account, check out this in-depth explanation of how to use the most popular social media network in the world.
Here, we’ll focus on the basics.
Table of Contents:
- What is Facebook?
- Why use Facebook?
- But is Facebook still popular?
- Why People Like Facebook
- Facebook Terms to Know
- How does Facebook work?
- How the Facebook Algorithm Works
- How to Use Facebook
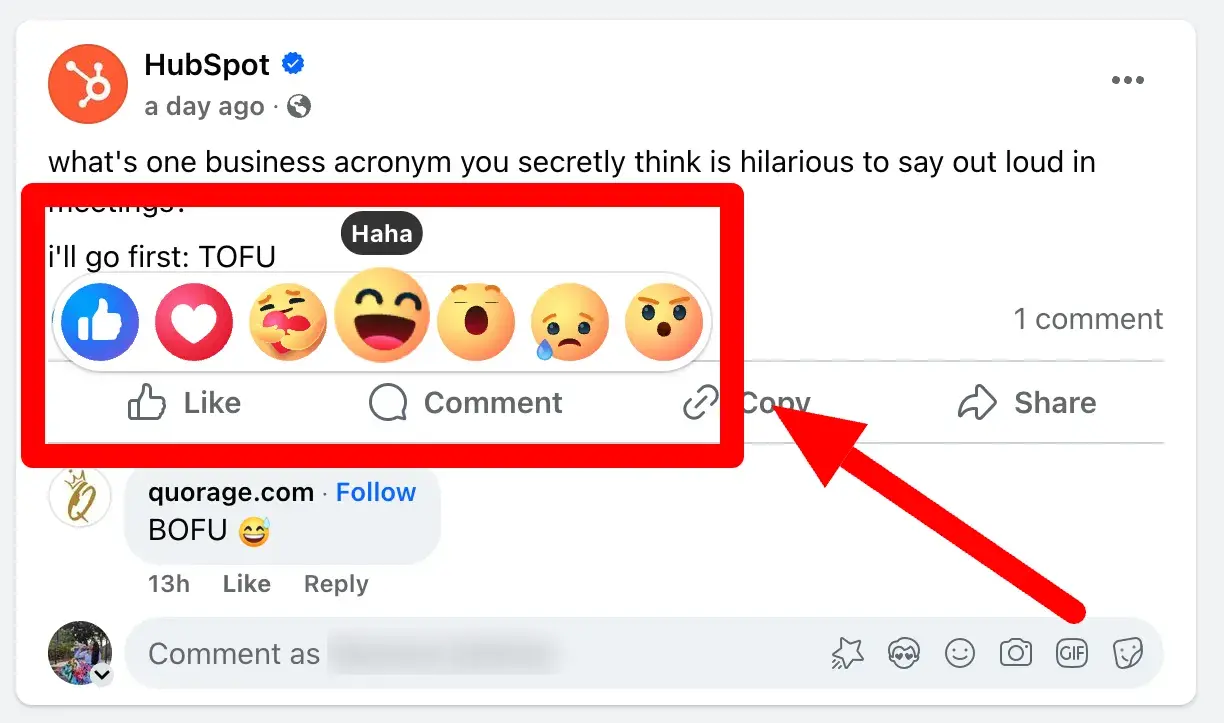
In addition to sharing their own ideas, users can engage with the content others share on Facebook with likes, comments, shares, and reactions such as a laugh, disapproval, and even a hug.
Facebook works similarly for marketing, except businesses have Facebook Pages, not profiles like individual users do. Businesses can use their Facebook Pages to engage with existing customers, target new customers, and administer customer support.
Why use Facebook?
We all likely know the stature of Facebook, but does it live up to the hype? For marketers, it certainly does. Let’s break down some of its biggest benefits.
It’s cost efficient.
Anyone with internet and an email address can sign up for Facebook and take advantage of Pages, Groups, Events, Marketplace, and everything else it offers.
It’s free and fairly easy, but optimizing it for business does take a bit more time and attention.
Learn more about setting up a Facebook Page in The Ultimate Guide to Facebook Marketing.
You have access to a wide, diverse audience.
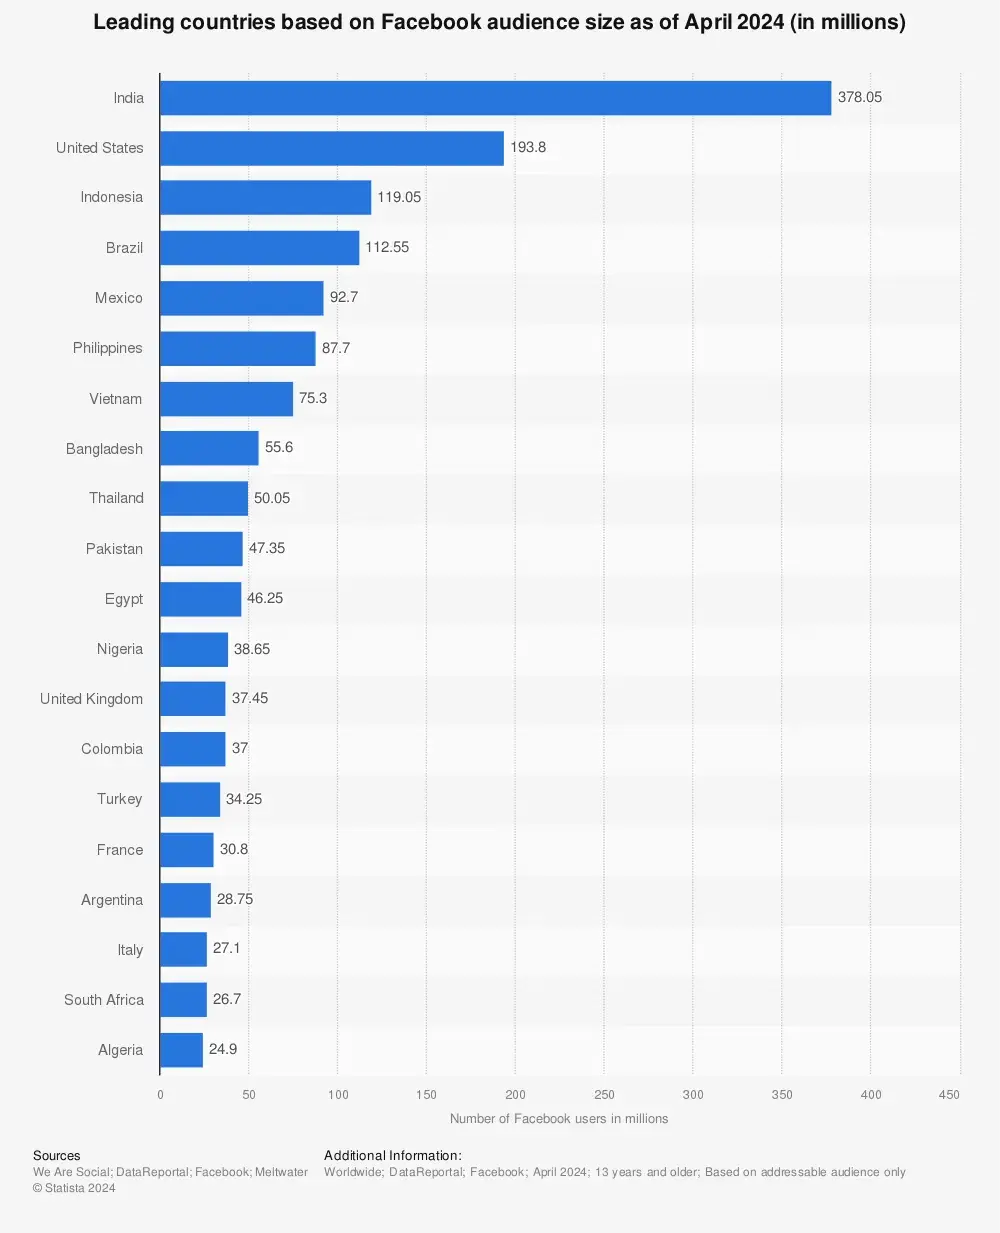
As of April, Facebook has over 3.06 billion monthly active users worldwide, making it the most popular social media platform by literally millions. That’s roughly 40% of the world population, so, as a business, there’s a good chance your target audience will be on Facebook.
Our research found that older generations, like baby boomers and Gen X, consider it one of their top two favorite platforms overall. Meanwhile, younger consumers, like millennials and Gen Z, frequent it for events and Facebook Marketplace.
It supports a variety of content mediums.
In addition to helpful connection tools like Groups and Marketplace, Facebook also allows users and businesses to post a variety of different types of content.
Different people like to consume content in different ways, so diversifying your content mix can be integral to getting your marketing messages heard.
Facebook supports sharing:
- Text
- Photo/Images
- Video
- Live Video
- Gifs
As they share the same parent company, it’s also easy to share Instagram posts directly to a Facebook Page and incorporate conversations via Messenger into a marketing strategy.
Clearly, HubSpot is not shy about exploring all of the options:
There are robust ad capabilities.
Despite strong competition from TikTok and even its sister network Instagram, Facebook remains the social media platform with the second-highest ad ROI for marketers, according to our recent report.
Marketers also said Facebook Ads offer the second-best audience targeting tools out of all social media platforms, losing out to YouTube by only 1%. This is no surprise, considering it lets you target people based on behaviors on and off the platform.
With organic impact on social media becoming increasingly difficult, businesses need affordable and effective ad options, and Facebook offers some of the best.
Learn more about Facebook Ads and how to do them successfully in these resources:
- How to Plan Your Facebook Ads Budget (And Make The Biggest Impact)
- How to Run Facebook Ads: Step-by-Step Guide to Advertising on Facebook
- Facebook Advertising Checklist
But is Facebook still popular?
If its huge number of monthly active users hasn’t already answered this question — yes, Facebook is still very popular.
While its usage may wane among younger generations who opt for visual-focused platforms like Instagram, TikTok, and Snapchat, Facebook still welcomes about two billion users daily.
Many of these users are members of older generations with more financial stability and disposable income than their younger counterparts, which is great news for businesses. Facebook is also the third most visited website in the world, following only Google and YouTube.
But why exactly?
Why People Like Facebook
Facebook is appealing to the general public for many of the same reasons it’s appealing to marketers and businesses.
It’s free and pretty easy to use, and it allows them to share and engage with a wide variety of content from both their loved ones and people around the world.
In addition to these, one of my favorite features of Facebook is the ability to get granular about the audience of every single thing you post. You can make posts:
- Private: Visible to only you
- Public: Visible to anyone who visits the page, on or off Facebook.
- Visible to friends
- Visible to friends minus specific individuals
- Visible to specific friends
- Visible to specific lists you create
In my experience, it offers the most customizable post privacy settings of any social media network.
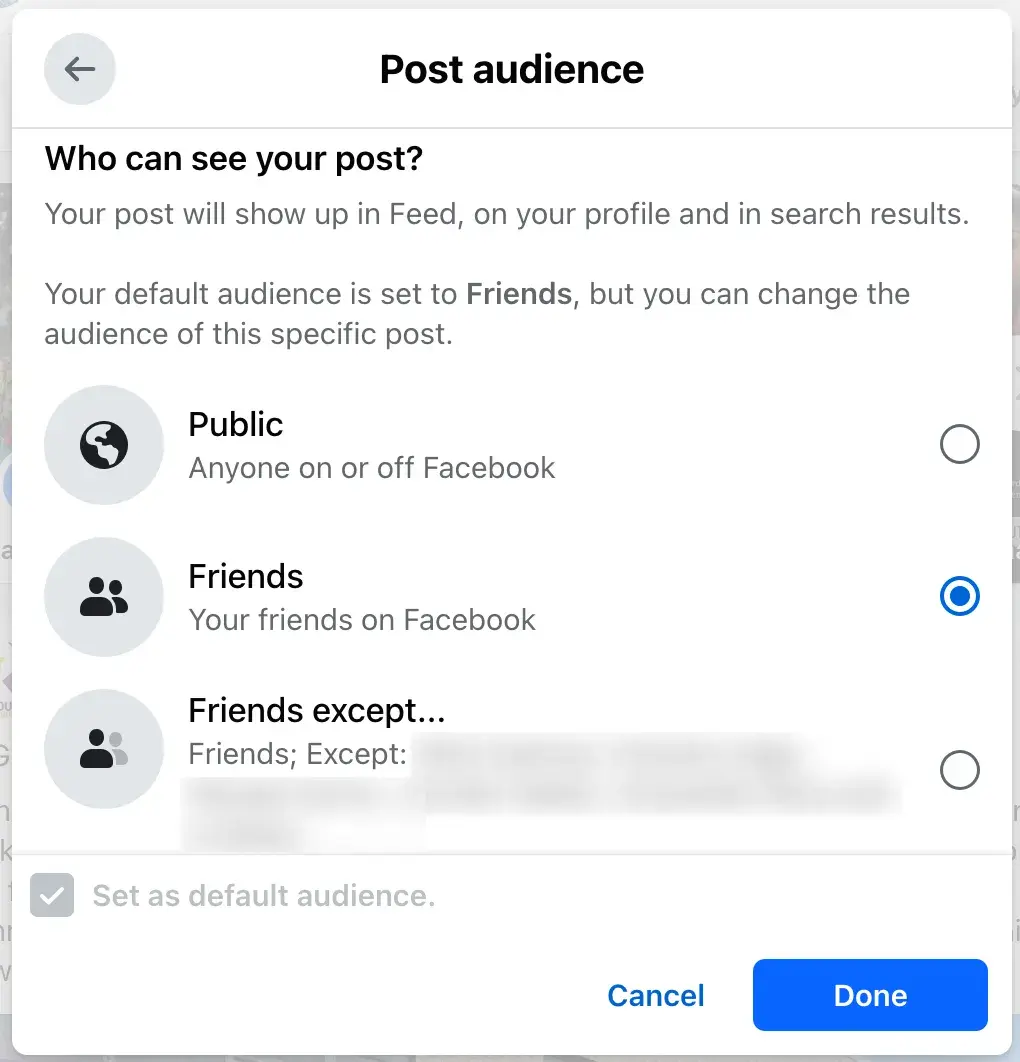
Of course, Meta itself will always be able to access your data — which has gotten it into hot water over the years — but it certainly lets you control what other users can see.
Facebook Terms to Know
To fully understand Facebook and how it works, you’ll want to become familiar with common terms used on the platform. Here is a list of key Facebook terms and what they mean.
Profile
Even if you only want to use Facebook to market your business, you have to set up a personal profile.
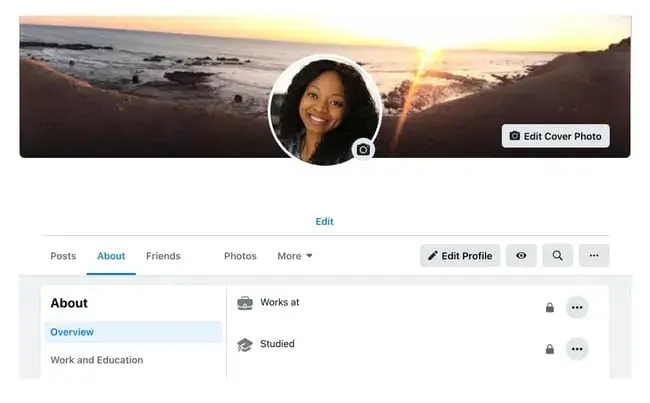
A profile is where a user’s personal information lives. It includes their name, photo, hometown, workplace, education history, and so on depending on their privacy settings.
You can make your profile as public or private as you want using the same audience options we mentioned earlier.
Pages
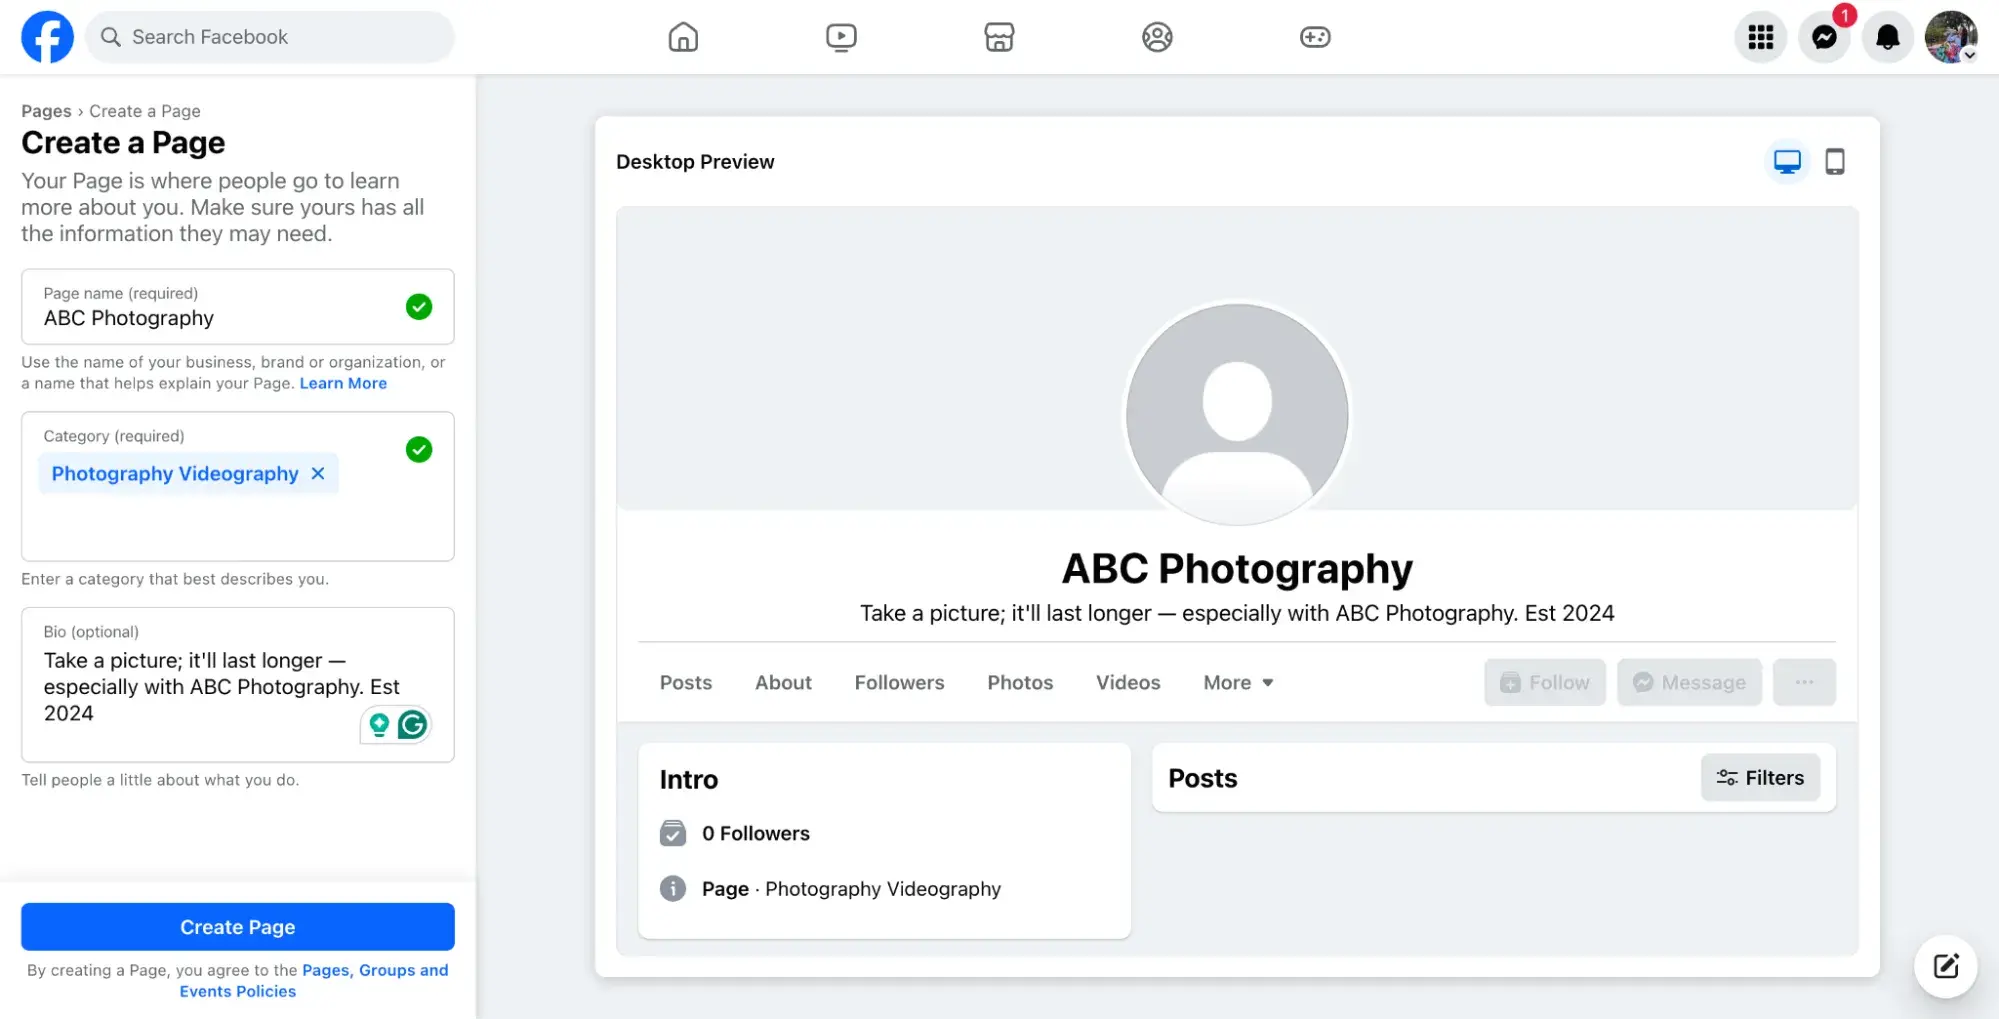
Pages are not individual Facebook users but rather profiles designed specifically for businesses or organizations. They include basics like your:
- Industry/Category
- Business Overview/History
- Contact Information (i.e., website, phone number)
- Business Hours (if applicable)
- Logo and Branding
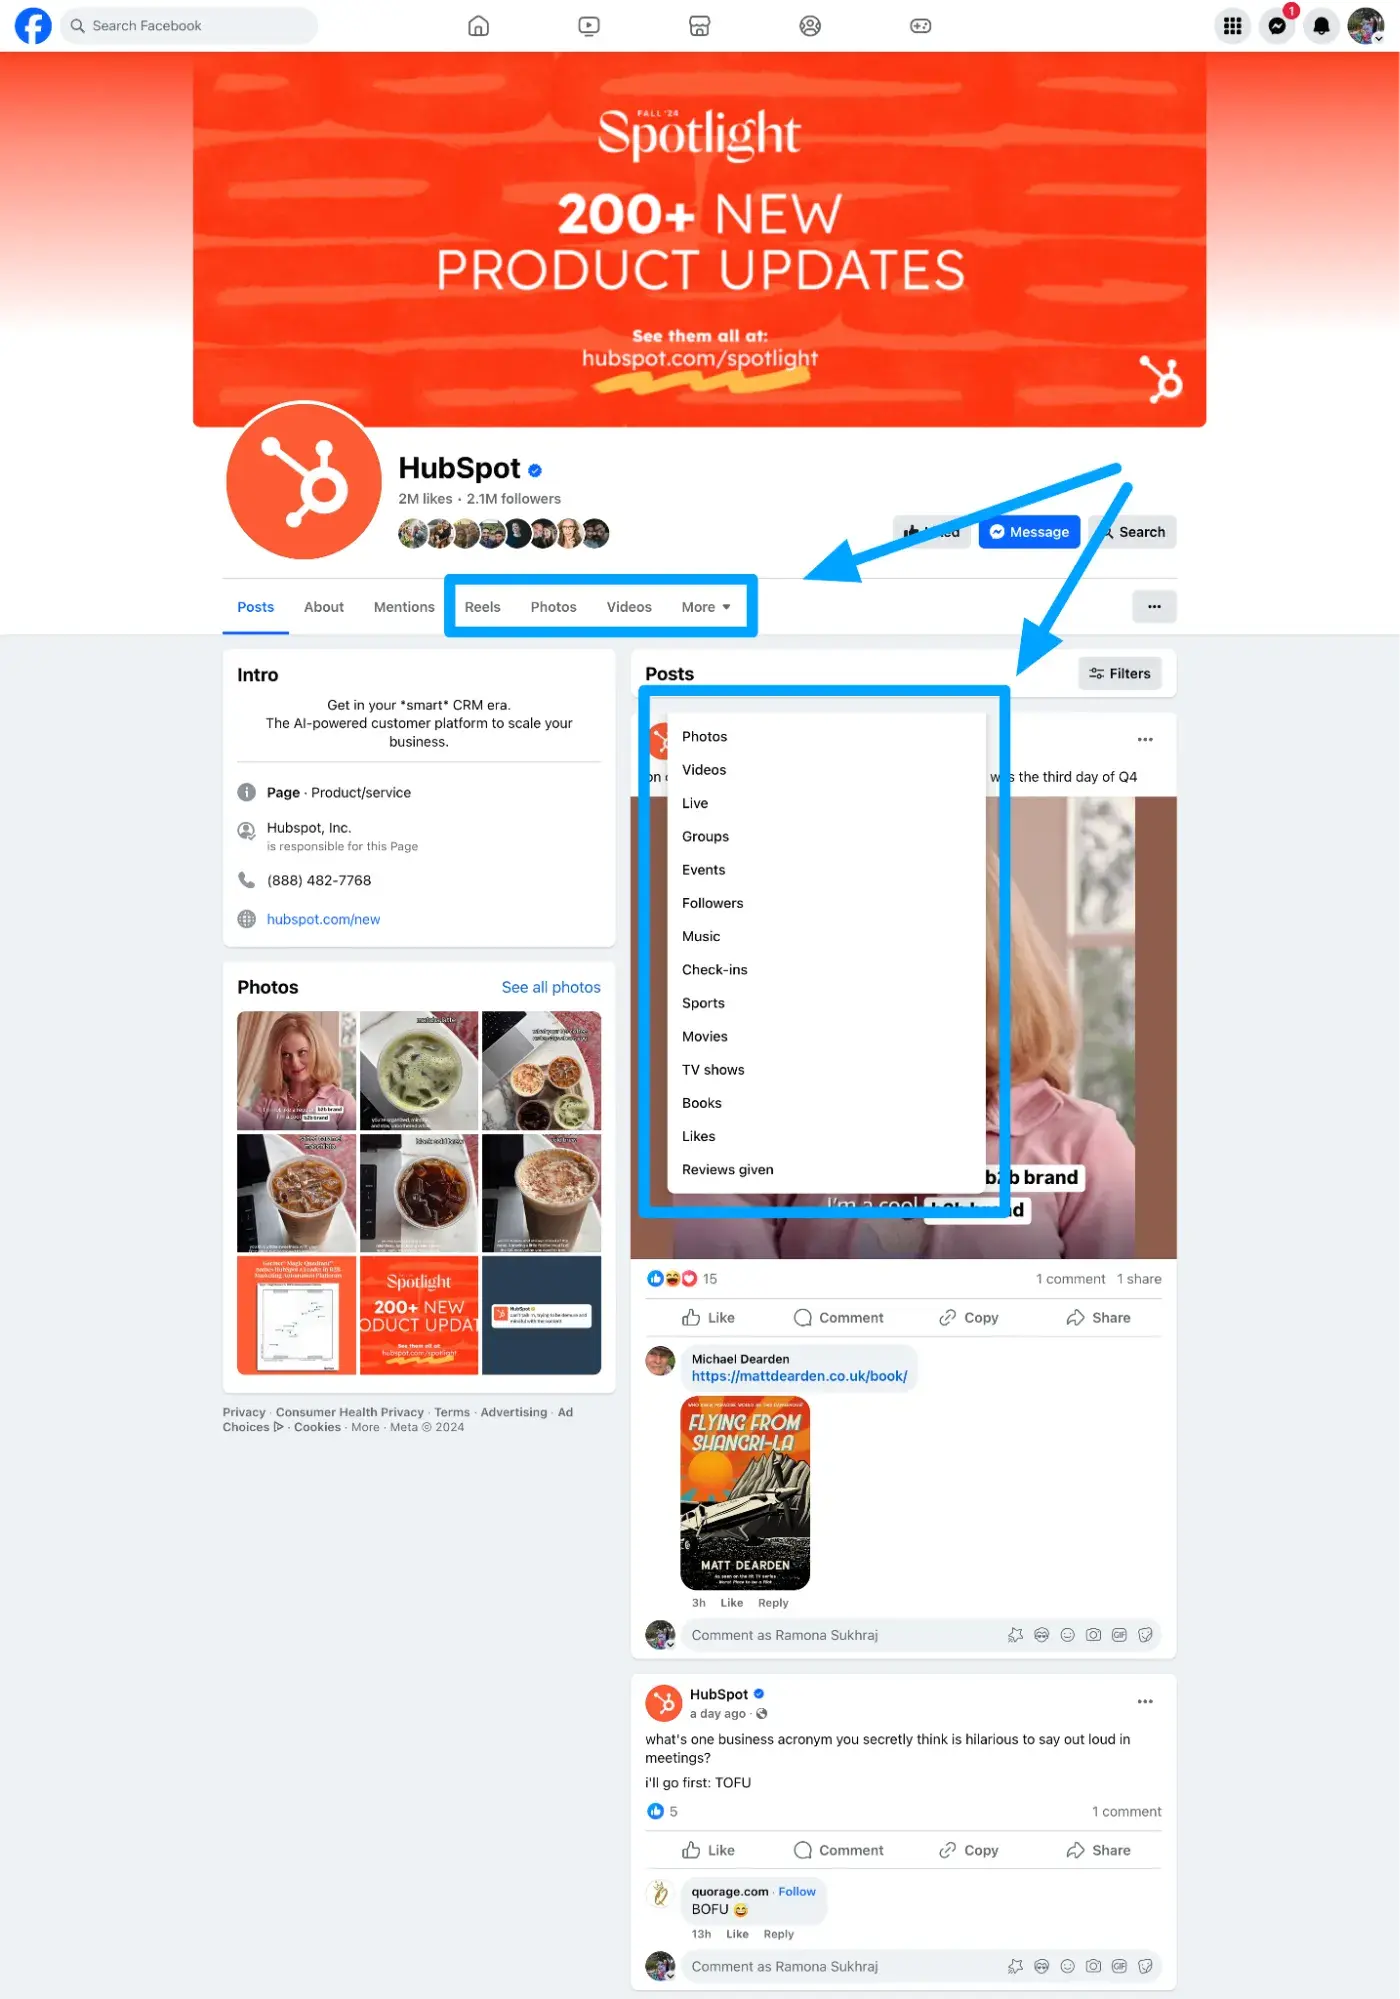
Depending on the category you choose when setting up your page, Facebook will recommend sections (the tabs at the top of your page), but you can generally add or remove additional ones as you wish.
That said, whether it’s a restaurant, an online pet blog, or a software company, any and all businesses, brands, and public figures can set up a Facebook Page.
Like personal profiles, businesses can use Facebook Pages to post text updates, images, videos, links, and events. They can also connect to Facebook for Business and run ad campaigns.
Note: Already a HubSpot customer? Click here to integrate your HubSpot account with Meta Ads.
With it, you can:
- Create targeted audiences that sync with your Facebook Ads
- Generate Facebook Lead ads within HubSpot and automatically sync leads to the CRM
- Monitor ad success and influence on your bottom line using various attribution views
- Managing ad campaigns alongside your other marketing efforts ensures a consistent narrative for your audience.
Newsfeed
This is where all of the posts from your friends or businesses you “like” or follow” will appear. What shows up here is typically determined by Facebook’s algorithm, which considers past engagement, post popularity, and ads. (More on that shortly.)
Your posts will also appear in the newsfeeds where your friends and fans can see them.
Timeline
Often confused with a newsfeed, the timeline is a record of all the posts made or interacted with specifically by a person or business. It appears on Pages and profiles as “posts.”
If someone else tags you, it’ll appear on your timeline as well. However, if someone tags your business, it will appear on the “Mentions” tab on your Page.
Your friends can see your timeline by default if they search your name unless you’ve set your privacy settings to do the contrary.
Algorithm
The algorithm is an elusive concept. Essentially, the algorithm is a series of computations that Facebook’s servers do every second to determine what content you want to see, interact with, and click on next.
The algorithm uses dwell time (how long you view a post), engagement, page likes, posts, and more to determine the type of content you want to see.
Over time, the algorithm supposedly gets better at determining what content to show you, but with all the noise on the platform, most businesses find it's best to run ads for content they truly want seen.
Post/Status
“Post” is the term Facebook uses to describe something you share on the newsfeed. Text, images, videos, and location are just a few types of posts you can share on the newsfeed for your friends to see.

Posts evolved from “Statuses,” which originally only allowed users to share text updates about what they were doing or what was on their mind in that moment.
Friends
These are people you’ve either sent a request to and they’ve accepted or people who have sent you a request and you’ve accepted.
Unlike other social networking sites that allow someone to follow you without you following them back, Facebook Profiles require both you and the other person to be friends with each other in order to engage.
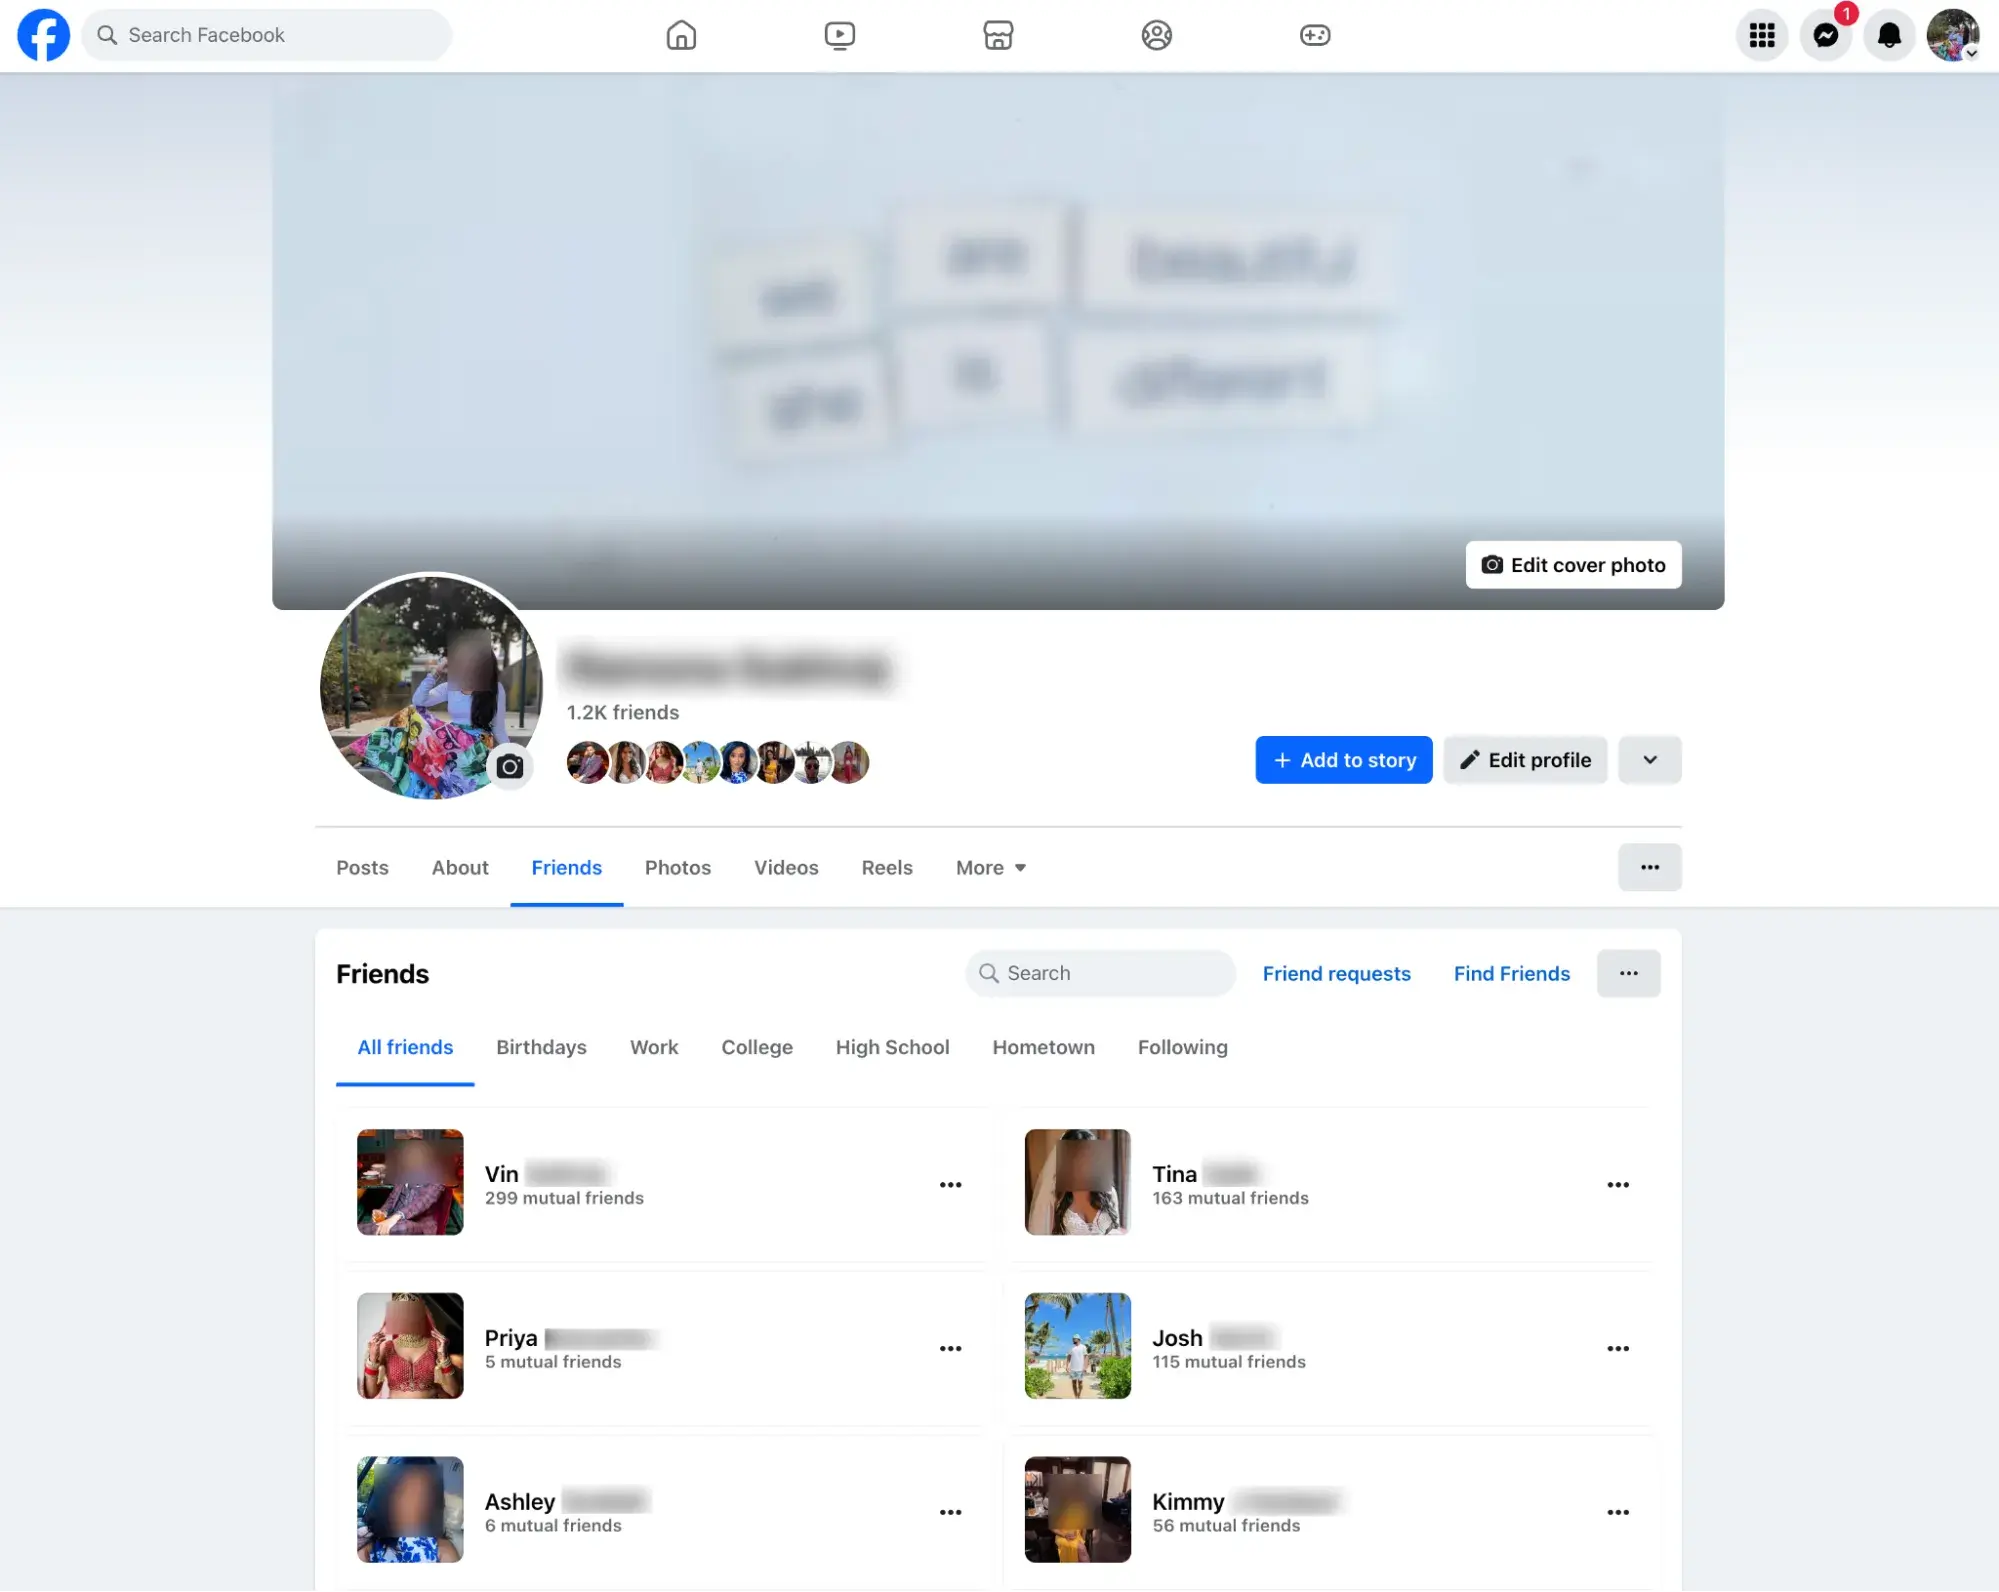
A personal account for an individual cannot have more than 5,000 friends (and it’s not a good idea to make a second Facebook profile to get around this rule).
Followers
Followers are people who have opted to receive updates from a specific page or profile.
When you add new friends, you automatically follow them (and they follow you, too). This is Facebook’s way of adding this new friend to your newsfeed and making sure you see their posts (at least for a little while unless you stop engaging with them).
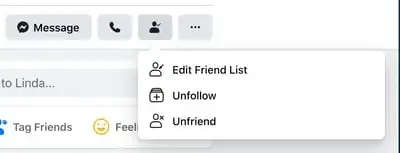
Facebook also allows you to “unfollow” individuals without unfriending them.
This action simply removes that individual’s posts from your newsfeed. If you do this, you’ll need to search your friends individually and surge their timelines to catch up on their latest posts.
For individuals who exceed 5,000 friends on their personal Facebook profiles, people can opt to follow them instead to stay up to date on their posts.
For business pages, anyone who connects with your page is a Follower. In the past, these would be people who “liked” your page on Facebook.
Groups
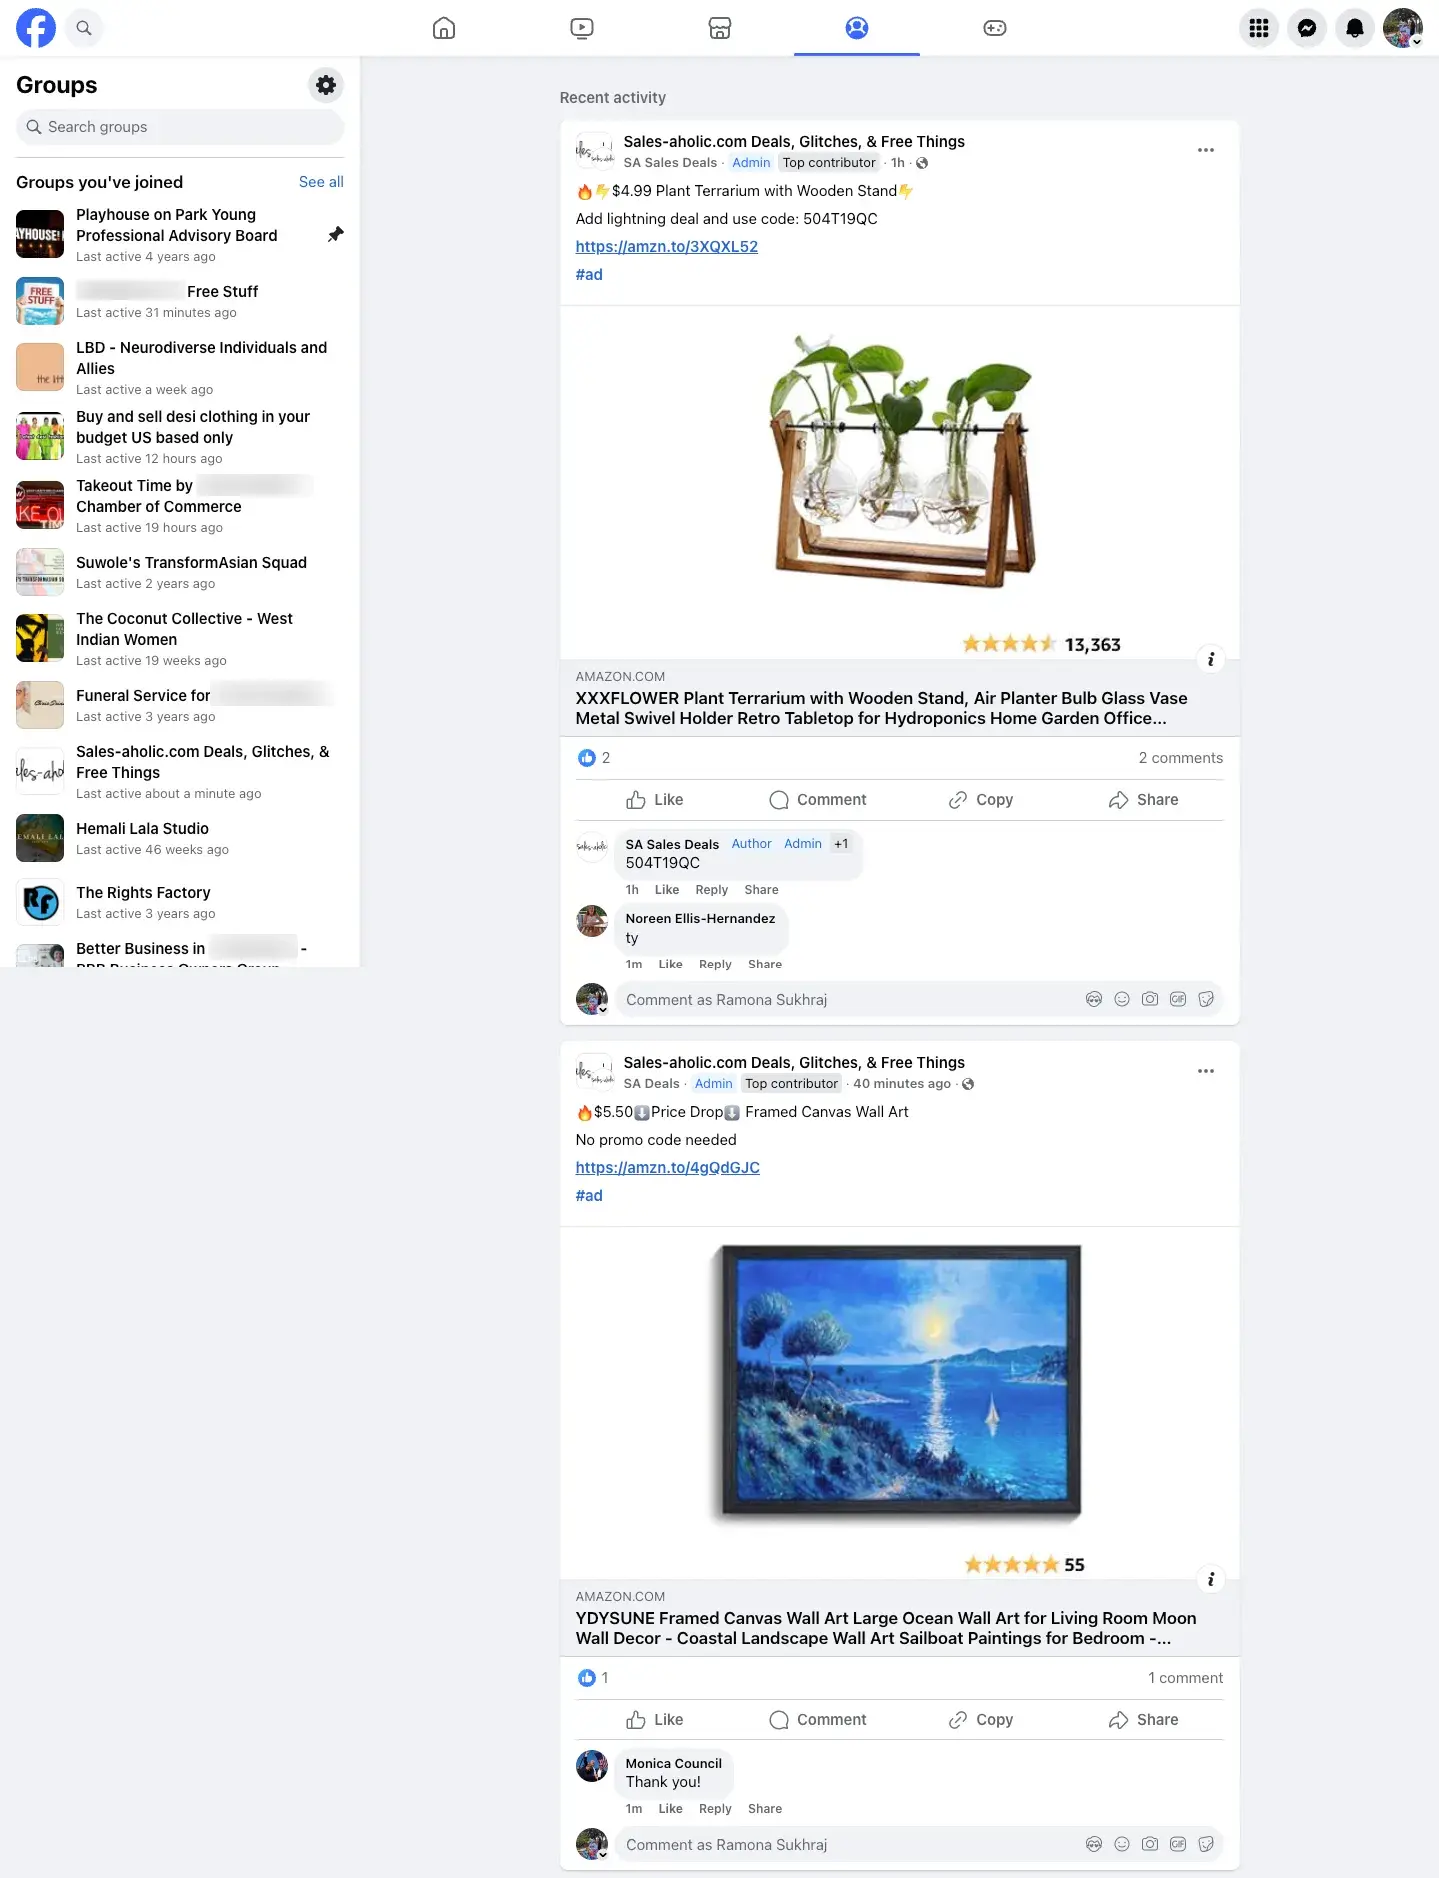
Facebook users with similar interests might find it helpful to create or join a group on the platform.
A Facebook Group is a community of users who interact with each other based on various topics set by the group’s admins and other users.
Only individual users or personal profiles can join, not business pages, but businesses can certainly create groups.
Members can share text updates, photos, videos, and more just as they can to their personal timeline, except posts will only be visible to other group members.
Events
With so much community happening on Facebook, individual users and businesses have the option to post and promote events.
Events share the date, time, and location of the event, as well as description and ticket information if applicable.
They can also accept RSVPs, show a guest list, and allow users to invite their friends. Events can be virtual or in person with a physical location.

Messenger
Messenger is Facebook’s native direct messaging platform. It allows users to hold private one-on-one or group conversations. Messenger can be accessed through Instagram or a separate app that can be added to third-party websites.
When using Facebook.com on a desktop computer, it is accessible through a popup within the platform.

Businesses can use Messenger to communicate privately with individuals to field questions, offer customer service, or even run ads.
Story
Like Instagram Stories, Facebook Stories appear at the top of the platform on both mobile and desktop and are visible for just 24 hours. After 24 hours, the content disappears.

Stories can be made directly from the Facebook app or shared from existing stories on Instagram.
Notification
Represented by the bell icon in the third circle below, a notification informs you when a friend engages with your posts, photos, videos, or timeline; you’ll receive a notification that explains what they engaged with and when.
You will also receive notifications of Group and Event activity as well as friend requests here.

Now that you know what Facebook is and how it works, here’s a handy guide to using it.
Note: If you use HubSpot, you can also link your Facebook account to the platform and track engagement in social inbox.
You can also create keyword monitoring streams for your social team and trigger email alerts to sales when people mention a specific keyword.
Soon, you’ll also be able to use AI insights to understand market sentiment and stay updated on your brand reputation directly from your inbox.
How does Facebook work?
Facebook is powered by an algorithm that learns each user's preferences and interests. The algorithm then displays content like images, status updates, and videos posted by friends and businesses that the user might be interested in.
The goal for Facebook is to get users to engage with, consume, and share content.
In addition, Facebook runs advertisements for businesses, which are sprinkled between organic content shared by your friends on the newsfeed.
The ads are tailored to your interests, so you see what the algorithm thinks you might be interested in based on content you’ve interacted with in the past. This is called behavioral targeting.
How the Facebook Algorithm Works
In the past, Facebook used a chronological timeline. This means that the posts on your newsfeed were listed in the order in which your friends most recently shared them on the platform.
If your mom posted three hours ago and your best friend posted five minutes ago, you’d see your best friend’s post first, then your mom’s.
However, that all changed in September 2011 when Facebook officially announced that it was removing the chronological newsfeed and replacing it with a more personalized experience.
Rather than seeing your friends’ posts in the order they were shared, you now see the content Facebook’s algorithm thinks you’ll enjoy the most. This newsfeed is still around today.
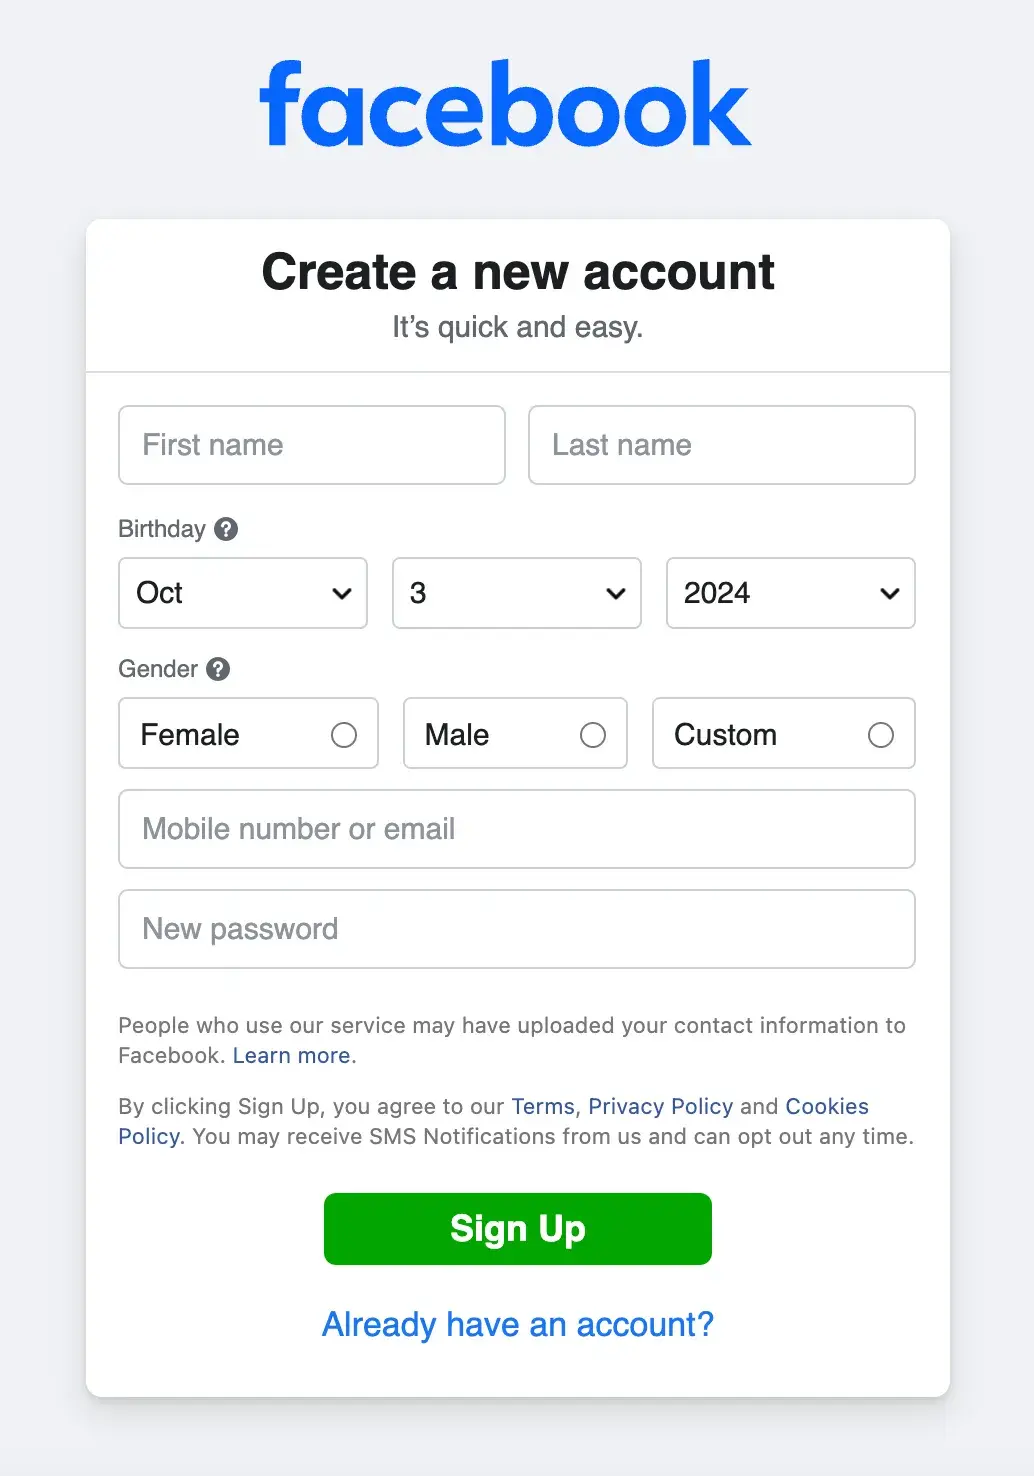
1. Sign up for a Facebook account.
To sign up for a Facebook account, follow these three easy steps.
- Visit Facebook’s website.
- On the homepage, enter your first name, last name, mobile number or email, new password, birthday, and gender.
- Click “Sign Up.”
2. Set up your privacy settings.
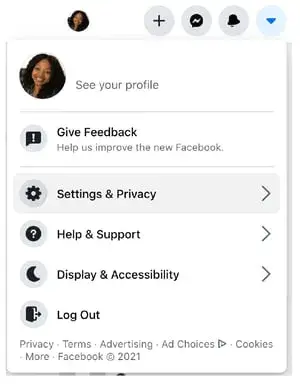
After you’ve signed up for a Facebook account, you can adjust your privacy settings to control who can see your profile and information. Follow these four simple steps to change your privacy settings.
- Click on the downward pointing arrow on the top right corner of any Facebook page.
- Click “Settings.”
- In the left sidebar, select “Privacy.”
- Set who is allowed to see your past and future posts. You can also control how people can find and contact you.
Odds are, there’s probably someone on Facebook who has the same name as you.
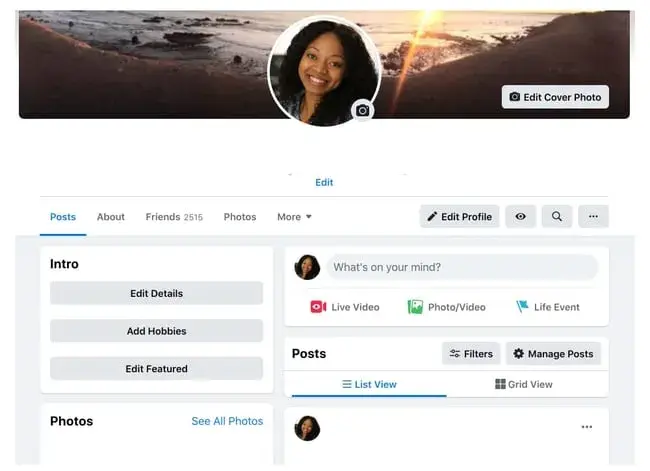
To differentiate yourself from these people and help your friends and family find you on Facebook, personalize your profile by adding a profile picture, cover photo, and some personal information.
3. Personalize your profile.
Picking a Profile Picture
- Go to your profile and click on your profile picture.
- To pick your profile picture, choose a photo that you’re already tagged in on Facebook, one that you’ve uploaded, or a photo from your computer. You can also add a decorative frame to your profile picture.

Choosing a Cover Photo
- Click the camera button on your cover photo on your profile.
- To choose your cover photo, you can pick a photo from your Facebook profile, select Facebook’s own cover artwork, create a collage, or upload a photo from your computer. You can also reposition or delete your current cover photo.

Updating Your Profile
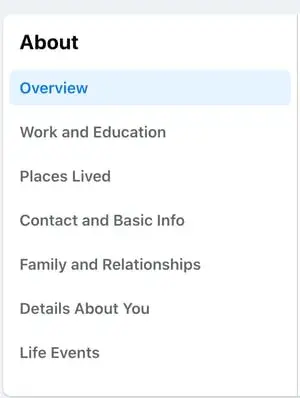
Click the “About” section on your profile page.
In this section, you can fill in information about your work and education, the places you’ve lived, contact and basic info, family and relationships, and life events.
The best way to do this is by searching for them on Facebook and “liking” or “following” their public page, which will have a blue verified check mark next to their name.
After you “like” or “follow” their page, you’ll start seeing their updates in your newsfeed.

5. Review your timeline.
Your timeline is a digital log of your Facebook activity in reverse chronological order. Your status updates, uploaded photos and videos, and the photos you’re tagged in will appear on your timeline.
6. Add friends on Facebook.
There are three ways you can add friends on Facebook.
You can either search for them, find them in the “Find Friends” tab, or import a list of contacts from your email, iCloud, or phone.
To find friends on Facebook, go to your profile, select the “Friends” tab, and tap the “Find Friends” button. You’ll see a list of friend requests from other people and a list of people you may know that you can add as a friend on Facebook.
If you upload a list of contacts onto Facebook, you can add your friends as you sort through each of your contacts.

7. Post on Facebook.
The main purpose of Facebook is to help friends and family connect with each other. And the best way to connect with your friends and family is by updating them about your life with status updates.
To share a Facebook status, go to the text box at the top of your newsfeed or profile.
With status updates, you can share text with 15 different colored backgrounds, photos, videos, GIFs, stickers, and links.
You can also share other types of posts, like:
- Feeling/Activity: Share how you’re currently feeling or what you’re currently doing.
- Check-In: When you visit a city, location, or place, check-in and let your friends know where you’re at.
- Tag Friends: If you’re hanging out with your friends, tag them in your status and share what you’re doing.
- Tag Event: If you’re at an event, you can tag it in your status and share what event you’re attending.
- Ask for Recommendations: If you just moved somewhere or you’re about to visit a location, you could ask your Facebook friends for recommendations on where to go.
- Poll: Ask your Facebook friends what their opinion is on a certain topic.
- Support Nonprofit: Choose a nonprofit organization of your choice and share it through your status. Your Facebook Friends can then select the donate button to support the chosen organization.
- Answer a Question: Choose a predetermined question to answer or create your own question to answer and share it with your Facebook friends.
- Lists: Choose a predetermined topic to make a list for or create your own topic and share it with your Facebook friends.
- Facebook Stories: All the content that you can share through a status update is shareable through your Facebook story. You can also upload content to your stories by clicking the “Add to Your Story” button on the right sidebar.
Additionally, you can watch all your friends’ Facebook Stories by clicking on their pictures in the “Stories” section, which is also located on the right sidebar on your home page.
8. Add photos and videos.
In addition to text statuses, you can add photos, videos, albums, and live video broadcasts to your profile.
Uploading Photos or Videos
To upload photos or videos to your profile, follow these four simple steps:
- Go to your profile.
- Select the “Photos” tab.
- Select “Add Photos/Video.”
- Upload pictures or videos from your computer.

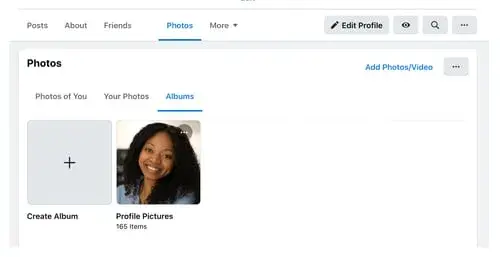
Creating Photo or Video Albums
To create a photo or video album, follow these four simple steps:
- Go to your Profile.
- Tap the “Photos” tab.
- Tap “Create Album.”
- Upload pictures or videos from your computer.
Facebook Live
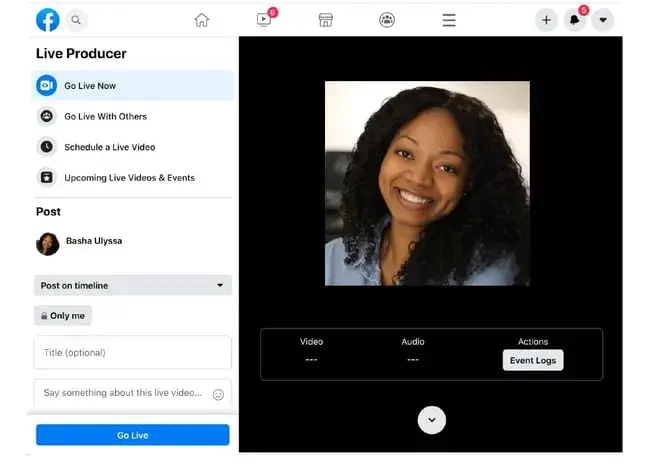
To do a live broadcast on your Facebook account, follow these three simple steps.
- In the box that says “What’s on your mind?”, select “Live Video.”
- Once you select “Live Video,” you can write a description about your broadcast, tag people in it, add a feeling or activity, check in to an event, support a non-profit, or add a poll. You can also title your live broadcast or tag a video game if you’re live-streaming gameplay.
- Select “Go Live.”
9. Engage with friends.
On your newsfeed, you’ll see updates from your friends, family, or public pages you follow. You can engage by liking and reacting to their posts, sharing content on their timelines, and communicating with them through text or video chat.
Like, Comment, or Share
If you like someone's post, give them a thumbs up, comment on their post, or share it.

Other Reactions
If your Facebook friend’s post evokes a stronger reaction in you than a like, you can also express that you love, laughed, are amazed, sad, or angry at their post by holding down the Like button.

Sharing Content on Your Friends’ Timelines
Anything you can post on your status, you can also post on your friend’s timeline.
Facebook Messenger
To chat with your friends or public pages on Facebook, use Facebook Messenger. You can access it by tapping the “Messages” button at the top right corner of any Facebook page or selecting the “Messages” button on the left sidebar of the home page.
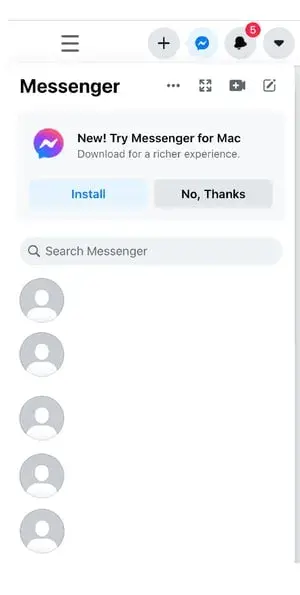
Next, select “New Message” and type in the name of the friend or brand that you want to connect with. Facebook Messenger also lets you create group chats by clicking on “New Group.” After that, all you have to do is name your group and add the friends you want to include in the group.
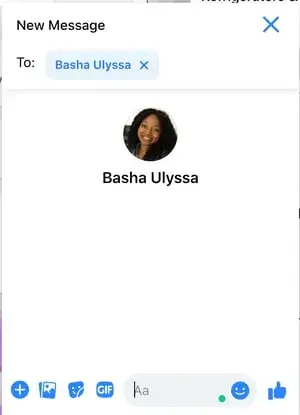
When you message your friends or group on Facebook Messenger, you can upload pictures, videos, and files from your computer, stickers, GIFs, and emojis, and take pictures and videos from your computer’s or phone’s camera.
You can also view Messenger on its own page, where you can search for past conversations and manage your settings. To view Messenger on its own page, tap the “Messages” button in the top right corner of any Facebook page and then tap the “See All in Messenger” button.

To instant message your friends who are logged onto Facebook at the same time as you, tap the “Chat” button on the bottom of any Facebook page and strike up a conversation with your friends who are online
Phone and Video Calling
When Messenger is open on its own page, you can search for any of your friends or groups, click on their names, and tap the phone or video chat button to call them.

10. Review your newsfeed.
Your newsfeed is a curated feed of posts from your friends, family, and public pages you follow that Facebook’s algorithm thinks you’ll be interested in. You’ll also see ads from brands who think you’ll enjoy consuming their content or products.
To customize your newsfeed, tap the downward pointing arrow in the upper right corner of any Facebook page and tap “News Feed Preference.”
From there, you can prioritize whose posts you’ll see first, unfollow people and groups to hide their posts, reconnect with people and groups you unfollowed, discover public pages that match your interests, and hide apps from your newsfeed.
You can also “mute” or “unfollow” individuals, groups, or pages directly from individual posts.
11. Discover additional Facebook features.
Facebook isn’t just a platform for viral content and connection. It’s also a hub for community communications, video streaming, marketplaces, and games.
Events
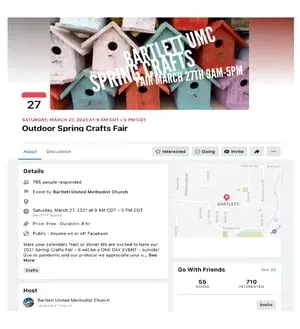
The Events page on Facebook will show you any upcoming events that are popular with your Facebook friends or have been set up by the groups you belong to. You can also find events based on their date, location, and category.
To find the Events page, select the Home button. Then, on the left sidebar, you’ll see the “Explore” section, where you can select “Events.”
Groups
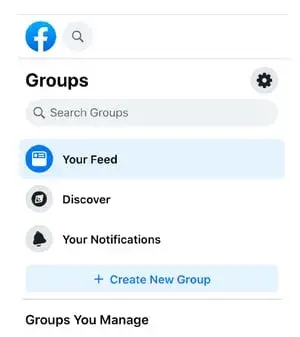
The “Groups” page on Facebook will show you which groups you manage and belong to. You can also discover groups to join based on Facebook’s suggestions and many other categories.
To access the “Groups” page, tap the “Home” button. Then, on the left sidebar, you’ll see the “Explore” section, where you can click “Groups.”
Facebook Watch
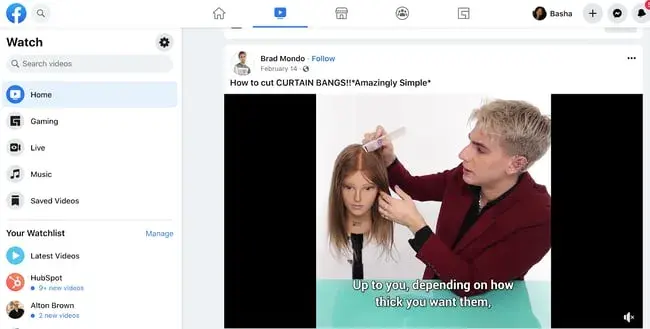
On the Facebook Watch platform, you can watch videos from the shows you’re following and search for other shows and videos.
To access Facebook Watch, select the “Home” button. Then, on the left sidebar, you’ll see the Watch button under the “Marketplace” button.
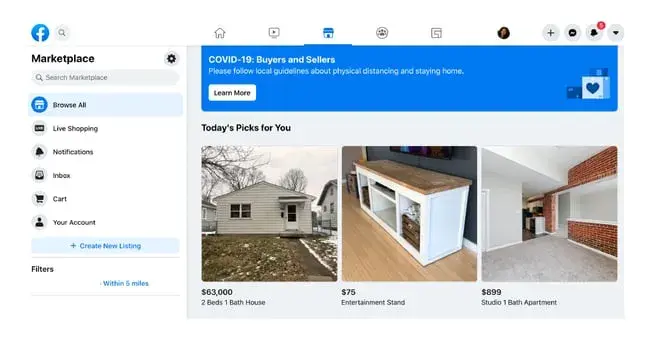
Marketplace
Not only does Facebook compete with Netflix in the streaming industry, but it also competes with eBay in the marketplace industry.
With Facebook Marketplace, you can browse for all kinds of products, join groups to buy and sell products with people in your area or who share similar interests, shop for products sold from different shops, shop by category, and sell your own products.
To access Facebook Marketplace, select the Home button. Then on the left sidebar, you’ll see the Marketplace button right under the Watch button.
Games
Facebook Games is one of Facebook’s best features. They host a huge collection of massively popular games, and you can browse the most popular games on the platform by top charts and categories. You can even play most of the games with your friends, too.

Make friends with Facebook.
Even if you’re not using Facebook personally, Facebook marketing can be immensely powerful for businesses of all kinds.
Use our guide to get comfortable with the platform and start exploring how you can use its various features and wide reach to make contact with your target audience.
Editor's note: This post was originally published in October 2018 and has been updated for comprehensiveness.
Facebook Marketing

.png)


![22 Facebook Stats to Know in 2023 [+HubSpot Data]](https://53.fs1.hubspotusercontent-na1.net/hubfs/53/Untitled%20design%20(8)-1.jpg)
![How to Create a Facebook Group for Your Business [+ Why You Should]](https://53.fs1.hubspotusercontent-na1.net/hubfs/53/Copy%20of%20Featured%20Image%20Template%20Backgrounds-Jun-30-2023-05-58-51-2746-PM.png)
![Facebook Insights: A Beginner's Guide [+ Step-by-Step Instructions]](https://53.fs1.hubspotusercontent-na1.net/hubfs/53/Untitled%20design%20(38).jpg)

![11 Facebook Cover Photo Size & Design Best Practices [Templates]](https://53.fs1.hubspotusercontent-na1.net/hubfs/53/facebook%20cover%20photo%20size.jpg)
