Creating marketing campaigns is one of the most effective investments you can make to bring in new leads for your company. In HubSpot, our Campaigns App helps you aggregate all of the assets across HubSpot that are included in your campaign.

But creating these campaigns can take time, and we know you don’t have a lot of it. That’s why we enhanced our Campaigns App to include a wizard that helps you organize and manage the assets in your campaign, and a guide that follows you through HubSpot as you create content to streamline the process and save you time.
In this post, I’ll walk you through creating a campaign from scratch, using an ebook on social prospecting as an example, and what that process looks like in HubSpot.
Before you get started
Creating campaigns in HubSpot moves even faster if you’re prepared. What does that mean? Being prepared to build your campaign in HubSpot means you’ve:
-
Determined your SMART goals
-
Defined your campaign audience, which could potentially be one of your buyer personas
-
Created the offer that is the focal point of your campaign
If you want to, you can also check out our Campaigns App user guide as a sneak preview to this post.
Campaigns in HubSpot
Let’s start by heading over to the Campaigns App and clicking on “Create a new campaign”.
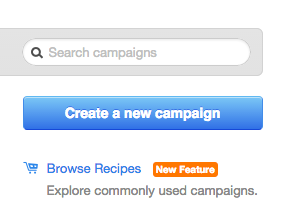
Quick tip: We offer two recipes for Campaigns (shown above), tailored towards an ebook campaign and a consultation campaign. You can use these recipes to spin up marketing campaigns on the fly.
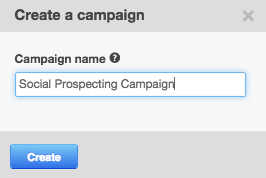
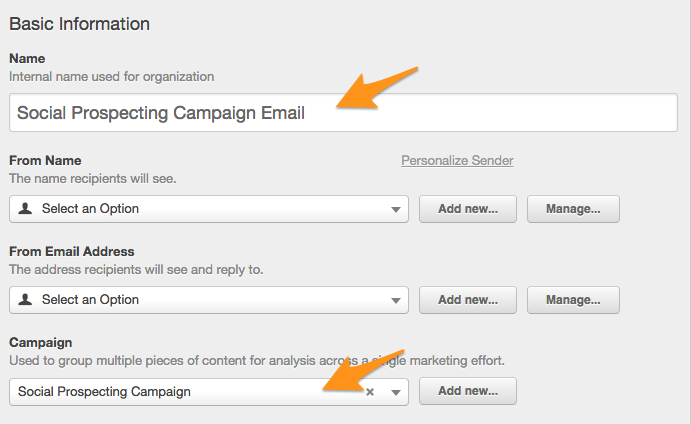
This is where you’ll be asked to name your campaign. If you’re just getting started with the Campaigns App in HubSpot, you may want to consider a certain naming convention from the start. For example, you may want to start your campaign name with the month they’ll be running, or with a certain tag in the name that means something to you. Or, you can keep it simple like I did below:
Once I’ve created my campaign, this is the first screen I see:
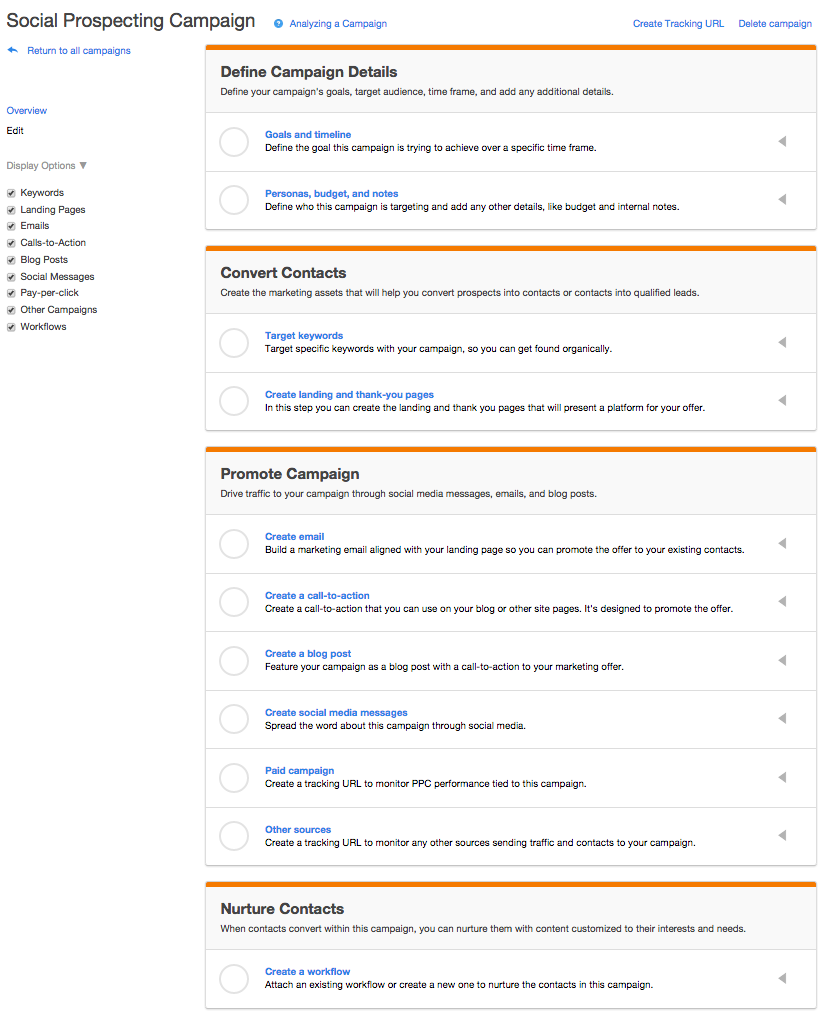
This checklist-like screen is the new Campaigns Wizard, and it’s the perfect companion for any marketer building an inbound marketing campaign. Let’s go through each of these sections and build out a campaign.
Building a campaign
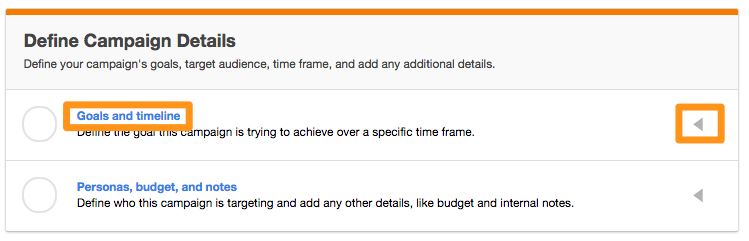
I’ll start by adding in some fundamental details about my campaign. I can do that by clicking into each line item in the module, or by clicking the drop-down menu arrow on the right:
These are details I already have due to my campaign planning, so filling out this section should be quick. Here’s what it looks like when I’m finished:
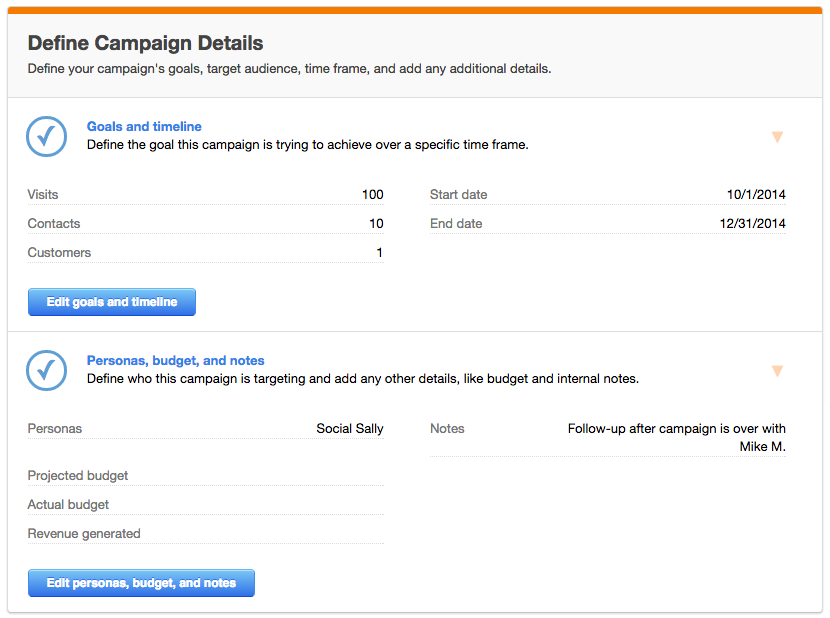
Please note: The budget and revenue information you input here is for notes purposes only. If you want to see how much revenue your marketing efforts have generated, you can run a Contacts or Companies Report if you have the Enterprise version of HubSpot.
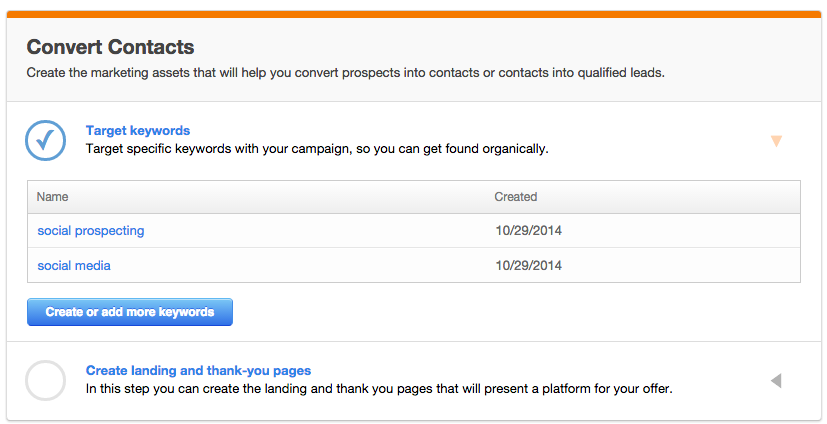
Next, it’s time to start adding assets into my campaign. In this section, I’ll add keywords and work on my landing pages, which is where my ebook will live and acts as the conversion point for my campaign.
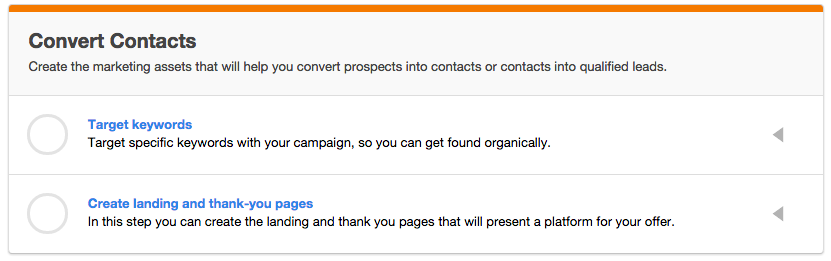
In the keywords section, I’ll add keywords that will help my content in this campaign get found organically, and I’ll use these keywords throughout the content associated with my campaign. I can always create or add more keywords at any time.
Guided campaign creation
Now, it’s time to create my landing page that will hold my ebook offer and my thank-you page for folks that download my ebook, converting on the form on the landing page. When I click the blue link above, I notice there’s a new blue bar pinned under my navigation where I’ll be creating my landing page. On the left, it tells me the campaign name:
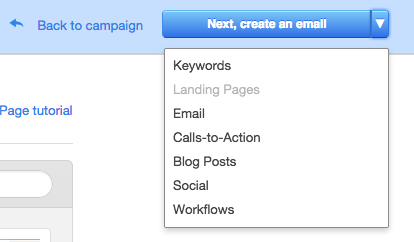
And on the right, I see a new menu that’s relevant to the campaign:
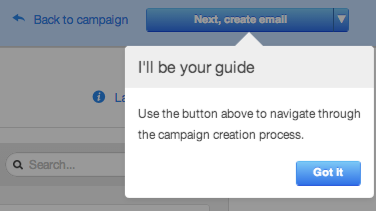
Along with the wizard, campaign creation in HubSpot also features a guide that helps you navigate the content creation necessary for your campaign. You can see that I have the option to return to the wizard from here, create the next asset in the list if I want to skip around, and if I really want to skip around, I can click on the drop-down menu on the right to choose a new kind of content to create that’s still associated with my campaign.
For now, I’ll stay on the landing page. I can choose any landing page template I want, and when I do, the name is pre-populated for me:
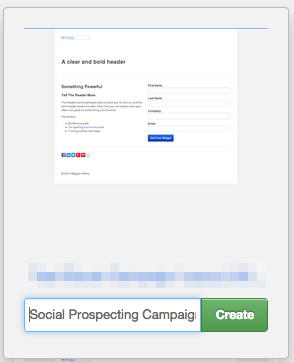
Once I click “Create,” I’m taken to the landing page editor. HubSpot has already done some of the heavy lifting for me, like:
-
Naming my landing page with the campaign name
-
Tagging my landing page with the campaign name under the “Options” tab
-
Redirecting to a corresponding thank-you page for form submissions, which is already made:

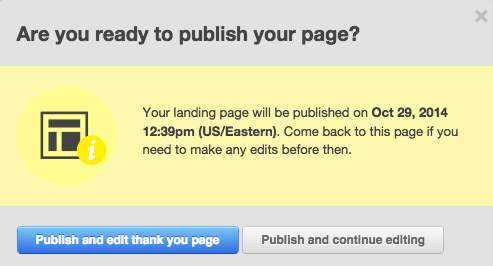
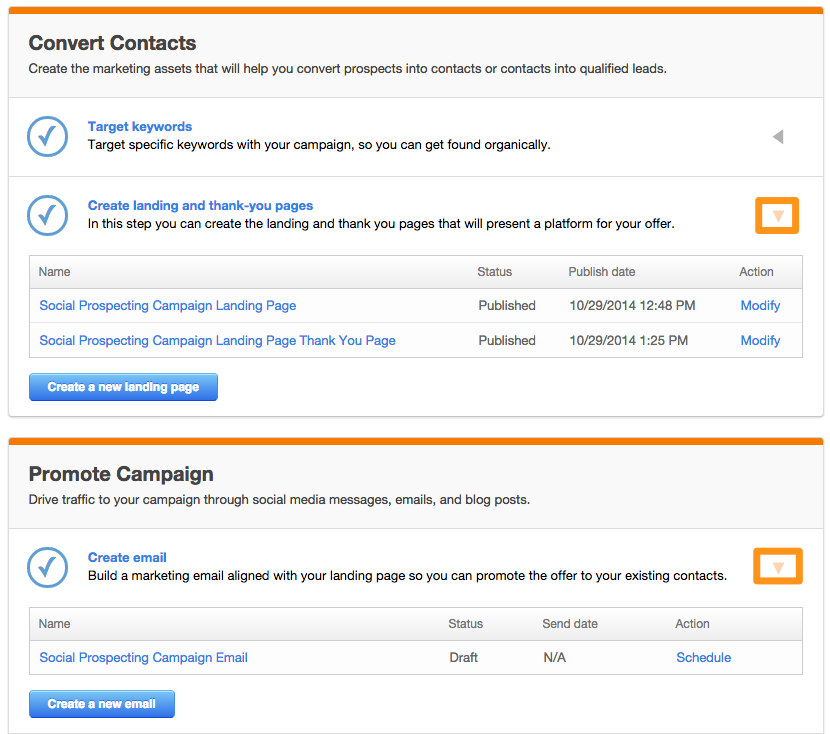
Once my landing page is up to snuff, I’ll publish it. The guide then shows me a pop-up, prompting me to work on my thank-you page next:
My thank-you page, which is already live, has a lot of the same pre-populated campaign details as well as my landing page. This is because the guide helps you carry the campaign details all throughout the content in your campaign, saving you the most time possible.
After I’m done with my thank-you page, I’m prompted to continue on to the next step in the campaign:
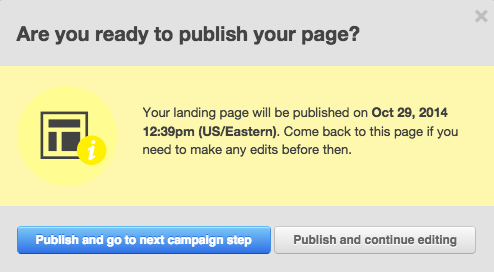
Which I knew was email, because the guide told me so:

When I get to creating the email to promote my ebook to my existing contacts, I can see that not only is the guide still with me, but my email has some pre-populated campaign information, too:
You may want to take this opportunity to write your email, but you can always come back to it later. It’ll be saved as a draft, which I'll be able to find Campaign Wizard. For right now, I’ll choose to save it for later, but continue on with the next step in my campaign by clicking on the button in the guide:

When I arrive on the Calls-to-action (CTA) dashboard, this automatically pops up:
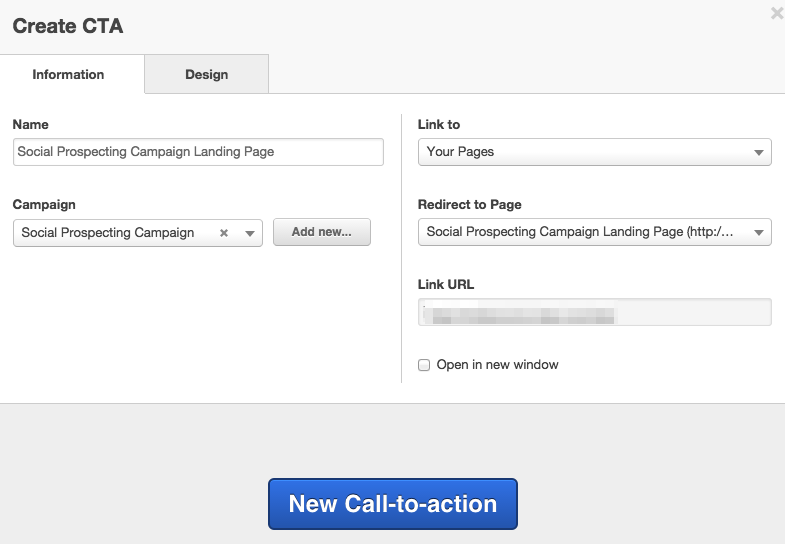
Now, all I have to do is edit the copy of the CTA. It’s already tagged with my campaign, named by the campaign name and redirects to the landing page I created earlier. HubSpot has already coordinated that behind-the-scenes, so you don’t have to.
Once I edit the copy and create my CTA, I can move on to creating the next asset in my campaign, my blog post. I’ll get there by clicking on the button in the guide:

Whether you decide to complete the blog post now or not, clicking the above button will create the draft so you can easily come back later. It also features some smart pre-population, like tagging the post with the campaign name:
After I finish up my blog post, it’s time to create some social messaging around my campaign, so I’ll use the guide to get me to HubSpot’s Social Inbox App to create a broadcast to promote my ebook:

Clicking on “Create a broadcast” in the guide drops me back into the wizard with the Social Inbox compose window on top:
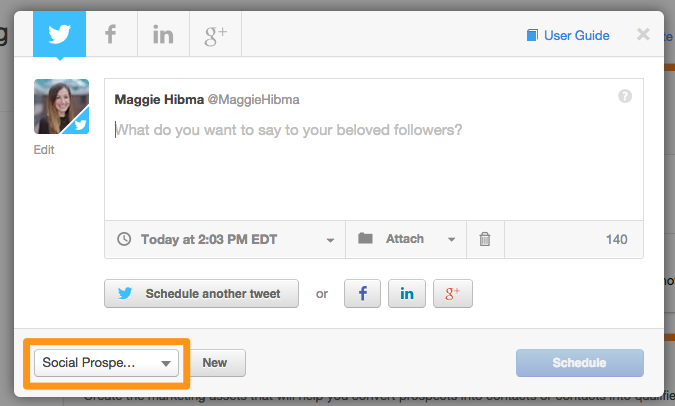
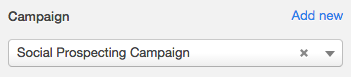
As you can see in the screenshot above, any message(s) I create are already tagged with my campaign.
Once I’ve scheduled a few social messages to promote my ebook, I’ll click “Schedule” in the compose window and arrive back at the wizard:

As you can see in the screenshot above, it’s very clear what campaign assets I’ve already created by the blue checkmarks next to the asset.
If I didn’t want to include and tracking urls or set up a workflow for this campaign, I can choose to take those assets away from being displayed in the wizard by the menu in the left-hand navigation:
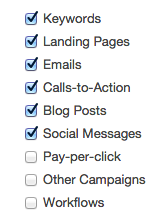
Please note: Only Professional and Enterprise customers have access to the Workflows App. If you want to learn more about Workflows, HubSpot’s marketing automation app, check out our product page.
Now that you have some content drafted (and some scheduled), you can go into your campaign at any time and modify, schedule or create more assets by using the drop-down arrow on the right of the modules:
Easy campaign measurement
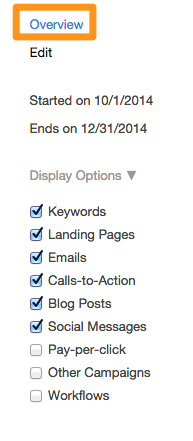
Once you’ve built out the assets for your campaign, you can get an overview of the assets and their performance by clicking on the “Overview” link in the left-hand navigation:
Here’s what it’ll look like before your campaign starts (and what we've done in this post so far):
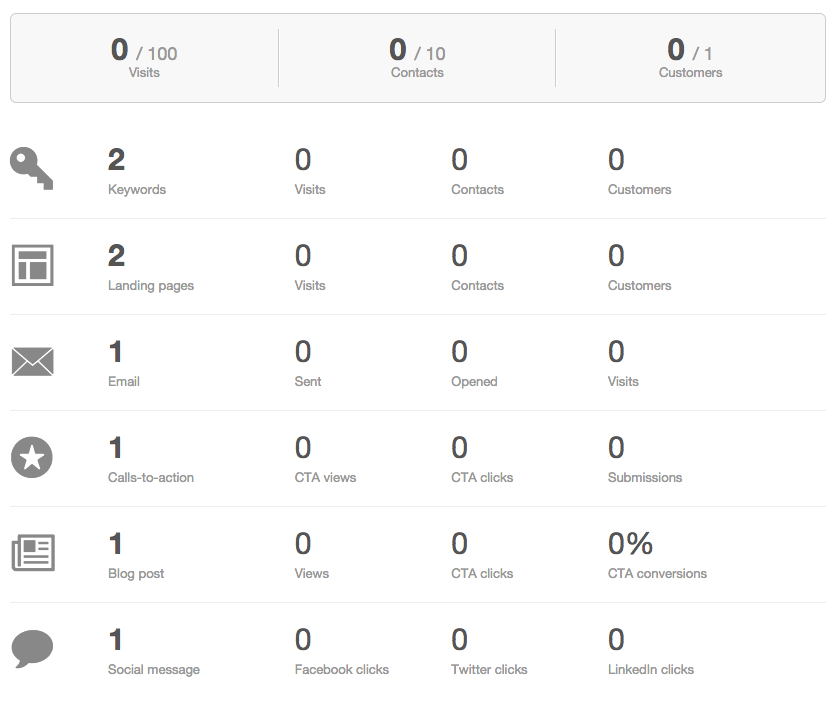
But here’s an overview of a campaign that’s already run its course:
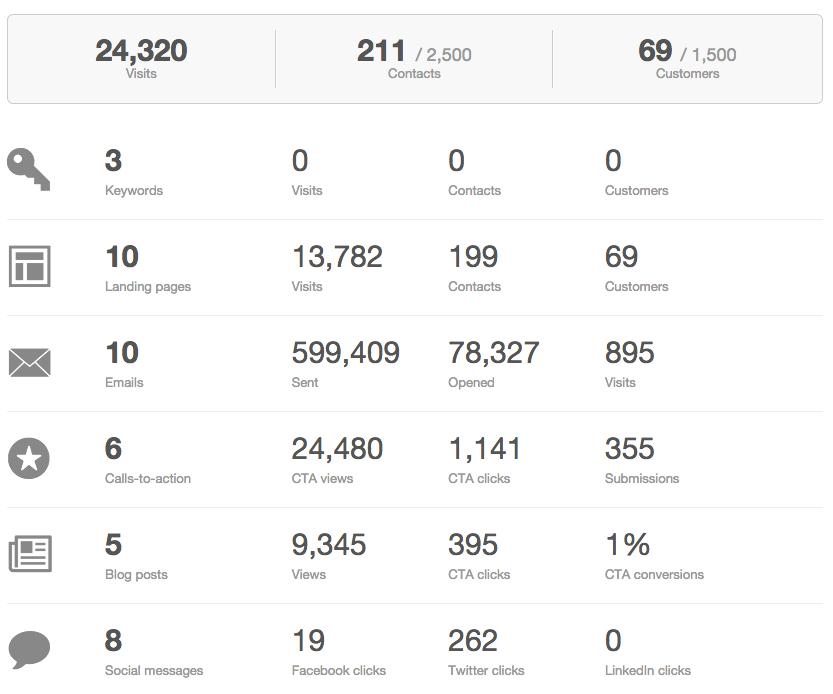
This is a snapshot of what’s included in your campaign and how well it’s performing against the goals you’ve set. It only takes one glance to know whether you’ve hit your top-level visits, contacts and customers goal, giving you some insight on what worked and what didn’t. If you want to learn more about how to analyze your campaigns in HubSpot, check out this article in the user guide.