I’ve got several methods in my back pocket for improving image quality, and I’ll share them with you in this high resolution image guide. Some methods are more complex than others, and the one I use typically depends on the image size, existing quality and file format.
Table of Contents
- What is a high-resolution image size?
- How many kb is high resolution?
- Can you make a low-resolution image high-resolution?
- Understanding Resampling for High-Resolution Photos
- How to Make an Image Higher Resolution
If the resolution of an image is too high, I’ll end up with obscenely large file sizes. If the resolution is too low, the image will look blurry and/or pixelated.
Let’s check out my example below:
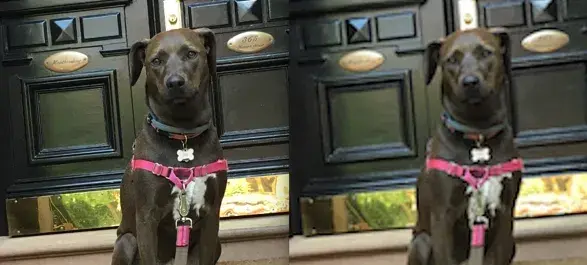
While these images have similar dimensions, their resolution is different. The image on the left is crisp and clear, while the one on the right is significantly blurrier. This is because of the amount of information contained in each image.
The problem that I often encounter is being handed something like the image on the right, but being expected to make it as sharp as the example on the left.
How many kb is high resolution?
Kilobytes (or kb) refer to the file size of the image. The larger the dimensions and resolution, the larger your file size can be.
Because resolution is only one factor that can affect file size, there isn't a set number of KB that would indicate an image was high resolution. In theory, you could have an image with extremely large dimensions and low resolution at the same file size as an image with smaller dimensions and higher resolution.
Can you make a low-resolution image high-resolution?
The short answer to this question is “yes,” but with a caveat. If you’ve got the technology and know-how, you can take a lower-resolution image and vastly improve its quality at a higher resolution.
In times gone by, I’ve had clients hand over files containing extremely low-resolution images that they want blown up for a digital asset like a website banner or social media post. Previously, I would have simply requested that we use a different image altogether. As I’ve explained, it’s much easier to start with a high-res image and work your way down than the other way around.
But these days, there are tools available to make it much easier to turn a low-quality image into high-resolution. Resampling is the most popular way for professional photographers and graphic designers to do this. In the past, you would have needed specialized knowledge of graphic design tools to achieve it, and results could easily get messy. Now that AI is on the scene, it’s become a much simpler process.
Before I move on, let’s go back to the caveats I mentioned above. Even with AI now in the mix, there’s no magic wand you can wave over a very low-resolution image and make it high-resolution. There will always be limits to what a photo editor can achieve here. My best recommendation is to try out the methods I’ll be outlining below with some test images. You’ll soon get a sense of what’s possible, and when it’s best to just opt for another image.
Pro tip: One great tool to try out is HubSpot’s Content Hub, which makes it simple to scale and streamline your content strategy, including automated image resizing.
Understanding Resampling for High-Resolution Photos
Images are made up of pixels (picture elements). They’re basically tiny dots of color that, when pieced together, make up a photograph. The more pixels an image has, the higher resolution it is. That’s why, when an image is low resolution, it becomes more blurry and difficult to distinguish the more you increase the size — an effect also known as pixelation.
Resampling (also known as “upscaling” or “interpolation”) is the process of taking a low-resolution image and filling in more pixels to make it high-resolution. If I were to do this the other way around to make the file size smaller, it would be called downsampling.
If I were doing this process more manually, there are a few methods I could use. In most photo editors, you’ll get a resizing option that then gives you choices for the resampling or interpolation method, including:
- Nearest Neighbor. This method copies the color of the nearest pixel. It doesn’t provide a smoothing effect, so it’s best for simple graphics rather than complex images.
- Bilinear. This method takes an average of the color of the nearest four pixels and adds new pixels accordingly. It provides a smoother effect than Nearest Neighbor, but you might still find blurriness in smaller details.
- Bicubic. This method creates a weighted average of the color makeup of the nearest 16 pixels. It makes smoothing more accurate and is the best option for complex images.
Now, however, AI has entered the chat. Popular programs like Adobe Photoshop and GIMP have added AI tools to automate the process of resampling using machine learning. The AI will use whichever method is best for the image you’re trying to enlarge and resample. So, all I have to do is resample images at the click of a button.
How to Make an Image Higher Resolution
Part of creating designs for web and print means setting the dimensions and resolutions appropriately for your project. Sometimes, you may be working with images that are not set at a resolution that will display clearly once implemented. Let’s look at a couple of ways to address this issue.
1. Adjust the resolution using a photo editor.
Photo editors such as Adobe Photoshop, Gimp, Microsoft Photos, Canva, Visme, BeFunky and Apple Photos all have the capability to adjust image size, including the resolution and the dimensions.
In your photo editor of choice, navigate to the resizing feature and input the resolution you want. The feature will often be called something along the lines of "Resize“ or ”Image Size" or be denoted with an icon that looks like a square with arrows to symbolize resizing.
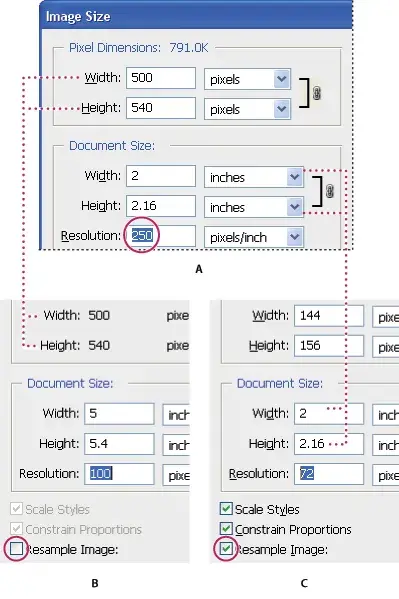
When using this feature, you‘ll likely see a box to designate resolution. For example, here’s what it looks like using Adobe Photoshop:
[alt] Photoshop image resizing example
Keep in mind that the photo editor cannot create detail that isn‘t there, so it will fill in the gaps as best it can. If you’re resizing a 300x300px image with a 72ppi to a 1000x1000px image with a 300ppi, you'll likely end up with a poor quality image.
Let’s take a look at the process using BeFunky’s editor. I like this tool because it’s useful for beginners, but still has pretty detailed functionality when you need it.
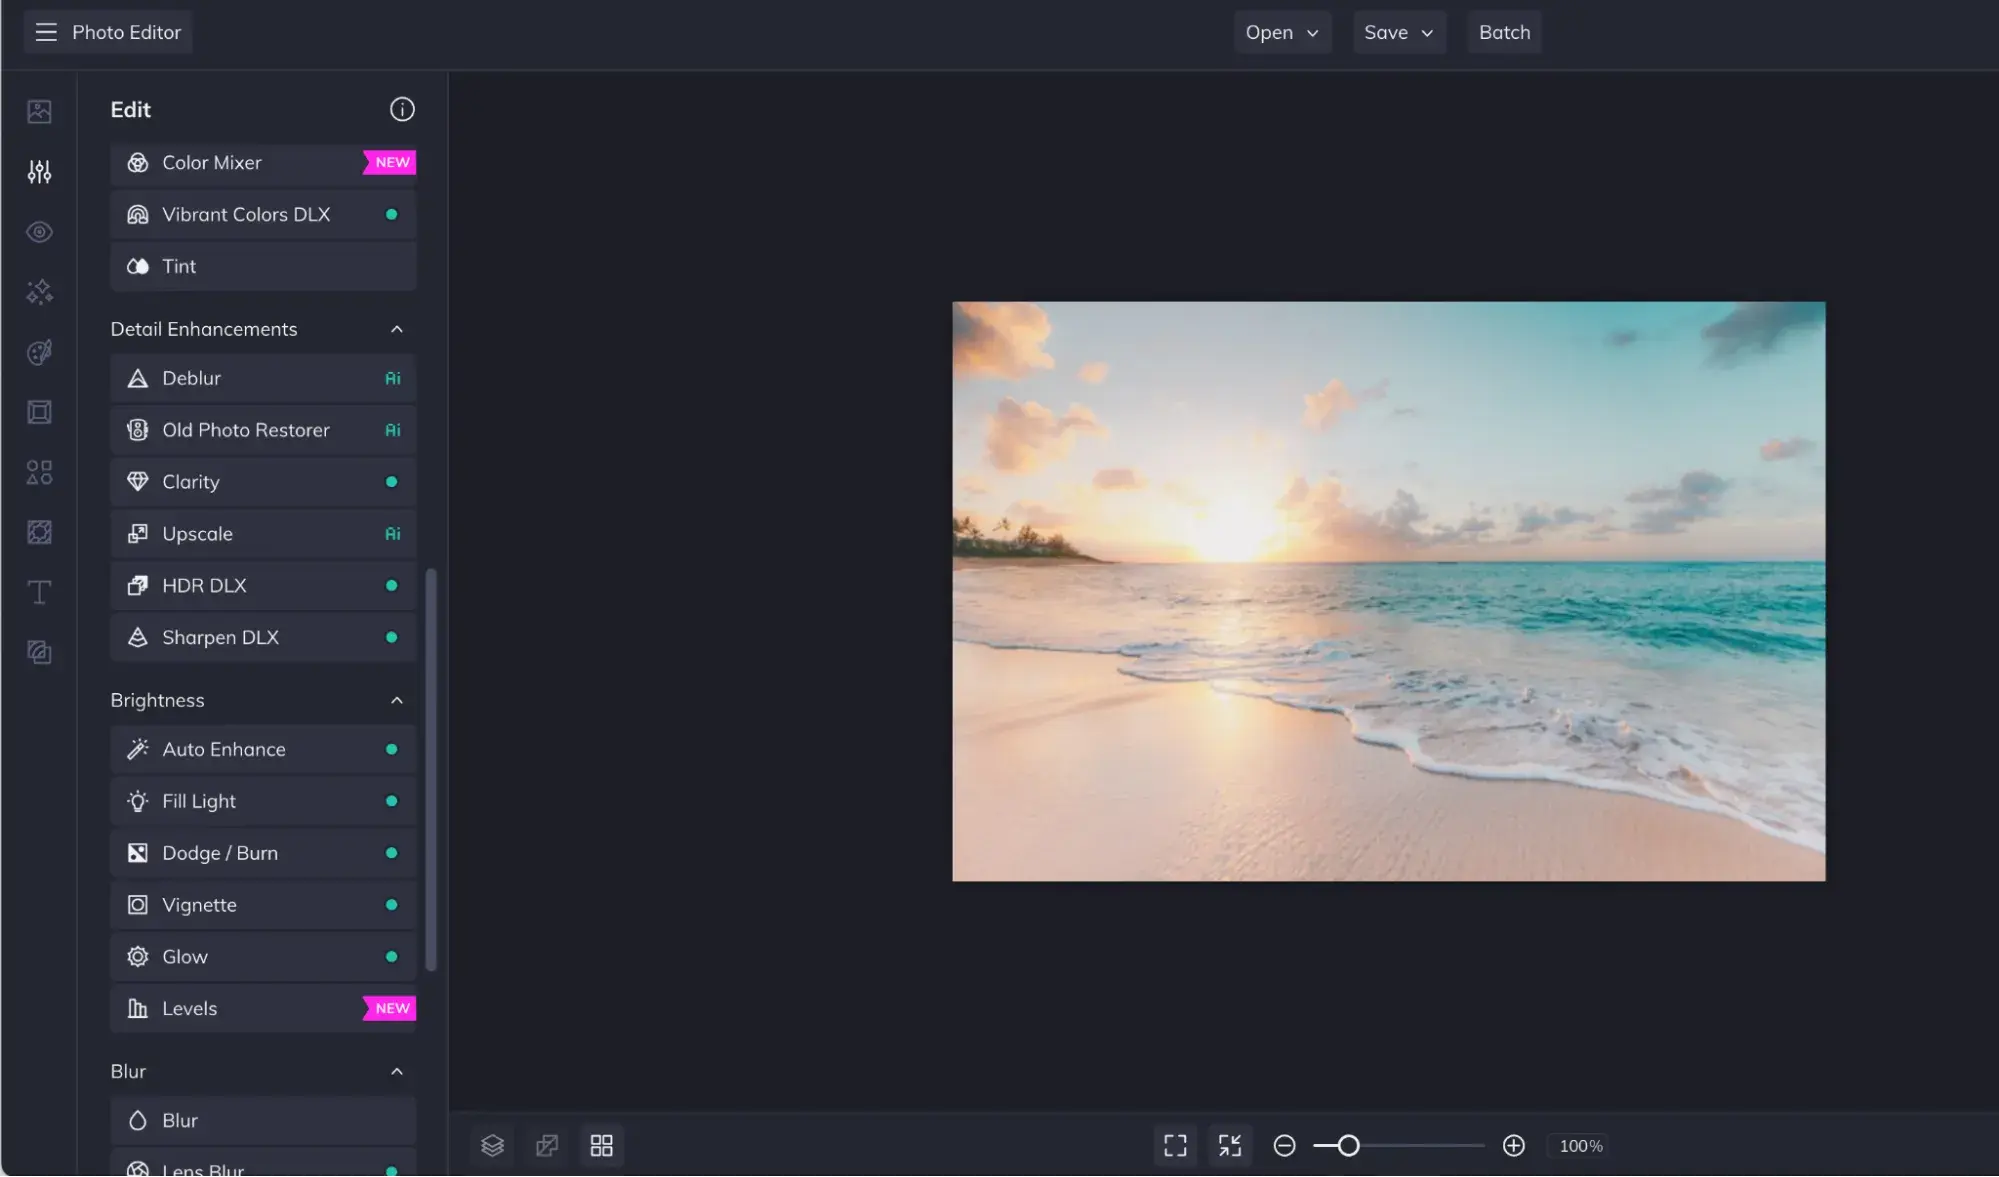
In the BeFunky app, I upload my low-resolution image and scroll down to “Detail Enhancements” to find the Upscaler option. BeFunky has now implemented AI functionality to upscale images:
BeFunky upscaled my image from 640 x 245 pixels to 2,560 x 1700. It’s an impressive ratio, and the results speak for themselves in this before and after comparison:
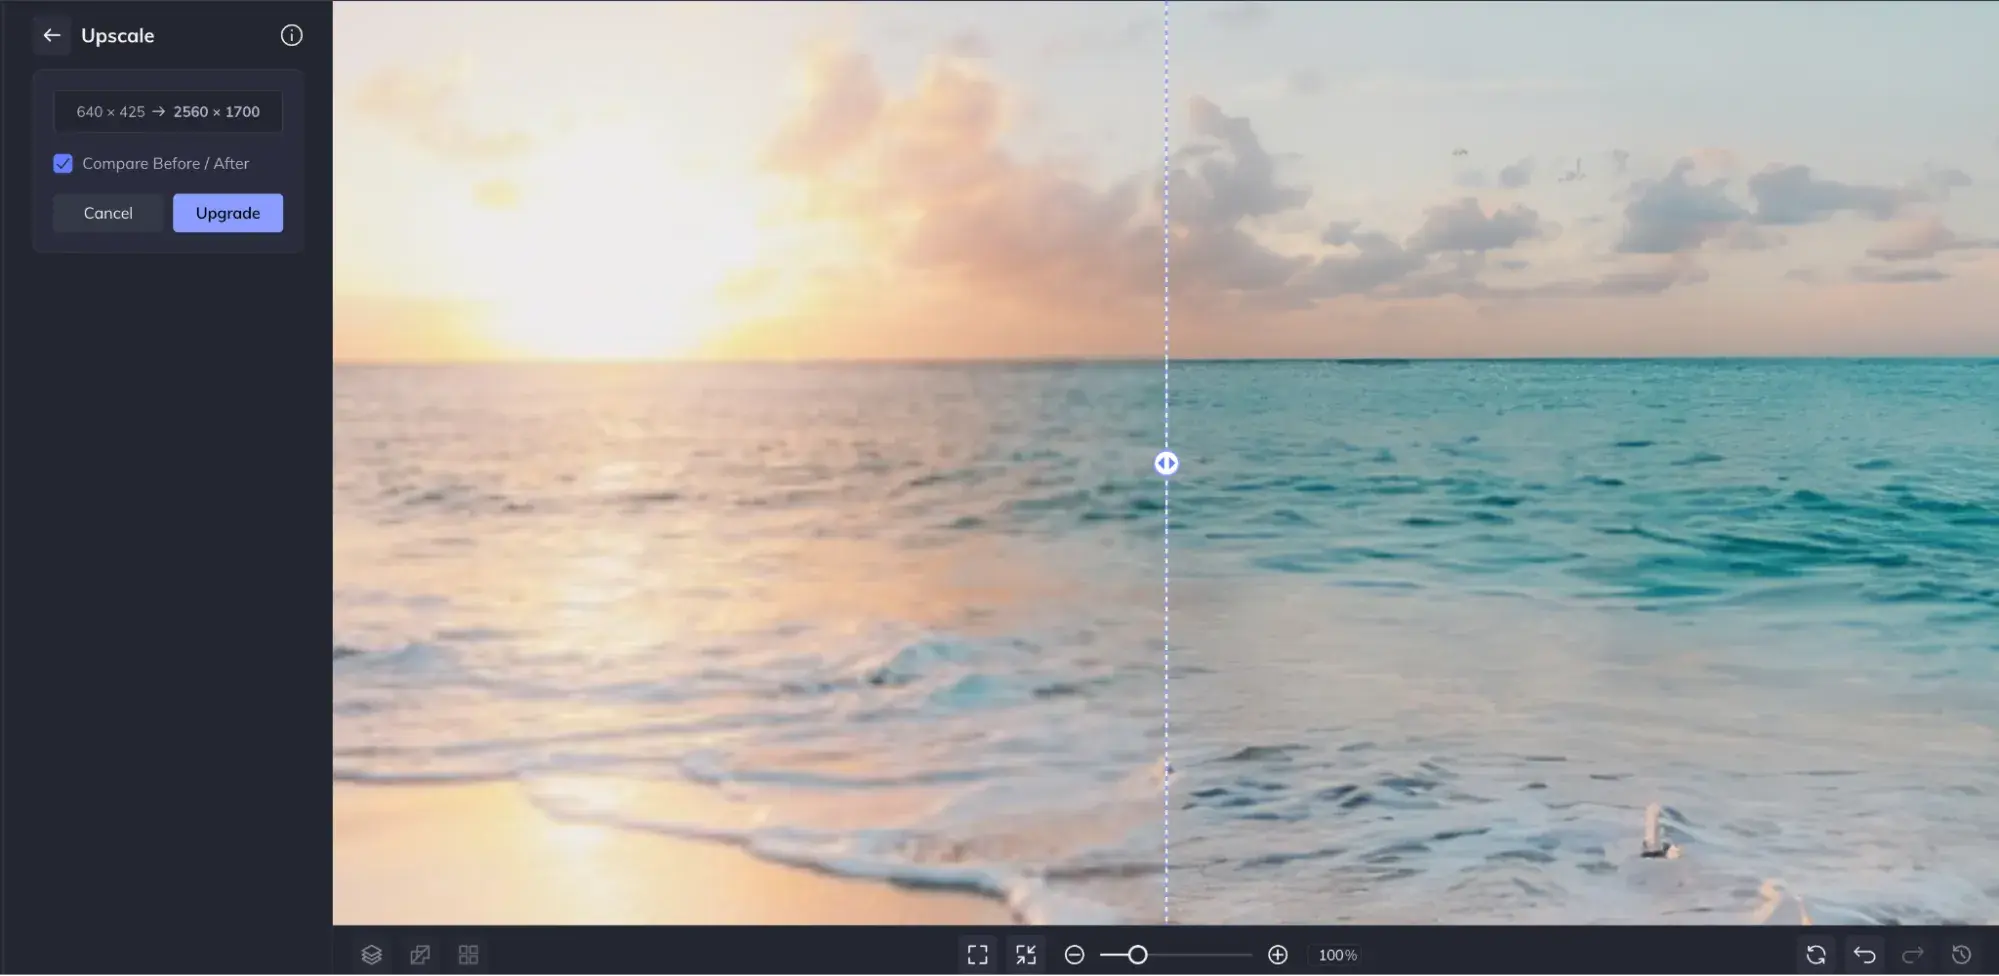
At first glance, it looks great. But I did notice there are some funny-looking edits to some of the white caps in the forefront of the image. Depending on how and where I plan to use an image, I might opt for a slightly less ambitious upscale ratio to avoid this.
Canva also has an upscaler app, so I wanted to try it out using the same image to compare results.
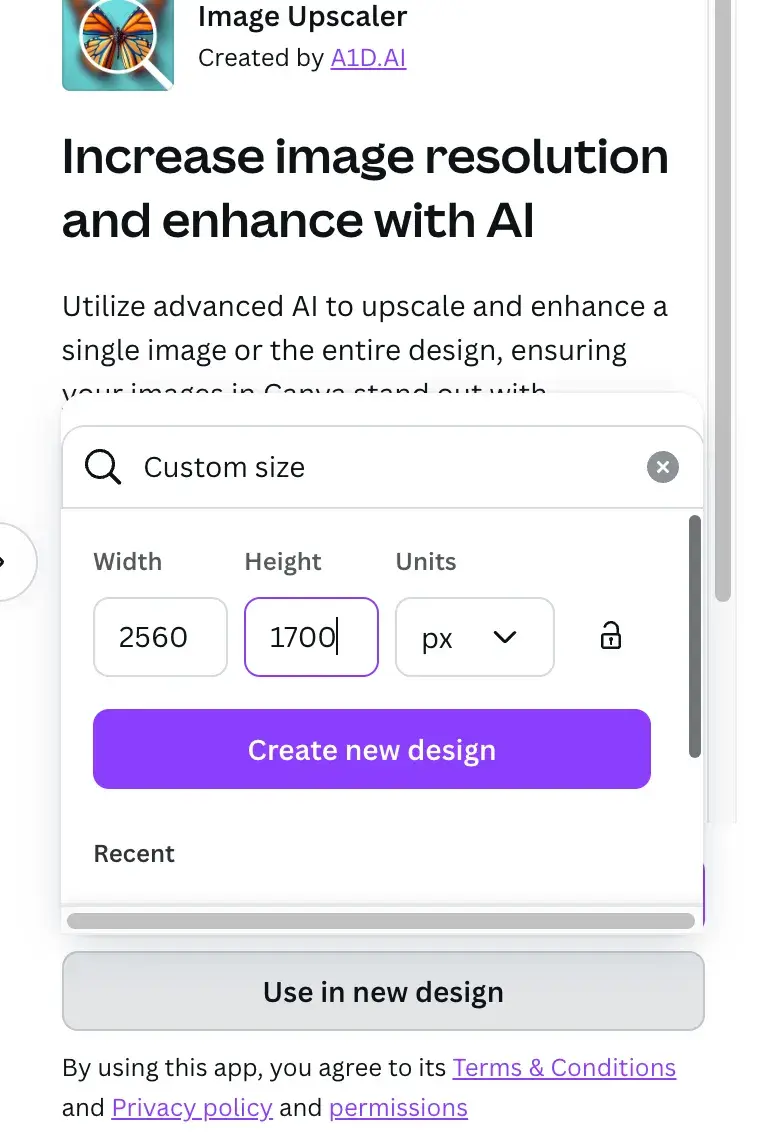
Open up the upscaler app in Canva, and click “Use in a new design.” To get a true comparison, I entered the same dimensions that BeFunky upscaled my image to:
Next, I uploaded my test image.

The app gives me an impressive four options for upscaling. The first two are free (but this does give you a x4 upscale, unlike other tools which frequently limit you to x2 upscaling on free plans) while x8 and x16 options are only available on a premium Canva plan.
Here’s how the x2 upscale looked:
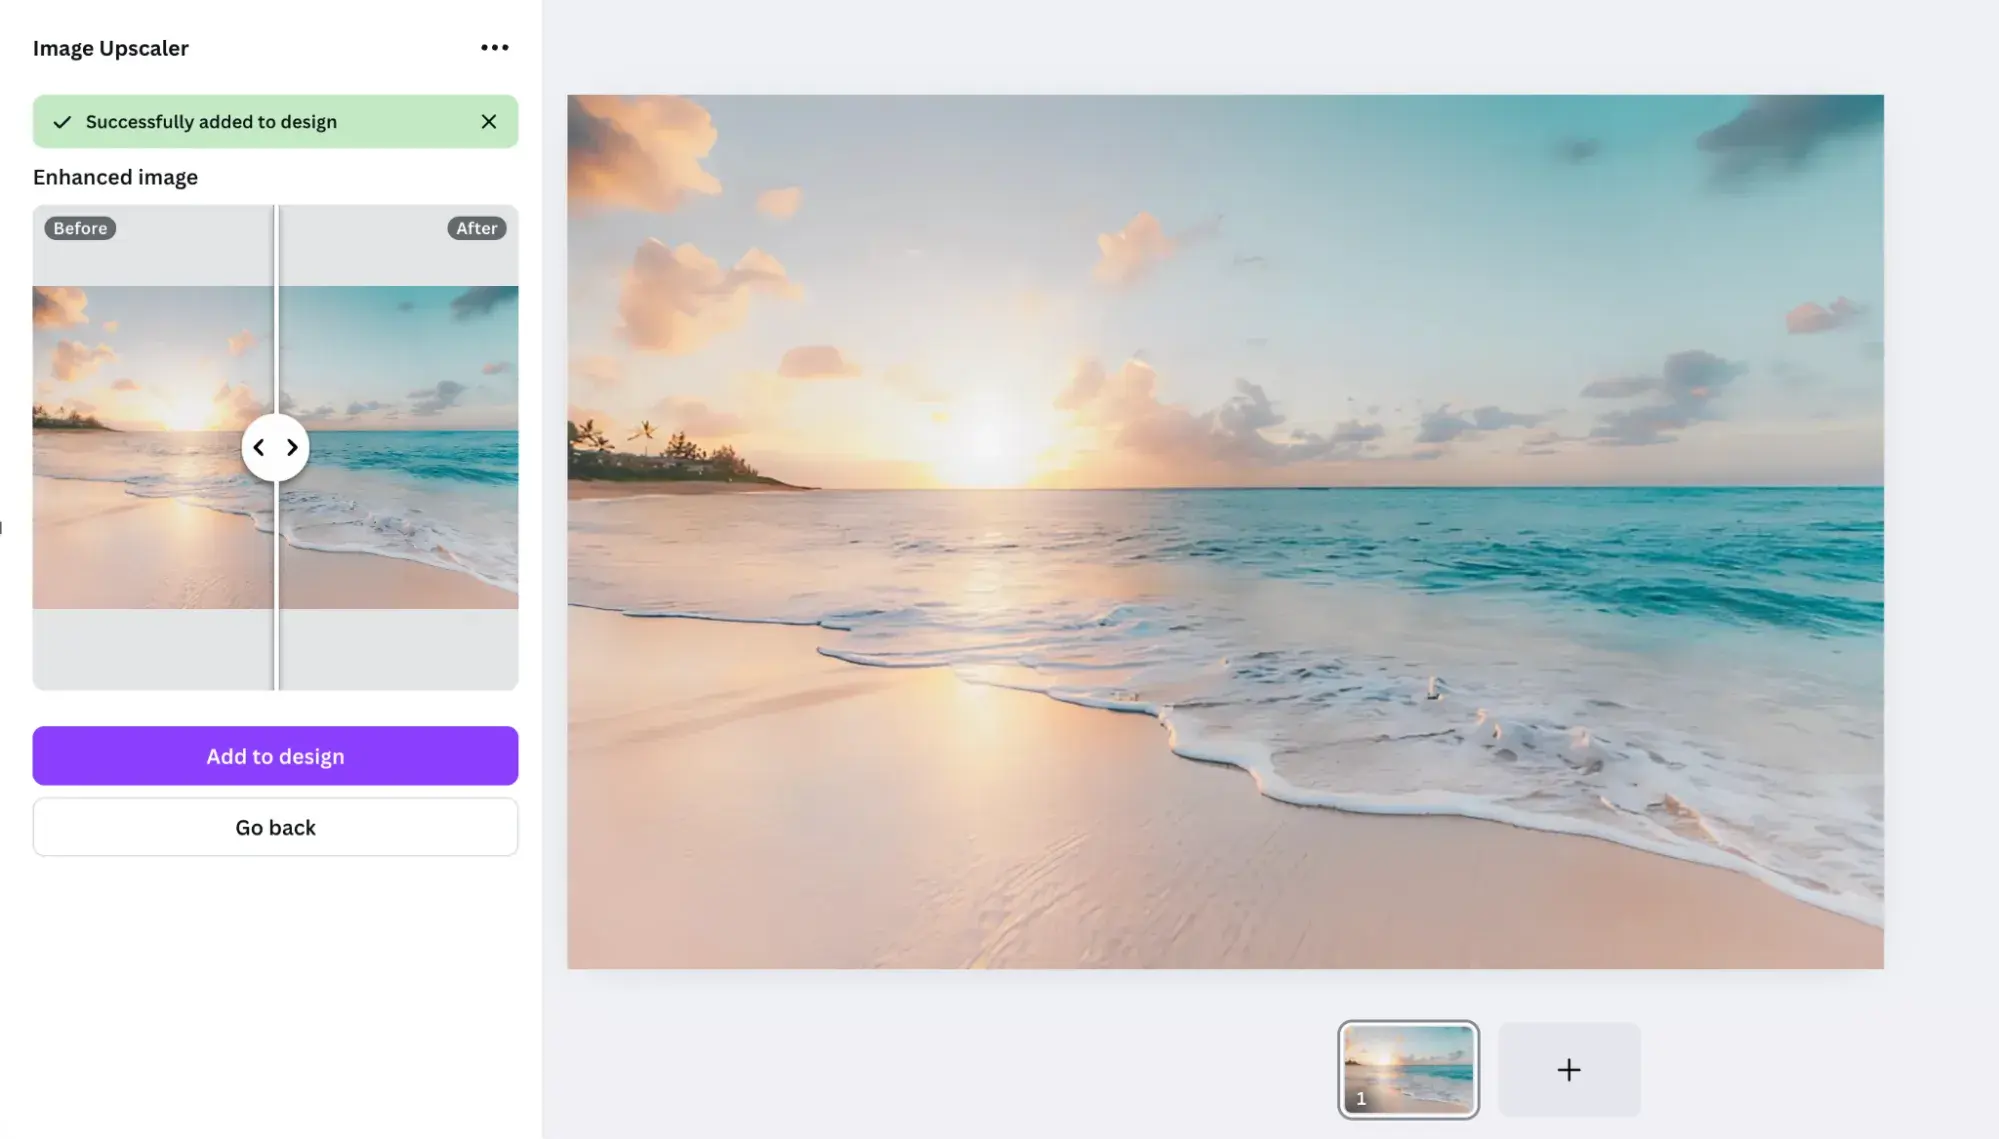
The results definitely look good, but there is a little bit more “smoothing” than I would have liked, as this can make the image start to look unrealistic and less detailed.
Here’s how the x16 upscaling turned out for comparison:
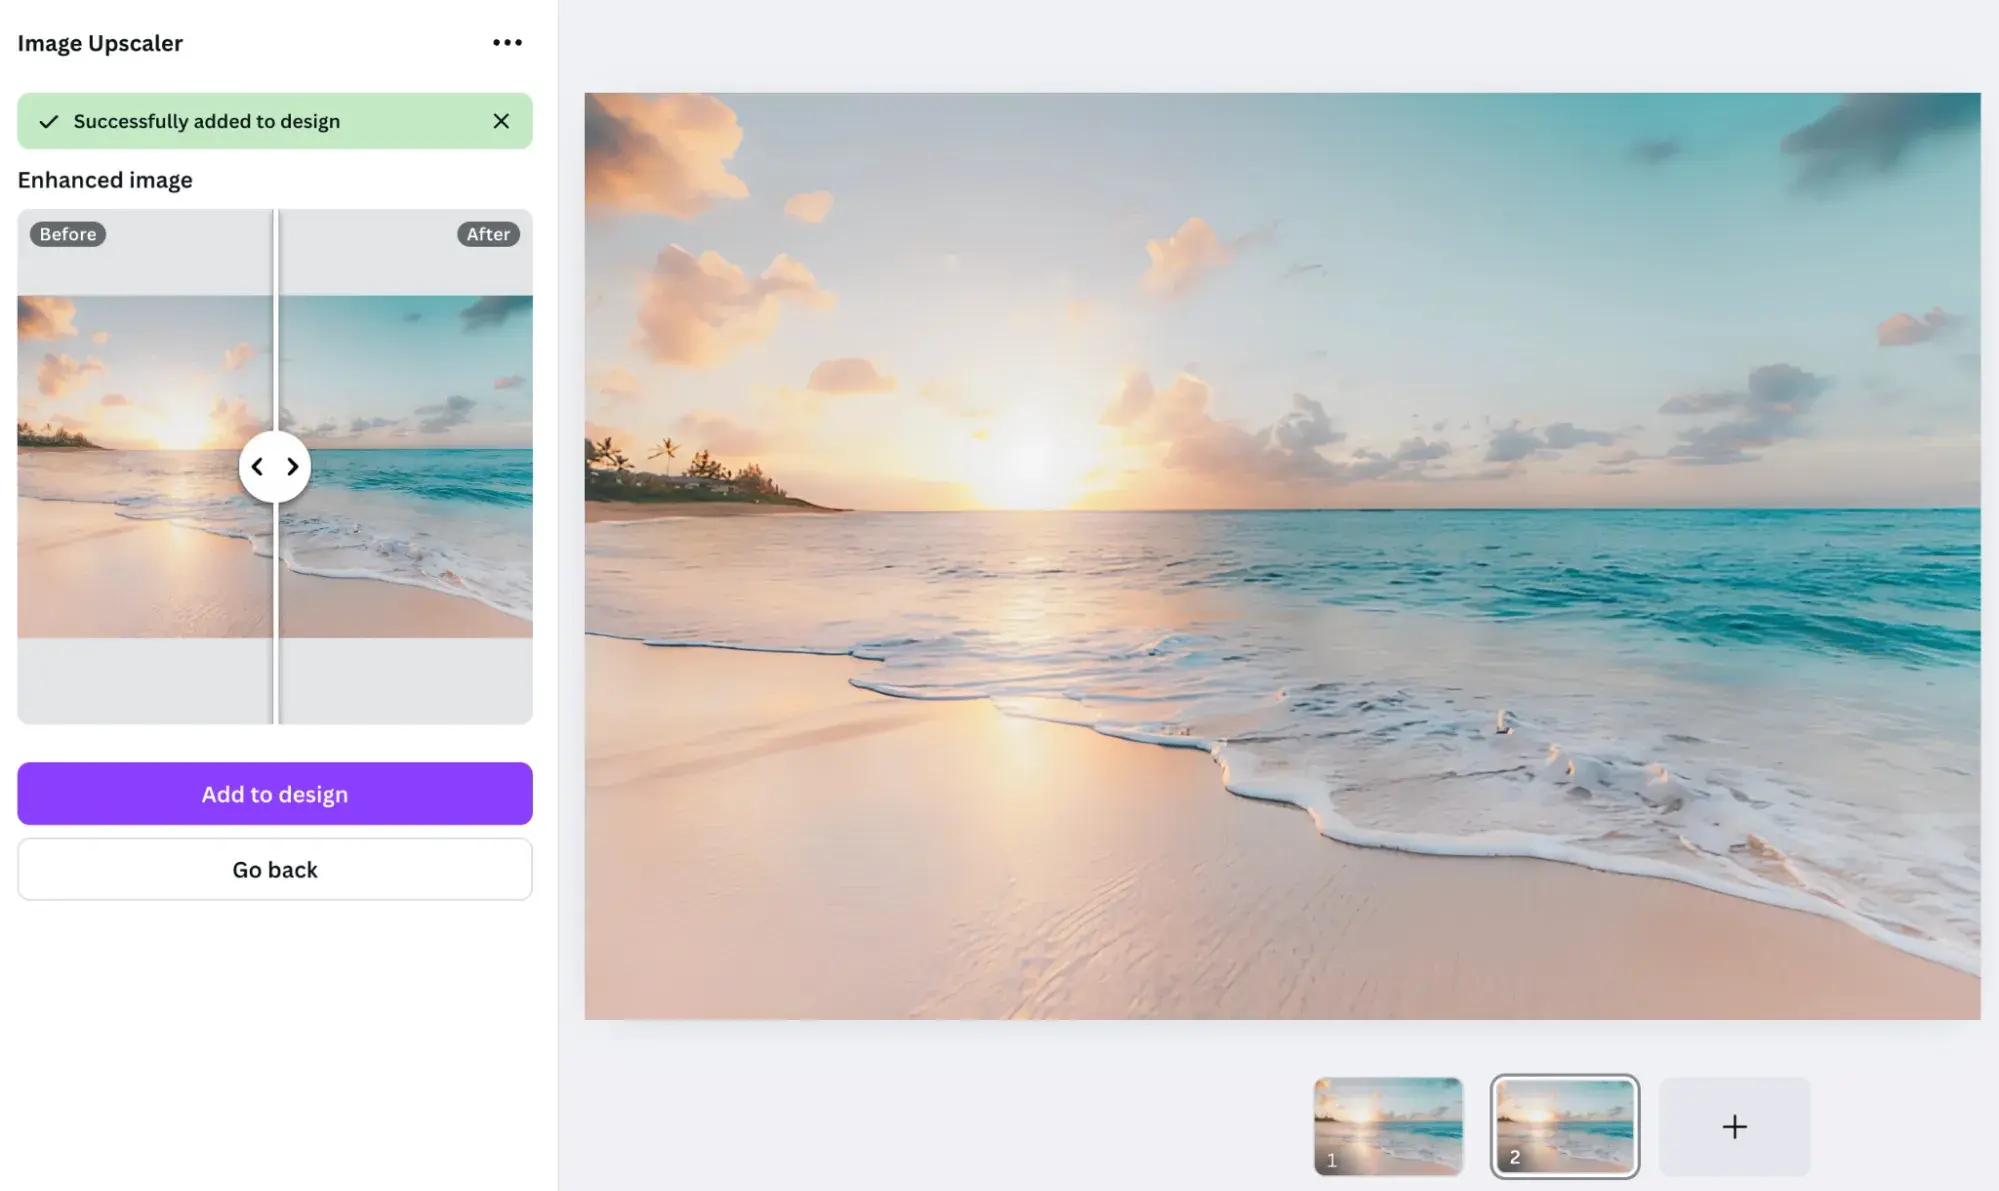
I was pretty impressed with these results, so I wanted to try it on a super low-resolution but highly detailed image.
This is a screenshot I took from a small portion of HubSpot’s homepage image:

As you can see, it’s a little pixelated here. I uploaded it to Canva’s image upscale tool and chose x16 to see what it could do. Here were the results:
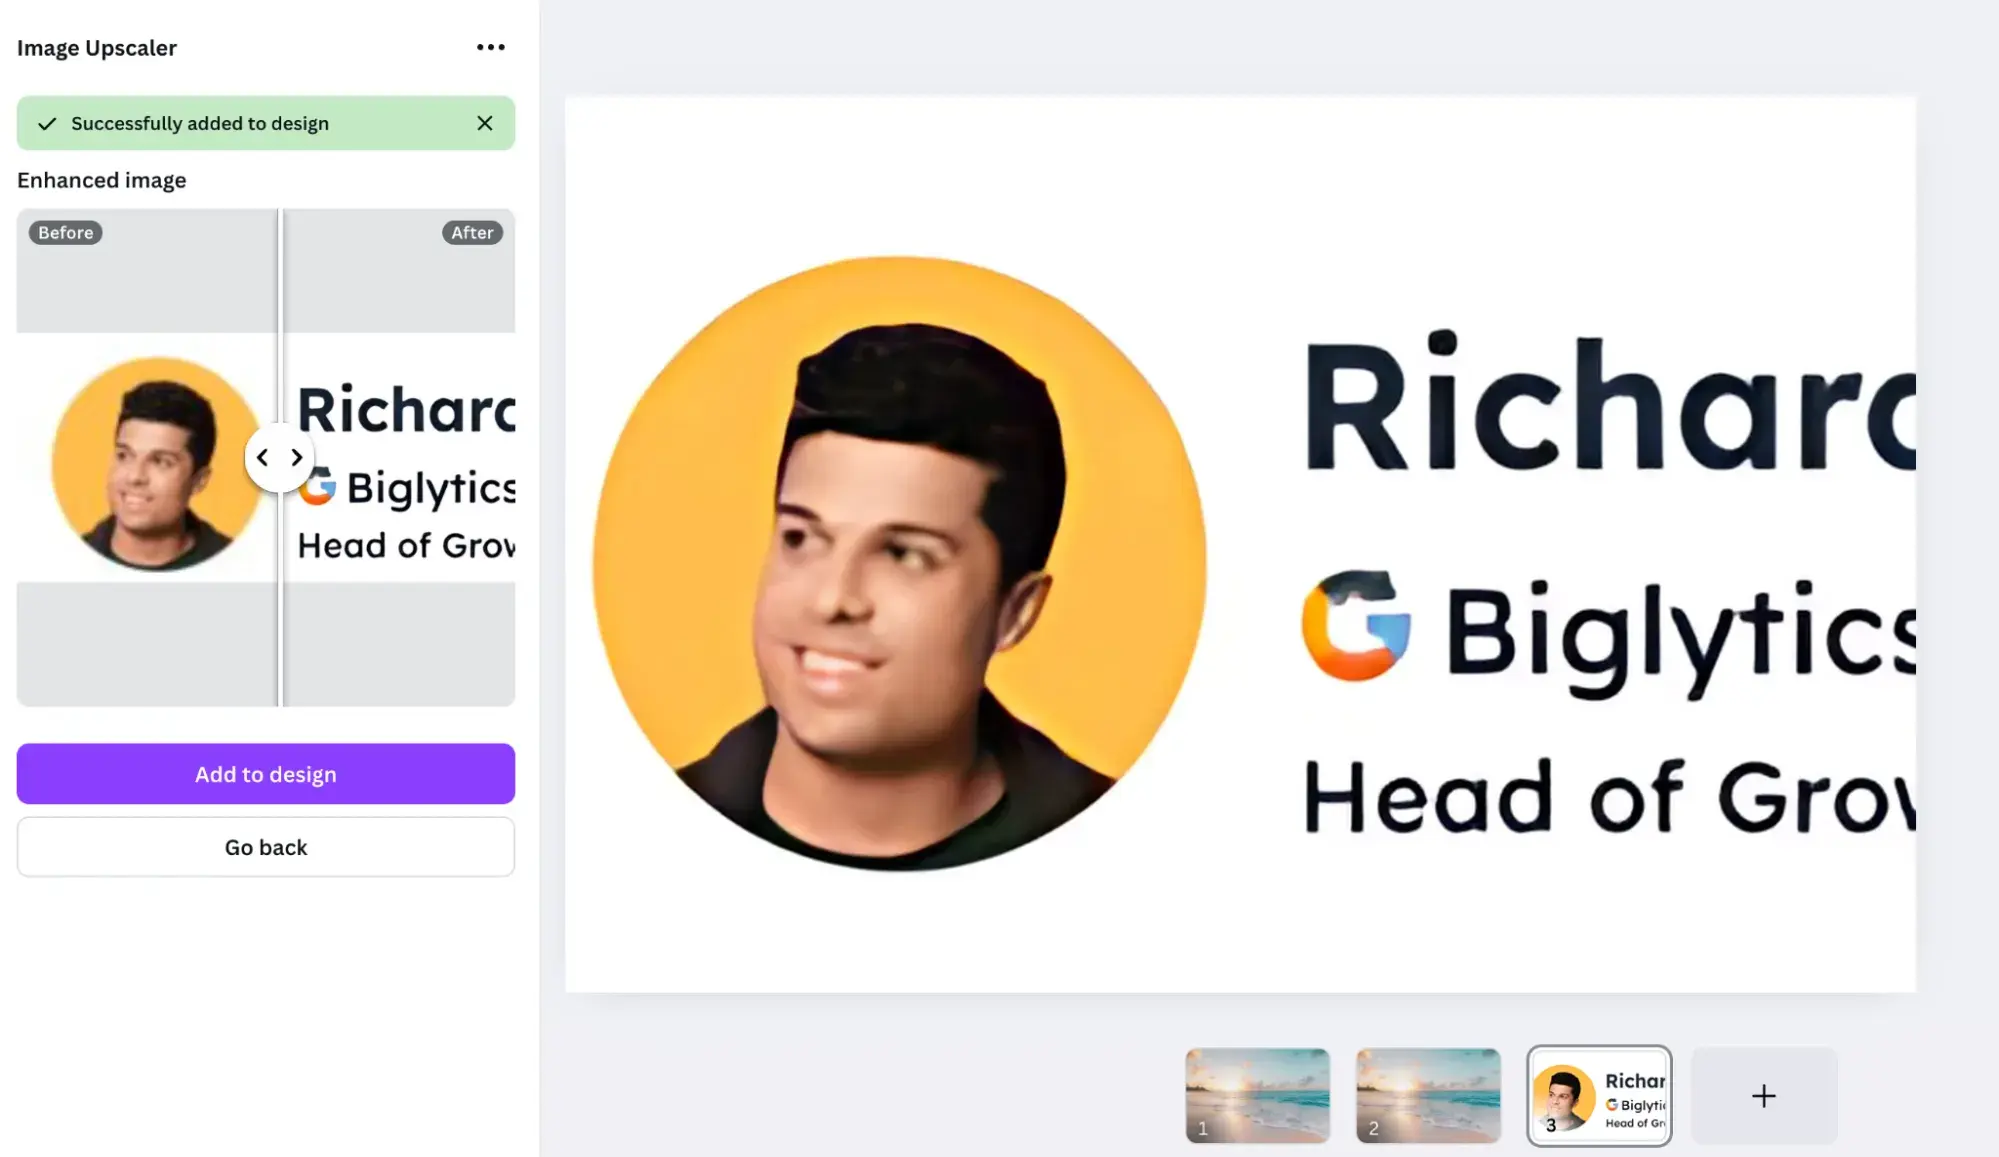
As you can see, it did a pretty good job on sharpening up the text. But the image has clearly been smoothed over too much and is looking very AI-generated. Even when I took a step back to x2 upscaling, the results were similar.
It’s not surprising, however. Faces are some of the most detailed images you can try to edit, and any unrealistic touch-ups are far more recognizable than other images. I think it’s a great example of the limitations of resampling, no matter which method you use.
2. Use image enlarger software.
You can also try tools specifically designed to make images larger, such as image enlarger software. Some of the best enlarger software products out there include Vance AI Image Enlarger, Stockphotos Image Upscaler, and AI Image Enlarger.
Let’s take a look at this process using AI Image Enlarger.
First, I navigated to the “AI Image Upscaler” in the website navigation. Here you can upload your low-resolution image.
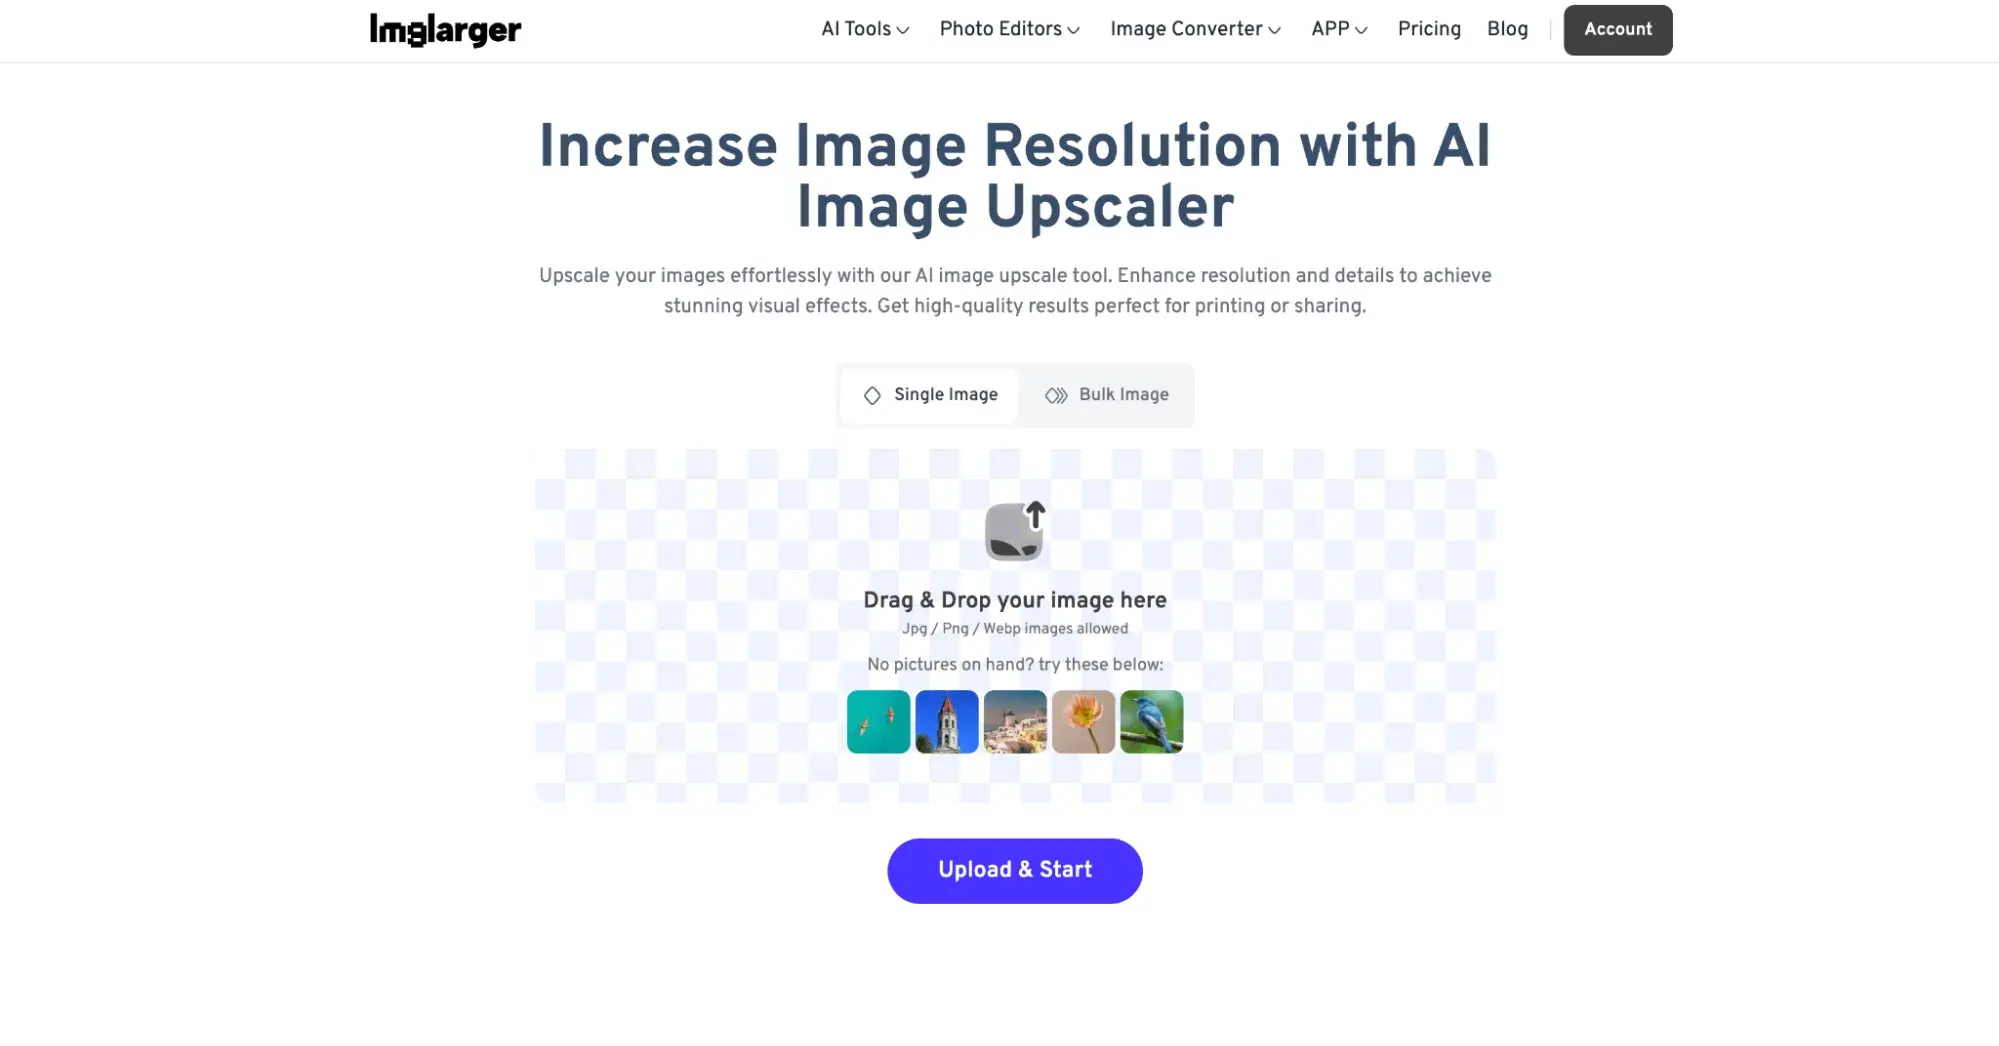
Once I upload the lower-resolution image, I can choose between a 200% or 400% ratio increase. You’ll need a paid account to test out the 400% increase:
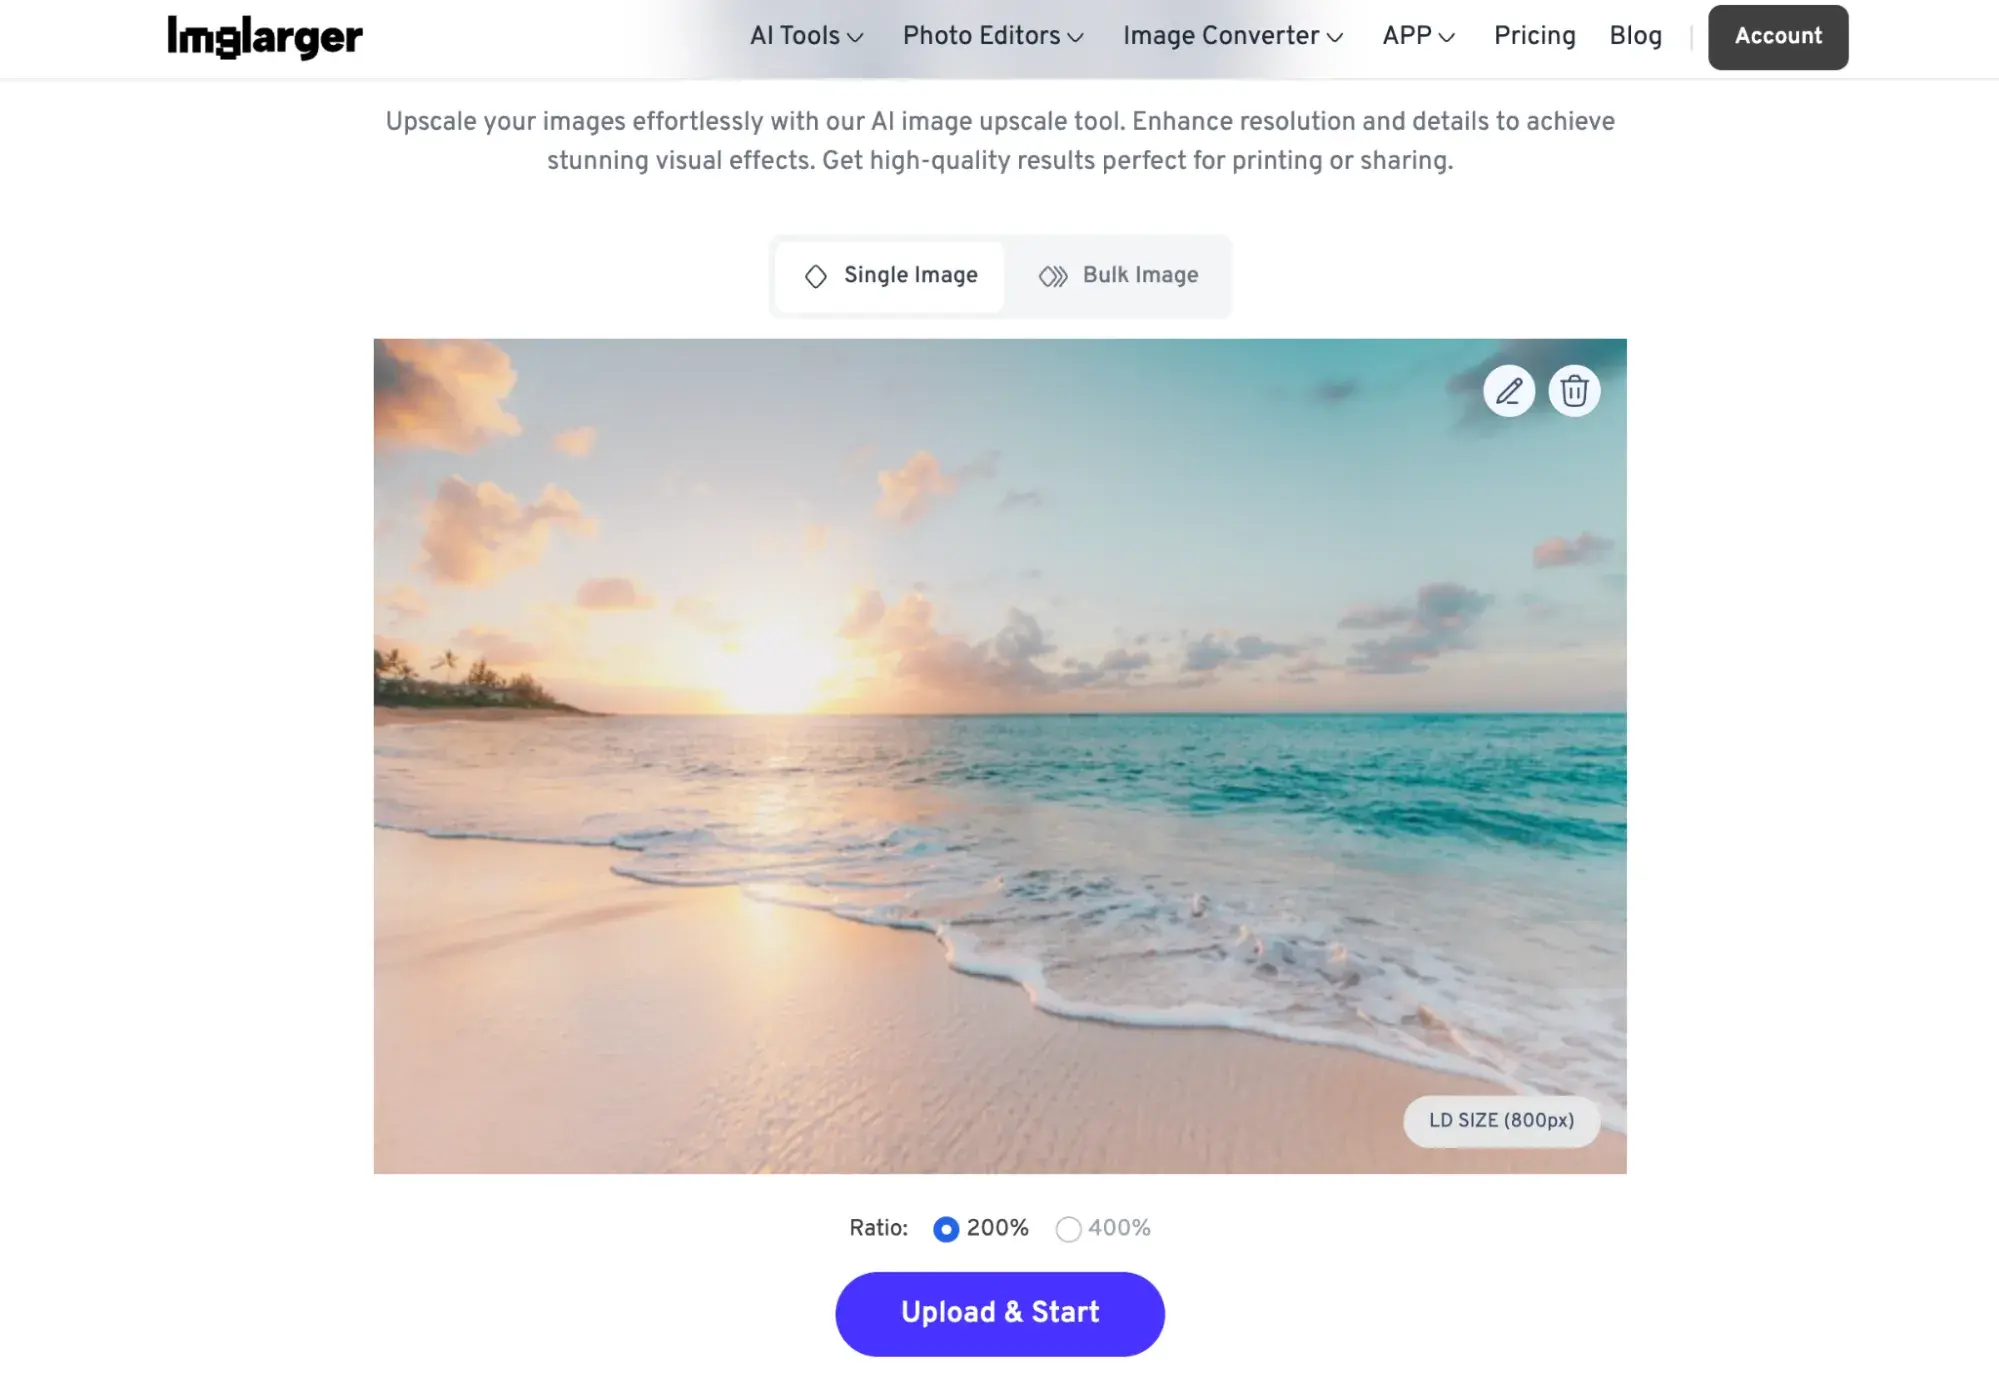
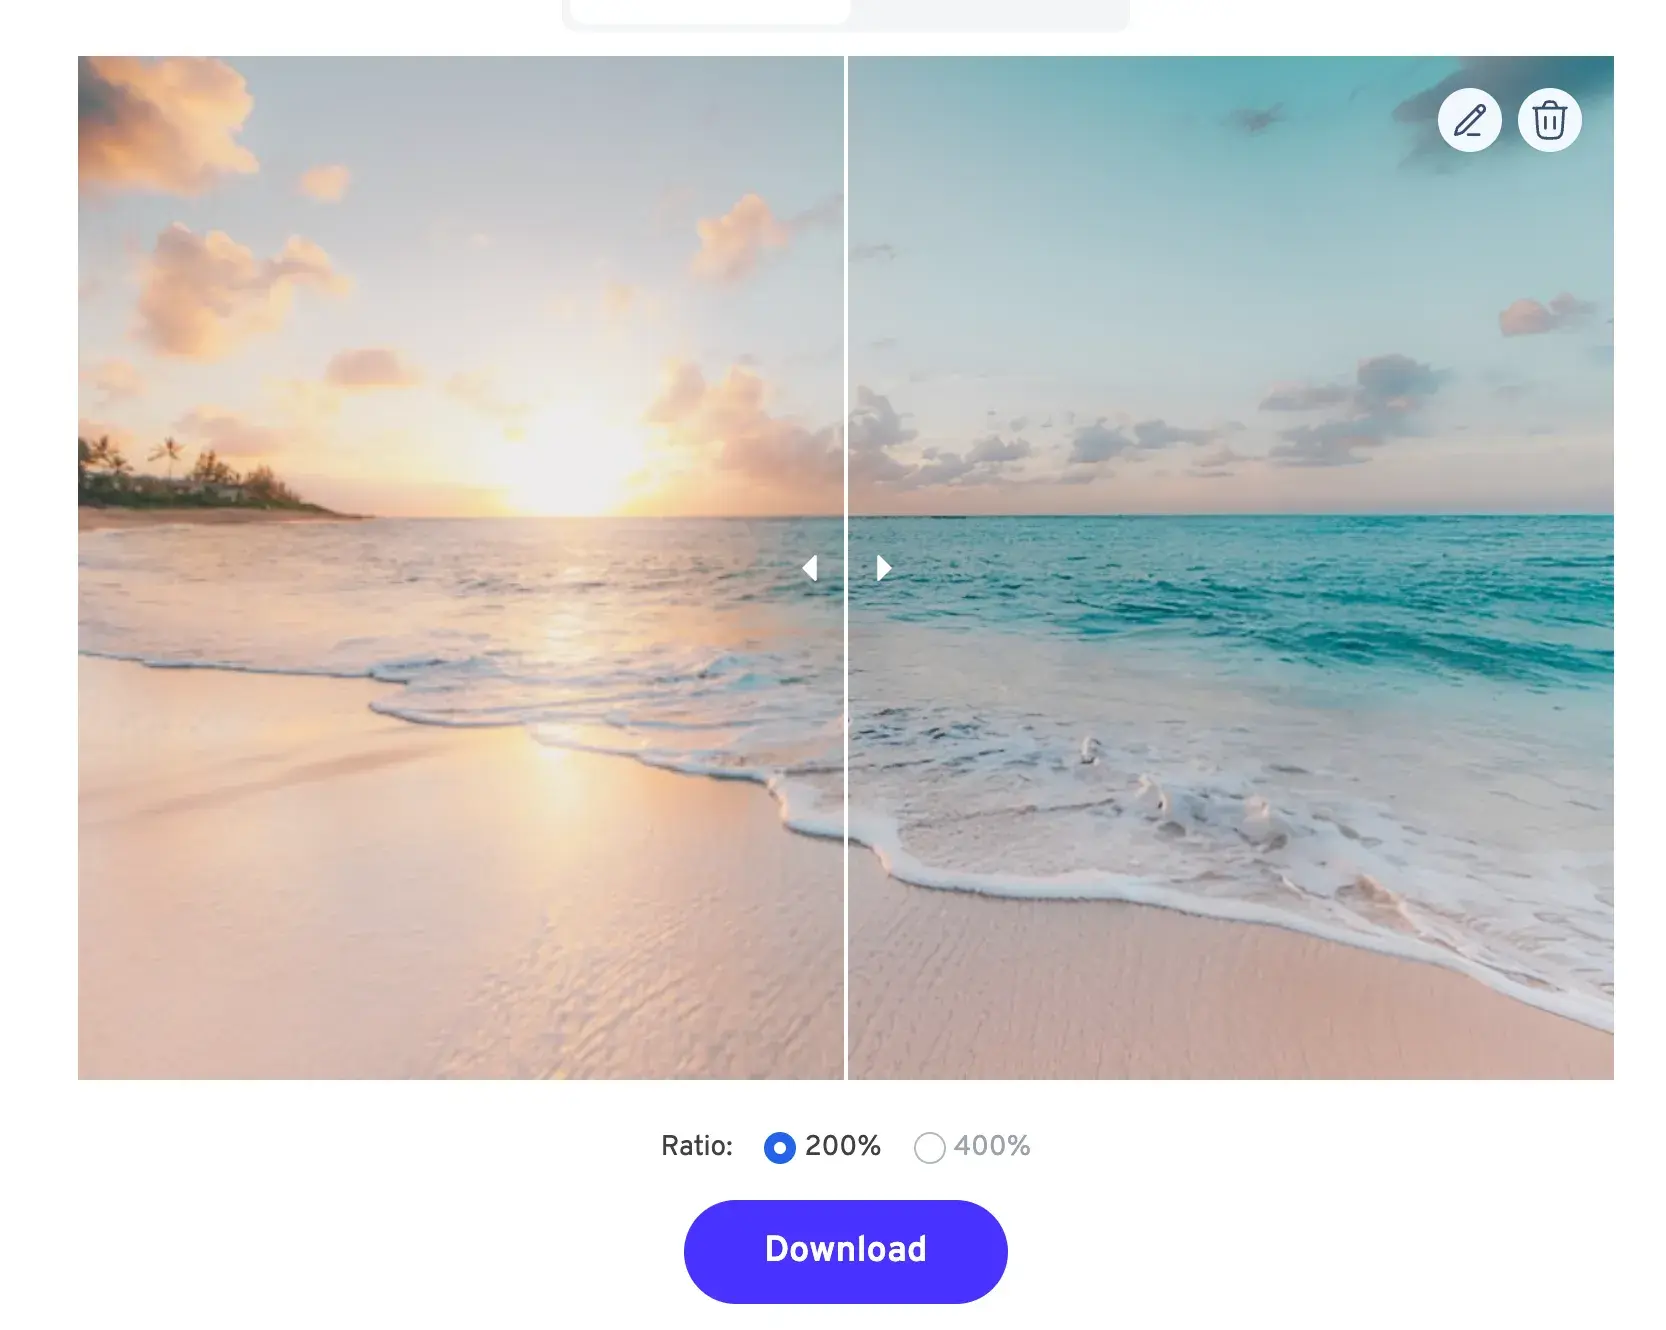
Even at 200%, I found the results pretty impressive. The tool even gives you a large side-by-side slider so you can see the before and after results before downloading your new higher-resolution image:
3. Choose a different image.
As my tests above show, upscaling can only get you so far. If you have certain need and size specifications for an image and resampling just isn’t getting you there, I recommend throwing in the towel and working with a different image.
Ultimately, image quality can be more important than its contents. I know this can get tricky with images of people. For example, I frequently have to request new headshots for team pages on client websites. But with high-quality smartphone cameras and image editors these days, it’s not a difficult request.
How to Ensure the Best Image Quality
For the best image quality, I still recommend starting with a large raw file and sizing it down to the dimensions and resolution that are appropriate for your project. Print projects typically need a higher resolution at 300 ppi (pixels per inch) or more, while a good resolution for a digital display such as a monitor screen is around 72 ppi or more. In some cases, using noise reduction software like the tools recommended by FixThePhoto can also help reduce digital noise and make the image appear cleaner and sharper.”
That being said, it was an interesting test to go through different AI upscalers and compare results. Some are better than others, but for images that just need a little sharpening up for digital displays, they’re a great tool to keep in your back pocket.
Editor's note: This post was originally published in September 2018 and has been updated for comprehensiveness.
Website Performance


![7 Site Performance Challenges That Will Hold Businesses Back [Data + Expert Predictions]](https://53.fs1.hubspotusercontent-na1.net/hubfs/53/how-to-improve-lcp-1-20250121-126295.webp)
