Check out this email I received from JetBlue, below. Their background images are simple, high-quality destination photographs, with a caption, hyperlink, and text detailing the destination. All of these factors are components of a great background image.

Note the text below background images is often an offer or exclusive. They're great to use in this way because the image captivates the reader and the offer encourages them to click, raising that precious CTR for you.
Now, we're going to go over how to create an email background image using HubSpot's marketing tools.
1. Create a new email module.
In your HubSpot dashboard, head over to the Marketing tab, then hover over “Files and Templates” and click “Design Tools.” This will take you to space where you can create new modules, like CTA buttons or new additions to your website.
From there, click on “File,” > “New file,” > “Module” from the popup box.
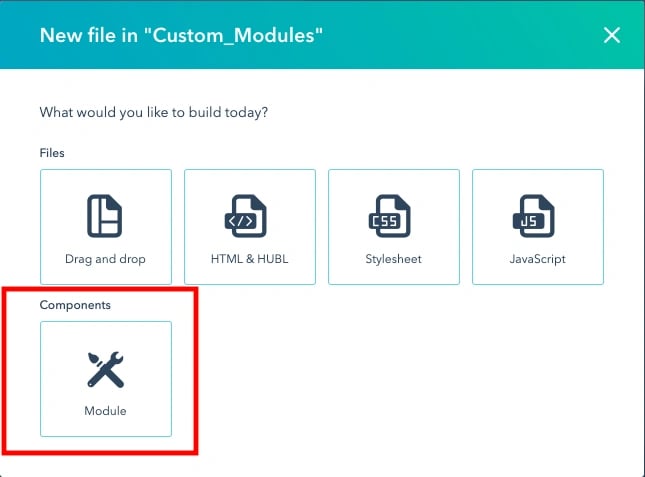
After selecting "Module," a popup box should open. All you need to do in this popup box is check the box that says Email templates under "Where would you like to use this module?"
Make sure it's a local file, and name your file appropriately. In the image below, I've named the file, "Background Image Email." Then, click the orange “Create” button.
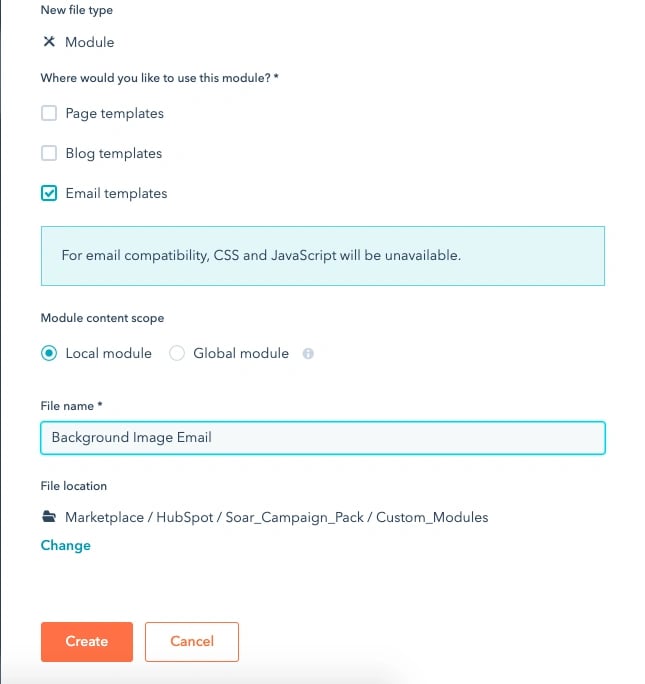
2. Create and name editable fields.
Editable fields are components of your email that you can update and change once the module is created. We're going to create rich text, so you can edit the text of your emails and the image. To do this, look to the right toolbar under “Fields.”
Click the "Add field" command and type in the search bar, "Image," and name it "Background Image." Then type in "Rich text" and name it "Content." These names will help you notate what you're working with (it really helps).
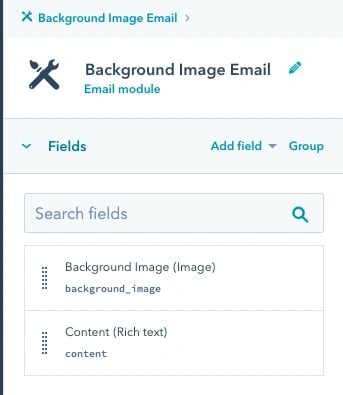
Your toolbar should now look like this.
To save time, let's customize the fields now. Edit the "Background Image" field and add your image. I used a stock photo I had saved in HubSpot's File Manager. You'll be able to find all the photos you've uploaded into HubSpot clicking the Image space.
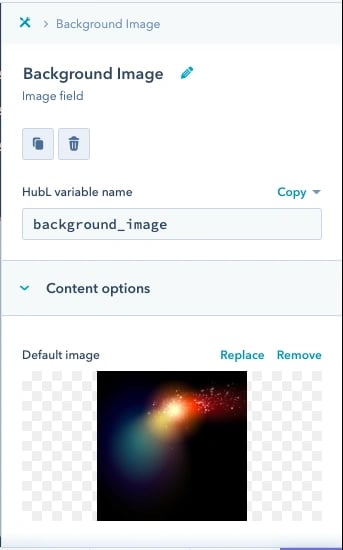
After you've added your image, time to add the text of your email. In the rich text editor, you can add a CTA, different fonts, and really jazz it up with your brand. I went very basic.
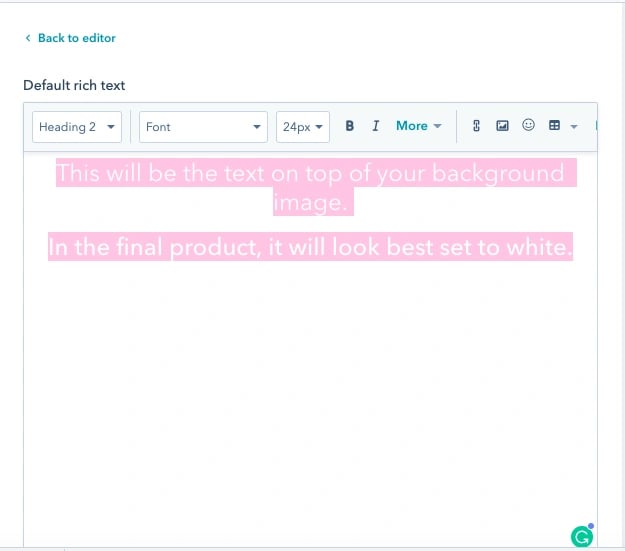
A good tip to note here is to make sure your text is white when you're done; it'll look better over the image if that image is dark. I highlighted my text because it was already white.
3. Create module source code.
You're going to need some code. Head here for sample code to use for background image creation. Once you retrieve the code, copy and paste it into the HTML and HubL section. This is what allows the module and text fields that you've created to actually render.
An important detail to note is that the sample code linked above uses the module names "content" and "background image." If you give your text and module fields a different name, you will need to update the module source code to reflect those changes, which will require some familiarity with HTML and HubL.
After you've added in your module code, when you open "Preview," you should be able to see your text and background image.
In the code, there are sections where you can insert your logo and social links to your content.
They're in lines 24-30. These entries, specifically lines 24, 26, 28, and 30, have two parts — links and images. The links, where you want visitors to go when they click on your social network, should be placed within the quotation marks where you see <a href="#">.
For example, if we wanted visitors to be taken to our homepage when they clicked on our logo, we would edit the href in line 24 to read as <a href="https://www.hubspot.com">.
To define your logo and give each social media platform an icon that users can click on, you’ll need to provide an image source URL as well. In each of these lines, you should see some HTML that looks like <img style="margin: 0 5px; max-width: 25px; max-height: 25px;" src="#">.
Replace the “#” with the URL of whatever images you would like to use. If you don't want to include a logo and social icons, you can safely remove lines 22-31 from the sample code.
4. Preview and publish.
Your background image should look something like this. I'm sure it looks way more spruced up than mine, but this is a general idea.
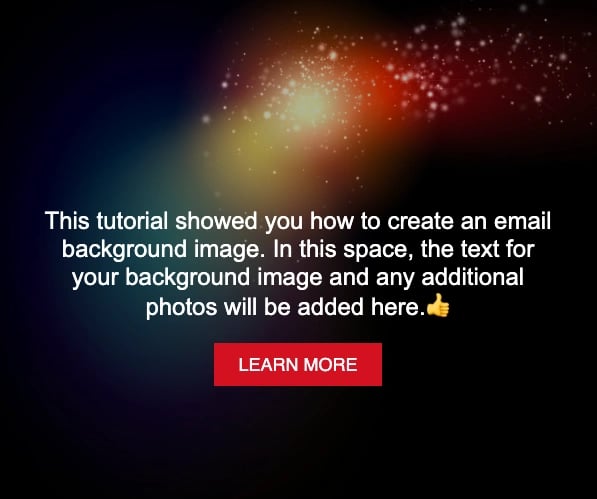
This is a template for background image emails, which not only saves time creating emails but makes them look uniform. When customers open your emails, they should know who they're receiving the message from and why. Email background images are a chance to add personality to business emails.
When I get emails from HubSpot Academy, I know, due to the background images and branding, that I'm looking at an email from HubSpot.
When I get emails from JetBlue, the background images and fonts are a clear indicator of the company's brand. Email background images enhance your marketing strategy. Give them a try on your next email today.
Email Design
.png?width=112&height=112&name=Image%20Hackathon%20%E2%80%93%20Vertical%20(84).png)

-7.png)


![Email signature examples: How to write a great one [+ free generator]](https://53.fs1.hubspotusercontent-na1.net/hubfs/53/Screenshot%20(1)-1.webp)
![How to Add Social Media Icons to Your Email Signature [+ Free Resources]](https://53.fs1.hubspotusercontent-na1.net/hubfs/53/email%20signature-Jul-25-2023-03-50-33-9137-PM.png)
![Creating HTML email marketing campaigns: The design playbook you need [+ free templates]](https://53.fs1.hubspotusercontent-na1.net/hubfs/53/html-email-marketing-1-20251029-6001253.webp)


.jpg)
![How to Make Your Emails More Interactive [Expert Tips + Examples]](https://53.fs1.hubspotusercontent-na1.net/hubfs/53/interactive-email.jpg)
