How to Add Meta Tags in WordPress Manually
Manually adding meta tags in WordPress is relatively simple. For this demo, we’ll use the example from the WordPress Codex. Imagine you’re Harriet Smith, a veterinarian who blogs about their animal stories on WordPress. You want to add the following generic meta tags to your site:
<meta name="resource-type" content="document" />
<meta http-equiv="content-type" content="text/html; charset=US-ASCII" />
<meta http-equiv="content-language" content="en-us" />
<meta name="author" content="Harriet Smith" />
<meta name="contact" content="harrietsmith@harrietsmith.us" />
<meta name="copyright" content="Copyright (c)1997-2004
Harriet Smith. All Rights Reserved." />
<meta name="description" content="Special stories and
tales about dogs, cats, birds, ferrets, and other
domestic animals as told by Harriet Smith,
veterinarian. Stories include tales of animal
bravery and courage, life and death, companionship,
and the wonderful joy animals and pets bring to
their human partners." />
To do so, follow this step-by-step guide.
1. Log in to the control panel of your hosting account and open the File Manager.
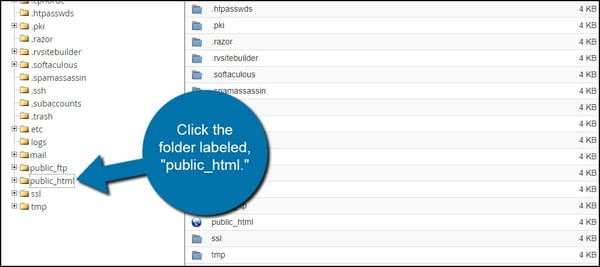
2. Click the public_html folder on the left hand side of your screen.
3. Click the wp-content folder.
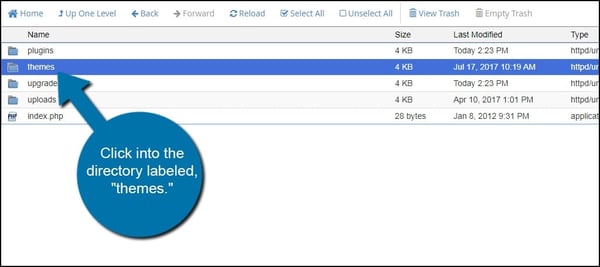
4. Find the folder labelled “themes.”
5. Click the folder with your theme’s name.
6. Right-click the header.php template and select Edit from the drop-down menu.
7. Add your meta tags in the head section (between the <head></head> tag.
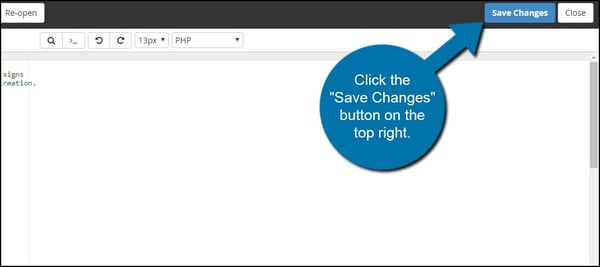
8. Save your changes.
While manually adding meta tags is a relatively simple process, it only works if you have a clear purpose for your website like Harriet. In that case, you can use basic information to create generic meta tags and place these in your header.
If your site covers a wider range of topics, then you’ll need to set unique meta tags for each post and page. You can do so using a plugin.
How to Add Meta Tags in WordPress Using a Plugin
With a plugin, you can add generic and unique meta tags to your WordPress site. We’ll walk through how to add them using the Meta Tag Manager plugin. If you’re using another plugin, check out its documentation for exact steps.
1. First, log into your WordPress dashboard.
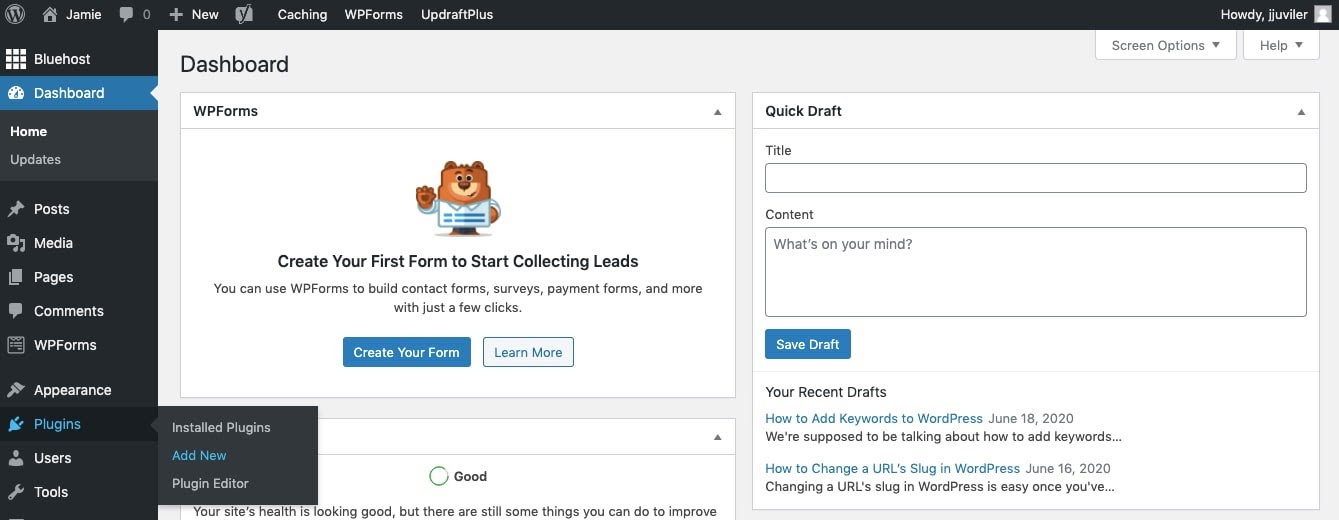
2. Click Plugins > Add New.
3. Search for “Meta Tag Manager.” When the search result appears, click Install Now and Activate.
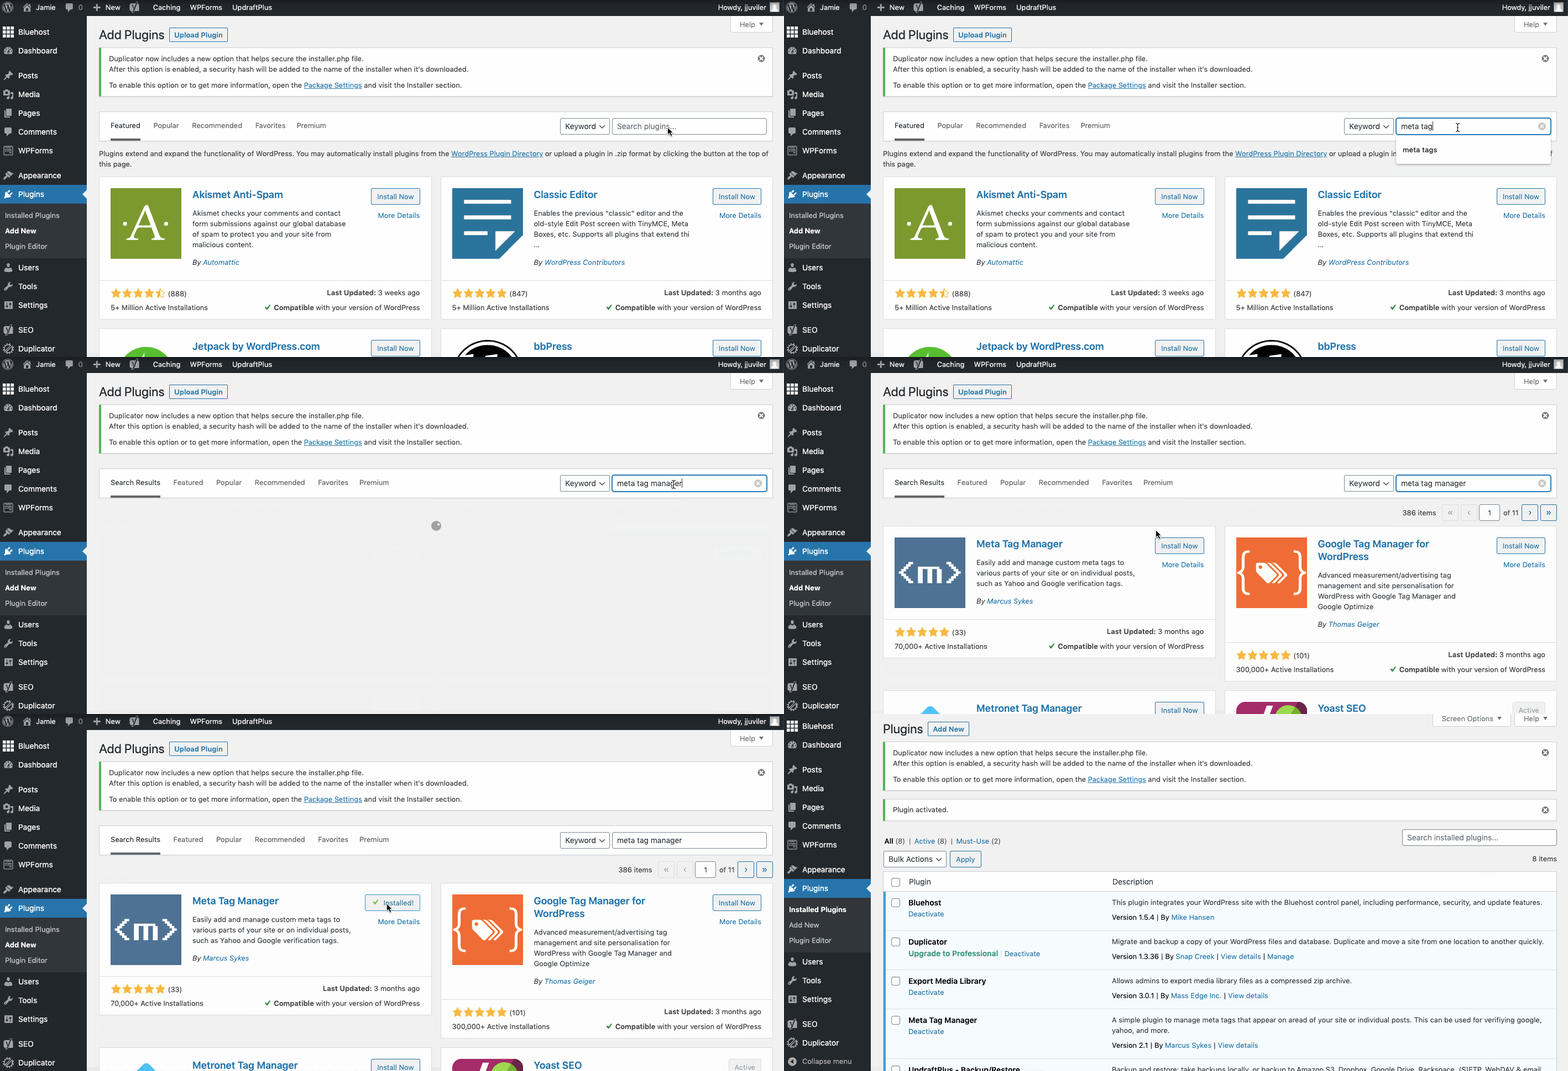
4. You’ll be automatically redirected to the tab containing all installed plugins on your site. At the top of the screen, you should see a message confirming the plugin has been activated.
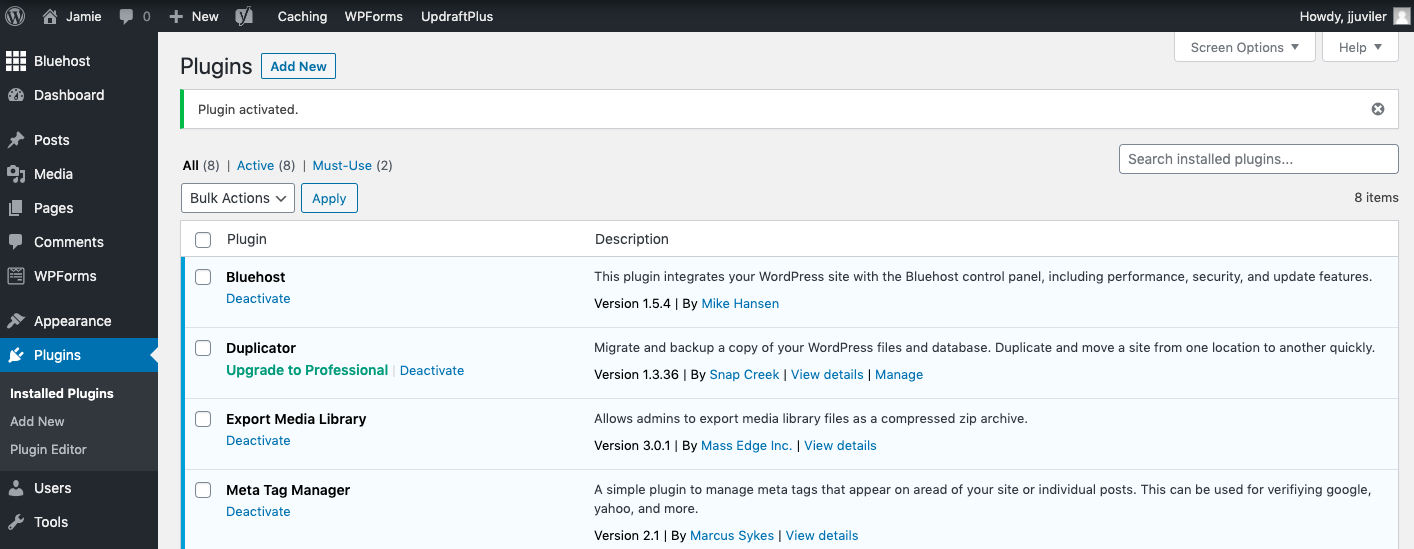
5. Navigate to Settings > Meta Tag Manager.

6. Now you can begin creating global meta tags and assigning them to different areas on your site. Let’s say you want to add an author meta tag for all posts on my site. You’d configure the settings as shown below.
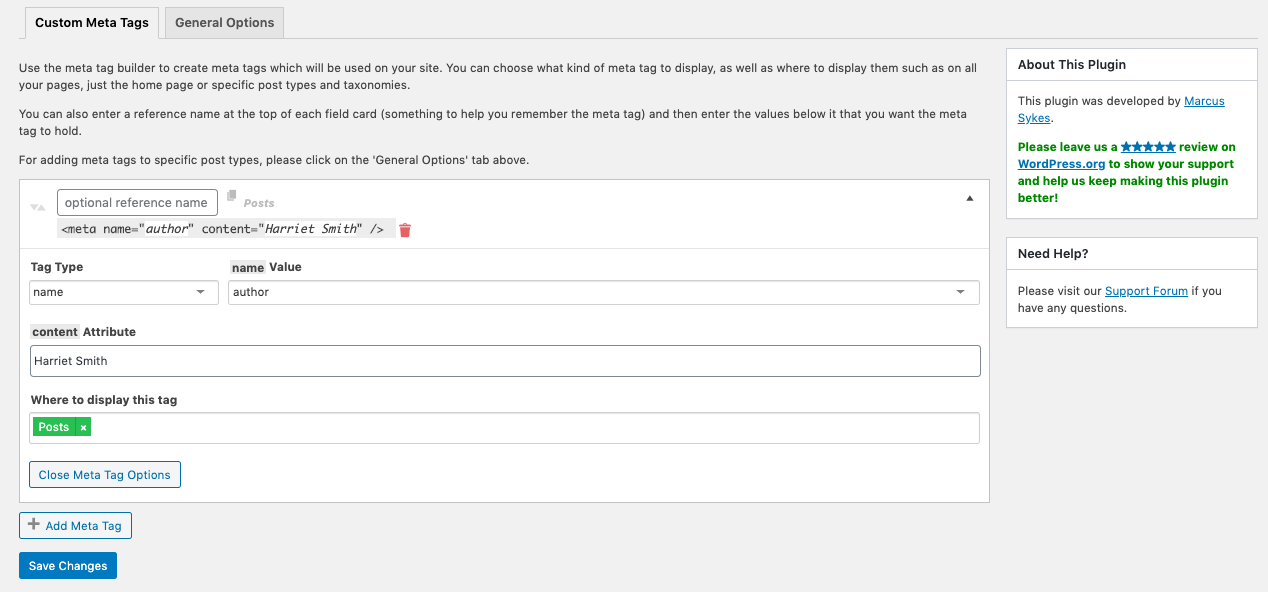
7. Then, switch over to the General Options page and make sure that posts, pages, and media are listed in the field labelled “Post Type Support.” That way, when editing a post, page, or media file, you can add meta tags that will only be displayed on that specific item.

8. When editing in this way, the Meta Tag Manager will appear as an individual meta box, as shown below.

In the demo below, you’ll see that I’m in the post editor. I scroll past the Yoast SEO meta box to the Meta Tag Manager meta box and add a meta description tag that’s unique to this specific post.

Following the same process, you can add unique meta tags to all your posts and pages.
Adding Meta Information to Your Site
To provide search engines with as much information about your WordPress website as possible, you can add generic meta tags in your theme’s header. Or you can use a meta tag plugin to create and manage global meta tags as well as custom meta tags for your individual posts and pages. Pick the method that works best for you and your site.
WordPress Website


![How to become a WordPress developer [+ tips from WCEU speaker Paul Bearne]](https://53.fs1.hubspotusercontent-na1.net/hubfs/53/59_How%20to%20Become%20a%20WordPress%20Developer.png)


