
By enabling a security protocol called Secure Sockets Layer (SSL), websites can protect all connections between their server and visitors' browsers. In this post, you'll learn more about ensuring your WordPress site provides security for your visitors with the help of a WordPress SSL certificate. Then, you will uncover how to get one and set up your site with this handy new configuration.
What Does an SSL Certificate Do?
To get a better understanding of what an SSL certificate is (and why it's crucial), it's helpful to first understand SSL as an overarching concept. SSL stands for Secure Sockets Layer, and is a protocol, or set of set rules and procedures, that secures data transfers between a browser requesting a website and the web server delivering the website.
SSL is essential as it encrypts data transfers between two machines so that only the browser and server can decrypt the files. This is beneficial because even if a bad actor somehow intercepts the files, they can't interpret or modify the stolen data.
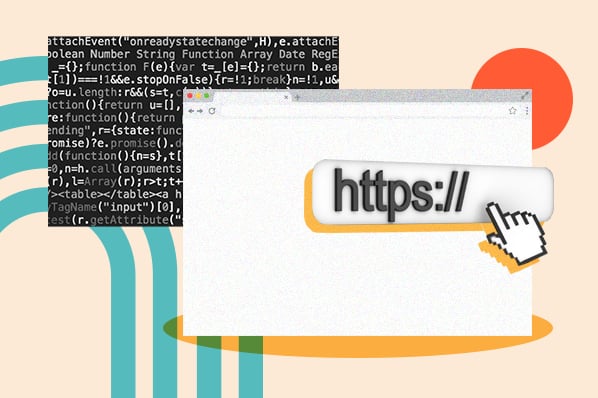
So, how is this technology so crucial and widespread if most people haven't heard of it? You might have noticed a shift in URLs across the web from "http" to "https." When a URL begins with "https," this means that the URL is protected under SSL. Every day, the old HTTP is becoming less common, and HTTPS is becoming more of an expectation.
SSL works in conjunction with another internet protocol you've probably heard of, the Hypertext Transfer Protocol (HTTP). HTTP dictates how web servers and web browsers send files to each other. When the SSL protocol is applied to a website, the HTTP protocol changes to HTTPS — the extra "S" stands for "secure" or "SSL."
Verifying if a website uses SSL or not is easy. All you have to do is check the beginning of its URL for "https." If you see https, you're in the clear. Most browsers will also display a padlock icon to indicate that your connection is secured with SSL encryption. Here's what that looks like in Google Chrome:

This brings us to the question: How do you activate SSL on your website?
This is where SSL certificates come in handy. An SSL certificate is a collection of small data files located on a web server that establish an encrypted link between the server and the browsers that access the server. When a browser first accesses a website, it will check the host for an SSL certificate. The little padlock icon will appear when your browser can find and verify it.
The certificate files contain identifying information about the holder, the expiration date, and a public key to encrypt the data. Several kinds of SSL certificates are available, which we'll explore later.
For a quick overview of what HTTPS is and how to get started with it, our video guide can help.
Why Do You Need a WordPress SSL Certificate?
Today, SSL isn't a luxury. It's a necessity — and here are the three main reasons why.
First, of course, is security. Websites often handle the transfer of confidential data like payment information, login credentials, and health records. This is especially relevant if you have an ecommerce site or provide healthcare and customers' health records, but it's important even if your site doesn't fall under these categories.
If this data is intercepted, the consequences for the visitor and the web service can be disastrous. If you're an online store or a website requiring login, the cost of an SSL certificate is nothing compared to the potential damage a successful attack does.
Additionally, securing a WordPress SSL certificate is especially crucial because users are highly vulnerable to these types of attacks. This is due to WordPress's security vulnerabilities, and many WordPress users tend to be new site owners who neglect security principles. By being cognizant of WordPress sites' security vulnerabilities, you can ensure you're not part of the statistic.
Second, SSL affects your presence in search. Since 2014, Google has listed HTTPS as a factor in its ranking algorithm. If your site lacks it, you're less likely to land in front of potential visitors. Even if you're not handling secure transactions, SSL is worth it for SEO.
The third and final big reason for SSL is the user experience factor. Remember how web browsers will visually indicate when a connection is encrypted? If a connection is not encrypted, users see something like this in the browser:

...which, let's admit, is not the best way to get your visitors to trust you. We're used to seeing the padlock in our browser bar, so when we land on an unsecured page, the absence of one immediately dampens our experience. The consequences of poor user experience may not be as dire as poor security, but they can harm your business nonetheless. And, unlike the WordPress branding in your footer, you can't get rid of this warning with clever coding.
With these reasons in mind, let's see how to get an SSL certificate for your WordPress website.
If you'd rather watch a video, check out this walkthrough from Website Learners:
How to Get an SSL Certificate in WordPress
Ready to learn how to get a WordPress SSL certificate? Due to their popularity, SSL certificates are easy to acquire. Your exact process will depend on your hosting provider. But in general, we can break it down into three steps:
Ready to learn how to get a WordPress SSL certificate? Due to their popularity, SSL certificates are easy to acquire. Your exact process will depend on your hosting provider. But in general, we can break it down into three steps:
- Determine the type of WordPress SSL certificate you need.
SSL certificates vary in type and cost. One certificate can run you anywhere from zero to hundreds of dollars per year, depending on which certificate you choose and who you get it from. Here are the types of SSL certificates you can install:
Domain Validation Certificate
A domain validation (DV) certificate is the cheapest and most basic SSL certificate. The verification process to receive a DV certificate is minimal, and it displays just the padlock icon in the browser bar. This certificate is ideal for low-budget sites that don't handle any transfer of sensitive information.
Organization Validated Certificate
Organization validated (OV) certificates are the next step up in protection — they display a padlock along with your company's name in the browser bar and do a more thorough job of validating the certificate holder's identity.
Extended Validation Certificate
An extended validation (EV) certificate is the most expensive certificate, as it requires you to prove you are authorized to use the domain you're submitting. In the browser, it displays a padlock alongside the business name and geolocation. Businesses handling highly sensitive information like payment or medical data use EV certificates, if not OV certificates.
Unified Communications Certificate
A unified communications (UCC) certificate applies SSL protection to multiple domains on the same certificate and is meant for online properties with multiple websites. This is opposed to a single-domain SSL certificate, which only protects — you guessed it — one domain.
Wildcard SSL Certificate
A wildcard SSL certificate applies SSL protection to the domain it was purchased for, along with all of the domain's associated subdomains. For example, a wildcard SSL certificate purchased for mysite.com also covers blog.mysite.com and store.mysite.com.
- Acquire an SSL certificate.
Once you've picked the SSL certificate you need, the next step is to acquire one through a certificate authority (CA). A CA is an organization that generates SSL certificates and authenticates the websites requesting them.
Any of the sources we've listed below can provide you with an SSL certificate. Depending on the type of certificate, verification by the CA may take up to an hour or up to a few days to go through, so be patient!
Your Hosting Provider
Before searching for a third-party CA, check to see if your current WordPress host offers SSL certificates through their service. Many include at least one SSL certificate with their plans and will handle the setup process for you. So, it's worth checking if your host offers the type of SSL certificate you need.
Let's Encrypt
Let's Encrypt is a nonprofit CA that distributes free SSL certificates. Its goal is to make SSL protection more common and easier to obtain. Let's Encrypt issues over a million certificates per day and is backed by major players like Google, Amazon, and Shopify.
While starting from scratch requires some coding knowledge, many hosts already have Let's Encrypt integrated, allowing you to get a free certificate through your hosting admin panel. Certificates from Let's Encrypt are valid for only 90 days, but you can renew them an infinite number of times and set your certificate to renew automatically, which is handy.
Other Certificate Authorities
Many reputable third-party CAs can provide you with whichever certificate your WordPress site needs — popular options include Comodo, Cloudflare, and GoDaddy. See our list of SSL certificate authorities for more recommendations.
- Install your SSL certificate.
Now that you've acquired your WordPress SSL certificate, it's time to install it. Your SSL certificate files will be located on your web server, so the installation process varies by hosting provider. Consult with your host's documentation for installing SSL — you may need to employ FTP to upload your SSL certificate yourself. Still, this should hopefully be the least time-consuming step of the process.
- Configure WordPress for your SSL certificate.
After installing your SSL certificate on your server, there are several steps you must take on your WordPress website to transition your site to SSL fully.
First, remember that your site now follows the HTTPS protocol. If you switch your website to SSL, you'll have to update your existing URLs from "http" to "https". Otherwise, people (and search engine crawlers) trying to access your "http" link will be shown an outdated version of your site and/or a warning in the browser. To resolve this, you must set your HTTP URLs to redirect to the new HTTPS URLs permanently.
This step can be done manually or with a plugin like Really Simple SSL. The Really Simple SSL plugin automatically redirects all incoming requests to "https" URLs. It also replaces "http" with "https" in content source links.
Next, ensure your WordPress address and site address follow the HTTPS protocol. Log into your WordPress dashboard, then select Settings > General. Here, check that both your WordPress Address and Site Address begin with "https://." If not, change these URLs.

The Really Simple SSL plugin also handles this step for you, which makes it an invaluable tool.
You'll also want to locate any links to your website located both on and outside of your website and change these to HTTPS. Look through blog posts, social media profiles, and other places where you've linked to your site. While your permanent redirects will handle any links you miss, changing the ones you can find is a good idea.
Finally, conduct one final sweep of your web pages under your secured domain(s). Look at each URL and make sure it says "https." See our explanation of SSL errors for solutions if you find any discrepancies.
Protect Your Visitors and Your Business with SSL
The SSL protocol is a cornerstone of cybersecurity today and one of the most important measures you can take to protect visitors on your WordPress site.
However, your security doesn't end there. There's a big reason why WordPress websites are targeted at disproportionately higher rates than other CMSs — it's because hackers assume that WordPress users are inexperienced and will fail to take the proper precautions.
This doesn't have to be true for your website, though. Your visitors deserve protection, and your business needs it.

WordPress Security

![14 WordPress Security Issues & Vulnerabilities You Should Know About [New Research from WCEU 2022]](https://53.fs1.hubspotusercontent-na1.net/hubfs/53/wordpress-security-issues_9.webp)