
What is an IP Address used for?
Similar to a physical address, IP addresses provide information about the network and service used to connect to your website. However, an IP address differs from a physical address in one significant way: It's not static.
While you typically have the same IP address when connecting devices through your home network, this address changes if you're using another network outside your home and can also change if you reboot your router or switch Internet providers.
The most common type of IP address, known as IPv4 addresses, uses four sets of up to three numbers, each separated by dots. It looks something like this:
127.0.0.1
This address is known as the "loopback address." All devices use it to identify themselves on any network. They are then assigned a specific IP address to connect to the Internet.
Anyone who connects to your site with any device uses an IP address, which your content management system (CMS) records.
Let's say you have a WordPress website. If users leave a comment, their IP address can be found in the "Comments" section of your WordPress admin page.
You can also find a list of all the IP addresses that have visited your site using your WordPress hosting provider's cPanel dashboard. Find the "Logs" section and click "Raw Access Logs." After you download the raw access data file, you'll need to decompress it and open it using a text editor to see a list of all the IP addresses that have recently visited your site.
Now, let's discover why you should learn to block IP addresses.
Why learn how to block IP address?
Your site attracts visitors, creates interest, and drives engagement. Usually, this creates a predictable pattern. Better content generally means better SEO, which means more traffic and improves overall sales conversions. Usually, this also means your website experiences increased interactions. Whether visitors leave comments, provide their emails via an intake form, or mention your brand on social media, the more eyes on your site, the more interactions there will be.
But what if some of that attention isn't all advantageous? For instance, are there any steps you can take if you notice visitors are leaving rude or aggressive comments? What are you to do if your inbox is getting spammed with emails? Or what about if your site is slowed down due to unwanted traffic?
Of course, it's possible to resolve many of these issues with reasonable restrictions and polite requests. For instance, if you're receiving many unkind comments on your site and you've reached out in an attempt to resolve the issue, it might be time to take further action.
It's also possible that your website may be targeted by malicious actors looking to compromise administrative logins or carry out distributed denial of service (DDoS) attacks which can significantly reduce site performance or take your site offline entirely.
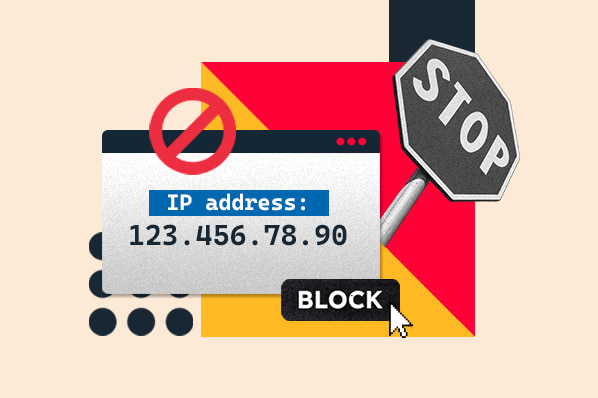
While resolving issues without blocking users or their devices is always preferable, the above scenarios call for more drastic action: Blocking specific Internet protocol (IP) addresses. This will ultimately frustrate offensive commenters, stop spammers, and avoid ongoing attacks. Therefore, deciding to block IP address is sometimes necessary for your business's good.
Site admins can use built-in comment moderation or cPanel hosting management tools for single, specific blocks or small-scale address ranges. For targeted attacks using VPN or proxy processes, consider building better blocks with location-blocking WordPress plugins or advanced IP address detection and rejection tools.
How to Block IP Address
Ready to learn how to block IP address? Let's walk through it.
You can block a single address using the WordPress administrator page if you have a WordPress site. Go to the "Comments" section and click on a specific comment to see the user's IP address.
Then, go to "Settings," click on the "Discussion" submenu, and scroll down to "Comment Blacklist." This brings up a text box that allows you to block specific IP addresses.
Enter one IP address per line and click the "Save Changes" button — now, users with these specific IP addresses won't be able to comment on any posts. It's worth noting, however, that this method only stops users from commenting on your posts but won't stop them from accessing your site or spamming it with malicious data traffic to slow down performance.
In this case, you must completely block the offending IP address using the administrative options in your WordPress hosting providers' cPanel dashboard.
Let's walk through how to complete that, too.
Head to the "Security" section and find the "IP Address Deny Manager," then enter a specific IP address or range of addresses to block.
Here, the result is more substantive: Anyone attempting to access your site from these addresses will get an error message instead of seeing your page.
The Obfuscation Issue
As noted above, IP addresses aren't permanent. Instead, they're assigned based on location, device, and network type. They can also be deliberately replaced with different IP addresses by using what's known as a virtual private network (VPN).
VPN services have a host of legitimate uses. For example, reliable VPN software can be used by businesses to obfuscate user locations and encrypt data traffic, in turn making it much more difficult for hackers to compromise critical functions.
But malicious actors can also use VPNs to generate massive amounts of website traffic — traffic that seemingly originates from multiple devices and locations worldwide. In this case, blocking specific IP addresses and even address ranges through WordPress or hosting cPanels won't help since attackers will simply use different addresses for their next attack.
How to Fix IP Overload
If you're experiencing IP address overload, the good news is that you can handle this dilemma in several ways.
For those who own a WordPress website, you can use a plugin allowing administrators to block traffic from specific geographic locations and IP ranges.
Consider the case of a DDoS attack on your site: If your examination of server logs shows that the bulk of malicious access requests is coming from a particular country or region, WordPress plugins such as IP2 Location Country Blocker let you actively block access from this geographic area to limit the risk of site compromise.
It's also worth considering more active security options for your WordPress site, such as web application firewalls (WAFs) offered by reputable security providers. These solutions help reduce malicious site traffic by routing all access requests through their servers and scanning them for suspicious activity or IP addresses.
If these tools discover a large volume of traffic from the same geographic area or detect suspicious activity — such as rapid-fire requests or using proxy servers to reroute and obfuscate them — they will automatically deny access to protect your site.
How to Block IP Address Mac
There are a few ways to block IP address Mac-style. We'll walk you through the most straightforward way to do so.
When you go to block IP address Mac-style, you'll block the addresses for the entirety of your network. To do this, you'll have to use a router.
To block an IP address only on your Mac alone and not the entire network, you can use Terminal.
To begin, open Terminal. Then, you'll enter this, enabling you to access PacketFilter configuration:
$ sudo vim /etc/pf.conf
Once you've done this, it's time to block the address you want to have access to your site no longer. Use this statement to do so successfully:
block drop from any to [INSERT IP ADDRESS YOU ARE ATTEMPTING TO BLOCK HERE]
For instance, it may look like this:
block drop from any to 127.0.0.1
If more than one user bothers your website, you can block several addresses quickly and efficiently. To do so, enter the other IP address instead of 'any.'
It would look like this:
block drop from 127.0.0.2 to 127.0.0.1
You're almost there! Now, enable your packet filter and load your rule with this statement:
$ pfctl -e -f /etc/pf.conf
You've successfully learned how to block IP address Mac-style. If you choose to disable the rule in the future, you can easily do so by entering the following:
$ pfctl -d
Building Better Blocks
In most cases, blocking an IP address isn't necessary — responsive administrators and robust security solutions can mitigate one-off comments and occasional site security issues. If commenters refuse to respect community guidelines or large-scale DDoS attacks on WordPress websites become a reality, it's worth considering more drastic action with IP address blocking.
Editor's note: This post was originally published in December 2020 and has been updated for comprehensiveness.
Wordpress Website
![How to become a WordPress developer [+ tips from WCEU speaker Paul Bearne]](https://53.fs1.hubspotusercontent-na1.net/hubfs/53/59_How%20to%20Become%20a%20WordPress%20Developer.png)


