.png?width=112&height=112&name=Image%20Hackathon%20%E2%80%93%20Horizontal%20(1).png)
Even when you’re an expert, it helps to slow down and really analyze what you’re doing.
The same is true for web design.
While you may naturally move from a client meeting to a mockup to a prototype, when’s the last time you considered all the steps you’re really taking? And have you considered you might be cutting corners on a step or two?
In this post, I’ll be breaking down the basics of a web design workflow — what it is and how to make one. Then, I’ll be providing a template to help you create your own. Finally, we’ll be looking at some tips and a real-world example from a UX designer.
Table of Contents
- What Is a Web Design Workflow?
- How to Create a Web Design Workflow
- Web Design Workflow Template
- Tips for Building a Workflow that Works for You
- Web Designer Workflow: Real-Life Example
What Is a Web Design Workflow?
A web design workflow is the structured series of steps that designers follow to create a website. It covers everything from initial planning to research and design, as well as development, testing, and deployment.
Workflows help keep designers on track. They make sure that all aspects of the project are taken care of, improving efficiency, reliability, and quality. By breaking down the project into manageable steps, a web designer’s workflow keeps them productive.
.png)
16 Free Timeline & Flowchart Templates
Visualize processes and timelines with these free templates.
- Company Project Timeline
- A/B Testing Flowchart
- Onboarding Flowchart
- And more!
Download Free
All fields are required.
Form not available
How to Create a Web Design Workflow
A good web design workflow captures the entire journey of a website, from initial conversation to deployment. Here’s how I suggest you go about designing a workflow that supports you.

1. Take an audit of your organizational skills.
Before you can start designing your workflow, you need to take time to understand what steps you need built in. If you’re someone who can hold a lot of deadlines and tasks in your head, your formal workflow may not need to be too robust. But if you’re a bit more prone to rabbit holes or distractions like me, you’ll probably want a more in-depth workflow.
Pro tip: Convert your workflow into a list of checkpoints for your client. Each checkpoint will have an opportunity for your client to give feedback — and you’ll have accountability to stay on track because they’re expecting a draft.
2. Understand customer needs.
You can’t design a good workflow without knowing what types of projects you’ll be doing. If you’re an experienced web designer, you no doubt have enough experience to pull from to have a good sense of what your clients generally want in a design process.
However, if you’re newer to web design, you may not know what customer-centric needs to anticipate. I recommend starting with these ideas, and then add or subtract as you hone your workflow:
- Deadline expectations.
- Frequent points of contact.
- Mid-process points of approval.
- Revisions built-in.
3. Plan major milestones.
Every workflow will include different milestones, but in general, you’ll want to make sure that your workflow includes:
- Research.
- Design.
- Development.
- Testing.
- Deployment.
As you test your own workflow, you may find milestones that you want to add to the mix. Again, if you’re a little prone to procrastination or losing focus, you might want to be more detailed in your flow.
4. Test.
Finally, you’ll have to test out your workflow to see if it works for you. Start using your workflow for clients and adapting it as you find what works and what doesn’t. At the end of each client contract, assess whether or not your workflow was helpful. If there were parts of the workflow that weren’t, try a new approach for next time.
Pro tip: Check out this guide and best practices for web design!
Web Design Workflow Template
While each person’s preferred workflow is a bit different, I’ve found most of them have the same bones. Use this template as a starting point for designing your own version.
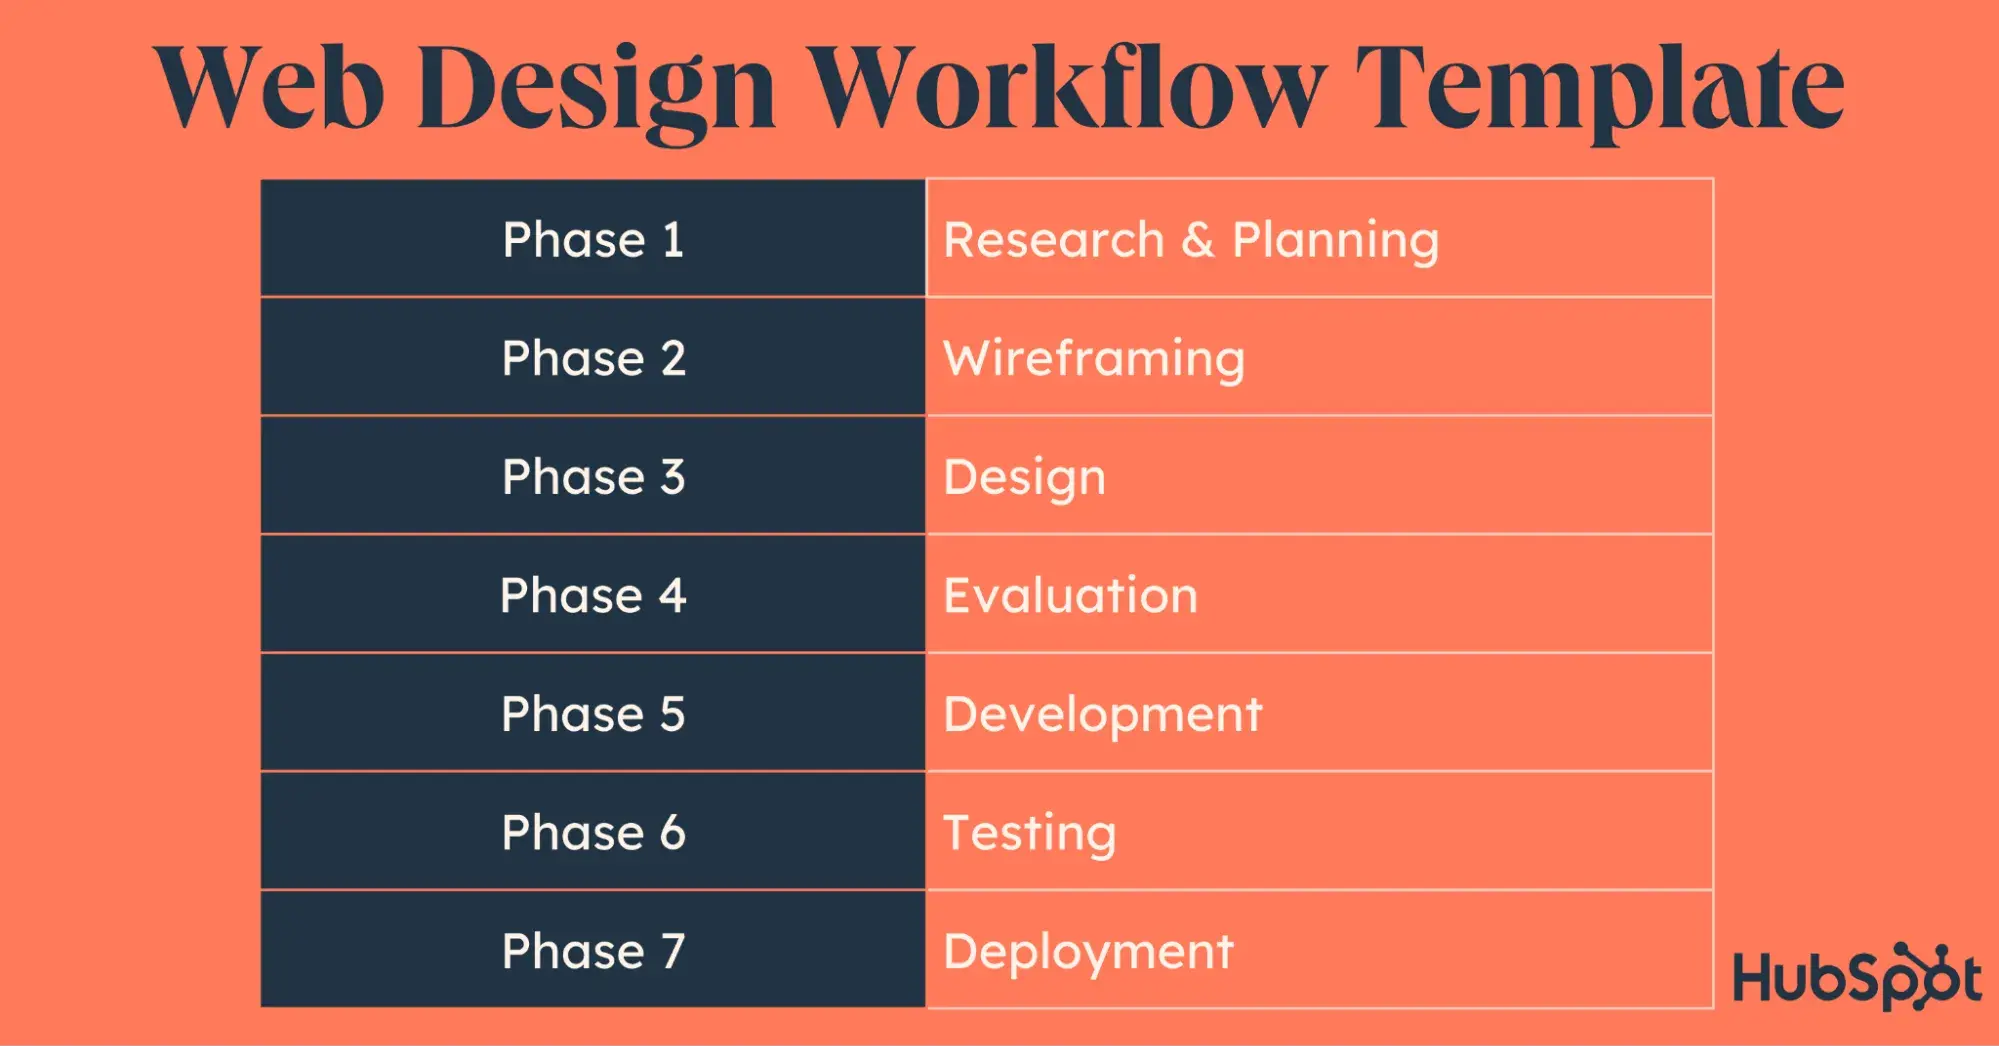
1. Research & Planning
In this stage, you’ll meet with the client to discuss goals, deadlines, target audience, and any functionalities they want to have. You may gather brand materials at this stage, too (or, if you’re the brand designer, you’ll start creating those).
During the research and planning stage, you’ll also very likely conduct competitor analysis. I suggest checking out the way that other websites are set up that are comparable, both for inspiration and for a sense of what this industry and client type requires.
William Wheeler, a UX/UI designer, shared a bit about the way he approaches the research stage: “For me, it‘s helpful to do a competitor audit. Just to see what their competition is doing design and marketing wise to see what I think is or isn’t working. Then try to improve on what I find.”
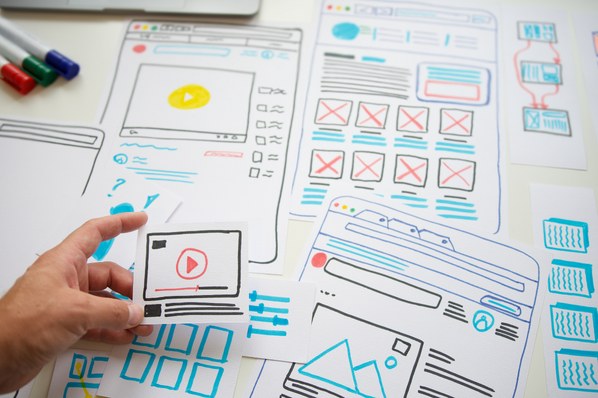
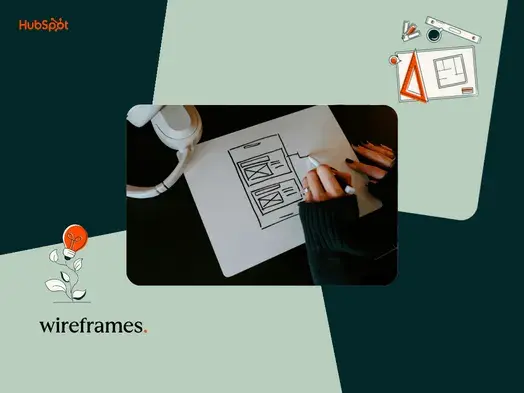
2. Wireframing
During this phase, you’ll be making the layout or wireframe of your design. This is a preliminary mockup that helps you identify the elements you need and where you want them to go. You won’t get in-depth with design elements at this stage, but you’ll get a good sense of what the page will include and where.
Wheeler pointed out a key point about the wireframing stage:
“It‘s a lot easier to change and narrow down layout ideas when everything is at its simplest stage. Also, if an idea doesn’t work in black and white or grayscale, chances are it won't work in color.”
The wireframe isn’t just a great place to test ideas, though. I think it’s also a perfect time to get client feedback.
3. Design
The design stage encompasses in-depth elements and filling out your mockup or wireframe with a higher fidelity version. You’ll incorporate brand colors, specific fonts, images, and other design elements to create a result that looks pretty close to the final product.
4. Evaluation
A website is not a static object, so you need to bring your design to life. Convert your design to a prototype at this step and begin interacting with it to test how various components work and feel. I also recommend you evaluate your site for accessibility and usability.
16 Free Timeline & Flowchart Templates
Visualize processes and timelines with these free templates.
- Company Project Timeline
- A/B Testing Flowchart
- Onboarding Flowchart
- And more!
Download Free
All fields are required.
Form not available
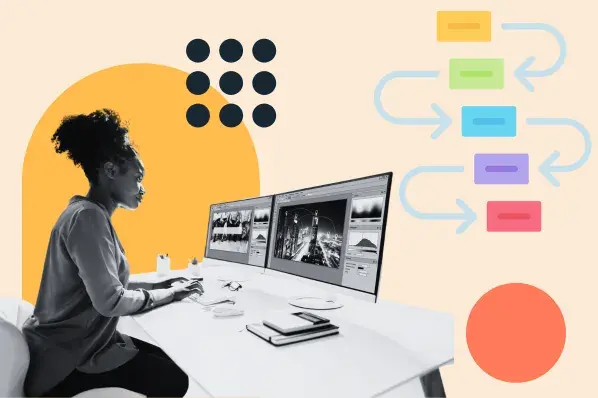
5. Development
The development phase is the technical creation of the website. This will vary considerably from web designer to web designer. You might hand off your website to a technical team, or you may be building it yourself if you’ve got more technical skills. You could also be designing a website in a program like Wordpress or Squarespace, in which case you’ll be building your elements directly in the platform.
6. Testing
During the testing phase, you’ll be making sure that all the elements of the website are working as designed. You’ll check buttons, navigation panels, and hyperlinks to make sure everything actually works as intended. You may be user testing or testing within your own organization at this point.
If you have the time to conduct user testing, I recommend taking advantage of Hubspot’s UX Research Kit. This kit makes it easy to collect, report on, and present user information.
7. Deployment
Finally, your website will get deployed. Whether this hand-off is initiated by you or your developer team may vary based on project or company. Regardless of who is leading the deployment step, the project is complete at this stage.
Of course, a project is never really done. You’ll likely be testing variations to continue optimizing the site over time. If you want to A/B test, you can use Hubspot’s Content Marketing Software. While the tool can create and edit content, it can also run page tests and provide powerful analytics and reporting that you can use in your revisions.
Tips for Building a Workflow that Works for You
Start with clear goals.
To keep your project on track, start with clear, well-defined goals. If you don’t know the direction you’re intended to go, you’ll have to restart your project at the first point of contact. You want to understand the client’s objectives and have a clear vision of what you want to achieve prior to kicking off the project for maximum efficiency.
Brittany Shuck, a CRO strategist and UI/UX designer, shared some insights on building out your own workflow.
“I’d say if you’re first starting out, take your time on the first few projects to figure out a workflow that works for both you and your clients. I think it’s crucial to include some type of discussion on strategy and copy to ensure that the page you design will meet the goals and metrics you desire. Design is more than just looking beautiful — every design decision should be rooted in strategy.”
Pro tip: Create a form that you use for early client conversations that covers the basics you need to start your project. Include questions about the company, the target audience, and the overall objectives for the project. Add to this form overtime as you learn what information is most helpful for your design process.
Use the right tools.
Lean on good tools to support you throughout the design process. Organizational tools can keep you on track with deadlines, while AI-powered design tools like Uizard.io can streamline the actual design process.
But while a web design tool is necessary to bring a website to life, Claudio Cafeo, a designer and manager of digital communities, insists that a tool is only as good as its user — and the tool should align with your project goals.
“I always say it‘s never about the tool. There is such a big misconception that things can easily be done and solved for just by completely relying on a tool,” she says. “You won’t find a ‘one fits all’ solution — what you can do, and should be doing, is to focus on what it is that your users need. What is their final goal? Why do they need a redesign? When you think about the strategy you‘ll adopt to help them reach that goal, you’ll find that to be a helpful mental model when it comes to niching down into choosing one tool over another.”
Keep communication open.
An optimized workflow is great — but not if you have to halt the project due to miscommunication. Start on the right foot with a questionnaire, like William Wheeler does.
“It helps to know as much about the client as you can before you get started. You can find templates online for great questionnaires to send the client. You would probably want to customize them a bit to better suit your needs but it will save time and probably asks things you wouldn't think of,” Wheeler advises.
Then keep up the communication. The more you communicate throughout the project, the better. Provide drafts to the client at multiple points throughout the design process and incorporate feedback as you build out your design.
Be flexible.
If there’s one thing you can plan on, it’s that everything won’t go exactly as planned. Use your workflow as a roadmap, but don’t be too rigid. Stay open to making adjustments as you go. The client may want to edit something, or the goals will change, and you’ll have to be able to adjust your workflow to manage the shifts.
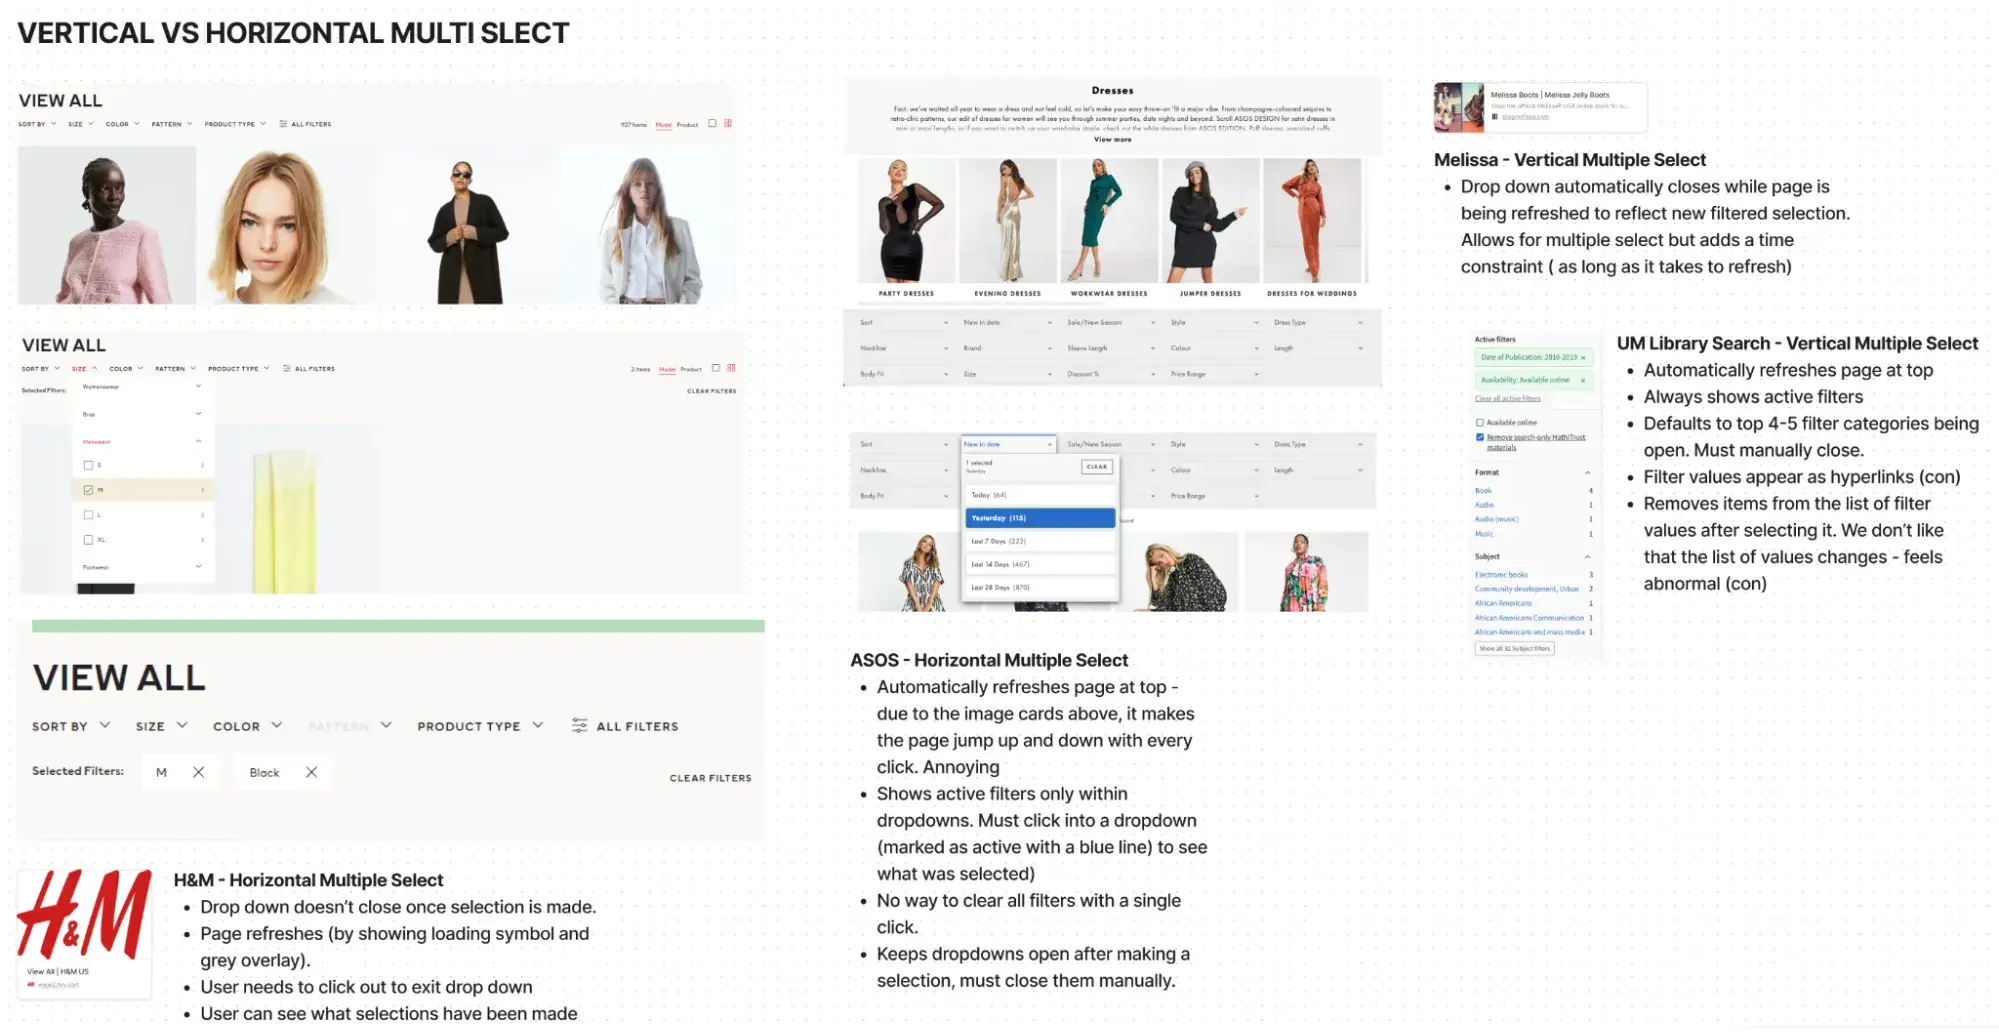
Web Designer Workflow: Real-Life Example
I spoke with Emma Brown, a UX Designer for the University of Michigan, about the workflow she uses when she’s working on web design projects. Her web design workflow is made up of five steps:
1. Research
Based on the design I’m going to build, I find information about the best practices for organizing the information, creating layouts, and defining interactions, and find examples of similar designs for inspiration.
2. Low-Fidelity Mockups
I start really simple when I design to focus on making something usable rather than something artistic. I’ll create multiple variations on a design, but they will be low-fidelity — meaning no color, no style, just boxes and labels, so my team can focus on the structure of the site and hierarchy of the content.
Some designers will sketch mockups with paper and pencil, others might use design tools like Figma or Balsamiq. I do a mix of sketching and wireframing in Figma.
3. High-Fidelity Designs
Once I’ve finished iterating on different low-fidelity design ideas, I’ll begin adding typography, color, and stylistic elements. This is where a site’s brand identity gets to shine!
4. Evaluate Accessibility
All of my work meets WCAG AA Accessibility guidelines. The most common accessibility violations I see in design are color contrast issues. The good news is that they are really easy to fix! I use Figma plugins that check my designs for color contrast ratios, or I plug hex codes into the WebAIM Contrast Checker.
5. Evaluate Usability
There are many ways to evaluate the usability of a website. The best way is to test it with users, but in addition to that, I like to conduct a heuristic evaluation of the site using Nielsen Norman Group’s 10 Heuristics.
Takeaways
As I dove into the nuance of web design workflows, it stood out to me the way that accessibility and usability are (or should be) ingrained in the process of website creation. The consequences of skipping that step are substantial — when web design isn’t accessible or usable, users can’t get the most out of your content, product, or service.
Web design plays a major role in facilitating a user’s ability to convert, and that’s what makes a workflow so critical. I can imagine that a rushed designer could neglect important parts of the process like testing or evaluation, so using a workflow can help ensure that more websites are usable and compliant with accessibility guidelines.
Not only that, but I’ve found structured workflows to be an unlock when it comes to client satisfaction. The more transparency you can provide, the better — and when you have a structured workflow, you have a roadmap for points to communicate.
Ultimately, the result of a workflow is a happier client AND happier users.
16 Free Timeline & Flowchart Templates
Visualize processes and timelines with these free templates.
- Company Project Timeline
- A/B Testing Flowchart
- Onboarding Flowchart
- And more!
Download Free
All fields are required.
Form not available
Website Design Process
![How to create a website to sell products: 7 steps I used [+ expert tips]](https://53.fs1.hubspotusercontent-na1.net/hubfs/53/how-to-create-a-website-to-sell-products-1-20240909-6141294.webp)
![Website design proposal: A streamlined approach to pitching [+ templates]](https://53.fs1.hubspotusercontent-na1.net/hubfs/53/%5BUse%20(1)-Oct-23-2025-03-34-31-8363-PM.webp)


.png)
-2.png)