PowerPoint presentations can be professional, attractive, and really help your audience remember your message.

If you don’t have much experience, that’s okay — I’m going to arm you with PowerPoint design tips from pro presenters, the steps you need to build an engaging deck, and templates to help you nail great slide design.
![→ Free Download: 10 PowerPoint Presentation Templates [Access Now]](https://no-cache.hubspot.com/cta/default/53/2d0b5298-2daa-4812-b2d4-fa65cd354a8e.png)
Buckle up for a variety of step-by-step explanations as well as tips and tricks to help you start mastering this program. There are additional resources woven in, and you’ll find expert perspectives from other HubSpotters along the way.
Table of Contents
How to Make a PowerPoint Presentation
Microsoft PowerPoint is like a test of basic professional skills, and each PowerPoint is basically a presentation made of multiple slides.
Successful PowerPoints depend on three main factors: your command of PowerPoint's design tools, your attention to presentation processes, and being consistent with your style.
Keep those in mind as we jump into PowerPoint's capabilities.
Getting Started
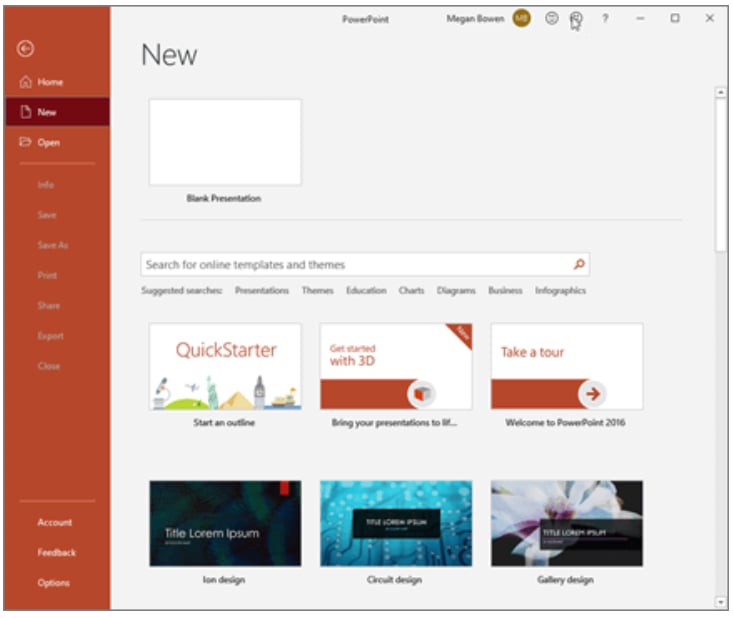
1. Open PowerPoint and click ‘New.’
A page with templates will usually open automatically, but if not, go to the top left pane of your screen and click New. If you’ve already created a presentation, select Open and then double-click the icon to open the existing file.
2. Choose a theme or create your own.
Microsoft offers built-in themes and color variations to help you design your slides with a cohesive look. To choose from these pre-built themes, choose the File tab again, select New, choose one of the options, and click Create.
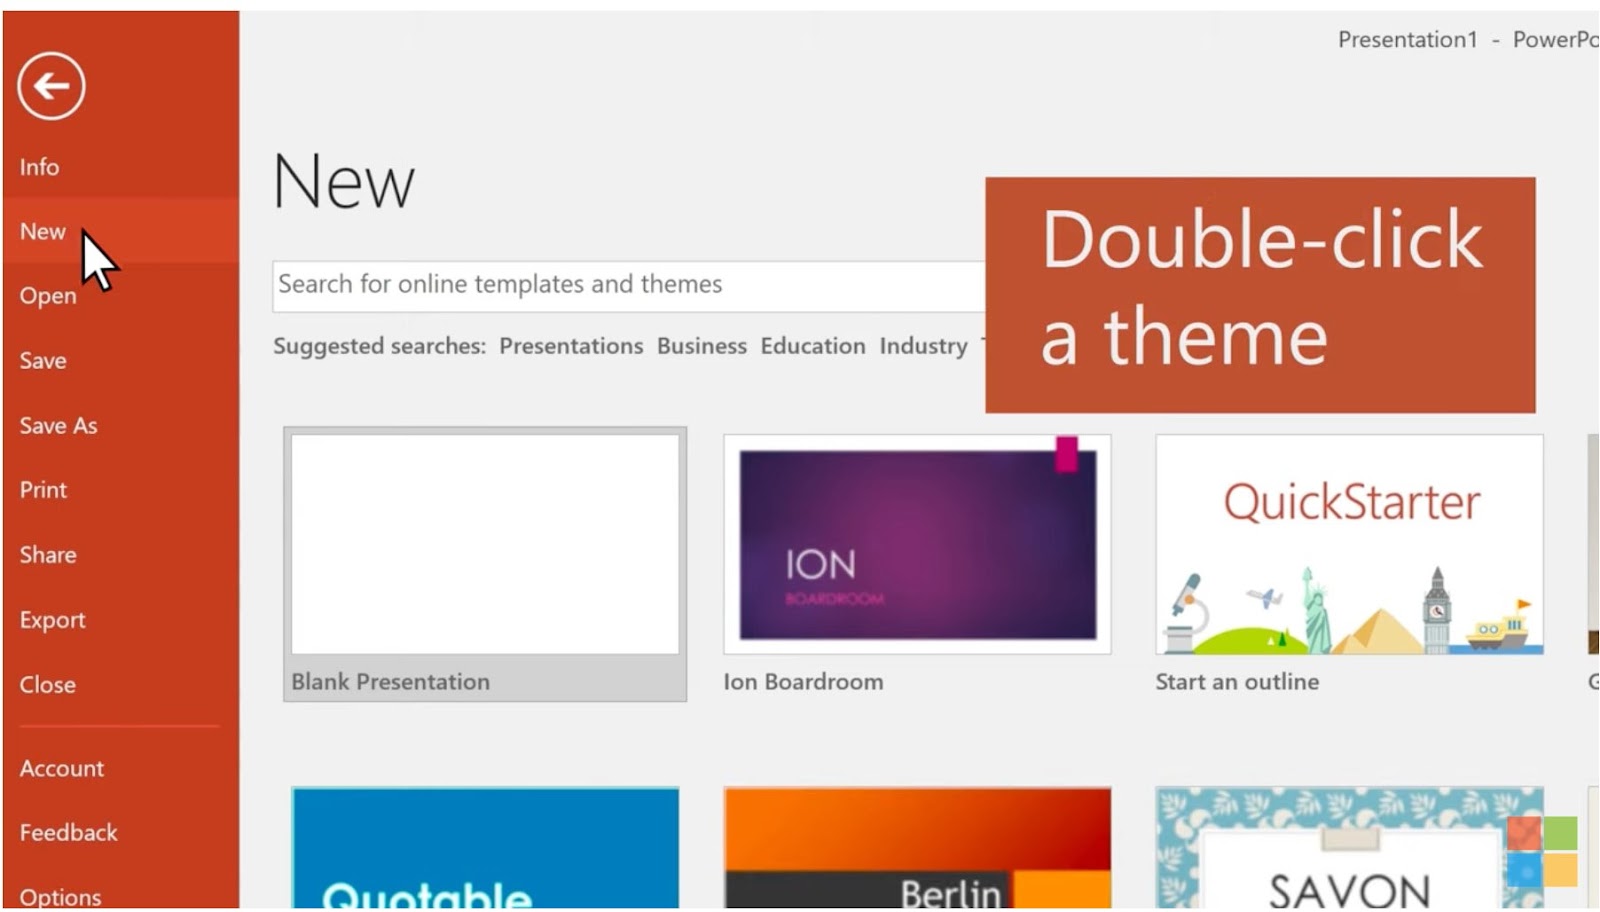
There is also an option to select a blank presentation if you prefer to start from scratch. With this option you can use PowerPoint elements, your design sense, and your brand's color palette to make your own theme.
10 Free PowerPoint Templates
Download ten free PowerPoint templates for a better presentation.
- Creative templates.
- Data-driven templates.
- Professional templates.
- And more!
Creating PowerPoint Slides
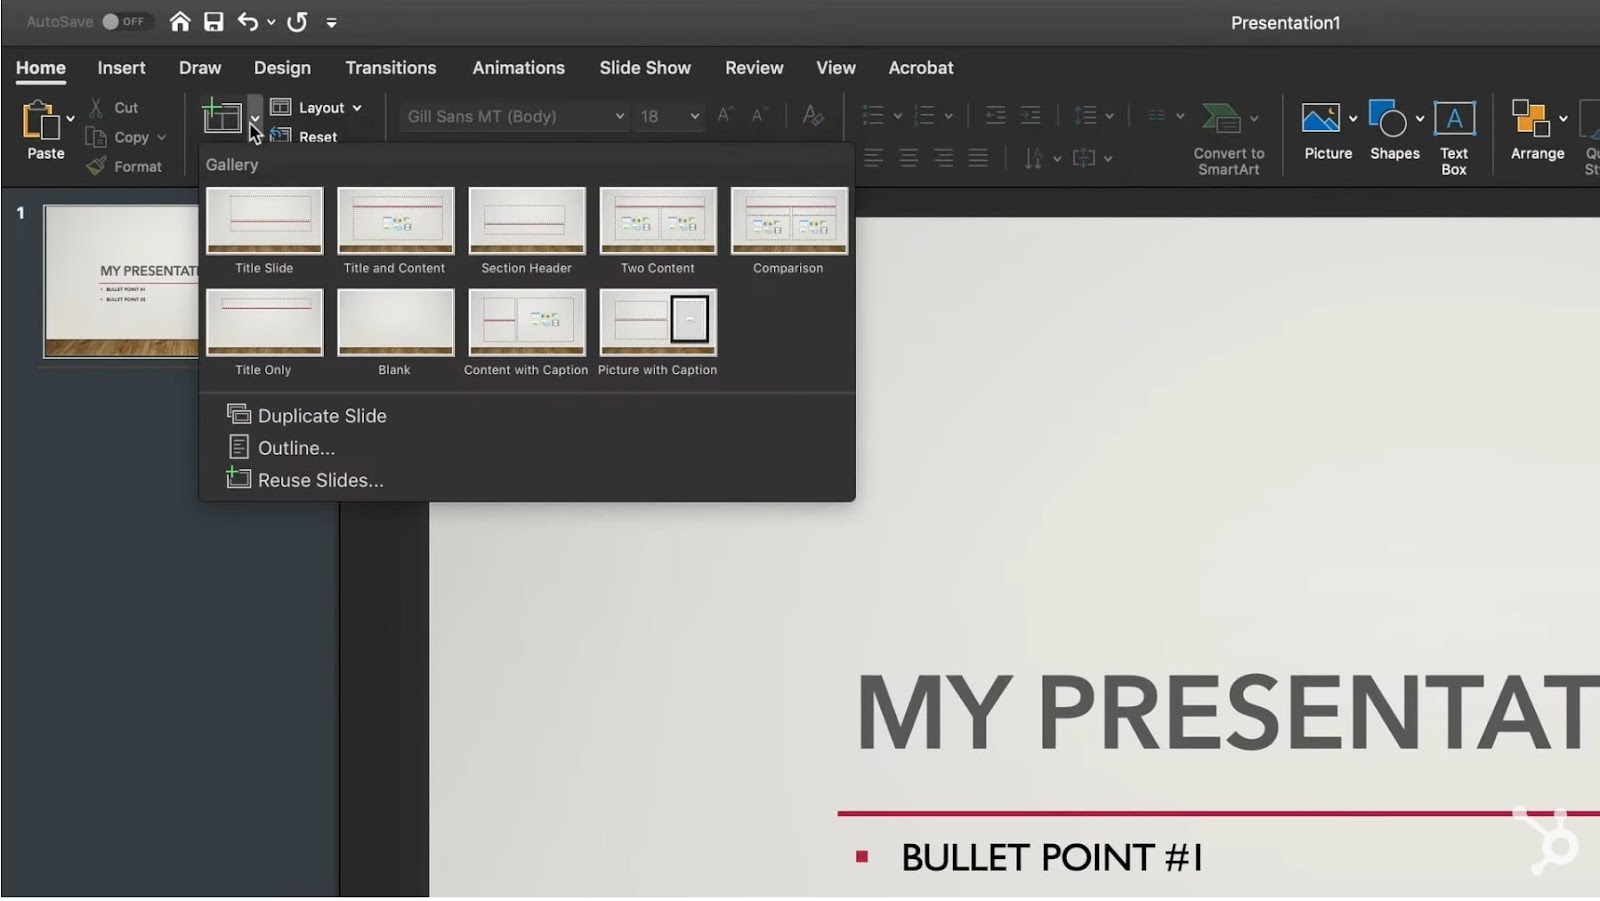
3. Insert a slide.
Insert a new slide by clicking on the Home tab and then the New Slide button. Consider what content you want to put on the slide, including heading, text, and imagery.
4. Create a variety of slides for different purposes.
You don’t want to present the same exact slide each time, just with different content on it. This would bore your audience, so make sure that you create multiple variations.
Consider what kind of multimedia you’ll be using, and choose or create different layouts accordingly. At minimum, you’ll need:
- A title slide
- An agenda or table of contents slide
- A slide that introduces the speaker
- Various content slides
5. Use the Duplicate feature to save you time.
There’s no need to create these designs over and over. Now that you have a few to draw from, simply duplicate them before inputting your content:
- On the left pane, right-click the thumbnail of the slide you want to duplicate.
- Choose Duplicate Slide from the pop-up menu.
This will automatically add a copy of this slide to the presentation. From there, you can customize it for your needs.
6. Add photos to your slide.
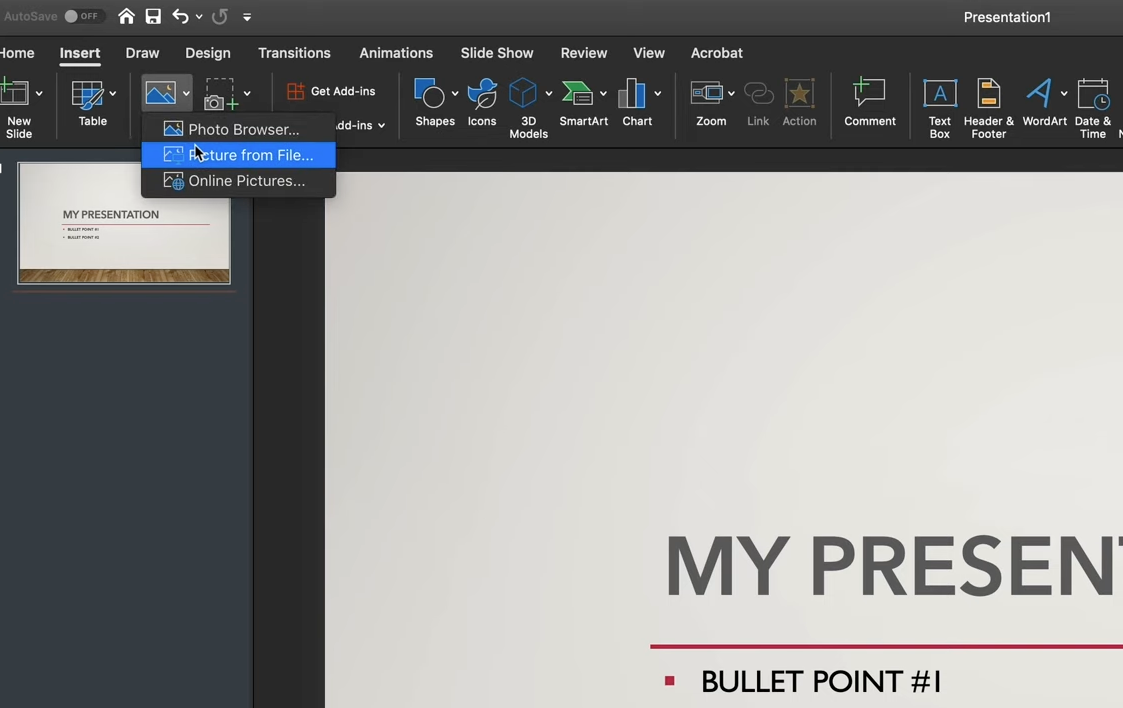
Add images by clicking Insert and clicking the Pictures icon. You can add other elements by using features in the Home and Insert tabs on the top ribbon. Explore your layout by dragging elements around.
7. Add transitions to your slides (optional).
When done well, transitions can add a little bit of movement and showmanship to your presentation. PowerPoint has several transitions built in for you to choose from.
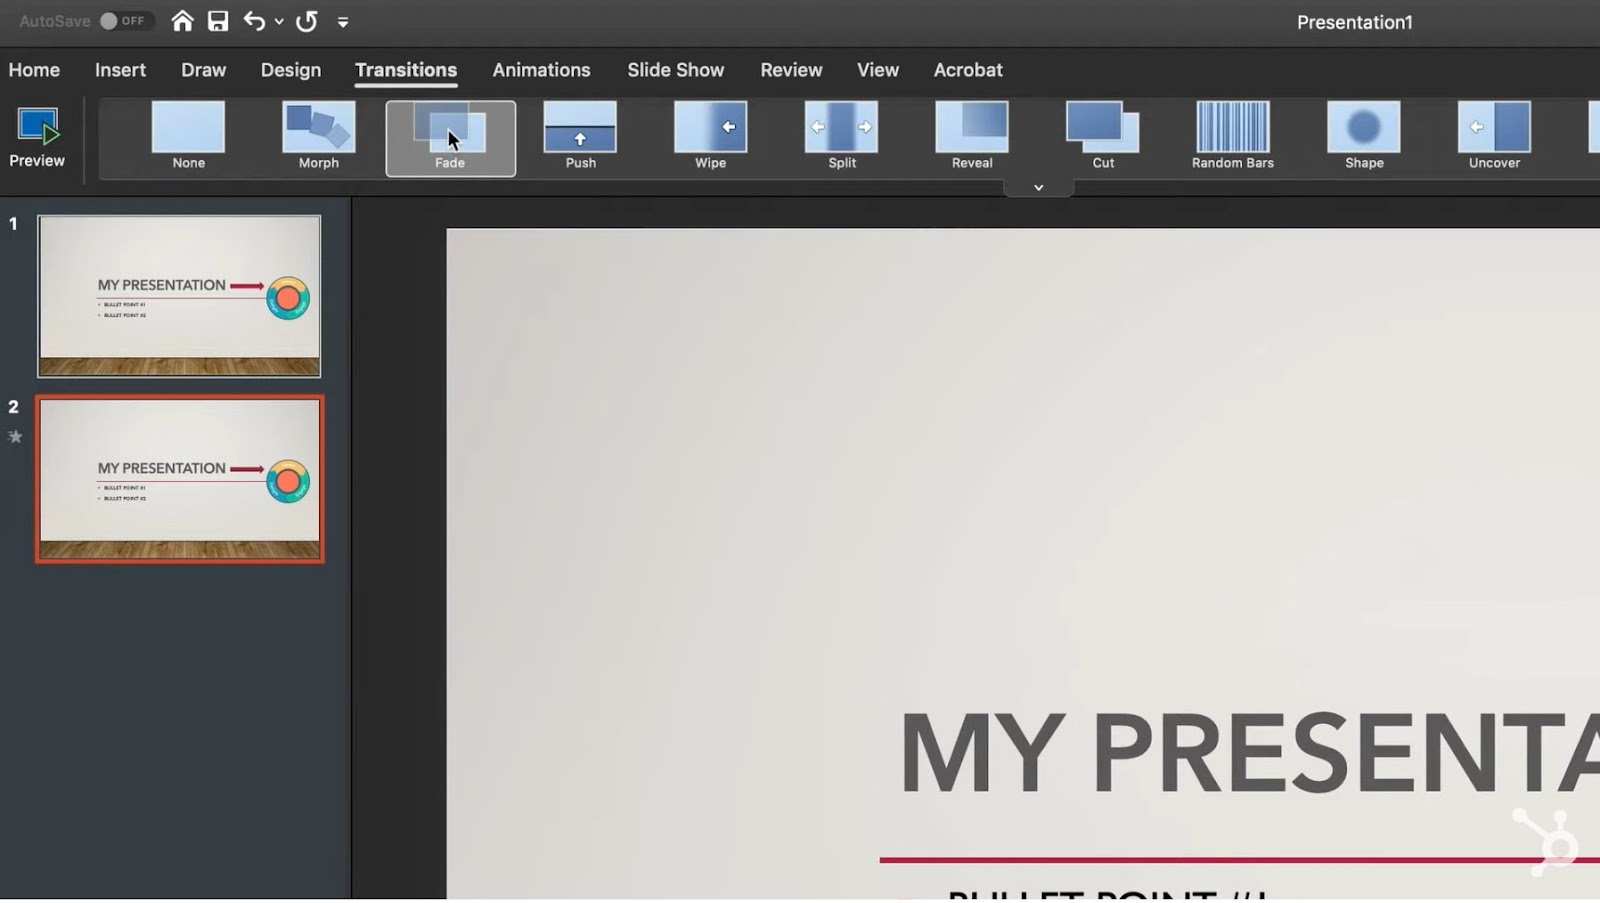
Select the Transitions tab from the top ribbon. Select a transition for it to preview on your screen. To customize it further, click Effect Options and play with the features to find something that suits your liking. To remove a transition, select Transitions and click None.
8. Add animations to your slides (optional).
Like transitions, animations can add movement, reveal information, and help you underscore the points you want to hit during your speech. To animate an element, follow these steps:
- Select the element you want animated by clicking on it.
- Choose Animations from the top ribbon.
- You'll have the option to choose from several effects displayed in the ribbon.
- Clicking on one will give you a preview.
- To customize the animation, select Effect Options.
- To remove an animation, click None in the ribbon.
You'll also have the option to move animations around as you edit your slides by clicking on the Animation Pane button, then reordering the animations in the pop-up list.
Finishing Up Your Presentation
9. Save your presentation.
Click File and Save, making sure to specify where you want your PowerPoint to be stored. If you're using your slides for education or teaching, it could be beneficial to convert your presentation to an online course.
10. Run your presentation.
Always do a trial run to ensure that your slides are set up properly and your animations fire the way you expect them to.
To present your PowerPoint, go to the Slide Show tab and click Play from Start. The slide will cover your whole screen so that your audience (in this case, you) is solely focused on the visual elements of your presentation.
11. Advance the slides.
Whenever you’re in presentation mode and you’re done with one slide, click your mouse to advance to the next slide.
10 Free PowerPoint Templates
Download ten free PowerPoint templates for a better presentation.
- Creative templates.
- Data-driven templates.
- Professional templates.
- And more!
PowerPoint Presentation Tips
- Don't let PowerPoint decide how you use PowerPoint.
- Create custom slide sizes.
- Edit your slide template design.
- Write text with your audience in mind.
- Make sure all of your objects are properly aligned.
- Use ‘Format Object’ to better control your objects' designs.
- Take advantage of PowerPoint's shapes.
- Create custom shapes.
- Crop images into custom shapes.
- Present websites within PowerPoint.
- Try using GIFs.
- Keep it simple.
- Embed your font files.
- Save your slides as a PDF file for backup purposes.
- Embed multimedia.
- Bring your own hardware.
- Use ‘Presenter View.’
PowerPoint Style
1. Don’t let PowerPoint decide how you use PowerPoint.
Microsoft wanted to provide PowerPoint users with a lot of tools, but this does not mean you should use them all. You don’t want it looking like your tweenage Geocities site and playing unwanted midi-files.
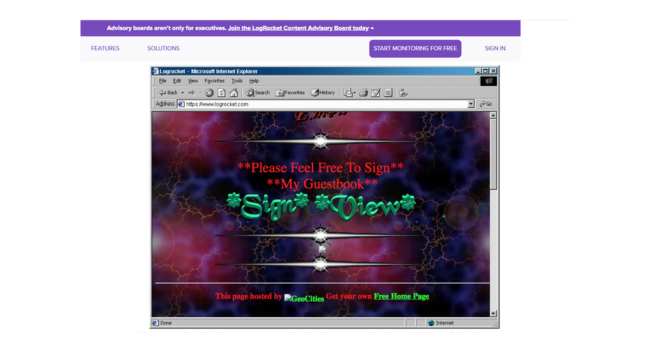
To keep it professional, here are some key things to look out for:
- Make sure that any preset themes complement your needs before you adopt them.
- Avoid Microsoft Office’s default fonts, Calibri and Cambria — they can make the presentation feel underwhelming.
- Professionals should never use PowerPoint’s action sounds.
- PowerPoint makes bulleting automatic. Bullets are often appropriate, but not always.
- All shapes start blue with a small shadow. Remove this shadow if it's not needed, and don’t leave shapes default blue — it reads as a mistake to other PowerPoint users.
The easiest way to know you’re getting it right is to download some templates. We offer 10 free templates that you’re welcome to try out. Even if you don’t end up using them, you’ll get a sense for best design practices.
2. Create custom slide sizes.
Default slide sizes work for most presentations, but you may need to adjust it for larger presentations and/or weirdly-sized displays. Here's how:
- In the top-left corner, choose File.
- Select Page Setup.
- Type the height and width of the background you'd like, and click OK.
- A dialogue box will appear. Click Scale if you want to also resize your content, or Don’t Scale if not. We recommend clicking Don’t Scale, then manually adjusting minor layout issues.
Pro Tip: You can avoid a headache if you resize your slides before you add any objects to them. Otherwise, the dimensions of your objects will become skewed.
3. Edit your slide template design.
It‘s much easier to edit your underlying PowerPoint template before you start — this way, you don’t have to design each slide by hand. Here's how:
- Select View in the top navigation.
- Click Master.
- In the drop-down, click Slide Master.
- Make any changes you like, then click Close Master in the top ribbon. All current and future slides in that presentation will use that template.
4. Write text with your audience in mind.
Remember that whatever else your PowerPoint presentation does, it needs to support the fantastic content you’re sharing with stakeholders.
A significant part of a PowerPoint's content is text, and great copy can make or break your presentation.
Evaluate your written work from a few different angles so you know your entire audience can see and understand it.
Keep the amount of text under 6-8 lines (or 30 words max). Use a minimum of size 24 pt. How your text is received differentiates good presenters from the best.
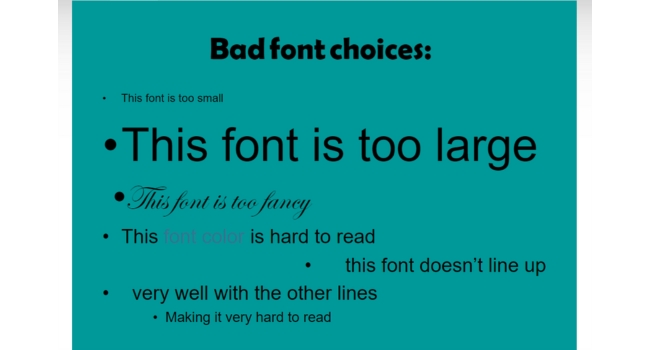
Typography
Choosing the right font is important — the perception of your font type could influence your audience's impression of you. The right typeface is an opportunity to convey consistent brand personality and professionalism.
Some fonts are seen as clean and professional, but this doesn‘t mean they’re boring. A common mistake is thinking your font isn't exciting enough, which could lead you to choose a font that distracts from your message.
I recommend sticking to simple serif and sans-serif fonts. Avoid script fonts because of potential readability issues.
That said, you can still use fun and eccentric fonts in moderation. Offsetting a fun font or large letters with something more professional can create an engaging presentation.
Above all, be sure you're consistent so your presentation looks cohesive throughout each slide. Check out this example from HubSpot’s company profile templates:
Interested in this presentation template? Download it for free here.
5. Make sure all of your objects are properly aligned.
Having properly aligned objects on your slide is the key to making it look polished and professional. You can manually try to line up your images, but we all know how that typically works out.
Get rid of the guessing game and let PowerPoint work its magic to align multiple objects:
- Select all objects by holding down Shift and clicking on all of them.
- Select Arrange in the top options bar, then choose Align or Distribute.
- Choose the type of alignment you'd like.
Here’s how to align objects to the slide:
- Select all objects by holding down Shift and clicking on all of them.
- Select Arrange in the top options bar, then choose Align or Distribute.
- Select Align to Slide.
- Select Arrange in the top options bar again, then choose Align or Distribute.
- Choose the type of alignment you'd like.
PowerPoint Design Tools
6. Use “Format Object” to better control your objects' designs.
Format menus allow you to do fine adjustments that otherwise seem impossible.
To do this, right-click on an object and select the Format Object option. Here, you can fine-tune shadows, adjust shape measurements, create reflections, and much more. The menu looks like this:
Although the main options can be found on PowerPoint’s format toolbars, look for complete control in the format window menu. Other options include:
- Adjusting text inside a shape.
- Creating a natural perspective shadow behind an object.
- Recoloring photos manually and with automatic options.
7. Take advantage of PowerPoint's shapes.
PowerPoint’s shape tools have come a long way. Today’s shapes include a highly functional Smart Shapes function, which enables you to create diagrams and flow charts in no time.
These tools are especially valuable because paragraphing and bullet lists are boring to look at — you can use shapes to help express your message more clearly.
10 Free PowerPoint Templates
Download ten free PowerPoint templates for a better presentation.
- Creative templates.
- Data-driven templates.
- Professional templates.
- And more!
8. Create custom shapes.
When you create a shape, right click and press Edit Points to create custom shapes that fit your specific need. For instance, you can reshape arrows to fit the dimensions you like:

Another option is to combine two shapes together. Select the two shapes you’d like to work with, then click Shape Format in the top ribbon. Tap Merge Shapes. There are several options to create custom shapes:
- Combine creates a custom shape that has overlapping portions of the two previous shapes cut out.
- Union makes one completely merged shape.
- Intersect builds a shape of only the overlapping sections of the two previous shapes.
- Subtract cuts out the overlapping portion of one shape from the other.
- Fragment will split your shape into different parts depending on where they overlap.
9. Crop images into custom shapes.
You can also use PowerPoint to crop existing images into new shapes:
- Click on the image and select Picture Format in the options bar.
- Choose Crop, then Crop to Shape, and then choose your desired shape.
10. Present websites within PowerPoint.
Believe it or not, presenting websites within PowerPoint is something we’re still having to find work-arounds for.
From my experience, these are some tactics that have worked in the past that may be helpful depending on which version of PowerPoint you have:
- Traditionally, to show a website in a PowerPoint slide you would just create a link to the page and prompt a separate browser to open.
- Try adding the third-party program LiveWeb that you install on your PowerPoint program. Head to the LiveWeb website and follow the instructions. Unfortunately, Mac users don’t have a similar option.
- Take screenshots of a website, insert the image on your slide, and link in through a browser. You can embed media (such as a YouTube video) by downloading it directly to your computer.
- Some versions allowed a Web Viewer Add-on until Microsoft decided that was a security risk. Insert>Get Add-ons, search for Web Viewer, then click on the Add button.
- Install ClassPoint, which essentially puts an internet window on top of your slide for use until you’re done with it, then you can just move to the next slide. You can even bookmark the webpage you want ahead of time to jump straight to it. Using this does introduce a new navigation bar along the bottom of your presentation. Here’s a video Introduction to ClassPoint:
- Finally, PowerPoint Live is a new tool that enables you to do more seamless presentations during video calls and may be a better overall match for doing presentations remotely. Check out this video:
11. Try Using GIFs.

GIFs are looped animated images used to communicate a mood, idea, information, and much more.
Users add GIFs to PowerPoints to be funny or quickly demo a process. They’re very popular with and easily recognized by Millenials and Gen Z, and it’s easy to add GIFs to your slides:
- Download and save the GIF you want.
- Go to the slide you want the GIF on.
- Go to the Home tab, and click either Insert or Picture.
- From the Picture drop-down menu, choose Picture from File.
- Navigate to where you saved your GIF and select it. Then, choose Insert.
- It will play automatically the moment you insert it.
PowerPoint Process
12. Keep it simple.
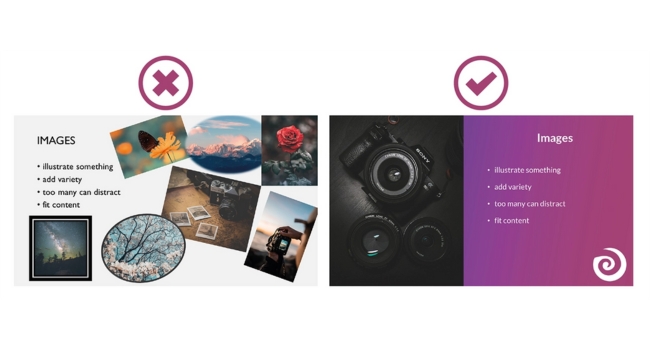
PowerPoint is an excellent tool to support your presentation with visual information, graphics, and supplemental points.
Your PowerPoint should not be your entire presentation, and the elements you do introduce need to function properly.
If the presentation simply repeats your words, has broken links, or shows unreadable text, the hiccups can become the take-away of your talk no matter how well-spoken the presentation.
Slam-dunking the basics by keeping it simple is the way to go. If your slides have dense and cluttered information, it will distract your audience and you could lose their attention.
In short? Keep your presentation persuasive by keeping it clean:
- Limit bullet points and text.
- Avoid paragraphs and long quotes.
- Maintain “white space” or “negative space.”
- Keep percentages, graphs, and data super basic.
13. Embed your font files.
One constant problem presenters have with PowerPoint is that fonts seem to change when presenters move from one computer to another.
The fonts are not actually changing — the presentation computer just doesn’t have the same font files installed.
To embed your fonts on a PC:
- Click File then Options.
- Open up the Save tab.
- Select the Embed fonts in the file check box under Preserve fidelity when sharing this presentation.
Now, your presentation will keep the font file and your fonts will not change when you move computers.
To embed your fonts on a Mac:
- On the top bar, click PowerPoint, then click Preferences.
- Under Output and Sharing, click Save.
- Under Font Embedding, click Embed fonts in the file.
14. Save your slides as a PDF file for backup purposes.
If you’re still afraid of your presentation showing up differently when it’s time to present, you can create a PDF version just in case.
This is a good option if you’ll be presenting on a different computer because if it doesn’t have Powerpoint installed, you can still use the system viewer to open a PDF.
The only caveat is that your GIFs, animations, and transitions won’t transfer over.
To save your presentation as a PDF file:
- Go to File, then click Save as…
- In the pop-up window, click File Format.
- A drop-down menu will appear. Select PDF.
- Click Export.
You can also go to File, then Export, then select PDF from the file format menu.
.png)
12 Free Customizable Resume Templates
Fill out this form to access your free professionally-designed templates, available on:
- Microsoft Word
- Google Docs
- Microsoft PowerPoint
- Google Slides
15. Embed multimedia.
PowerPoint allows you to either link to video/audio files externally or to embed the media directly in your presentation. For PCs, two great reasons for embedding are:
- Embedding allows you to play media directly in your presentation. It will look much more professional than switching between windows.
- Embedding also means that the file stays within the PowerPoint presentation, so it should play normally without extra work (except on a Mac).
If you use PowerPoint for Mac it gets a bit complicated, but it can be done:
- Always bring the video and/or audio file with you in the same folder as the PowerPoint presentation.
- Only insert video or audio files once the presentation and the containing folder have been saved on a portable drive in their permanent folder.
- If the presentation will be played on a Windows computer, then Mac users need to make sure their multimedia files are in WMV format.
- Consider using the same operating system for designing and presenting, no matter what.
16. Bring your own hardware.
Between operating systems, PowerPoint is still a bit jumpy. Even between differing PPT versions, things can change. The easiest fix? Just bring along your own laptop when you're presenting.
The next easiest fix is to upload your PowerPoint presentation into Google Slides as a backup option — just make sure there is a good internet connection and a browser available where you plan to present.
Google Slides is a cloud-based presentation software that will show up the same way on all operating systems.
To import your PowerPoint presentation into Google Slides:
- Navigate to slides.google.com. Make sure you’re signed in to a Google account (preferably your own).
- Under Start a new presentation, click the empty box with a plus sign. This will open up a blank presentation.
- Go to File, then Import slides.
- A dialog box will come up. Tap Upload.
- Click Select a file from your device.
- Select your presentation and click Open.
- Select the slides you’d like to import. If you want to import all of them, click All in the upper right-hand corner of the dialog box.
- Click Import slides.
When I tested this out, Google Slides imported everything perfectly, including a shape whose points I had manipulated. This is a good backup option to have if you’ll be presenting across different operating systems.
17. Use Presenter View.
In most presentation situations, there will be both a presenter’s screen and the main projected display for your presentation.
PowerPoint has a great tool called Presenter View, which can be found in the Slide Show tab of PowerPoint. Included in the Presenter View is an area for notes, a timer/clock, and a presentation display.
For many presenters, this tool can help unify their spoken presentation and their visual aid. You never want to make the PowerPoint seem like a stack of notes that you’re reading off of.
Use the Presenter View option to help create a more natural presentation.
Pro Tip: At the start of the presentation, you should also hit CTRL + H to make the cursor disappear. Hitting the “A” key will bring it back if you need it.
Your Next Great PowerPoint Presentation Starts Here
Now that you have these style, design, and presentation tips under your belt, you should feel confident to create your PowerPoint presentation.
But if you can explore other resources to make sure your content hits the mark. After all, you need a strong presentation to land your point and make an impression.
With several templates to choose from — both in PowerPoint and available for free download — you can swiftly be on your way to creating presentations that wow your audiences.
Editor's note: This post was originally published in September 2013 and has been updated for comprehensiveness.
![Blog - Beautiful PowerPoint Presentation Template [List-Based]](https://no-cache.hubspot.com/cta/default/53/013286c0-2cc2-45f8-a6db-c71dad0835b8.png)
![How to Write an Ecommerce Business Plan [Examples & Template]](https://blog.hubspot.com/hubfs/ecommerce%20business%20plan.png)
![How to Create an Infographic in Under an Hour — the 2024 Guide [+ Free Templates]](https://blog.hubspot.com/hubfs/Make-infographic-hero%20%28598%20%C3%97%20398%20px%29.jpg)
![20 Great Examples of PowerPoint Presentation Design [+ Templates]](https://blog.hubspot.com/hubfs/powerpoint-presentation-examples.webp)


![How to Start a Presentation [+ Examples]](https://blog.hubspot.com/hubfs/how-to-start-presenting.webp)

![How to Create the Best PowerPoint Presentations [Examples & Templates]](https://blog.hubspot.com/hubfs/Powerpoint%20presentation.jpg)

![How to Create a Stunning Presentation Cover Page [+ Examples]](https://blog.hubspot.com/hubfs/presentation-cover-page_3.webp)