Email marketing is a powerful way to generate leads, connect with your customers, increase brand awareness, and promote your business. When done effectively, email marketing results in a personalized marketing strategy that helps build relationships with customers.
The right tools make creating and sending beautiful, professional emails a breeze. HubSpot’s email marketing toolset includes features to build an end-to-end marketing campaign without the need for designers or IT.
In this article, we’ll walk through how you can use HubSpot to run email marketing campaigns, starting with collecting and segmenting contacts, creating and personalizing emails, as well as optimizing campaigns with analytics and A/B testing.
Free Email Marketing Tools
Create, personalize, and optimize your marketing emails without waiting on designers or IT.
- Boost email opens.
- Design stunning emails.
- Automate follow ups.
- And more!
Gather your Contacts
To send emails, you’ll need to know who you’re sending them to. All HubSpot contacts are stored in the free CRM tool. Within HubSpot’s CRM, contact information is automatically organized and enriched with other data so you can follow each lead’s journey through the sales funnel and easily personalize marketing campaigns.
Collect Contacts with Forms
Using HubSpot’s free online forms is a simple way to build your audience. To create a form within HubSpot:
- From within your HubSpot account, navigate to Marketing > Forms and click Create a Free Form.
- Select the style and the type of form you want to create.
- Choose which fields you want to include in your form.
- Create a Follow-Up Email that will be sent immediately to the new contact.
- Review other options such as creating a thank you page and where to send the form submissions, then finalize any additional style before clicking publish.
- Add this form to your site as a separate landing page, a pop-up, or an embedded form.
Learn more about how to generate leads using HubSpot’s free online forms here.
When creating forms for email marketing, make sure you’re following opt-in rules, and be clear about what you’ll use their email for. Unexpected emails will cause your contacts to unsubscribe or worse, mark you as spam.
Segment Customers within Lists
Segmentation is the basis of personalized, targeted marketing. It breaks up your list of contacts into sub-categories based on their unique characteristics and interests.
You can segment customers in many different ways. The easiest way is to sort the contacts collected by each form into separate lists and organize them by which stage of the sales journey they are at. For example, newsletter subscribers would be on a separate list from leads who’ve downloaded a case study.
You can also slice your contacts into lists using other fields, including:
- Geographical location
- Lifecycle stage
- Awareness, consideration, decision stage
- Industry
- Previous engagement
- Language
- Job Title
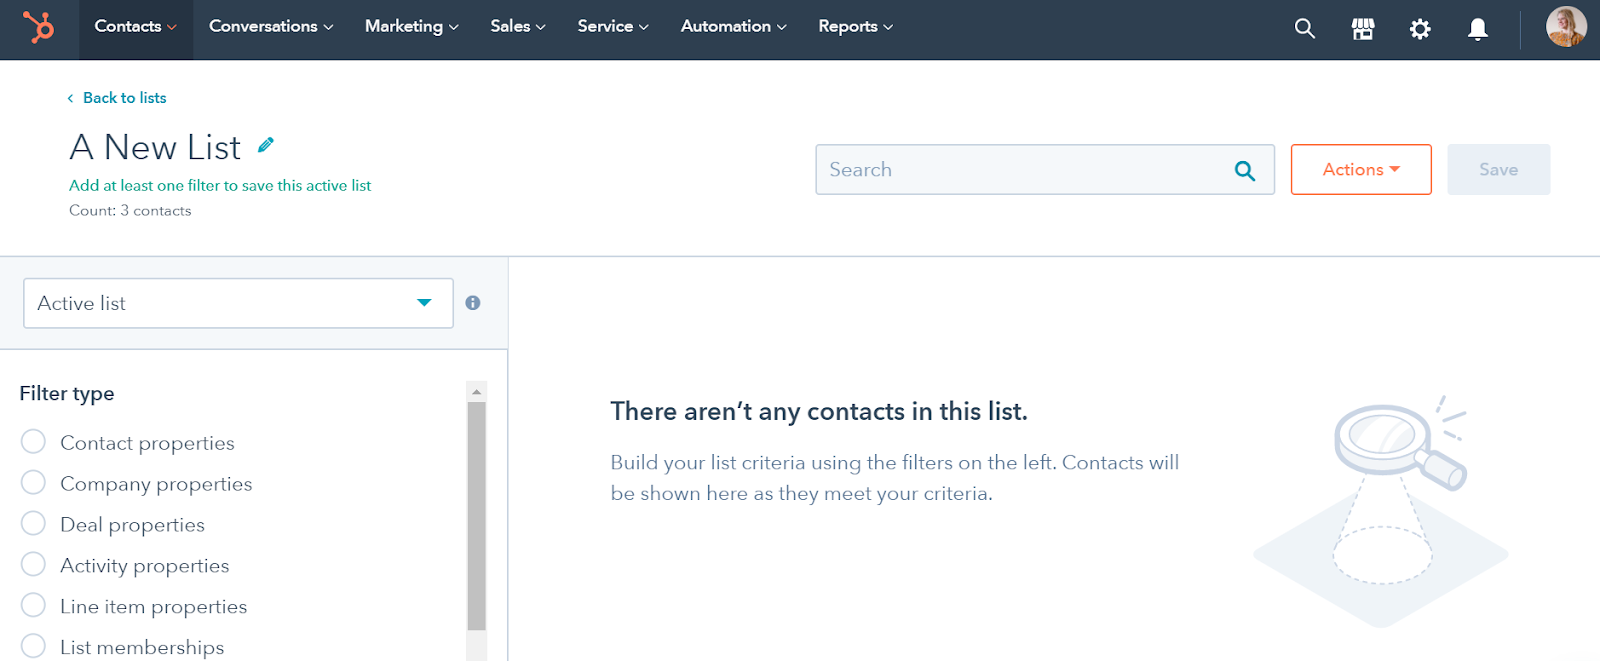
To create a new list:
- From within your HubSpot account, navigate to Contacts > Lists
- Click Create New List
- Give your new list a descriptive title that will make it easy for you to locate when you’re deciding who to send your email campaign to. For example, a good title might be “Customers who have not purchased in the last 6 months.”
- On the left side panel, select the filters that you want to include.
- Click Save.
Want to learn more about the different criteria you can use in HubSpot lists?
Check out our knowledge base article on list criteria.
Create and Send Emails
Note: With the free HubSpot CRM, you can send up to two thousand emails a month. If you need to send more, consider upgrading to Marketing Hub Starter, Professional, or Enterprise.
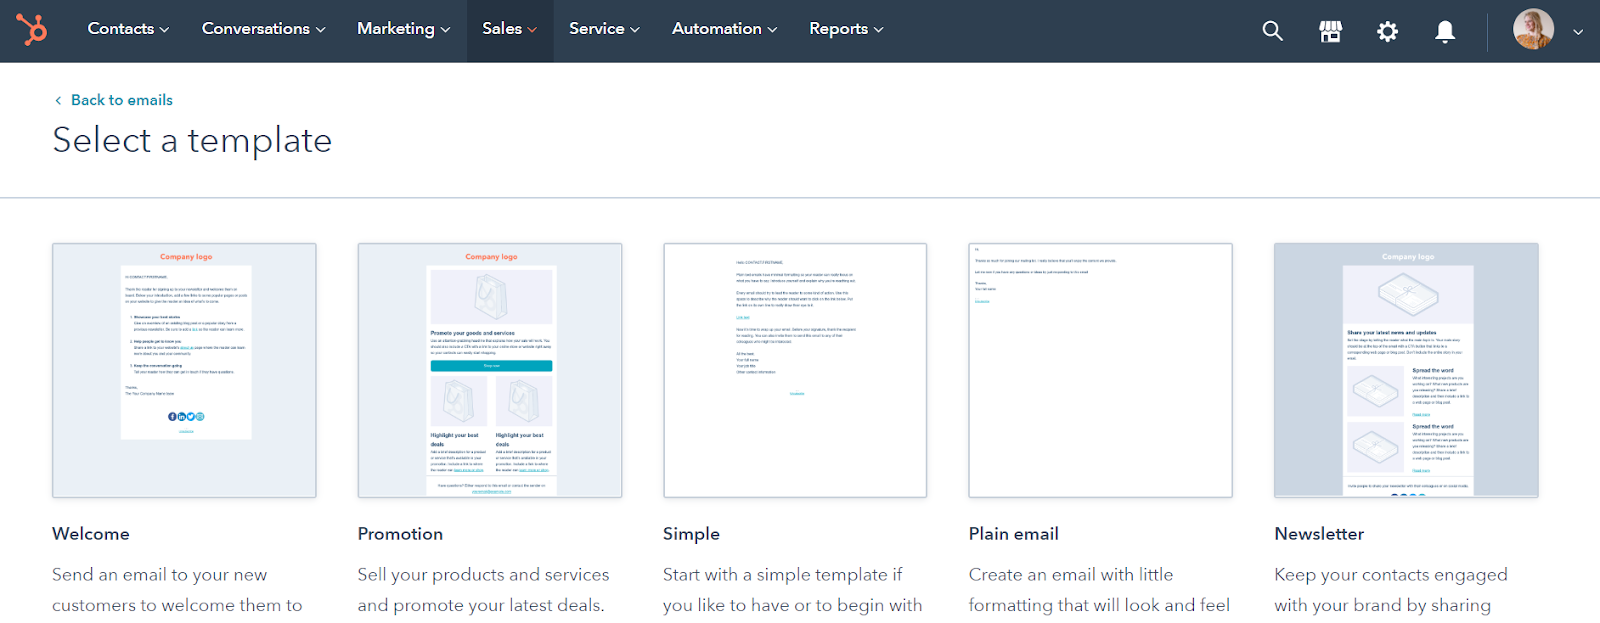
First, you’ll need to choose what type of emails you’d like to send. HubSpot’s free email marketing platform includes many different types of email templates including newsletters, sales emails, and more.
- From within your HubSpot account, navigate to Marketing > Emails.
- Click Create Email.
- Choose the template you want to work with.
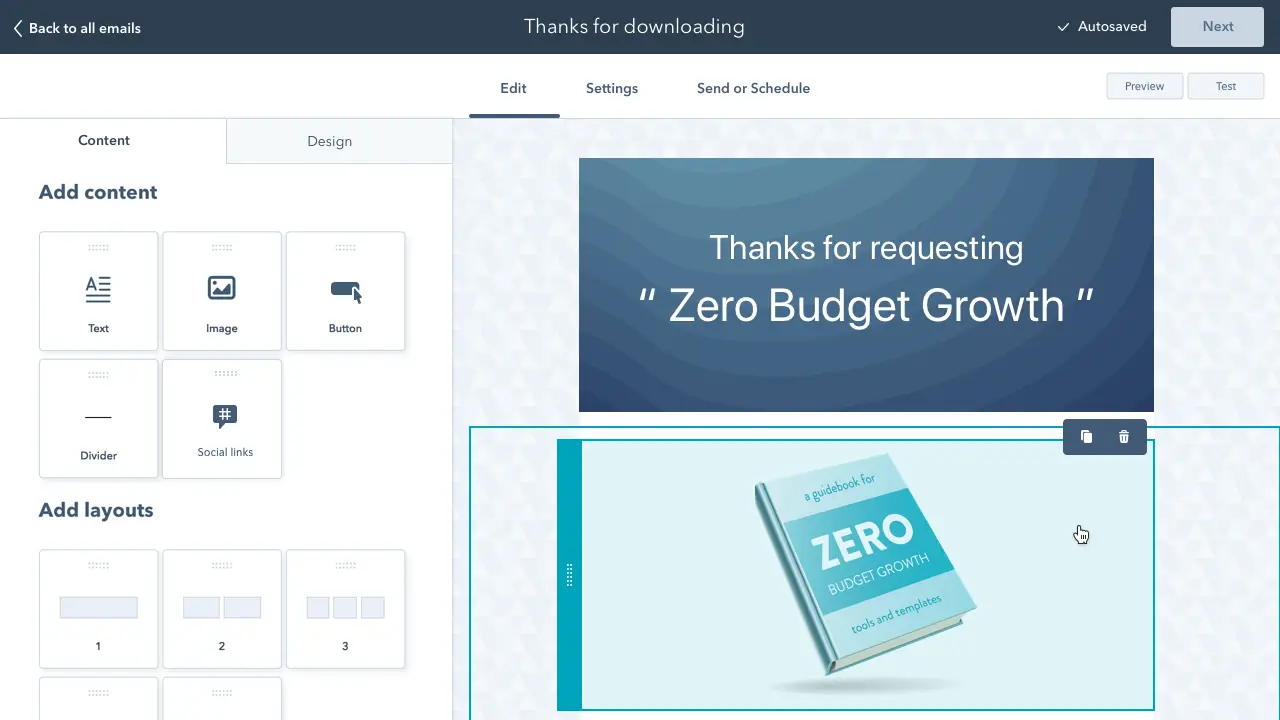
- Next, edit your email using the intuitive drag and drop email editor. Style the email to match your brand, and create a compelling message for your customers.
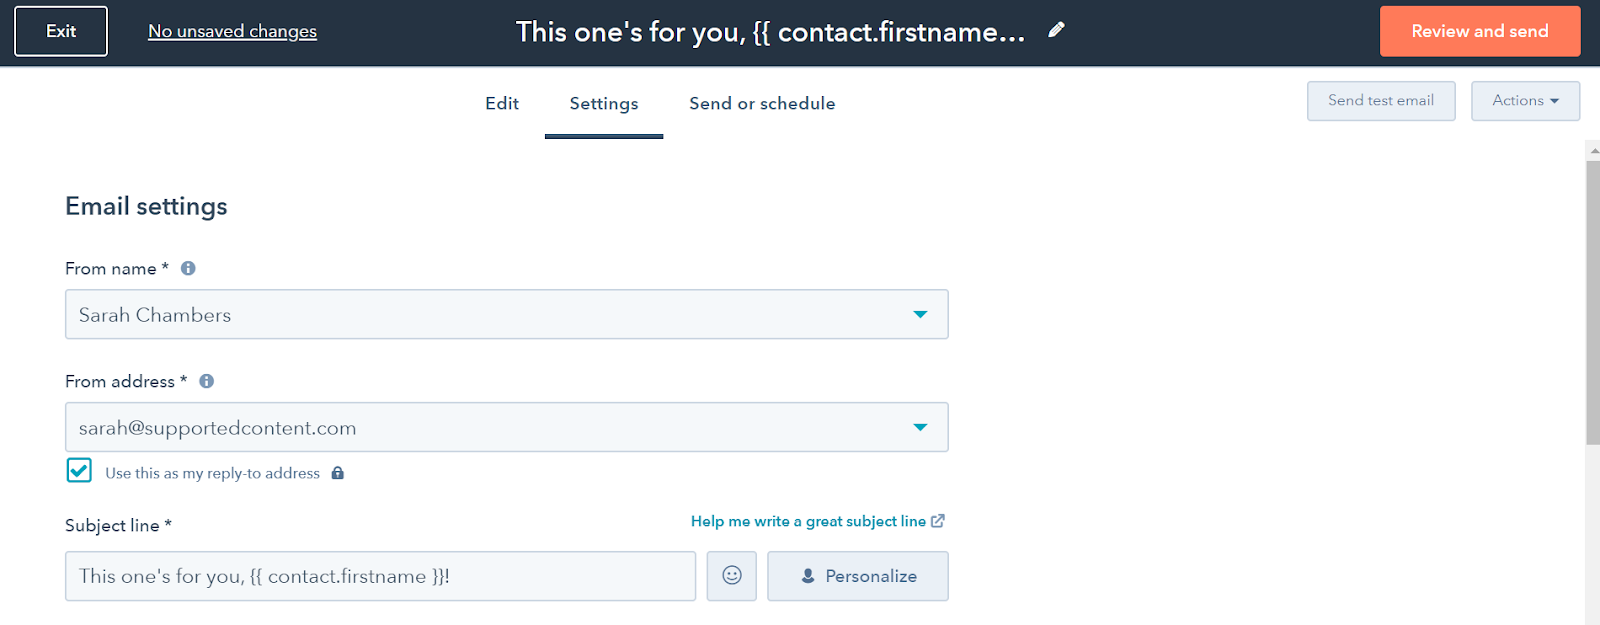
- Finally, personalize your email. Make sure to end all your emails with a personal signature from a human, rather than from an automated system or from the company.
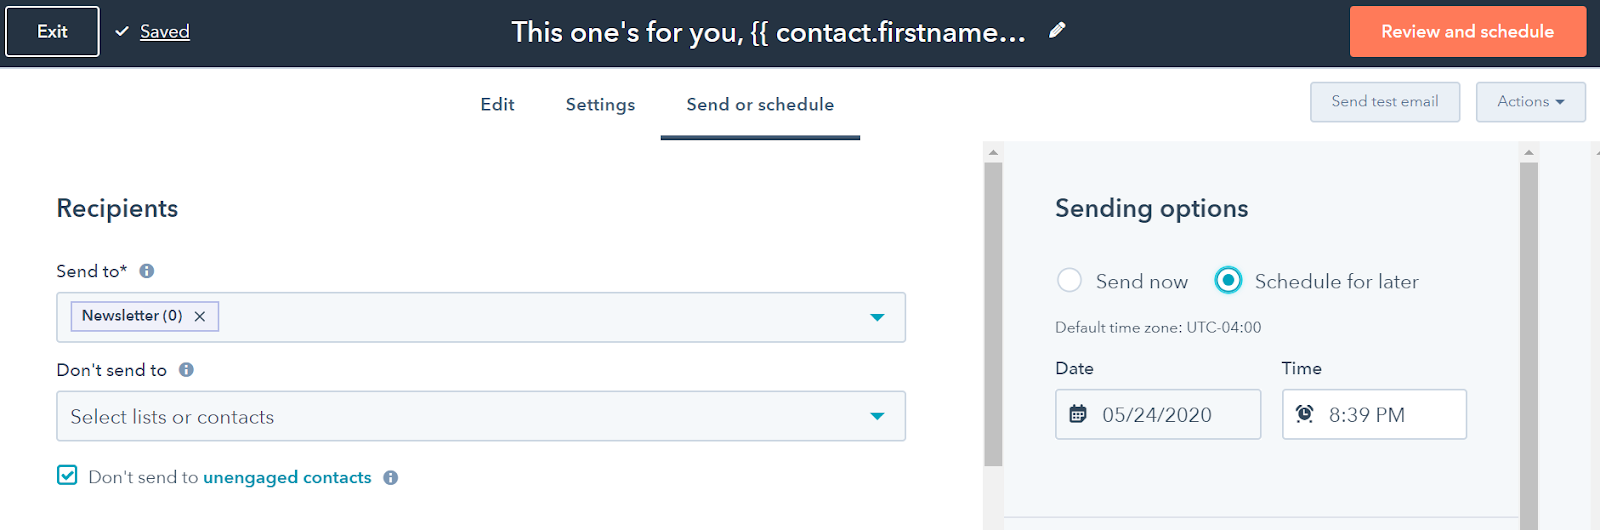
- Select your recipients by clicking Send or schedule. In the recipients’ panel on the left-hand side, you can choose all the lists you want your email to go to, as well as any segmented lists that you don’t want to receive the email.
- Choose to send your email out immediately, or schedule for a later date.
- Click Review and Send, or Review and Schedule on the top right-hand corner of the screen.
- Once you’ve confirmed your email looks exactly like you want it, click Send or Schedule.
Quick tip: If you’re using HubSpot Marketing Hub Professional or Enterprise, you can include smart rules in your email that make sure each recipient gets content personalized to their situation. For example, new contacts receive a CTA to sign up for the newsletter, while newsletters are directed to download your newest e-book.
Want to learn more about using smart rules in your email marketing?
Check out this knowledge base article on implementing smart rules.
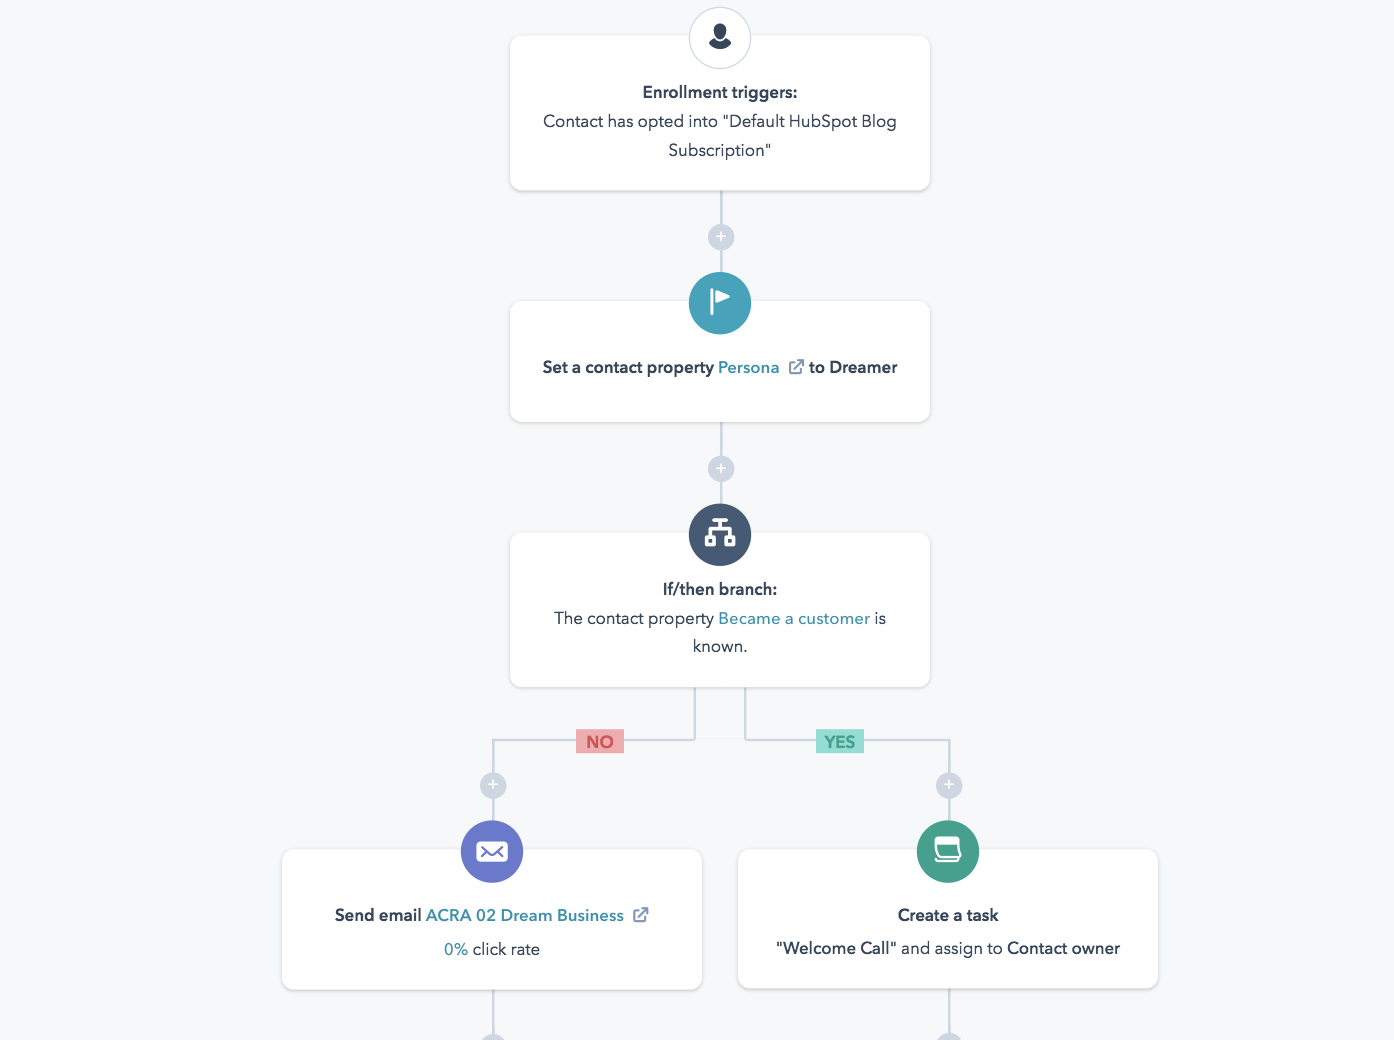
Bonus: Create automated emails with workflows
One email is great, but a series of emails can make an impression on your new contacts. Using Workflows, you can set up automated emails to go out to specific contacts based on different triggers. For example, if a subscriber signs up for a free trial, you can send them an email with more information about their new account. At the same time, you can set a task for a salesperson to follow up with the lead to see how they’re doing.
Workflows and marketing automation tools are available in Marketing, Sales, and Service Hub Professional and Enterprise.
Interested in setting up workflows in your email marketing?
Read our knowledge base article on creating workflows.
Free Email Marketing Tools
Create, personalize, and optimize your marketing emails without waiting on designers or IT.
- Boost email opens.
- Design stunning emails.
- Automate follow ups.
- And more!
Analyze and Optimize Email Campaigns
HubSpot can help you understand your audience better overtime. By analyzing your email marketing performance and optimizing emails to your audience’s preferences, you can improve engagement and increase your return on investment.
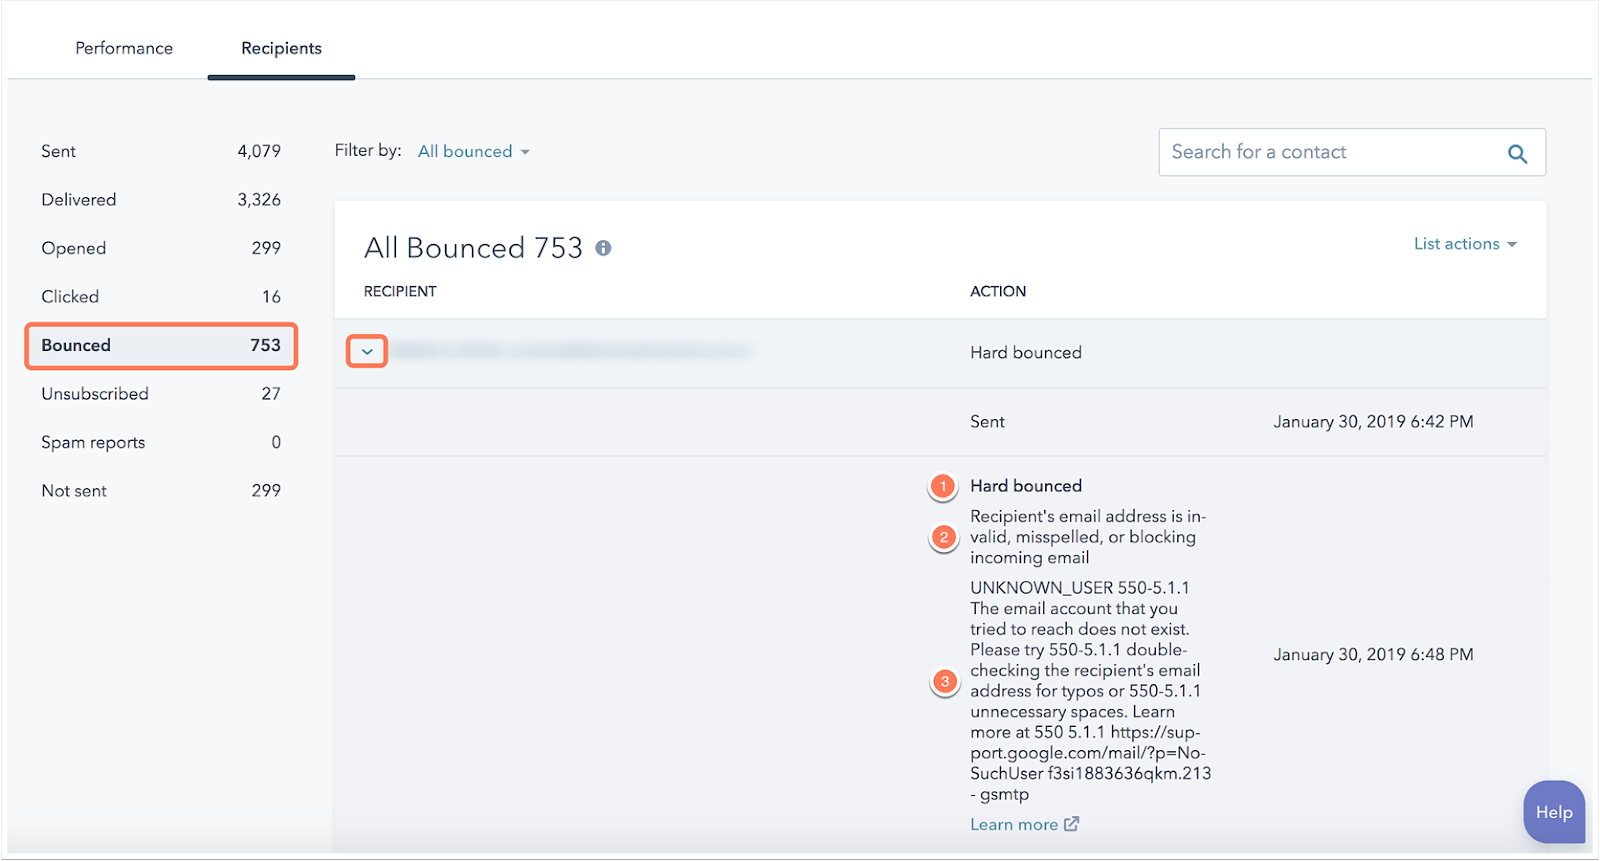
There are four important metrics to track after you’ve sent your email.
- Deliverability: the rate at which emails reach your recipient’s inboxes.
- Open rate: the percentage of recipients who have opened your email once it reaches their inbox.
- Clickthrough rate (CTR): the percentage of recipients who engage with your email and click on your call to action (CTA)
- Unsubscribes: the number of people who opt-out of your subscription list after receiving this email.
You can view email stats in two different places. Once you’ve sent your email, use the post-send analytics screen to see how your email performed from within your email dashboard:
- In your HubSpot account, navigate to Marketing > Email.
- Click the name of your sent email.
- Click See details to open a slide-in panel with complete email details, including the internal email title, subject line, from address, and the user who sent the message.
- More information can be found in the Performance and Recipients section of the email dashboard.
Secondly, because all data is stored in HubSpot CRM, you can also navigate to a specific contact record to see how they interacted with your email.
Need a deeper overview of email analytics?
Click through to this knowledge base article on analyzing email campaign performance.
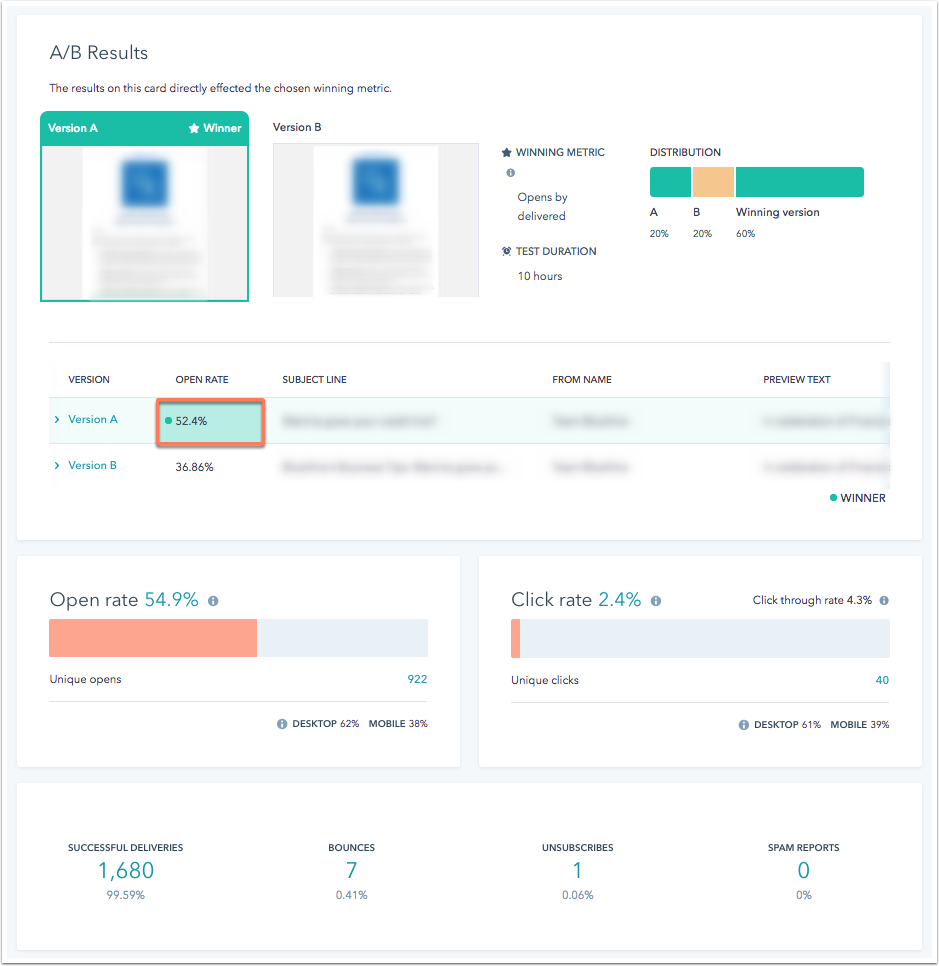
A/B Testing
Note: A/B testing is available in Marketing Hub Professional and Enterprise
To learn more about what your audience is interested in, you can use A/B testing within HubSpot. This marketing strategy tests levels of engagement for different versions of the same email. For example, you can test out different variations of subject lines to see which results in a higher open rate.
When you’re creating your email, you can create the second “B” email by the following steps:
- In the left sidebar, click the A/B icon, then click Create A/B test.
- In the dialog box, enter a name for the variation B email, then click OK.
- Update any components that you want to test. Keeping most of the emails similar will give you more targeted results.
- Once you've finished editing your A and B email variations, configure your testing options by clicking the A/B tab on the left side of the content editor. You can choose which percentage of recipients get each version of the email, and set the winning criteria for the test (ie. most click-throughs or highest open rate)
Want to get started with A/B testing your emails?
Read through this helpful knowledge base article on A/B testing.
Grow your business with HubSpot’s email marketing tools
Emails are still royalty in your marketing court, and that isn’t changing anytime soon. Use HubSpot’s email marketing tools to grow your audience and target them with personalized content. Convert browsers into buyers, and customers into long-term fans.