In 2014, buzzwords like "big data" and "personalization" were used frequently throughout marketing conversations, but the perceived barrier to entry for each topic seemed high -- or at least it felt like, as marketers, we needed to invest a significant amount of time learning each of these topics in depth before even considering to use them.

But it's a new year, and whether you have a long-list of new resolutions or just want to get your feet wet with the latest in personalized marketing, you can get started with a few tips that allow you to start running your first campaign today.
Each of these tips are designed to help you get running with little of the research and digging that you may have thought was required. When you use these ideas and even combine a few of them, you add relevance to your conversations with prospects and customers alike leading to more successful campaigns. Let's dive in.
K.I.S.S. (Keep It Small and Simple)
Instead of the traditional acronym, your first first personalization campaign should really just contain two elements: small and simple. Try not to over think the ways you could personalize a visitor's experience when they land on your site, and instead consider one point or interaction that they normally have that can easily be made remarkable. For example, your homepage is likely visited by numerous prospects and customers alike but instead of showing existing customers the same marketing messaging and call-to-action, show them a unique opportunity that is customer-facing.
Below we'll walk through a few ways you can easily customize your website simply by changing one or two elements on the page. These ideas are a beginning point for how you can get started with personalization - but you should take them and apply them within your own industry and based on your own buyer personas.
Note: These examples utilize smart content, which is a feature of HubSpot Professional and Enterprise. Basic customers can try HubSpot Professional free for 30 days.
1) Add Relevant Page Content & Calls-to-Action (CTAs)
Many websites treat every individual visitor the same. But the fact is, individuals evolve and some of those individuals are likely customers, so messaging that just speaks to the benefits of your product or solution is less relevant to them. Personally, I encounter this scenario multiple times a month where I visit a website that I purchased a product from and receive the same exact messaging and experience. We can do better as marketers and present more relevant experiences by the group of visitors that are coming to our website.
Keeping our above principle of small and simple in mind, we could simply change the main CTA on our homepage and show a different CTA for customers along with more relevant customer messaging. For example, if you run a software business one way to simply personalize a customer experience is to show a login call-to-action in place of a free trial offer. Or, it could mean showing a special customer discount to generate repeat business.
Here's how you can do this within HubSpot:
Step One: Go into the site or landing page where you would like to change the messaging and CTA, and click the Make Smart option as shown below. 
Step Two: Choose to create smart content by lifecycle stage as shown below.
Step Three: Choose the specific lifecycle stages for your personalized content. In our example above we are only creating messaging and a CTA for customers so I've highlighted customers here. You can select multiple lifecycle stages if you have an audience that would resonate with communication in different parts of your funnel.

Step Four: Create content specially for customers and add a CTA to this page that is targeted for your audience. Because in our example we are also changing messaging on the page you can use the same rich text editor that you previously used to create the initial page.
Note: If you are only changing the CTA instead of messaging on your page as well, you could use a Smart CTA instead of adding Smart Content.
Want to slightly increase the relevance and complexity? Instead of just creating one CTA for all prospects, and one for customers, we can divide the prospects group into lifecycle stage and tailor the messaging more to each group.
2) Personalize the Visitor Experience by Device
If you're using the Content Optimization System for your entire website, your site is already mobile optimized with responsive design. But beyond having a site optimized for mobile, you can take the experience one-step further using smart content to personalize the content shown to visitors on different devices.
If you have a significant amount of written content on a page, you can create a mobile-version that shows a limited amount of text and smaller images.
Here's how you can do this within HubSpot:
Step One: Click the Make Smart button on any rich text module, as shown in the example above.
Step Two: Choose the Device Type option, and then the specific device to personalize content for as shown below.
Step Three: Create the content you would like to display to mobile visitors.
3) Display Relevant Social Options Based on Referral Source
When a visitor lands on your site from a link on a social network, it's likely they are more engaged with that specific network and it's relevant to that individual. As a result, if you have social follow or sharing options on pages it's easy to display the relevant network a visitor came from, making it more likely they follow you on that network.
For example, if I were to click on a Twitter link and land on your product page it's more likely I would then follow your brand on Twitter, rather than other social networks. As a result, another easy way to get started with personalization is to simply use smart content to change the content shown based on where the visitor is coming from.
Let's walk through how you do this in HubSpot:
Step One: Click the Make Smart button on any rich text module as shown in the first example.
Step Two: Choose the referral source option to personalize content, as shown below.

Step Three: Choose the referral source that you want to display personalized content to. Note: You can create multiple rules here if you wanted to setup an individual rule for each social network, or various other sites.

These examples are simple but meaningful ways you can begin to personalize your website, without worrying about a high barrier to entry. Even just testing these ideas will help you think of other personalization opportunities that are relevant to your own audience, and how easy it is to start personalizing a full website experience with smart content.
How are you using smart content? Let us know in the comments!
Photo credit: Camera Eye Photography via photopin cc
Related Articles
-
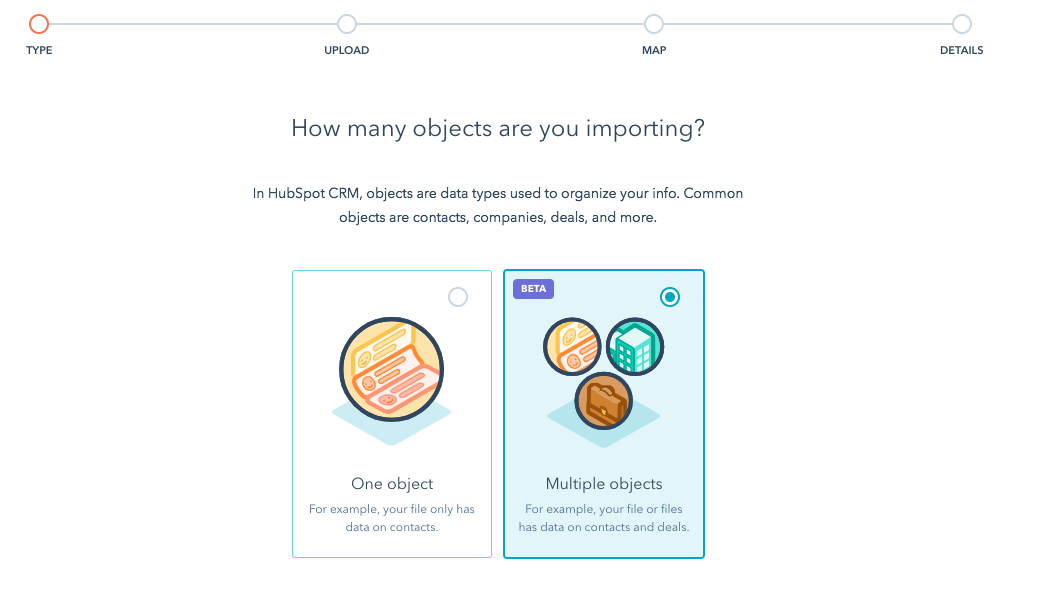
Everything You Need to Know About the New HubSpot Import
-

Working Around Workflows: A Guide to Copying Property Values
-

How to Navigate Integrations Reporting: GoToWebinar
-

How to Do Sales Forecasting in HubSpot CRM
-

How to Clean Up Your HubSpot CRM Data
-

A Closer Look at Multi-Touch Revenue Attribution Models in HubSpot
-

What's Under the Hood of HubSpot's AI-Powered Business Card Scanner?
-

Using the Lists Tool to Remedy Workflow Enrollment Mishaps
-

A Short Guide to Using Goals in Custom Reports
-

5 Recent Updates to the Products and Quotes Tools