Your homepage is the single most important aspect of your entire website. Arguably, the pages describing your product or service come in a very close second. With all the attention you devote to your homepages, how do you ensure your product pages resonate with the potential buyer?
The answer - tell a story with your product that is relevant to the buyer. That seems simple, but not all visitors are the same. This post will walk through how you can dynamically change your product pages and improve conversions using smart content. Let's dive in.
The Two Steps to Telling a Product Page Story
1. Start with People
At the center of every good story is at least one person. Like a good story, you need to first start with people and more specifically the Lists app in HubSpot.
The lifecycle stages of contacts tracked within your HubSpot account are a wealth of information. But a prospect that has viewed your website once, versus a prospect that has viewed your website five times could be very different. In fact, it's likely the more a contact visits your website (up until they become a customer), the more qualified they likely are.
So take the concept of Lifecycle Stage and Pageviews, both of which are built-in to HubSpot, and use them to tell your story.
In order to tell this story, start by building a list.
- Go to Contacts > Lists, and Create a New List.
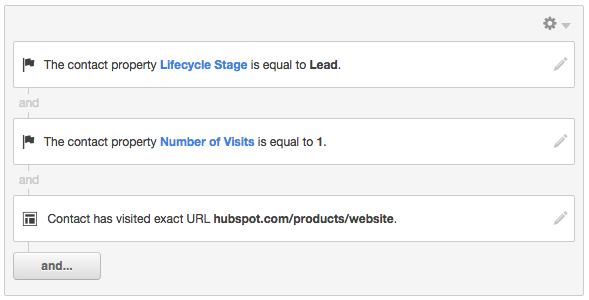
- Create a list based on the lifecycle stage contact property, and qualify the contacts in this list based on their number of visits. Here's a basic version of this list:

- Duplicate your list from the above steps, and change the Number of Visits. Depending on your business, these lists could be as granular as each visit or you could make it every few visits. Try to align the number of visits with your salescycle and the market you're in. The salescycle between a software company selling to small organizations and large hardware company selling to enterprises may be very different and, as a result, the visits in between each list should be increased.
- At the end of the process, you should have at least have two lists. For this post, three lists have been created. Here is the breakdown of the lists:
- List 1: Number of visits = 1, Lifecycle Stage = Lead, URL = hubspot.com/products/website
- List 2: Number of visits = 4, Lifecycle Stage = Lead, URL = hubspot.com/products/website
- List 3: Number of visits 6, Lifcycle Stage = Lead, URL = hubspot.com/products/website
Each of your lists represents a micro-persona. It's likely on the first visit that the potential buyer is looking at high-level information, and then progressively looking for deeper stories about how your solution works. You can also duplicate the lists above for each of your key lifecycle stages to ensure the entire journey your buyers go through is customized to them.
Note: The Smart Content functionality described in this post is available to Professional and Enterprise customers. Try out Hubspot Professional free for 30-days.
2. Create Your Story
Now that you've created your lists, it's time to actually create your story and change the page! To start, choose one product page within HubSpot and add Smart Content to the page.

- Go to Content > Website and choose your product page. (If you don't have the Website Add-on, you can try-it for free)
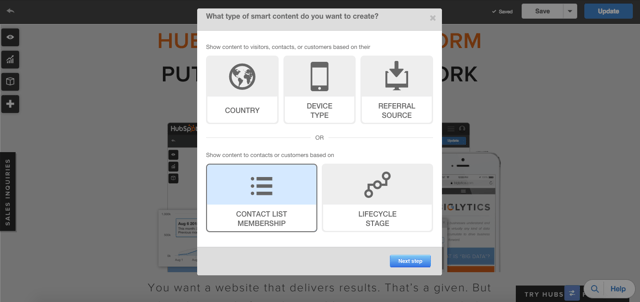
- Click the Smart Content icon, and choose Contact List Membership.
- Choose one of the lists you created above. It's recommended to go in ascending or descending order so the story you create follows a progression.
- Customize the content on the page to tell your story. This should go beyond just customizing the headline and hero image, but going back to your micro-personas. It's likely the visitor wants deeper information about your product or service. Ensure that your story ties in with the information that buyer needs over time.

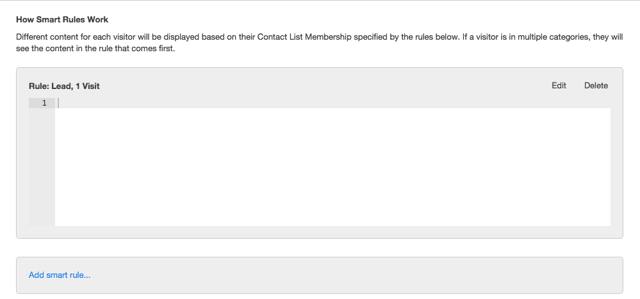
Once done creating your content, just click "Add smart rule" as shown in the bottom of the screenshot above, and select your next list. If you followed the previous example, you would have four customized versions of the page, a default which will be read by all search engines and visitors that don't meet the smart criteria, and the three versions based on each of the lists.
Each of these page versions helps tell more of the story and helps give the visitor more information to move further down the funnel. If your visitors become more qualified the more they see specific pages, you could also create a workflow that transitions these contacts between lifecycle stages.
This is just the start.
Based on the above, you can measure results and iterate your story or lists accordingly. This strategy does not end after you make the content more relevant, after that's done it's time to fine-tune your product pages and lists.
Have you used Smart Content on your product pages? If so, let us know what you think and how it's worked in the comments.
