After weeks of preparation, your upcoming campaign is ready to launch.

And as one of the last steps, you upload the PDF content offer to the HubSpot file manager.
From the file manager, you grab the link to the PDF and send it to yourself to ensure everything is in order, only to find that the name of the file in your browser is incorrect — you meant to write 2018, not 2017. The horror!
Thanks to your keen eye, you can correct this before sending the link to your prospects.

But what’s the best way to update that title? Your first thought might be to rename the file in the file manager tool. However, renaming the PDF from the file manager will only update the label in HubSpot and the URL, not the title that appears in your browser.
So how can you update this title in time for tomorrow’s email send?
The answer? Update the file’s metadata.
The metadata is where your browser pulls the title from, and this data is typically set at the time of the PDF’s creation. There are a few different ways to update PDF metadata after it has been created:
- If you have the original source for the PDF, such as an Adobe Illustrator file, you can update the metadata from within that application.
- If you have Adobe Acrobat, you can update the metadata using Adobe’s detailed instructions here. However, this process will not work for the free Adobe Reader application, so you will need the full Acrobat application.
Now, what if you don’t have access to the original file or Adobe Acrobat?
Below we’ll walk through how to update a file’s metadata using an application called Automator, which comes free with every Mac (sorry, Windows users!). This is a simple process that will take a total of about five minutes.
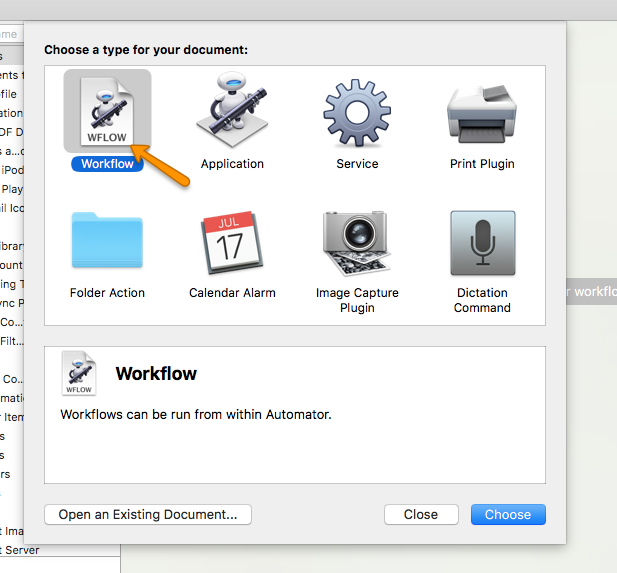
- Start by opening Automator, which can be found in your Applications. When you open the application, it will ask you which document type you want to create. For our purposes, you’ll want to choose Workflow.
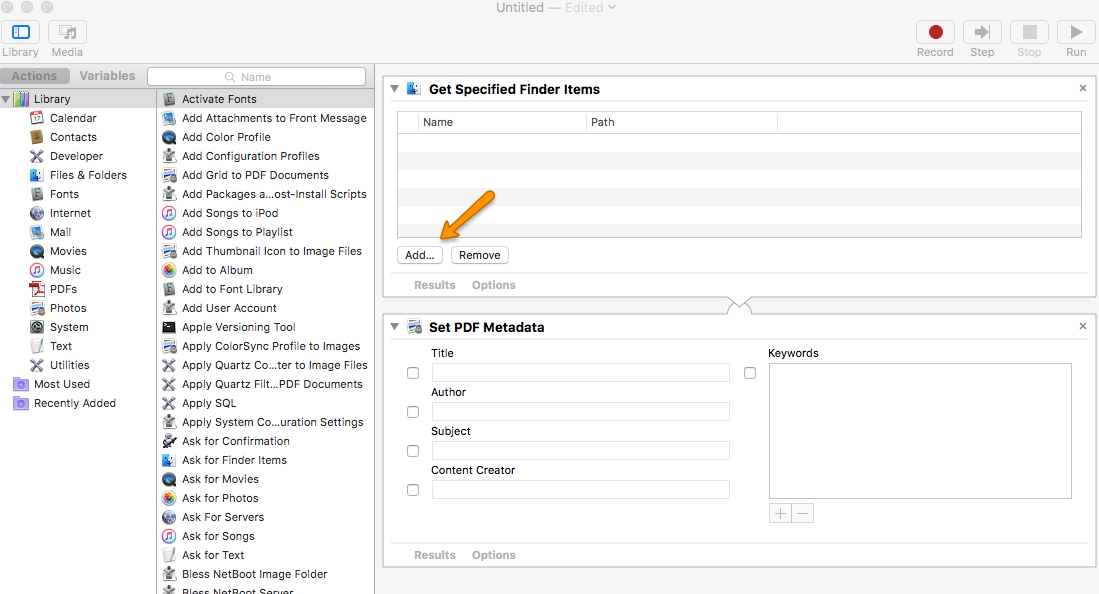
- Once Automator is open, find or search for “Get Specified Finder Items” in the middle column.
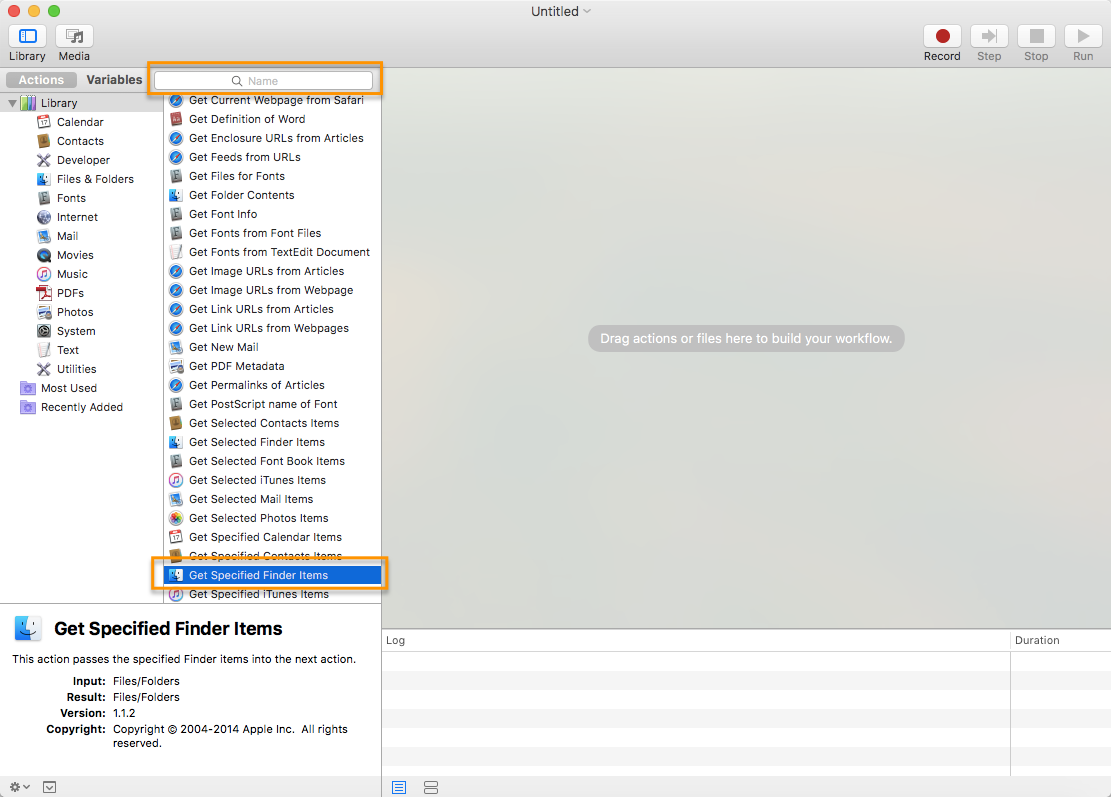
- Drag “Get Specified Finder Items” into the blank area on the right to place it at the top of your workflow. This will be the first of two actions for your workflow.
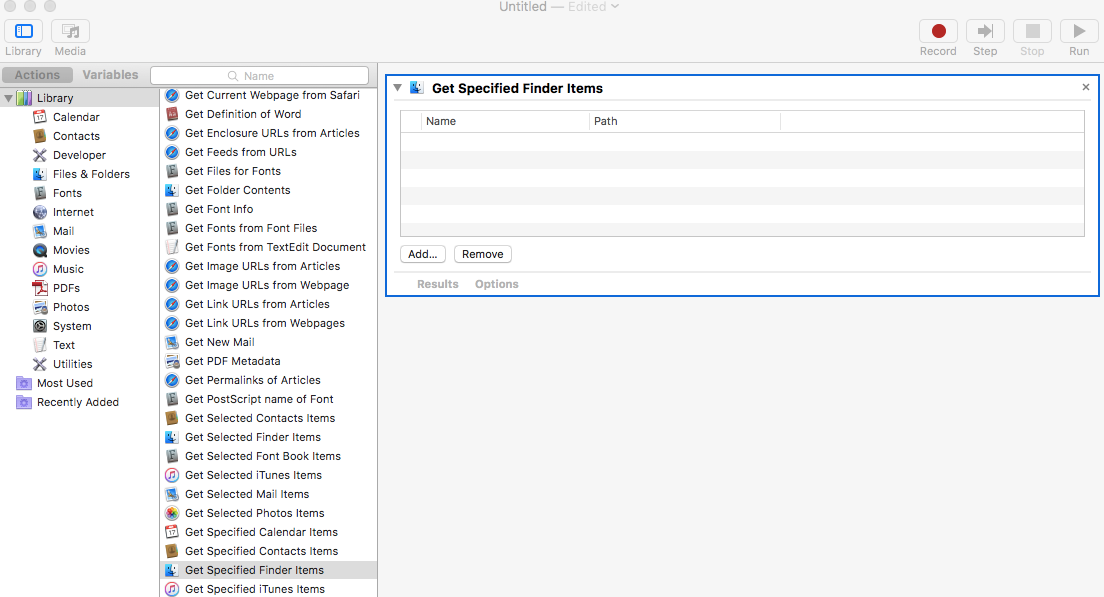
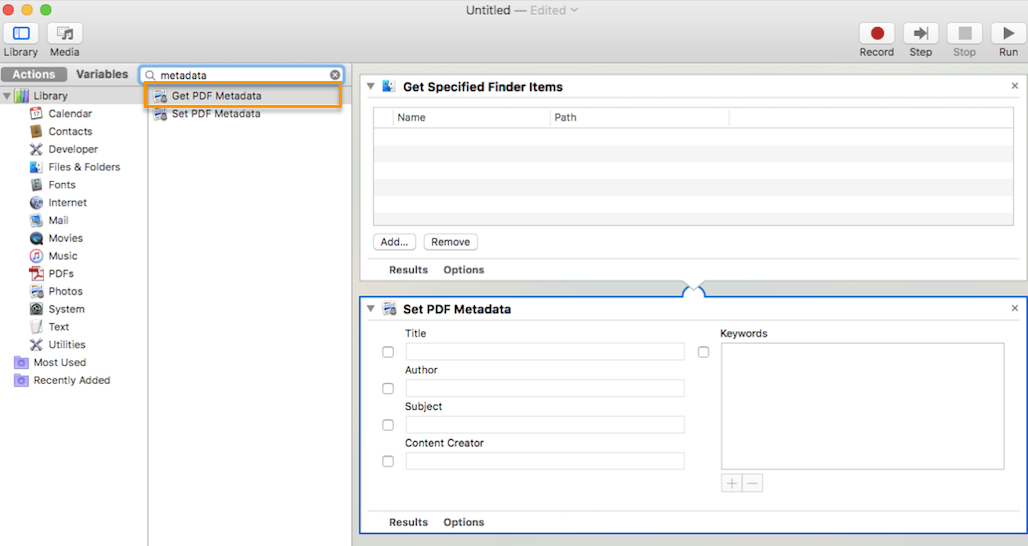
- Now we need to add the PDF editor action. In the middle column, find or search for “Set PDF Metadata” and drag it underneath the “Get Specified Finder Items” block to set it as the second workflow action.
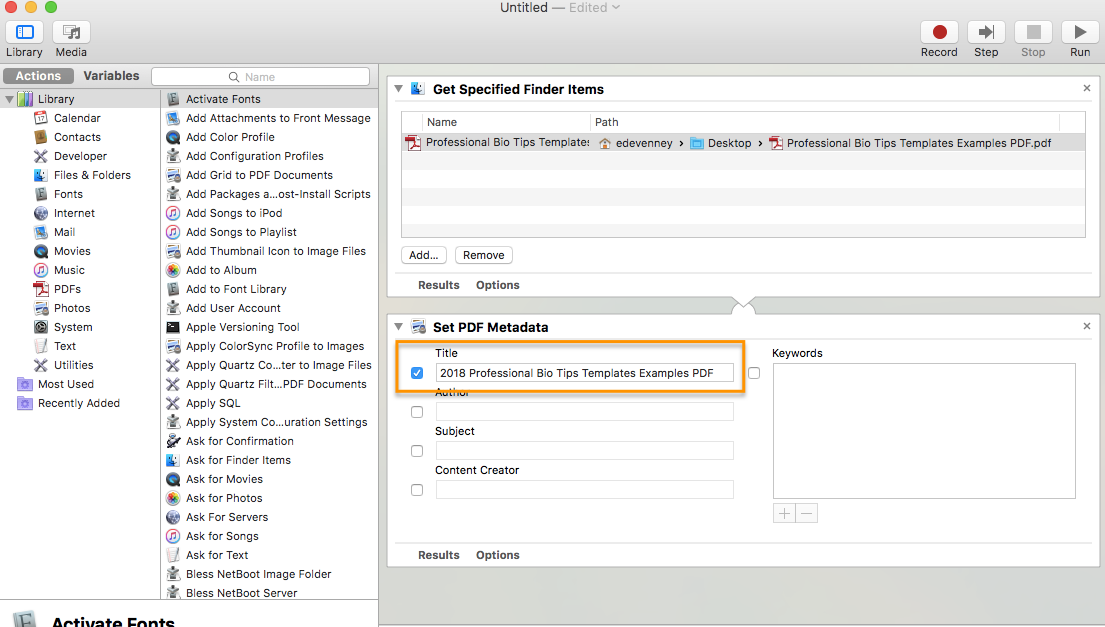
- In the “Get Specified Finder Items” block on the right, click “Add” to search for the PDF you want to update.
- Now that you have specified the file, click the blank checkbox next to “Title” in the “Set PDF Metadata” block. This is where you can type in the desired title.
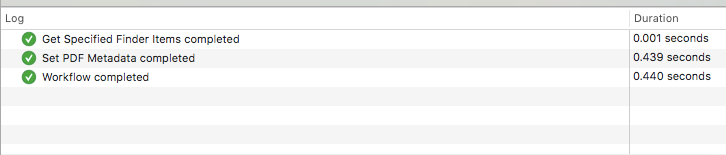
- Click “Run” in the top right of the application window. If the file processes properly, you should see those actions show up in the log in the bottom right, ending with “Workflow complete.”
Now upload the newly saved file into your file manager and you’ll see the proper title appear in your browser.
Huzzah!
Nice work. You can now sit back knowing your prospects will receive your content with the correct title. You can even save this Automator workflow for later in case you ever need to update your PDF metadata in the future.

![Troubleshooting Guide for Email Design Issues [Support Series]](https://53.fs1.hubspotusercontent-na1.net/hubfs/53/Hand%20typing%20on%20keyboard%20with%20digital%20tech%20icons%20and%20symbols-1.jpeg)
![3 Service-focused Workflows to Empower Your Support Team [Support Series]](https://53.fs1.hubspotusercontent-na1.net/hubfs/53/service%20button.jpeg)
![How to Add Your Branding to a Marketplace Template [Support Series]](https://53.fs1.hubspotusercontent-na1.net/hubfs/53/Support/Support%20Series%20User%20Blog%20folder%20copy%202.png)
![Creating a Custom Date-Based Property Report [Support Series]](https://53.fs1.hubspotusercontent-na1.net/hubfs/53/Support/HubSpot%20Support%20Series%20Horizontal-603978-edited.png)
![Advanced Troubleshooting: The Network Tab [Support Series]](https://53.fs1.hubspotusercontent-na1.net/hubfs/53/HubSpot%20User%20Blog/HubSpot%20Support%20Series%20Horizontal.png)