.png?width=112&height=112&name=Image%20Hackathon%20%E2%80%93%20Vertical%20(3).png)

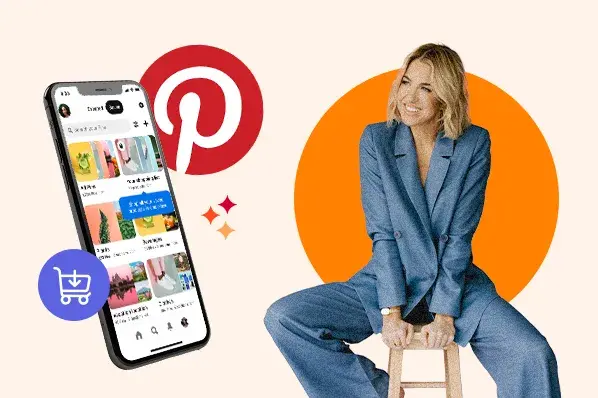
Sadly, you can't pin a million things and expect people to click through to your content every time. You've got to make each pin count.
Optimizing pins instead of posting willy-nilly isn't hard. It just calls for more thought into your brand: What exactly are you pinning? What does it say about your business? Why should your audience (and ultimately, your customers) care?
Keep reading to learn how to create your own pin, as well as the most important parts of a pin your audience will want to pin themselves.
How to Create a Pin on Pinterest
- Click the plus sign (+) at the top of your Pinterest profile.
- Select "Create Pin" from the dropdown menu.
- Upload an image file from your computer and add a destination link.
- Enter a destination link from which to save an image from that website.
- Title your pin.
- Add a pin description.
- Choose a board to add your pin to.
- Select "Save" to create your Pinterest pin.
1. Click the plus sign (+) at the top of your Pinterest profile.
To create your first pin, navigate to your profile by clicking your name and/or profile picture on the top-righthand corner of Pinterest.
2. Select "Create Pin" from the dropdown menu.
On your profile page, above the interest boards you selected when creating your Pinterest profile, click the plus sign icon ("+") and select "Create Pin" from the dropdown menu that appears, as shown below.

3. Upload an image file from your computer and add a destination link.
If you're using a desktop computer, clicking "Create Pin" from your Pinterest profile page will bring you to the pin-creation form shown below.

The first thing you'll do is upload an image to represent your pin. You can do this in two ways:
- By uploading an image file you have saved on your desktop and adding a destination link (if you use this method, keep reading through this step)
- By entering the URL of the website hosting your image and then selecting your desired image (if you use this method, skip to step 4)
To upload an image file from a folder on your computer, simply click the gray box and select the image file from the window that appears on your screen. You can also drag the image file itself directly into this gray box.
Once your image is uploaded, click "Add a destination link" on the bottom-righthand corner of the form and enter the website you want this pin to link to when users click on it.
4. Enter a destination link from which to save an image from that website.
If the image you want to pin already lives online somewhere, click "Save from site" beneath the gray image-upload box, and enter the URL of the website. This will be the website your image automatically links to when your pin goes live.
In the window that appears, you might see more than one image to choose from -- these are all the images Pinterest found living on the webpage you're linking to. Scroll until you find the image you want to pin, and select it.
5. Title your pin.
With your image successfully uploaded, it's time to optimize your pin with appropriate text. Click the "Add your title" preview text and give your pin an enticing preview that best represents the content of your pin -- and the website to which the image links.
For example, if you're pinning an image of a denim outfit, and linking to the purchase page of that outfit, you might title your pin "New Denim Wear by [Company Name]."
6. Add a pin description.
Add a description for your pin beneath your title, up to 500 characters. Keep in mind only the first 50 characters of your pin description will appear beneath the image in user's Pinterest newsfeeds. We'll talk about how to optimize your pin description in the next section of this blog post.
7. Choose a Pinterest board to add your pin to.
Your final task before saving your pin is to add this pin to a "board." As a Pinterest user, you can create boards that sort your pinned content based on your various interests.

To select or create a board for this pin, click "Choose a board (required)" beneath your pin's destination link. You'll be taken to the page shown above, where you can choose or create a board that best represents the type of content you're currently pinning.
8. Click "Save" to create your Pinterest pin.
Once you've selected a board to add your pin to, return to the pin-creation form and hit the red "Save" button at the top of your screen. Follow the prompts to push your pin live, and you'll be all set.
The Anatomy of a Perfectly Optimized Pinterest Pin

1. High-Quality Image
This seems like the most obvious of them all ... but it has to be said. Images should be about 736 pixels wide (when expanded) with no pixelation. In general, tall images work best as they will appear on the screen longer while people are scrolling through their feed, but you don't want your images to be overwhelmingly long.
There are lots of ways to make your pins look more beautiful, but if you're just getting started, sticking to a large, high-resolution image will work. You don't have to create every image you pin (though if you want to, here are some free tools to help you), but you should stay away from pinning cheesy stock photos -- Pinterest users love inspirational, beautiful photos or graphics, or images that are extremely helpful, clever, or informational.
2. Accompanying Title and/or Descriptive Picture
Besides being high quality, the image should be indicative of what's at the pin's link. You don't want to mislead your Pinterest followers with an image that doesn't match up with the accompanying link -- it feels like a bait-and-switch.
Instead, choose an image that reflects the link's contents. If you're struggling to convey an abstract concept, feel free to add text to your image to describe it. The above example didn't need that -- the icons themselves conveyed what was behind the link: free downloadable icons. If you want an example of a great pin with text on it, check the one out below. Without the title on the image, the pin wouldn't nearly be as strong -- people would have no idea that this was an ebook they could download.
Moral of the story here: make sure that people know what's inside the pin so they feel enticed to click. If you feel like the image isn't pulling its weight on its own, add text. That little bit of text could make the difference between someone clicking on your pin or not.
3. Links With UTM Parameters
Although you might provide a link to the content you're promoting in the pin's description (which we'll talk about in step 5, below), it's just as important to include this link in the image you're pinning. If the image you're pinning already lives somewhere online, this is easy to do -- you'll simply add the website link first, then select the image you want to pin once this link has been entered.
What Pinterest won't prompt you to do, but you should do anyway, is add a UTM code to the end of this link. UTM codes, also known as tracking tags, allow you to identify where your website traffic came from if it didn't come organically from a search engine. In this case, you can add a UTM code indicating when your website traffic came from a Pinterest pin.
New to using UTM tracking codes? Get the low-down on how they work here.
4. Attribution
Attribution goes both for pins you create yourself and pins you post from other people's content. It's really easy to get content stolen on Pinterest, so you want to make sure you're always giving credit where credit is due and protecting yourself if others won't do the same for you.
It's pretty simple: If you're pinning someone else's content, give them credit in the description or the link you're connecting to your pin. If you're pinning your original content, add your logo or website URL in the photo -- if folks share your content without attributing it to you, people will still know where it came from. In the example above, this is a design HubSpot made, so we threw up our logo in the background -- it's not intrusive, but it helps identify the image as ours.
5. Snappy, SEO-Rich Description
A pin's description is one of the most overlooked parts of a pin -- scroll through Pinterest and you'll see lots of pins without any at all. Even though others are doing it, you shouldn't. If you're trying to use Pinterest to build your business, you can't forget the description -- it could have too big of an impact on your results.
Keep your copy concise, yet enticing. Tell readers what they'll get if they click on the pin. Pinterest allots up to 500 characters of space for a pin description, reserving the first 50 characters for what will appear on most user's Pinterest newsfeeds. All things considered, pins with descriptions around 100 characters are often ideal to maintain brevity while enticing users to click your pin.
Also make sure you're using SEO-friendly terms to describe the content behind the pin so your pins can successfully rank in search engines. Notice in the example above we also include the phrase "we're hiring" in Spanish to optimize the pin for keywords used by Spanish-speaking professionals -- the target audience for this particular pin.
6. Call-to-Action
Even on Pinterest, where it's a standard practice to click on links, people need a little overt reminder to click. Even though you have a link in the pin itself, add a little call-to-action in the description to the pin's link -- it could pay off big-time for you.
*Rich Pin Information
I know what you're thinking: Why is this one a star instead of a number? Did Ginny make one huge typo in the middle of her blog post?
Nope -- this is a special placeholder for Rich Pins. You'll notice that the image isn't one. Rich Pins pull extra data into a pin whenever you or someone else pins specific things from your website. If you're a web developer, you can apply to Pinterest for permission to feature information on products, movies, articles, recipes, or places. Here's an example of a Rich Pin featuring an adorable greyhound:

See that information right below the title of the pin? You can see that this wall art is in stock and costs $15 without having to click through.
The reason I included this as a star is because not all businesses can realistically use Rich Pins ... but if your business can, you absolutely should. Rich Pins can perform much better than their not-so-rich counterparts. In fact, according to Shopify, 39% of "pinners" on Pinterest are more likely to be active shoppers than non-pinners, and 93% of Pinterest users are on the platform to explore potential purchases.
If you're looking to optimize your Pinterest presence to the fullest and have content that could fall in a Rich Pin category, figure out how to get them enabled for your website's content.
7. A Lot of Other Great Pins
This is kind of a trick element because it's not technically in the pin itself, but because of the way the pin layout looks when expanded, I had to include it here. Try clicking on a pin in Pinterest -- when you expand the pin, all the other pin images from the user's board are pulled in. This gives you more opportunities to engage with your Pinterest followers all without doing a thing.
To make sure you're optimizing the other pins on the board, all you have to do is follow all of the tips above for each pin. With a little more mindfulness when pinning, you'll have more and more opportunities to grow your business through Pinterest. Sounds like a sweet deal to me.

Pinterest Marketing
![18 Pinterest Metrics to Start Tracking ASAP [+ Tools]](https://53.fs1.hubspotusercontent-na1.net/hubfs/53/pinterest-analytics.webp)


![Key Pinterest Marketing Tools and Tips You Need [+ Recs for Small Businesses]](https://53.fs1.hubspotusercontent-na1.net/hubfs/53/marketer-using-pinterest-marketing-tips-for-strategy%20(1).jpg)

.jpg)
.jpg)