WordPress Custom Fields
WordPress custom fields can be assigned to a post or page to provide arbitrary extra information known as metadata. Metadata is handled with key/value pairs, in which the key is the name of the metadata element and the value is the information that will appear in the metadata list on the post.
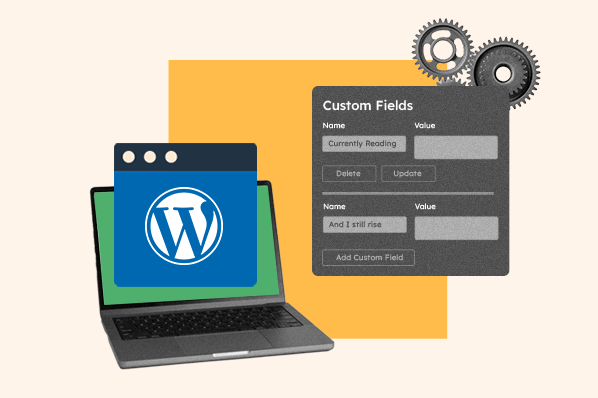
Below are some examples of WordPress custom fields:
- Mood: Inspired
- Currently Reading: And Still I Rise
- Listening To: Calm Down
- Weather: Partly Cloudy
If you’d like to add this type of structured data to your posts and pages, then check out the process for adding custom fields in your WordPress dashboard below.
How to Use Custom Fields in WordPress
Below is how to use custom fields in WordPress for the first time. If you or another user has already used custom fields on a WordPress website, then the process will vary slightly.
- Log in to your WordPress dashboard.
- Navigate to a post or page. You can create a new one, or edit an existing one.
- Click the three dots button at the top of the right sidebar.

- Scroll down and click Preferences.

- A new window will pop up. Click Panels.

- Toggle the button for Custom Fields. This will automatically reload the page.

- Now scroll down to the bottom of the post to the section labelled Custom Fields.

- To create a new Custom Field, fill in the text entry field titled Name. This will be the “key.”
- Now fill in the text entry field titled Value. This will be the value assigned to the key.

- Click the Add Custom Field button to save this metadata for that post.
- You can continue adding custom fields. When you’re ready, click Update.

- If you create or edit another post or page, then you will already see the Custom Fields section. The Name, or Key, field will now be a drop-down list featuring the previously entered Custom Fields.

While this process is not difficult, it’s not the most user-friendly or flexible. For these reasons, many users opt to use the Advanced Custom Fields plugin over the native custom fields functionality in WordPress.
Below let’s take a closer look at what this WordPress plugin is capable of, and how to use it.
Advanced Custom Fields Plugin
Advanced Custom Fields, or ACF, is a plugin designed to enable WordPress developers to have more control over their custom field data. The free version allows users to quickly and easily add 30+ fields all over your WordPress dashboard — including to posts, users, taxonomy terms, media, comments and custom options pages — and display the custom field values in any theme template file.
Supported field types include text (which is the only type supported natively in WordPress), range, button group, checkbox, select, true/false, color picker, date picker, time picker, link, and more. That means you have more control over your custom fields with ACF than with WordPress’s built-in functionality.
Advanced Custom Fields Pro
Advanced Custom Fields Pro is the premium version of ACF. It offers even more fields, functionality, and flexibility than the free version. Here are the pro features below:
Repeater Field
With this field, you can create a set of sub fields which can be repeated again and again.

ACF Blocks
Using this powerful PHP-based framework, you can develop custom block types for the Gutenberg Editor.

Flexible Content Field
This field provides multiple layout and sub field options that you can use to define, create, and manage content.

Gallery Field
With this field, you can build fully customisable image galleries.

Clone Field
Using this field, you can reuse existing fields and field groups to more efficiently manage field settings.

Options Page Feature
With this feature, you can add custom admin pages to edit ACF fields.

To understand how to use the Advanced Custom Fields plugin, we’ll walk through how to create and display a set of custom fields on your WordPress posts below.
- Create a field group.
- Add custom fields to that group.
- Edit fields in the WordPress post editor.
- Display fields on the front-end of your site.
How to Use Advanced Custom Fields
As an example, let’s say you run an ecommerce website and use your blog to promote popup events. With each blog post, you want to share an event’s:
- Date
- Start Time
- End Time
- Location
- Image Thumbnail
To do so, you’ll have to add five custom fields. Let’s walk through the process below.
Step 1: Create a field group.
To start, click Custom Fields > Add New from your admin screen. Then give this group a name in the title box.
Skip to Location where you can decide which edit screens will use this group of custom fields. For this example, you want to show this field group on all posts so create a rule that says “Show this field group if Post Type is equal to Post.”

Now skip down to Settings, where you can select the style, position, label placement, instruction placement, and more of your field group.

Step 2: Add custom fields to that group.
Now it’s time to add the custom fields that will make up this field group, and appear when editing a post.
For each of the five fields you want to add, click the +Add Field button and fill in the field label, name, and type at least.

Once you complete these steps for date, start time, end time, location, and image thumbnail custom fields, then click Publish. The page will automatically re-load.

Step 3: Edit fields in the WordPress post editor.
Now that the field group has been published and set to appear on Post edit screens, you can edit the field values by navigating to Posts > Add New. In this screen, fill in a value for each custom field.

When you’re done making changes, click Publish.
This information will now be stored in your database. However, it won’t appear on the front end of your site. See how the post appears if you click Preview Changes:

Step 4: Display fields on the front-end of your site.
To display Advanced Custom Fields data on the front end of your site, you can edit your theme’s template files or use a shortcode. Editing a template file requires some technical knowledge, but it’s the most effective and scalable way to display ACF data. Using a shortcode is a simpler method, but much more manual. You’ll have to add a shortcode to every post that you want to display ACF data on the front-end.
For these reasons, we’re going to walk through the process of editing your theme’s template file to display custom fields on the front-end of your site.
Depending on the location you set for your field group and your theme, you’ll either edit the single.php or single-{$post_type}.php file, or use template parts or filters to customize the HTML of your WordPress posts so they display custom fields on the front-end.
This example set the location of the event field group to all posts, then you’ll edit the single.php template and add the following code:
<?php

get_header();
the_post();


// vars
$location = get_field('location');
$thumbnail = get_field('thumbnail');

?>

<div class="wrap">

<div id="event-hero">

<?php if( $location ): ?>
<div id="event-map" class="acf-map">
<div class="marker" data-lat="<?php echo $location['lat']; ?>" data-lng="<?php echo $location['lng']; ?>"></div>
</div>
<?php endif; ?>


<?php if( $thumbnail ): ?>
<img class="thumbnail" src="<?php echo $thumbnail['url']; ?>" alt="<?php echo $thumbnail['alt']; ?>" />
<?php endif; ?>

<h2><?php the_title(); ?></h2>
<h3><?php the_field('date'); ?> from <?php the_field('start_time'); ?> to <?php the_field('end_time'); ?></h3>
<h4><?php echo $location['address']; ?></h4>

</div>

<div id="primary" class="content-area">
<main id="main" class="site-main" role="main">
<?php the_content(); ?>
</main>
</div>

</div>

<?php get_footer(); ?>
Notice how it includes the_field() function to display the value of specific fields, including the date, start time, and end time. It also includes functions for displaying the location and thumbnail fields.
You can go to your Theme Editor, select Single Post, and copy and paste this code before the closing <?php tag. Then click, Update File.
However, it’s recommended that you create a child theme since any modifications you make directly in your theme editor will be lost the next time you update your website. Once created, you’d follow the same process of adding the code snippet above to the single.php file in your child theme’s directory.
When you’re done, go to your post and scroll to the bottom. The result will look something like this on the front end of your site:

Now you know how to add and display Advanced Custom Fields data on WordPress posts. To learn how to add and display ACF data on WordPress categories, menus, users, widgets, and other places, check out ACF’s documentation.
Bonus Step: Translate the Custom Fields
After adding the custom fields to your WordPress site, consider translating them for your global visitors. Doing so demonstrates your commitment to ensuring a seamless user experience for visitors who speak various languages.
Translating pages and custom post types on your WordPress site is simple with a multilingual plugin. But once you set up the custom fields on your site, it’s equally important that you can translate the data coming from them. You need a translation plugin that can handle the extra functionality for this.
Luckily, that’s where ACFML (Advanced Custom Fields Multilingual) comes into play. An add-on for the WPML plugin, ACFML was designed to work with features included in both the free and premium versions of ACF. More importantly, ACFML is beginner-friendly. Thanks to a straightforward user interface and intuitive translation options, adding, editing, and maintaining ACF translations is seamless – no matter your level of expertise.
Taking Content Editing to the Next Level
The ACF plugin provides more control over the back and front end of your WordPress site. With it, you can add custom fields virtually anywhere in your WordPress dashboard and display them virtually anywhere on the front end. This custom fields data can help enrich your posts, taxonomies, media uploads, and more.

WordPress Plugins