Your host will probably give you the standard line: “DNS propagation takes 24-72 hours. Wait.” But did you know that by flushing your DNS, you might be able to end that painful waiting game immediately? (Assuming that the DNS propagation is complete and nothing else is wrong, such as improper nameserver configurations.)
Clearing your DNS cache can also protect your privacy, resolve internet connectivity issues, and prevent DNS spoofing. Get ready to learn, as I’ll walk you through how to clear DNS cache (flush DNS), what it means, and why you might want to try it.
Table of Contents
How to Flush DNS
The process for flushing DNS varies depending on your computer’s operating system. Let’s go over the process for the major systems below.
How to Flush DNS on Mac OS X
The process for flushing your DNS cache on a Mac computer is similar, regardless of the operating system version. But for step 6, you’ll need to know which version since the command prompt varies.
1. Open Finder.
2. Click Applications.
3. Scroll down to the Utilities folder and click it.
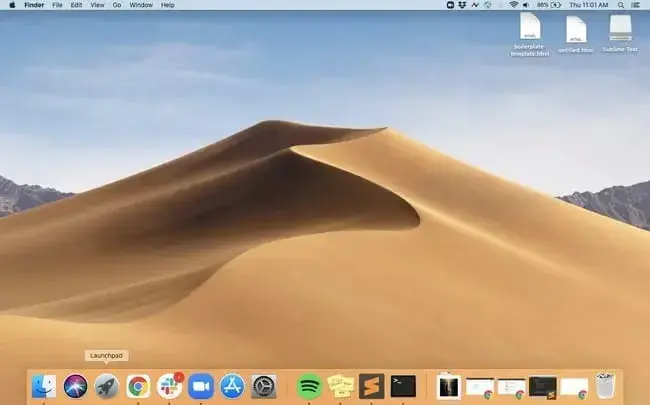
4. Open Terminal.
5. To open Terminal, you could also simply open Launchpad and type in “Terminal” in the search bar.
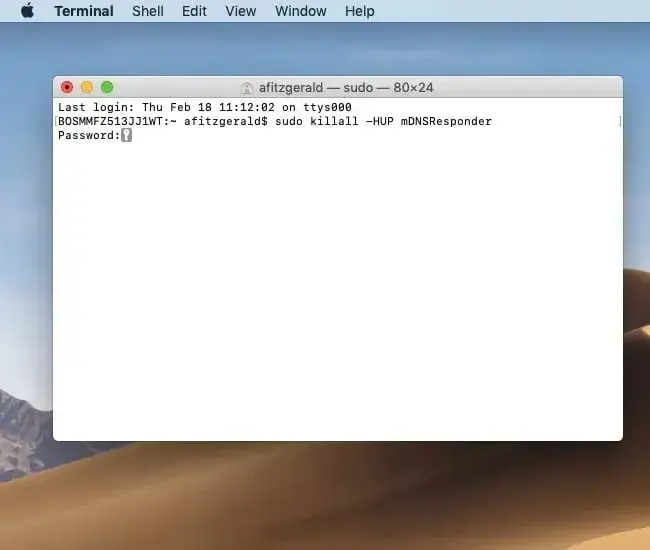
6. In the Terminal window, type in one of the following commands based on your software version:
- Sonoma, Ventura & Monterey: sudo dscacheutil -flushcache; sudo killall -HUP mDNSResponder
- Lion, Mountain Lion, Mavericks, El Capitan, Sierra, High Sierra, Mojave: sudo killall -HUP mDNSResponder
- Yosemite: sudo discoveryutil mdnsflushcache
- Tiger: lookupd -flushcache
7. Hit Enter.
8. Type your password and press Enter again.
9. You might see a message confirming that the DNS cache has been reset.
.png)
Free Website Optimization Checklist
This website optimization checklist will help you perfect your website's:
- Performance
- SEO
- Security
- Mobile Performance
Download Free
All fields are required.
Form not available
How to Flush DNS on Windows
How to Flush DNS on Windows 10 & 11
Here’s the process for flushing your DNS cache on Windows 10 and 11. These steps should also work for Windows 8.1.
1. Click the Start button. It’s the Windows logo in the bottom left corner.
2. Select Command Prompt (also called “Terminal”).
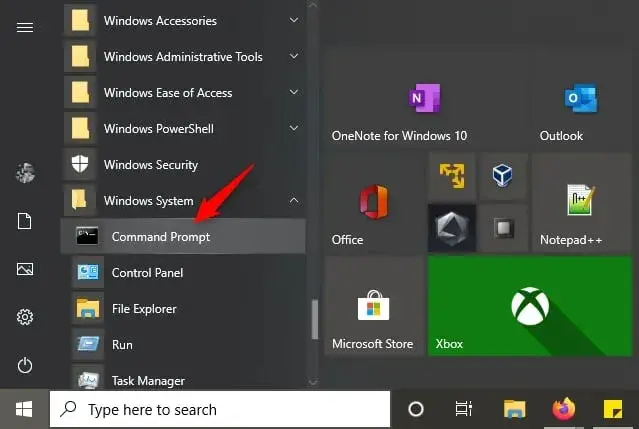
3. To open the Command Prompt console, you could also simply press the Windows and R keys at the same time and enter cmd.
4. You may see a popup asking if you want to allow Command Prompt to make changes to your computer. If you do, select Yes.
5. If you are asked for an administrative login at this point, then you’ll need to contact your system administrator to proceed.
6. In the command prompt window, type ipconfig /flushdns.
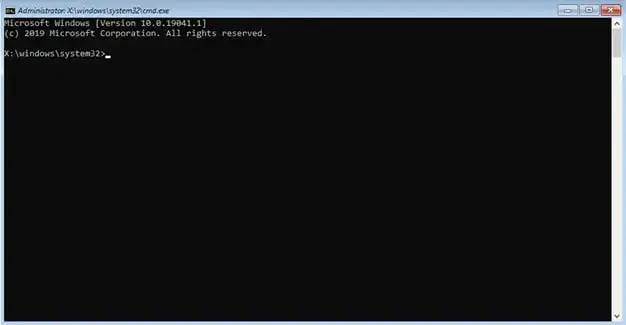
7. Press Enter.
8. You should see a message confirming that the DNS Resolver Cache was successfully flushed.
How to Flush DNS on Windows 7
The process for flushing your DNS cache on Windows 7 is nearly identical to that of newer versions.
1. Click the Start button. It’s the Windows logo in the bottom left corner.
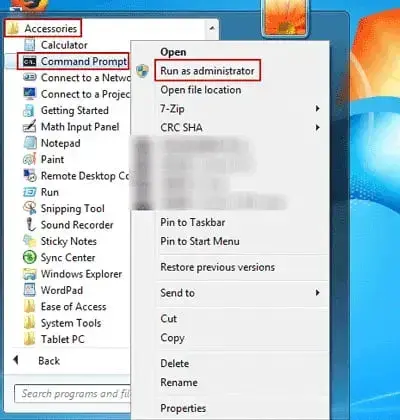
2. Click All Programs > Accessories.
3. Find Command Prompt. Right-click it, and choose Run as administrator.
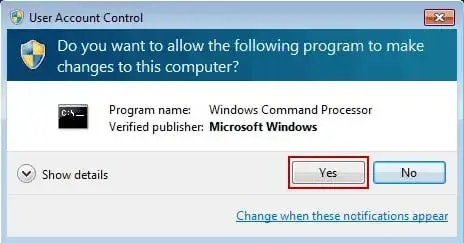
4. You may see a popup asking if you want to allow Command Prompt to make changes to your computer. If you do, select Yes.
5. If you are asked for an administrative login at this point, then you’ll need to contact your system administrator to proceed.
6. In the command prompt window, type ipconfig /flushdns.
7. Press Enter.
8. You should see a message confirming that the DNS Resolver Cache was successfully flushed.
How to Flush DNS on Linux
Pro tip: Unlike Windows and Mac computers, Linux systems don’t necessarily have a DNS cache by default. For that reason, it’s a good idea to first check that your Linux computer has a local DNS cache.
If you try to flush the cache and get an error message, it’s likely that you don’t have a DNS service installed.
Below is an example from a Linux Mint forum of what that error might look like. The user did not have the DNS service systemd-resolved installed, so the command to flush the DNS did not work.
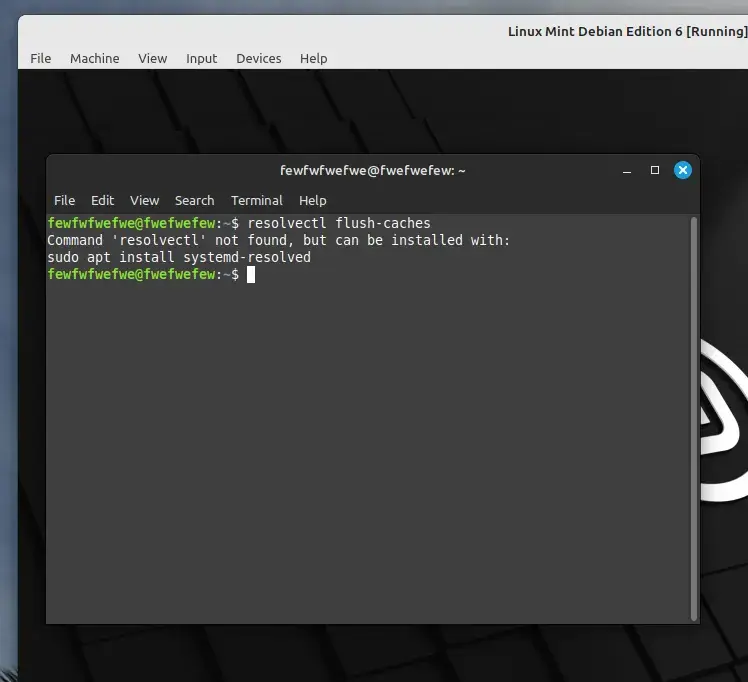
Additionally, each distribution might use a different DNS service to store DNS records locally. Depending on the service, you can either clear the cache or restart the service.
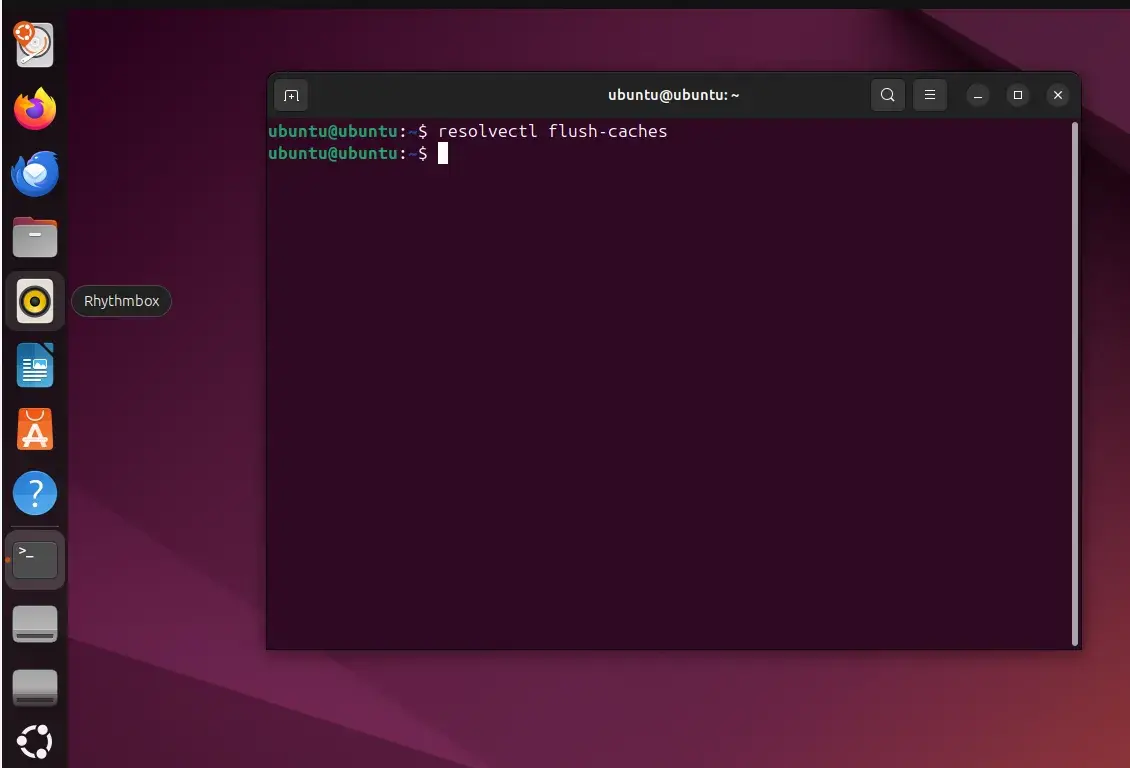
1. Press Ctrl+Alt+T on your keyboard to launch a terminal window.

2. In the Terminal window, type in one of the following commands based on the service your Linux system is running.
- Systemd-resolved: resolvectl flush-caches
- NCSD: sudo /etc/init.d/nscd restart
- Dnsmasq: sudo /etc/init.d/dnsmasq restart
- BIND: You may have to try multiple commands:
- sudo /etc/init.d/named restart
- sudo rndc restart
- sudo rndc exec
3. You may be asked to enter your password.
4. The service might stop, then start again before sending a confirmation message that the cache was successfully reset.
Here’s what the flush DNS command looked like when I tried these steps on a Linux virtual machine running Ubuntu 24.04.1:
How to Clear DNS Cache on Chrome
Google Chrome is not an operating system, but it does keep a DNS cache of its own. This is separate from your operating system’s cache and from Chrome’s browser cache.
If Chrome is set as your default web browser, then you’ll need to clear both Chrome’s DNS cache and your operating system’s DNS cache.
Here’s the process:
1. Type the following address into your browser’s address bar: chrome://net-internals/#dns
2. Click the Clear host cache button.
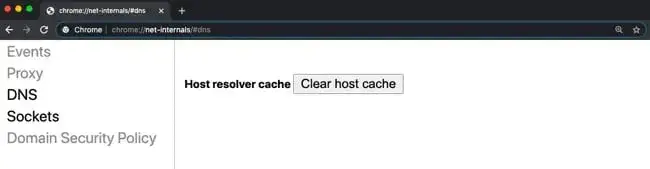
3. All done!
What is DNS cache?
A DNS (Domain Name System) cache is a record of all queries made to a DNS server from your browser.
When you enter a URL into your browser, your browser sends a request to the DNS server asking for the URL’s IP address. After your browser receives the IP address, it can then load the correct website in your window.
But what happens when you try to access the website a second time? Does the browser have to make a whole new request to the DNS server?
No. By default, most operating systems will cache IP addresses and other Domain Name System (DNS) records in order to fulfill future requests more quickly. This is your DNS cache.
The DNS cache prevents browsers from having to make a new request so that, instead, it can use stored information to load the website. This reduces server response times, making the site load more quickly.
Free Website Optimization Checklist
This website optimization checklist will help you perfect your website's:
- Performance
- SEO
- Security
- Mobile Performance
Download Free
All fields are required.
Form not available
What does flush DNS do?
Flushing DNS will clear any IP addresses or other DNS records from your cache. This can help resolve security, internet connectivity, and other issues.
For example, when I type in https://lonezscents.com/ in my browser’s address bar for the first time, the browser has to ask DNS servers where to find the site.
Once it has that information, the browser can store it in its local cache. Then, the next time I type in that website address, the browser will look for its DNS information in the local cache first and be able to find the site more quickly.
The problem is that sometimes dangerous IP addresses or corrupted results can be cached and need to be removed. The DNS cache can also impact your ability to connect to the internet or cause other issues.
Whatever the reason, all major operating systems allow you to force the process of clearing this cache — or “flushing DNS.”
It’s important to understand that your DNS cache will clear itself out from time to time without your intervention. That’s because the DNS cache — in addition to saving all information that’s relevant to identifying and finding a website — also saves a component called TTL, or time to live.
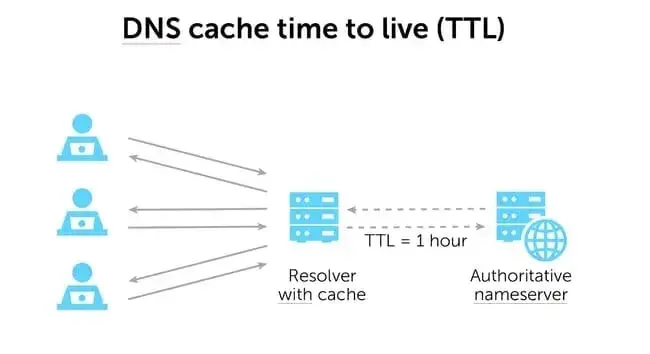
TTL specifies a period of time (in seconds) in which the DNS record for a site remains valid. Within this time period, any queries to the website are answered from the local cache without the help of the DNS server. Once the TTL expires, the entry will be removed from the cache.
However, there are reasons you may need to force a DNS flush rather than wait for the TTL of all the entries to expire. Let’s take a look at why below.
Why would you flush DNS?
There are a few reasons you might need to flush your DNS cache: technical problems, security, or data privacy. Let’s briefly cover each one below.
1. You’re seeing a 404 error or an old version of your website.
One reason you might want to clear DNS cache is if you recently changed hosts, launched a new website, or added a CDN or firewall. These are all reasons that clients have contacted Shane Larrabee, founder of WordPress hosting and support provider FatLab.
“Typically, clients don’t know that their local DNS cache needs to be flushed,” he says. “Instead, they call complaining that part or the whole website is not loading or loading with a different version than expected.”
This happens because the DNS information on your computer may not get updated right away. So it’ll show a 404 error or an outdated version of a site when you try to visit from your browser.
It's a situation HubSpot staff writer Amy Rigby once found herself in. "A freelance client hired me to migrate her WordPress.com blog over to self-hosted WordPress on SiteGround,” Rigby explains. “After the migration, when I tried to log into her site to make edits, the old website loaded — which sent me into a panic.”
Rigby used an online tool called whatsmydns.net, which showed her that the DNS had already finished propagating. That meant the migration was indeed successful, but her computer was “stuck in a DNS cache,” as her WordPress support person explained to her at the time.
In cases like Rigby’s, the information will eventually get updated in your local DNS cache, but you don’t have to wait. You can force the DNS cache to clear and get the website to load in your browser immediately.
“I wish I’d known this earlier,” she adds.
Pro tip: If this is the case for you, try clearing your browser cache first. Flushing the DNS isn’t the first fix Larrabee would reach for.
“If we know that the DNS records have changed recently, we will first have them clear their browser cache (which includes DNS information),” he says. “This rules out the first-level DNS cache plus the browser cache. If that does not resolve the issue, we will ask them to be patient if changes to the DNS records are recent.”
Why not just immediately clear the DNS cache?
“Clearing the computer DNS is a bit tricker and typically requires opening Terminal on a Mac or Command on a PC and running a command,” he explains. “This is not hard, but the terminal can be intimidating; therefore, we typically have to walk a client through it.”
Additionally, there are other reasons why you might not be seeing your updated website in your browser.
“I have seen scenarios where IT folks have hardcoded non-expiring DNS records in place for the website, so no matter what, the client cannot see the changes within their corporate system until IT changes those,” says Larrabee. “I have also seen corporate IT systems that override TTLs for a very long time in the name of network efficiency.”
For that reason, sometimes, all we can do is wait.
Free Website Optimization Checklist
This website optimization checklist will help you perfect your website's:
- Performance
- SEO
- Security
- Mobile Performance
Download Free
All fields are required.
Form not available
2. You want to prevent DNS spoofing.
DNS spoofing — also known as DNS cache poisoning — is an attack in which bad actors gain access to your DNS cache and alter the information in order to redirect you to the wrong sites.
In some cases, they will redirect you to a fraudulent website that resembles its intended destination so that you enter sensitive information, like your online banking login information.

Pro tip: While flushing the DNS cache can help, there are multiple other ways to enhance your website’s security. Here's a free website safety checklist we put together with the help of security experts.
3. You want to keep your search behavior private.
When you think of tracking user behavior on the internet, you probably think of cookies — but the DNS cache can reveal your search history as well.
That’s because the DNS cache is designed to act like a virtual address book, storing the information of the websites you visit regularly.
To keep this information away from data collectors or bad actors on the web, you might decide to flush your DNS cache.
Flushing Your DNS Cache: Just One Step to Try as You Troubleshoot
Flushing your DNS cache is not a common task, but there are some situations in which you might want to try it.
It can help prevent phishing schemes or other attacks on your computer, direct you to the most up-to-date version of a website, restore your internet connection, and keep your search behavior private.
The best part is how easy the process is. Following the steps above can help you perform a DNS flush quickly and easily, no matter your computer’s operating system.
That way, you can move on to your other website development tasks.
This article was written by a human, but our team uses AI in our editorial process. Check out our full disclosure to learn more about how we use AI.
Editor's note: This post was originally published in February 2021 and has been updated for comprehensiveness.
Free Website Optimization Checklist
This website optimization checklist will help you perfect your website's:
- Performance
- SEO
- Security
- Mobile Performance
Download Free
All fields are required.
Form not available
Website Development


![How to make a website with user accounts and profiles [with WordPress, Wix, and more]](https://53.fs1.hubspotusercontent-na1.net/hubfs/53/%5BUse%20(3).webp)
![How to build a Google Site that looks good and drives business [templates & examples]](https://53.fs1.hubspotusercontent-na1.net/hubfs/53/Website%20Redesign%20Terms.png)