
While BlueHost is an expert in web hosting, WordPress is a more popular content management system. By choosing both for your website, you can confidently create an attractive, user-friendly site that'll provide an excellent experience for your visitors.
In this post, we'll discuss how you can create an effective WordPress blog using BlueHost as your hosting provider.
How to Create a WordPress Blog With BlueHost
1. Choose a domain name.
One of the first steps you need to take to create your WordPress blog is choosing a domain name. Your domain name is the root name that your website will live on. For example, "HubSpot" is the domain name in "blog.hubspot.com."
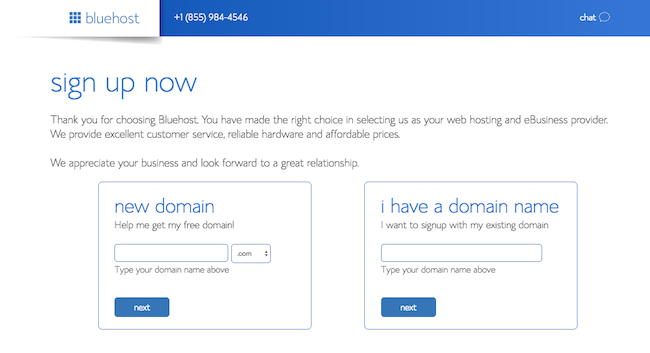
You'll also want to ensure your domain name isn't the same as or too similar to other existing websites. BlueHost does offer a domain name for free for your first year, so you'll save money as you get started with your site.
2. Purchase a hosting package.
After you input a domain name, BlueHost will prompt you to choose the package that's right for your business. The three tiers you can choose from are Basic, Plus or Choice Plus.
The tier that you choose will depend on the needs and goals of your website. If you need a simple website and want to get started quickly, the Basic plan is a good option. If you have a business that's scaling rapidly, the Plus or Choice Plus will offer better support for the number of storage and subdomains you'll need to meet traffic demands.
3. Install WordPress on your website.
BlueHost prides itself on how easy it is to install on WordPress websites.
After purchasing your domain, navigate to the control panel. From the BlueHost cPanel, visit "MOJO Marketplace" and then select "One-Click Installs." WordPress will be the first button to appear on this page.
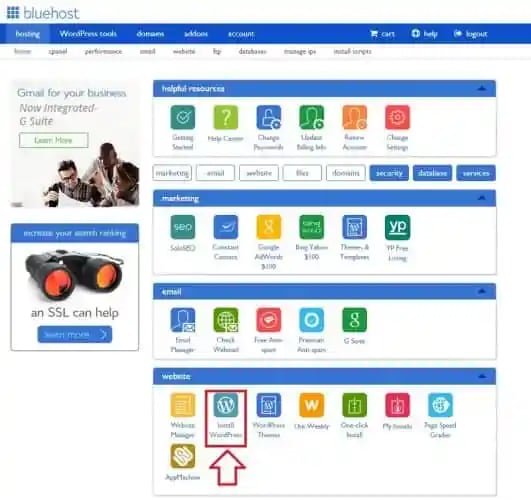
Once there, click the WordPress icon, then click the green "Start" button. You'll then choose the domain to install into WordPress. Under the ‘Advanced Options,' BlueHost recommends setting up your own unique username and password for installation. Review the terms and conditions, then click "Install Now."
4. Add a WordPress theme.
Once the installation process is complete, sign in to your WordPress site using your admin username and password. You should come to a page that invites you to choose a theme for your website.
It's always good to start with a free theme, and as you add elements and content to your site, you move to a more customizable, premium theme later on.
There are many modern and free themes, but if you don't see one you love, you can upgrade to premium themes for more choices and customization features. There's no rush to select a theme, as you can always return to this page later and find the right one for your site.
5. Explore the WordPress dashboard.
After choosing a theme, you'll be greeted by the WordPress dashboard. Take your time to get familiar with this interface, as it will help you control, manage, customize and update your site. If you're a new user, there'll be a section filled with links that help you familiarize yourself with some of the most common WordPress features.
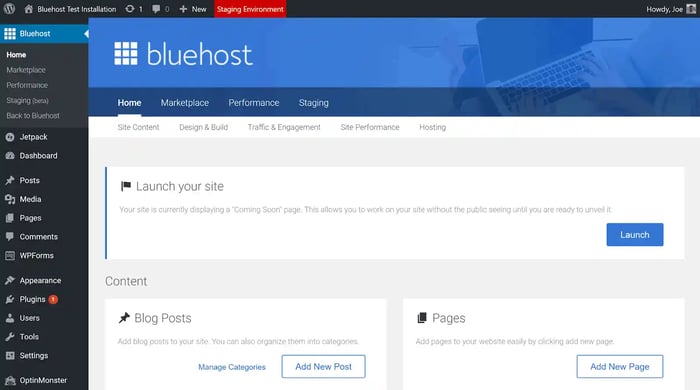
The dashboard is where you'll go to review comments, compose new blog posts, add pages and install integrations. Plugins, which add more functionality to your site, can be managed from the WordPress dashboard as well.
6. Update the permalink structure.
One of the most important steps you should take is changing the permalink structure. This might be handled automatically with BlueHost, but it's best to double-check; otherwise, you'll end up with strange URLs, which will ultimately hurt your site's SEO.
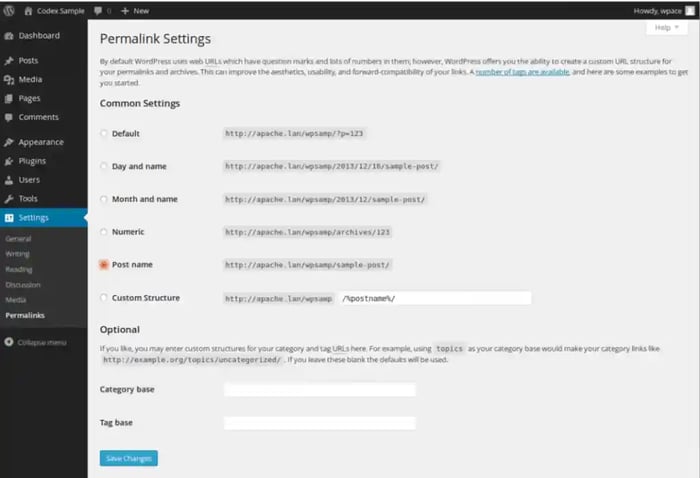
From the dashboard, go to "Settings," then "Permalink." You'll find several options for the permalink structures; make sure "Post Name" is selected. This way, your "About" page link will read, "www.yoursite.com/about" rather than, "www.yoursite.com/12345?."
If the default setting is already set to post name then, it must have been done by BlueHost during installation. You don't need to change anything then, but it is always best to check. Now your post URLs will be easier to track and remember.
7. Customize your site's layout.
Now, it's time to bring your website to life with page layouts and customized elements, like social media buttons and color schemes. Even though you have chosen a theme with preloaded color palettes, you can still adjust them to suit your needs for specific pages.
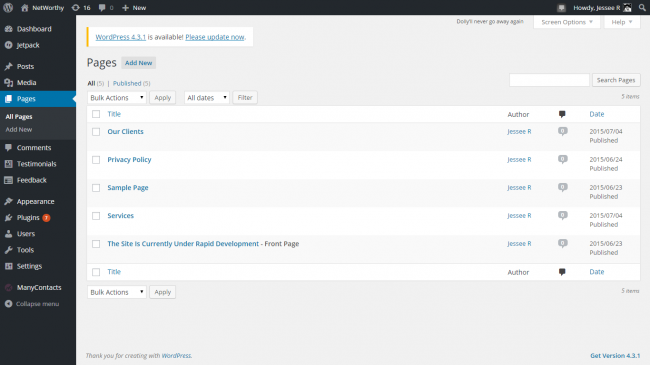
You also need to add webpages, which will be home to various segments of information. Some common pages include "About," "Contact," and "Blog." Be sure to add content to each page before you publish them, as blank pages will result in disappointing user experiences. Let them know your site is at least "under construction" before you get your visitors' hopes up with a link to your webpage.
8. Launch your website.
Once you've perfected the theme, color palette, page structure, and page content, it's time to take your website live.
Moving forward, be sure to keep your website content up-to-date to best serve your audience. You may also consider installing additional sections, like a blog, to help you create a better experience for your users.
Web Hosting

.jpg)
.webp)