.png?width=112&height=112&name=Image%20Hackathon%20%E2%80%93%20Vertical%20(50).png)
Table of Contents
What to Do Before You Design Your Website
Vision: Know what your business is.
First and foremost, you must define your business’s purpose and brand identity. Without these elements pointing you north, you’ll be lost at sea in crafting a successful website (let alone a strong business plan and effective marketing).
Niche down to one vision, then do it justice.
My Example Website: Vision
I’m going to create a website for a fictional business to walk you through the process. It’s an ecommerce store I’ve dubbed “Finn + Ellie” that sells baby clothes and other nursery products.
Purpose: Know why you are doing what you do.
Shoppers are getting more intentional with how they spend their money, and they want to know if you share their values. You don’t have to please everyone, so don’t try to have it both ways.
Be true and honest about your mission, and the people who understand and love your product will show their appreciation with their financial support.
That said, gild it! Put the best words to your best intentions to convince those adjacent to your values as well.
My Example Website: Purpose
The purpose of my ecommerce store is to sell baby clothes that channel the cottagecore aesthetic while also sourcing organic materials and encouraging sustainable living.
.png)
Free Website Design Inspiration Guide
77 Brilliant Examples of Homepages, Blogs & Landing Pages to Inspire You
- Agency Pages
- Ecommerce Pages
- Tech Company Pages
- And More!
Download Free
All fields are required.
Form not available
Scope: Know how you plan to accomplish your purpose.
Lay it out for your visitors to see. Tell them how you plan to pursue your values through the work of your business. It’s not enough to hold values — you want to show your visitors that you live them.
My Example Website: Scope
My store will not only sell new products but also create a network for customers to re-sell their preloved purchases to encourage re-using the baby clothes.
Design: Imagine a fitting style and color scheme.
Is your brand stylish? Martha Stewart stylish or Jean-Michel Basquiat stylish? Does your business lend itself to jewel tones, neon brights, pastels, or black and white? Is it sharp or soft?
Think about the best way to introduce and express your brand visually to people who have never heard of it before. Here’s an excellent resource for creating your brand assets and a great video about color and how you can use it for designing websites:
My Example Website: Design
I’d go for earth tones to align with my rustic clothing design and to communicate my green values.
Branding: Design a simple logo.
You will undoubtedly need a simple image or font to represent your brand that you will incorporate on every channel on which you have a presence — in other words, a logo. When you hit a link from your social channel to your website, or vice versa, it should be obvious to anyone with eyes that they landed in the right place because it looks and feels like the last place.
My Example Website: Branding
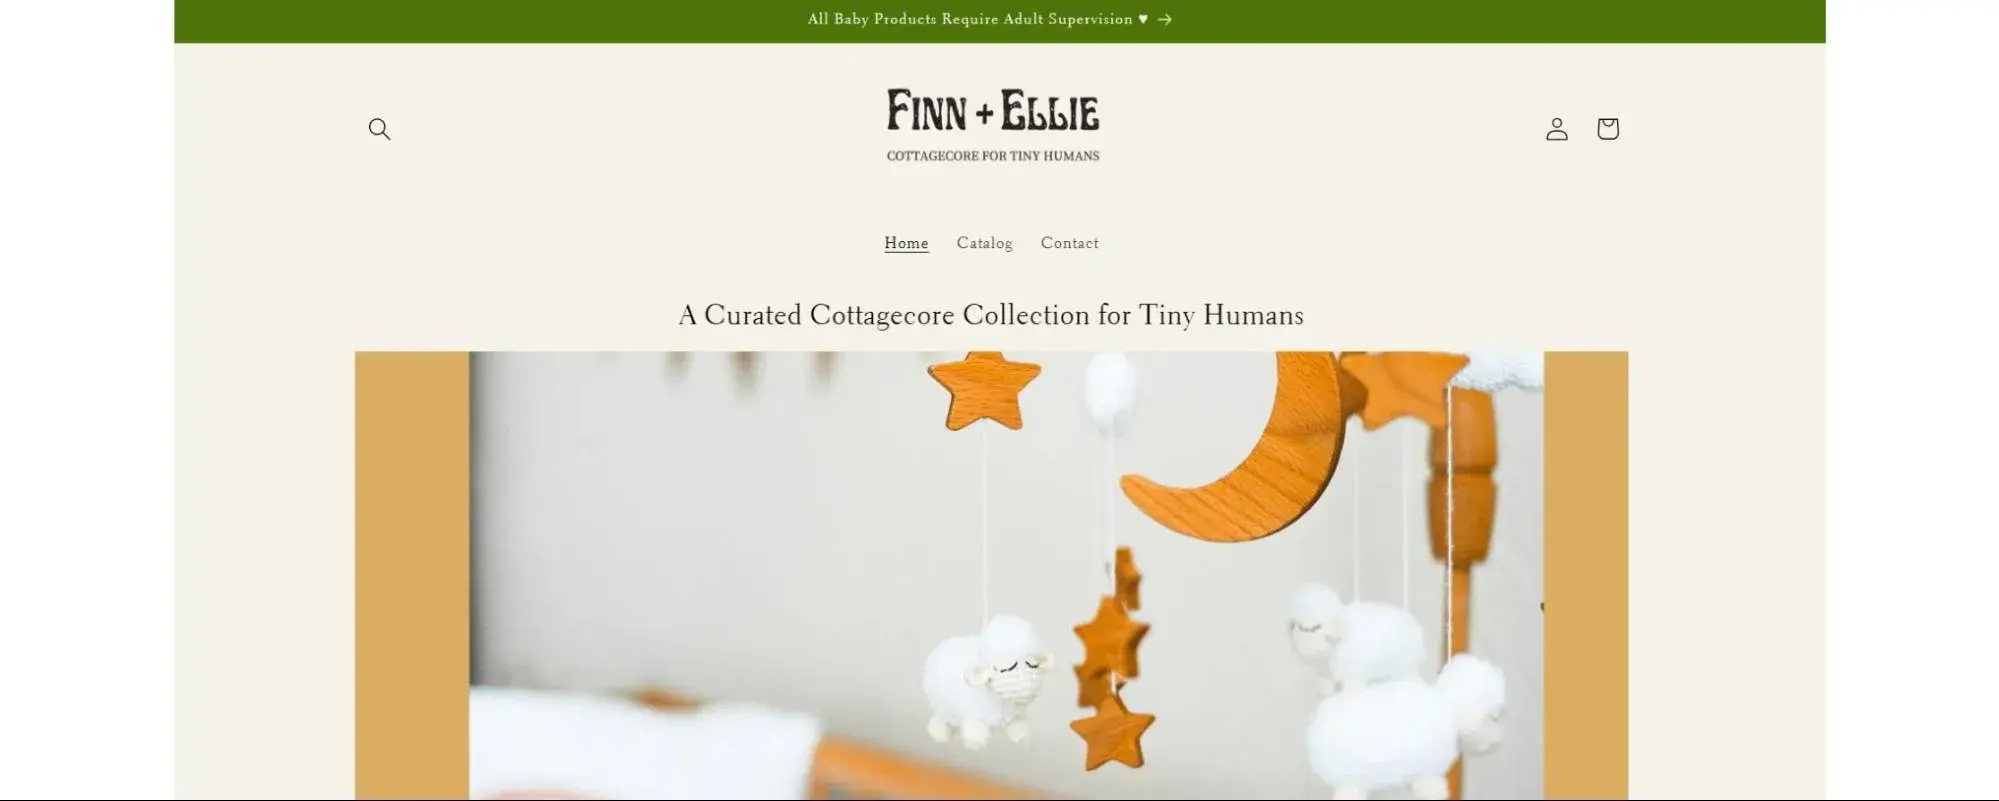
Here’s my logo for Finn + Ellie:
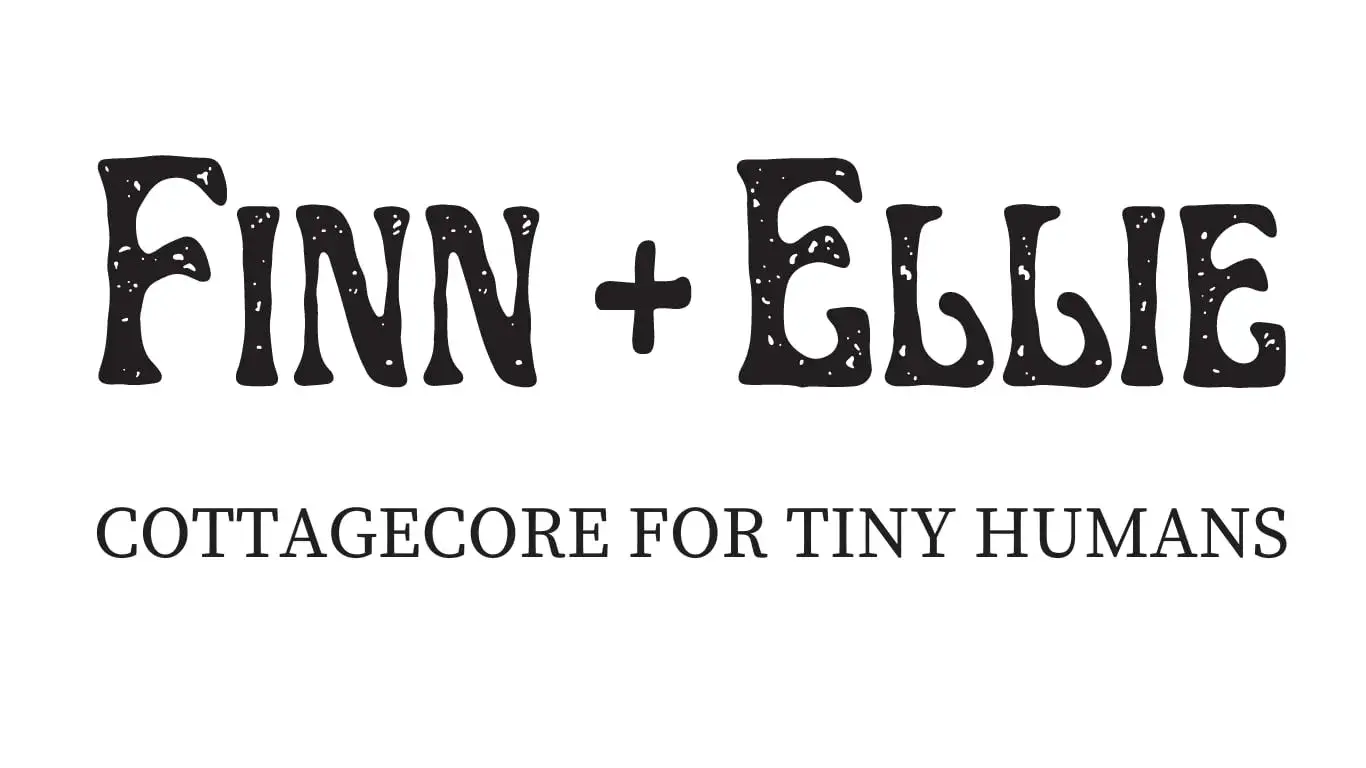
I chose this font because I think it captures the cottagecore aesthetic really nicely. I stuck with a simple text-based logo with a brief explanation of my brand’s purpose.
Visuals: Gather photos and other visual assets.
Finally, gather everything you can in terms of product photos, promotional artwork, customer reviews, etc. Pull together any kind of proof you can show in order to tell the story of your brand, what you do, for whom you do it, etc. You will need them to make your website yours.
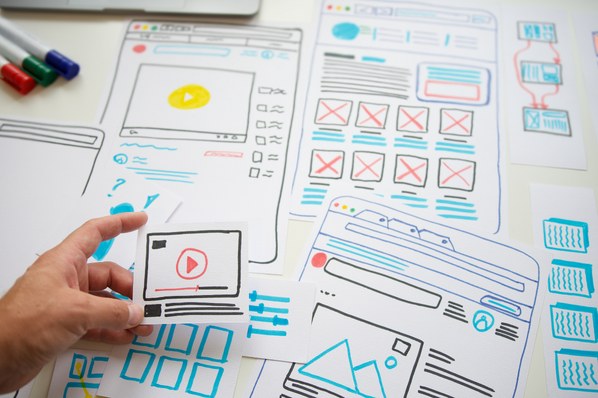
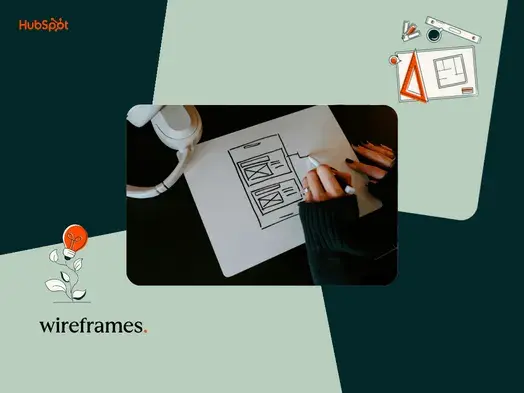
You will also need the images as well as chunks of written content to make — or at least identify — great layouts to help you choose your theme. Here’s a great video for helping you think about layouts and how different assets can help you build them:
My Example Website: Visuals
For Finn + Ellie, I’d take multiple photos of the products — including clothes modeled by real babies — so my customers could feel confident about what they’re buying. I’d also gather “feel good” photos of parents and children to attract my target audience.
How to Design a Website
I’ve used many website builders over the years, and for this article I’ll be working with Shopify. I love user-friendly technology, and have personally found Shopify to be highly intuitive and highly granular. You also have just about any app, tool, or integration you could wish for available at your fingertips.
I’ll demonstrate working through the steps in designing a website for Finn + Ellie. Feel free to keep this window open on one side and work on your own website in another window. Remember to save regularly and enjoy the journey!
Creating Your Homepage
This is actually the most complicated bit because it introduces you to the mechanics of getting things done in Shopify and where to find various functions. Then you have to do a little bit of everything to get going. It’s all downhill from there!
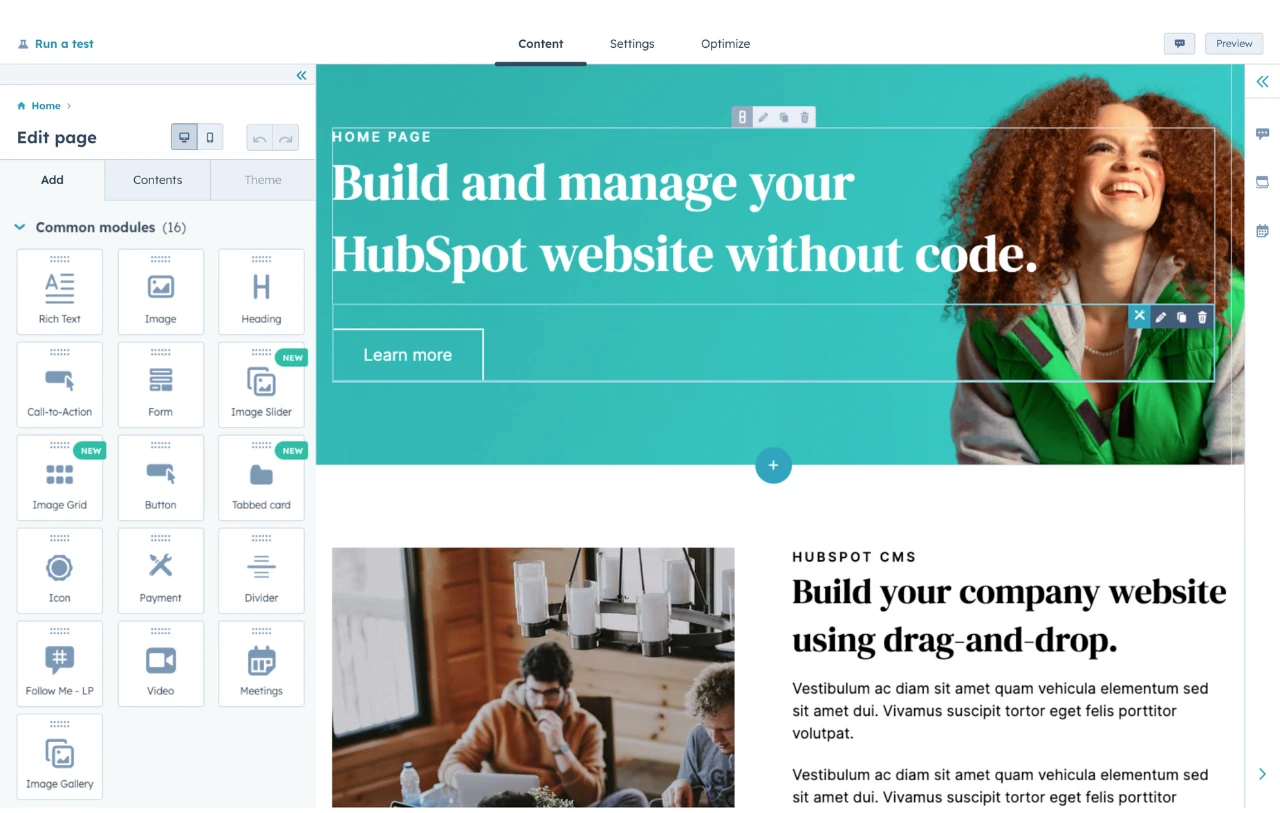
HubSpot's Free Website Builder
Create and customize your own business website with an easy drag-and-drop website builder.
- Build a website without any coding skills.
- Pre-built themes and templates.
- Built-in marketing tools and features.
- And more!
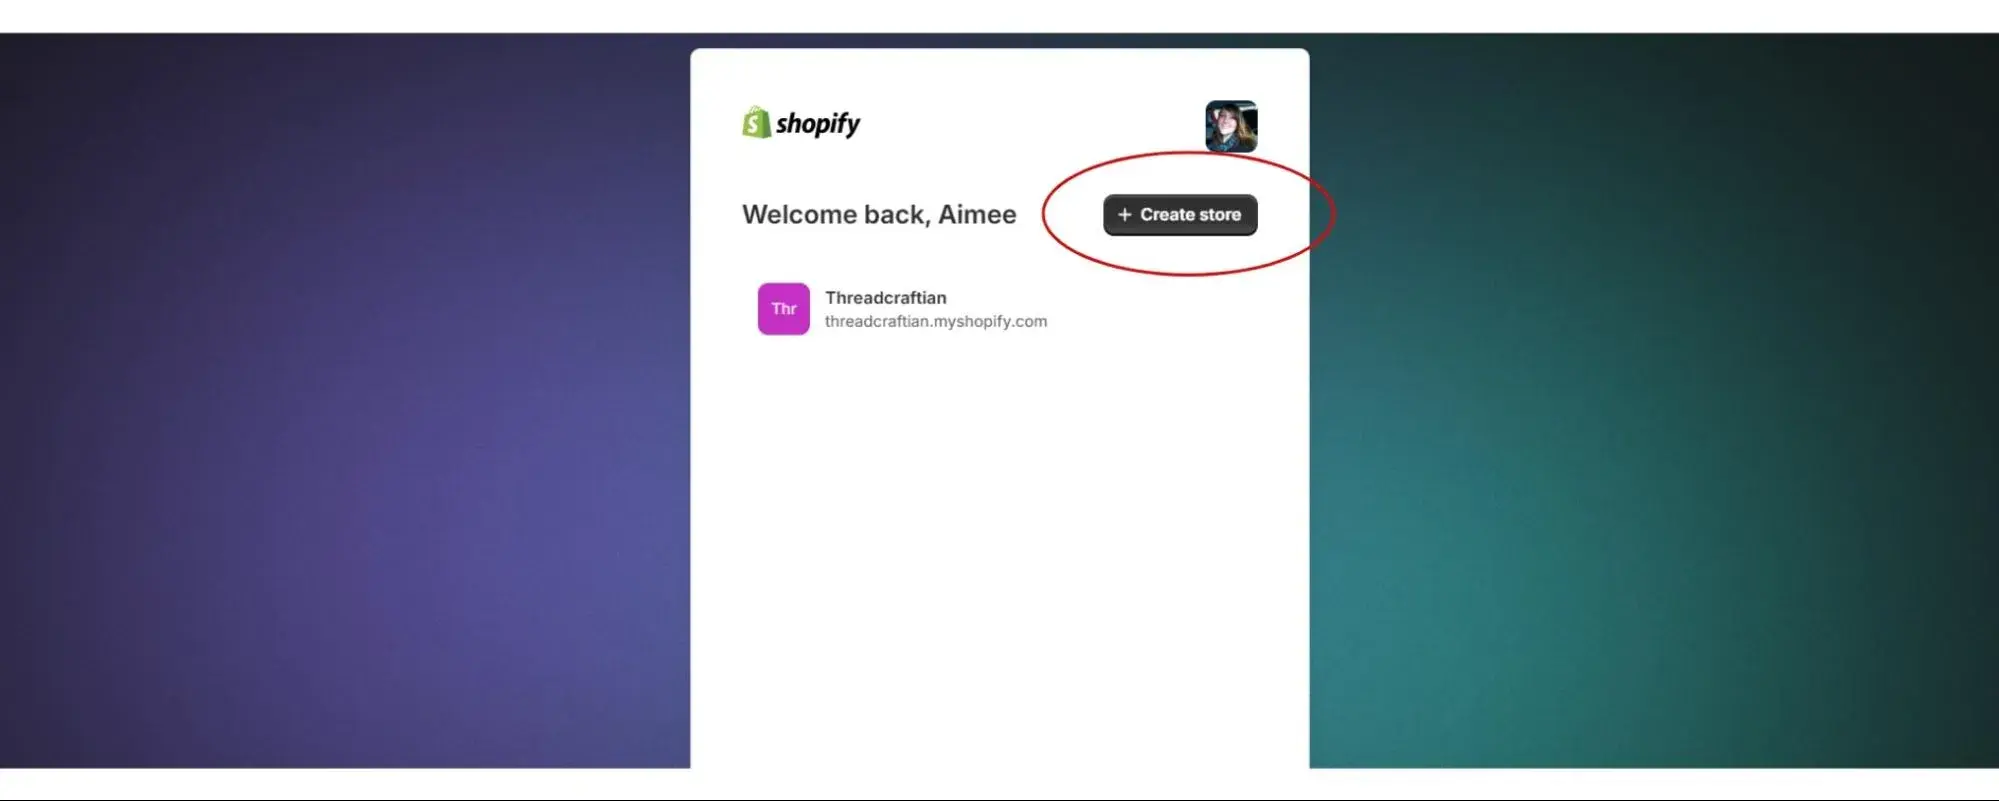
1. Create your account.
This step is super self-explanatory and Shopify walks you through it. I’m going to save you the time and hop to the button at the end of account creation that reads + Create Store.
You’ll answer some basic questions, and I recommend keeping it as simple as possible at first with just making the main website. You can always enrich things after your main site is functional.
It’s much faster and easier to populate a Facebook store, for example, once your main site is already populated. Ditto for social media when you have product links from your website to insert on your social channels!
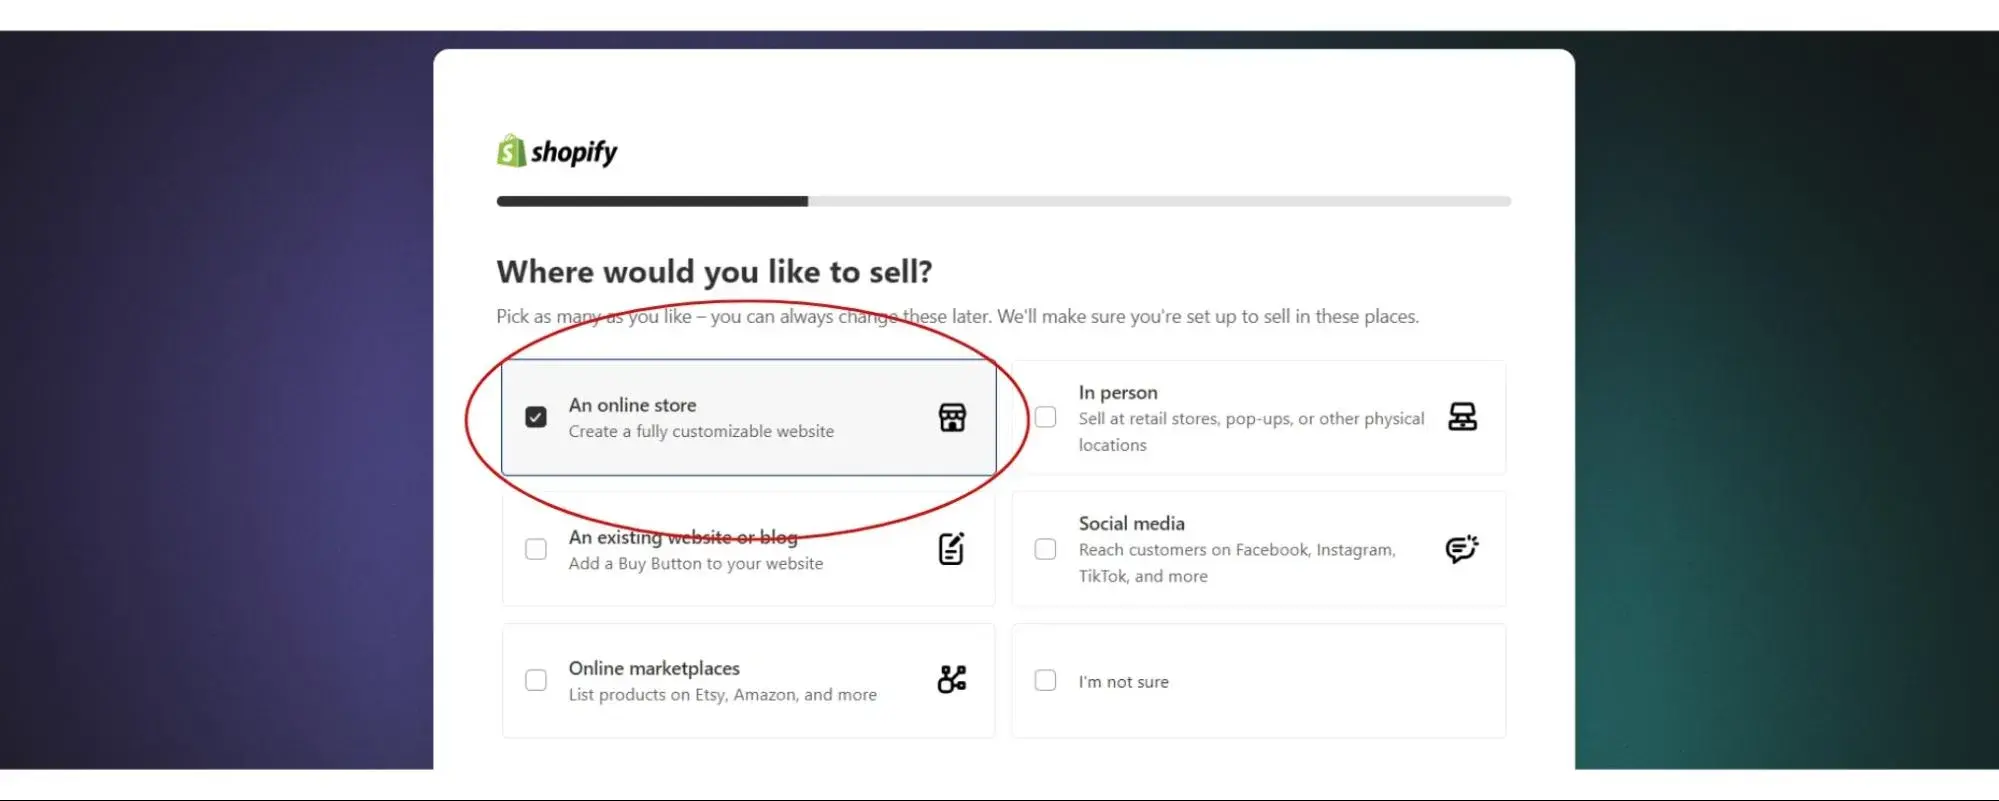
It will ask where you are located, show you a few nice images, and then you’ll land on your dashboard. This is where you will run your website from. At the start, it has a handy Set-Up Guide to work through, which we’ll start with.
2. Add a product.
Shopify has you jump right in with adding your first product, which is pretty exciting.
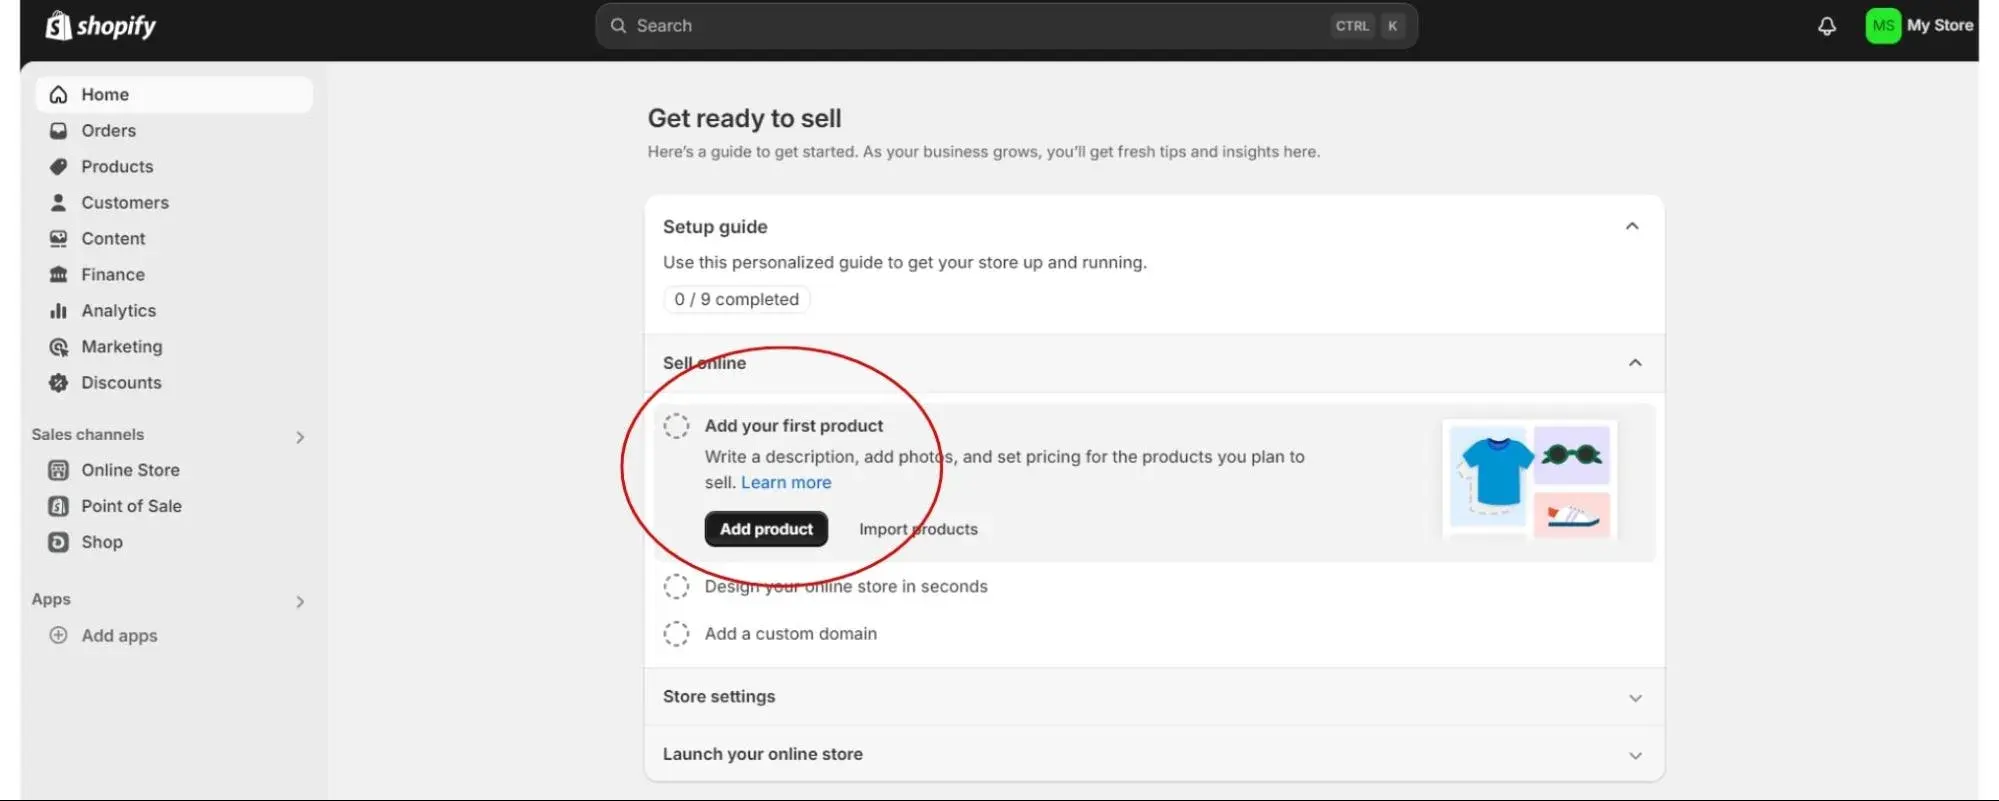
A good reason it starts with this is so you have an asset loaded to set the stage for choosing your theme. It’s also why I had you prioritize some product photography before starting.
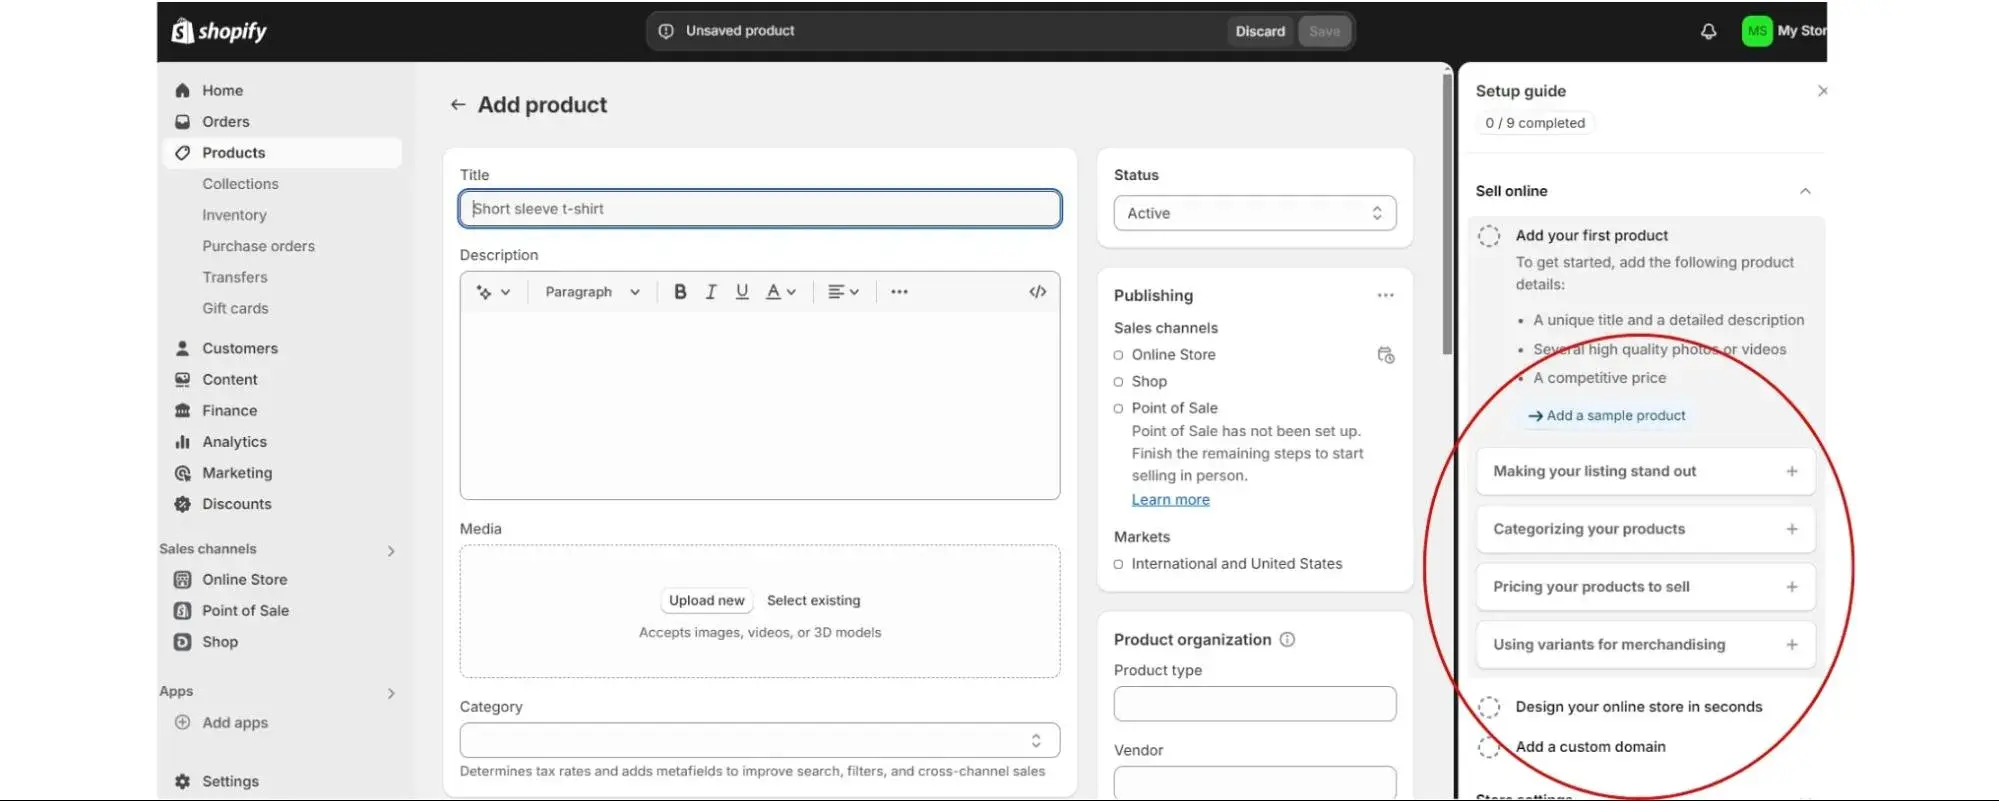
There are handy bits of info in the Setup Guide to educate you a little bit at a time, and I do suggest reading them now because they may not be as readily available later.

Fill out as many details about your product as you can so that it is maximally searchable, adding SEO content and keywords to the product description.
3. Choose your theme.
Next, you’ll click Generate Custom Themes. You then add a brief description of your business that’s full of your main keywords. You’ll get an additional option to explore themes, but I definitely recommend generating custom themes first.
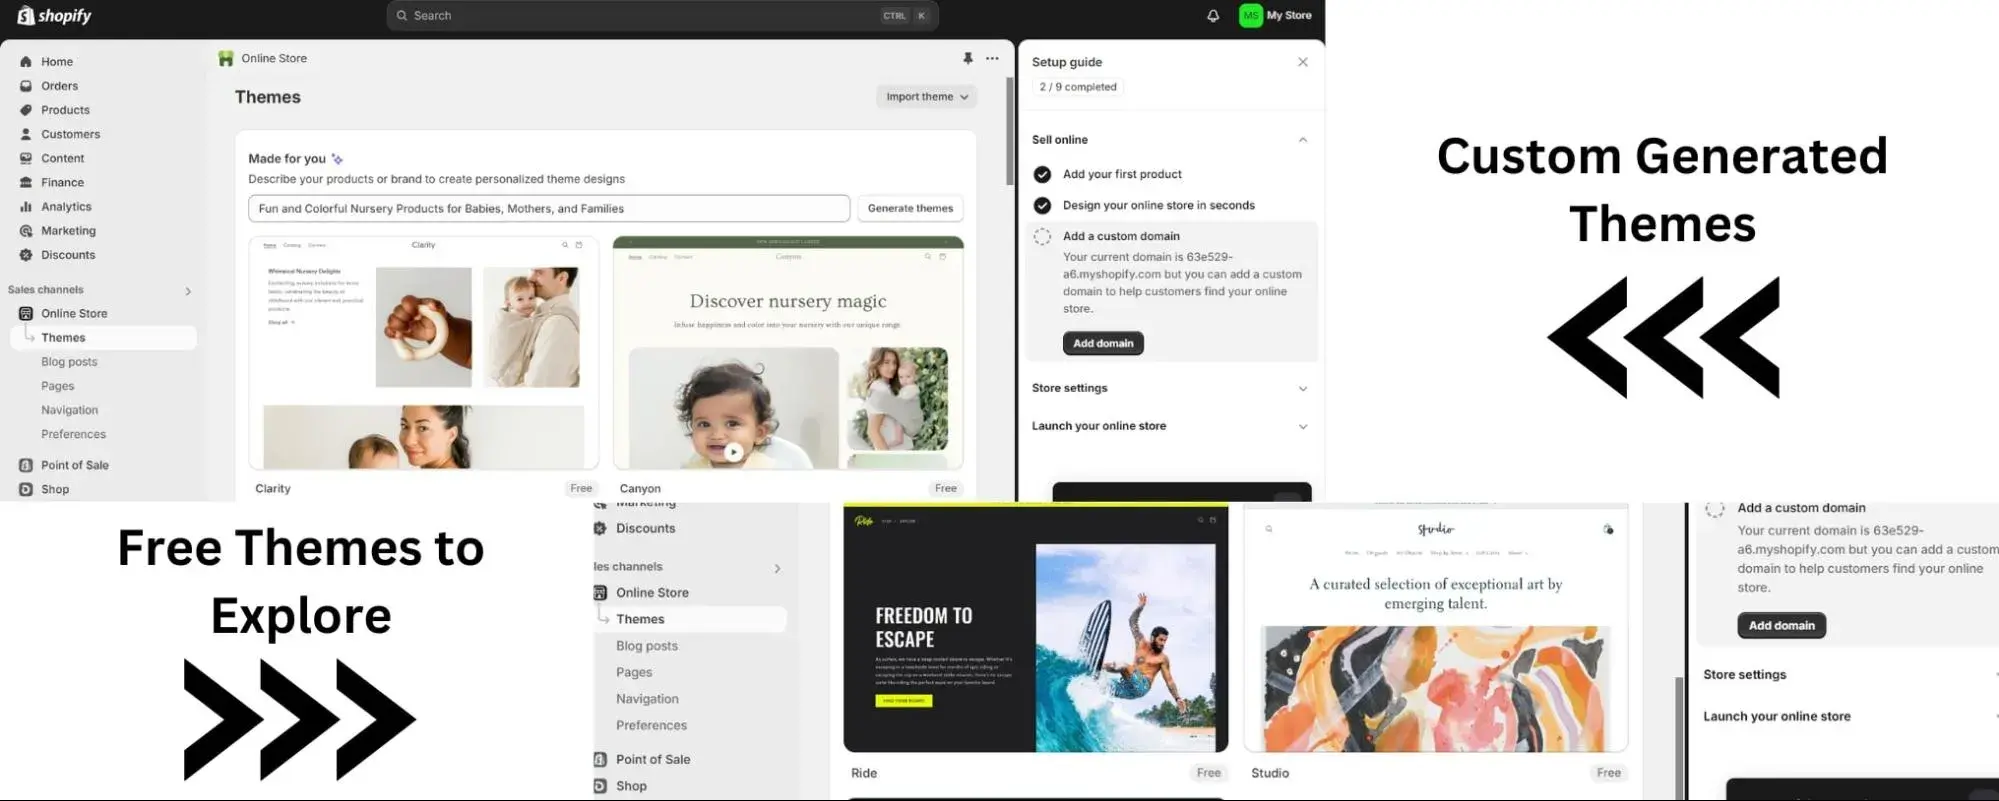
The custom themes will include photos that match your keywords and some basic content that you can massage into what you want. That’s what the Setup Guide means about “design your online store in seconds.”
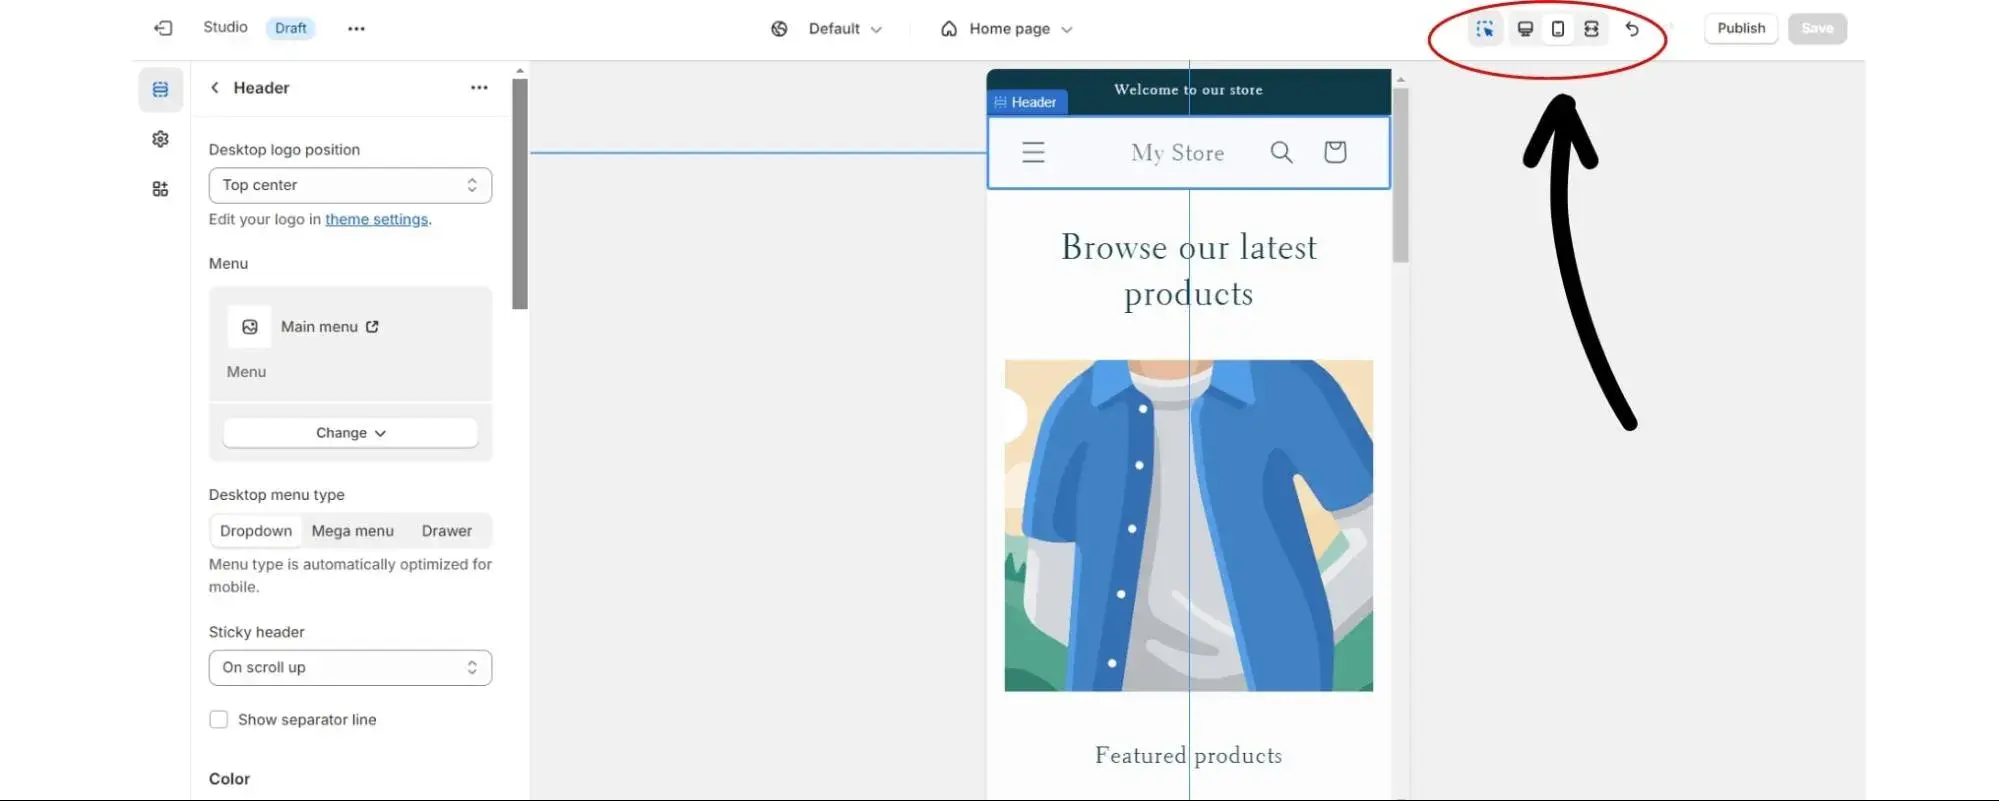
Pro tip: Design in Mobile View. The most frustrating thing you can do is design a perfect desktop website only to discover it looks and functions poorly on mobile. You’ll waste less time and have less heartache if you design for mobile, then double-check it in Desktop Mode. Here’s where you swap views:
The benefit of generating custom themes is they’re pretty much done for you. Upon seeing the options, though, you may like one of the free themes at the bottom better. I know I did! But recognize that doing that will take much more time and you will have a much larger learning curve to work through.
I loved the learning curve, and it definitely builds your skills and understanding of website design. When you have time, I highly recommend poking your way through all the possible customizations. The big ones to hit are color schemes, typography, and learning to manipulate design blocks.
Pro tip: Once you choose your colors, make a note of the hex codes for those colors. By using the specific hex codes of your colors, you’ll be able to apply them anywhere else, even in other programs, to come as close as matching that color as possible — keeping your branding consistent.
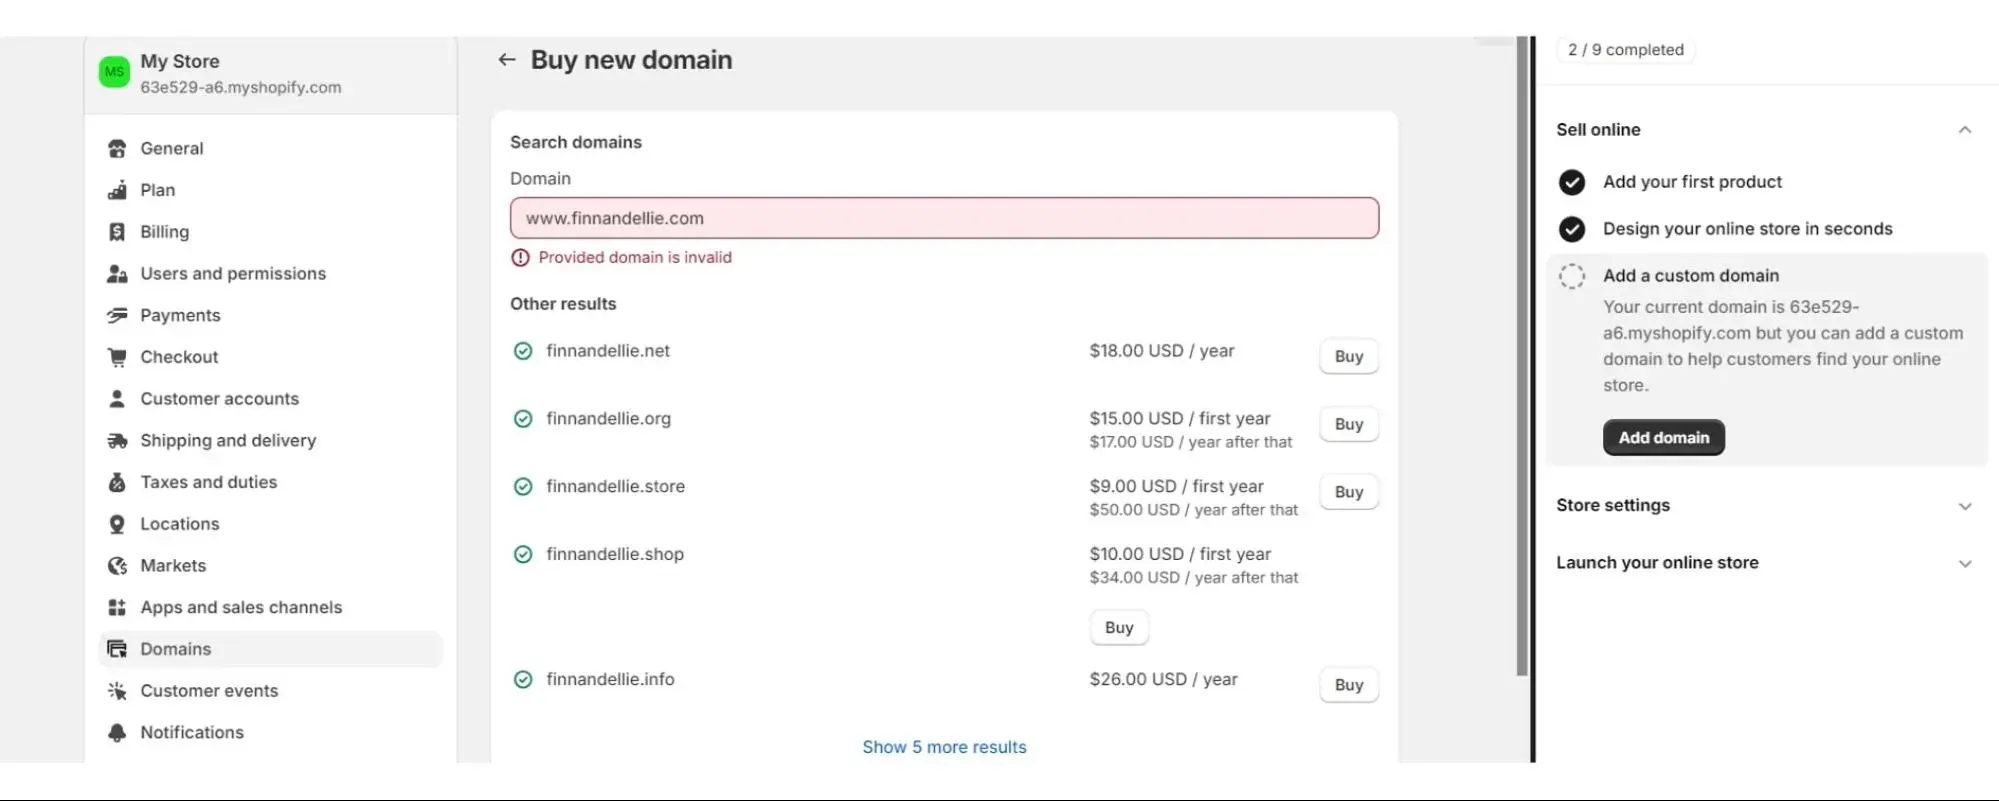
4. Own your domain.
Next on the Setup Guide is domains. This basically means your web address. You typically have to buy a domain or your website host will give you a free one so long as you have their name in it too (such as www.threadcraftian.etsy.com).
In this case, Shopify has assigned 63e529-a6.myshopify.com to me as my free domain, but gives me an opportunity to change it, which I will take below.
Now, on the right-hand side, I will check off that I dealt with the domain for now. Until I’m ready to invest in a domain, this website would be found at www.finnandellie.myshopify.com. When you’re ready to invest, it gives you some options to work with:
Next, we’re doing all of the nitty-gritty store settings that need to be done to do business.
Free Website Design Inspiration Guide
77 Brilliant Examples of Homepages, Blogs & Landing Pages to Inspire You
- Agency Pages
- Ecommerce Pages
- Tech Company Pages
- And More!
Download Free
All fields are required.
Form not available
Store Settings
5. Shipping
You’ll need to give some thought now to how to deliver your products, where, and at what cost. People are coming to expect free shipping because of how Amazon does business, but they are also more aware that sellers are having to bake shipping costs into the price of their items to be able to afford to offer free shipping.
Still, offering free shipping generally does increase conversion because it’s one less thing for buyers to think about. The case where this may not work is with expensive items that require special care or speed.
Baking in these costs would overshoot buyer expectations. In this case, help your customers understand in the item description that you charge separately for shipping.
Here is the page you will work through. I would recommend sticking with domestic shipping until you get a feel for everything, then tackle international shipping.
You do this by scrolling down to “International” and clicking the three dots, then Delete. You’ll see a section below where you can add international markets back in when you’re ready.
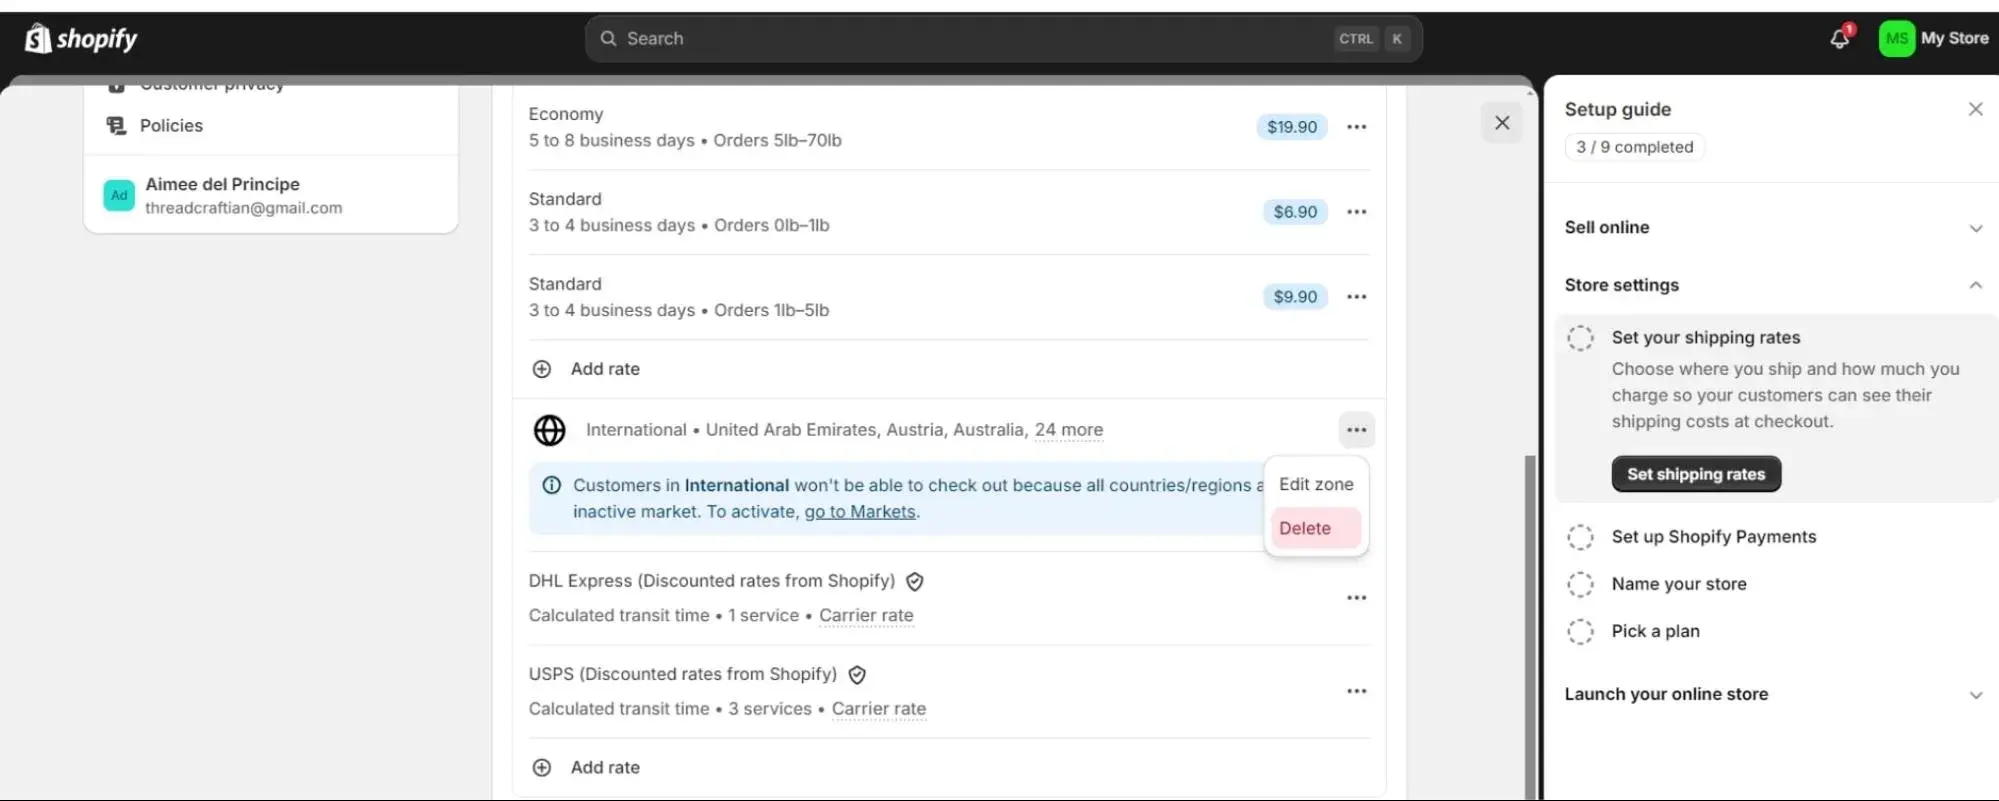
You’ll also note that there are shipping estimates for various situations up above, but at the top above Economy was Domestic Shipping where orders over $50 are set to free shipping. Your customers will see that information at checkout.
There are lots of shipping companies and also companies that have special rates worked out with various website builders. For ease, use Shopify shipping. If you have your heart set on others like Shippo or Pirate Ship, there are apps you can add from your Shopify dashboard in the bottom left-hand corner.
Once you’ve made your changes, hit save and mark it off on your Setup Guide. Onward!
6. Payments
Shopify obviously built in Shopify Payments to keep things easy on you if you’re new to designing a website for ecommerce, but you are welcome to use any payment processing company you like as long as it’s on the list you find after clicking See all other providers. You can see I’ve started the process for PayPal as well.
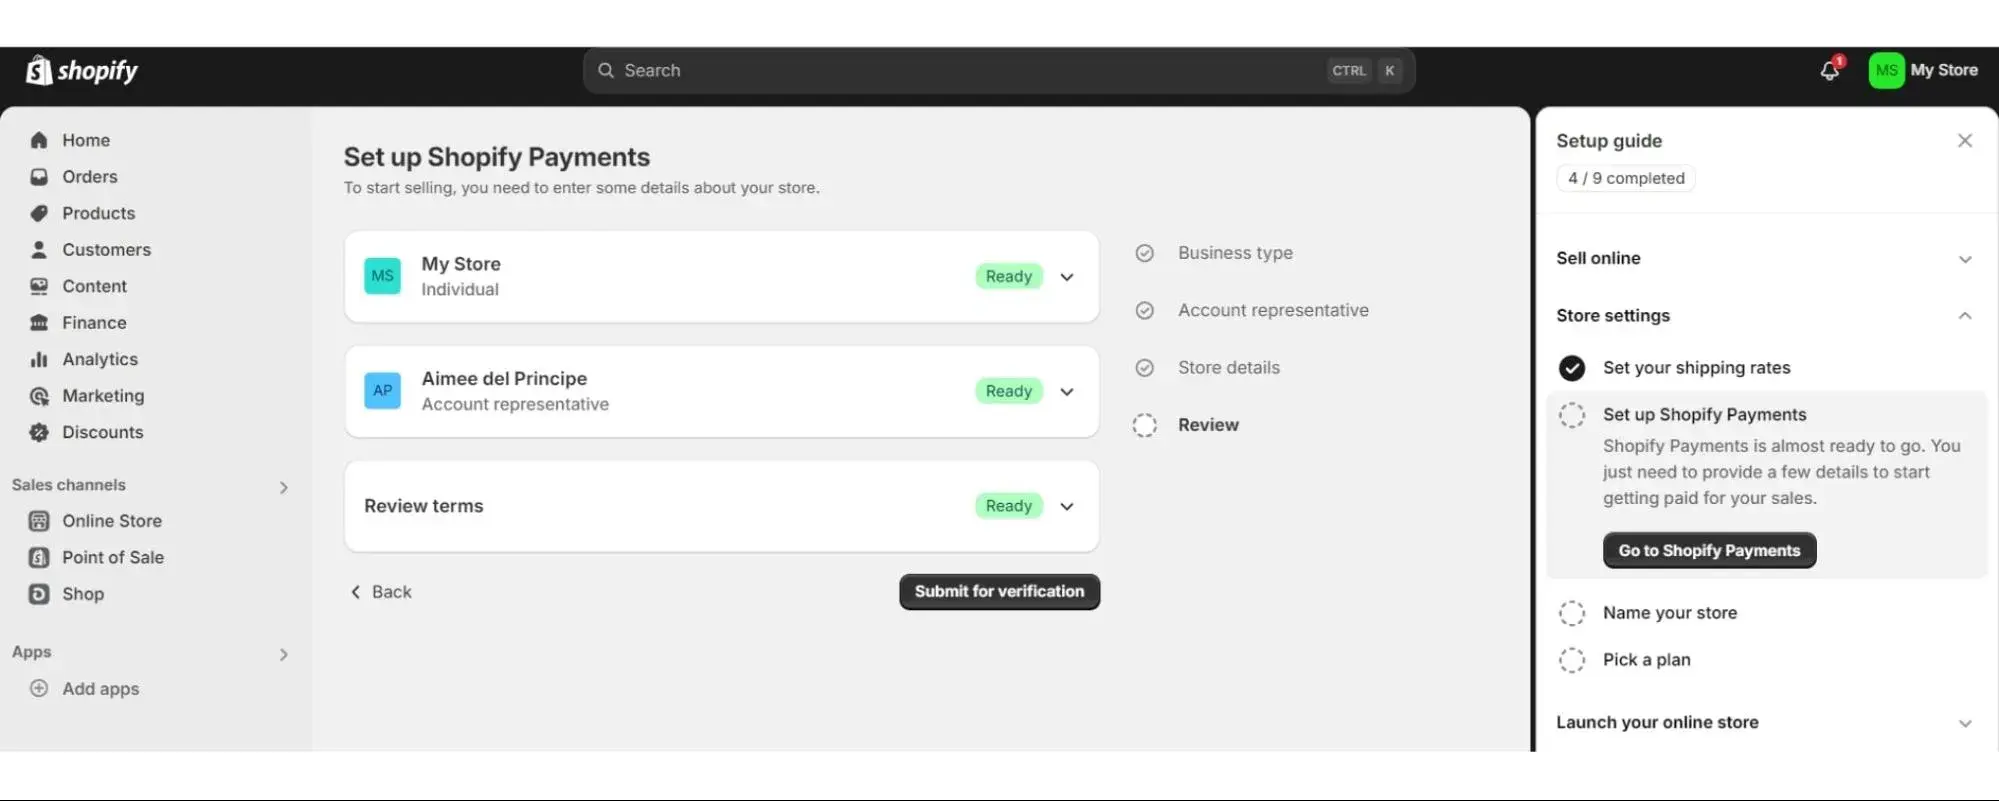
For Shopify payments, you’d click Complete Account Setup, and then move forward through the process of submitting your business details followed by store details, and finally review your information and terms of use before hitting the Submit button for verification:
Head over to your mailbox and check for a verification email for any additional steps to take.
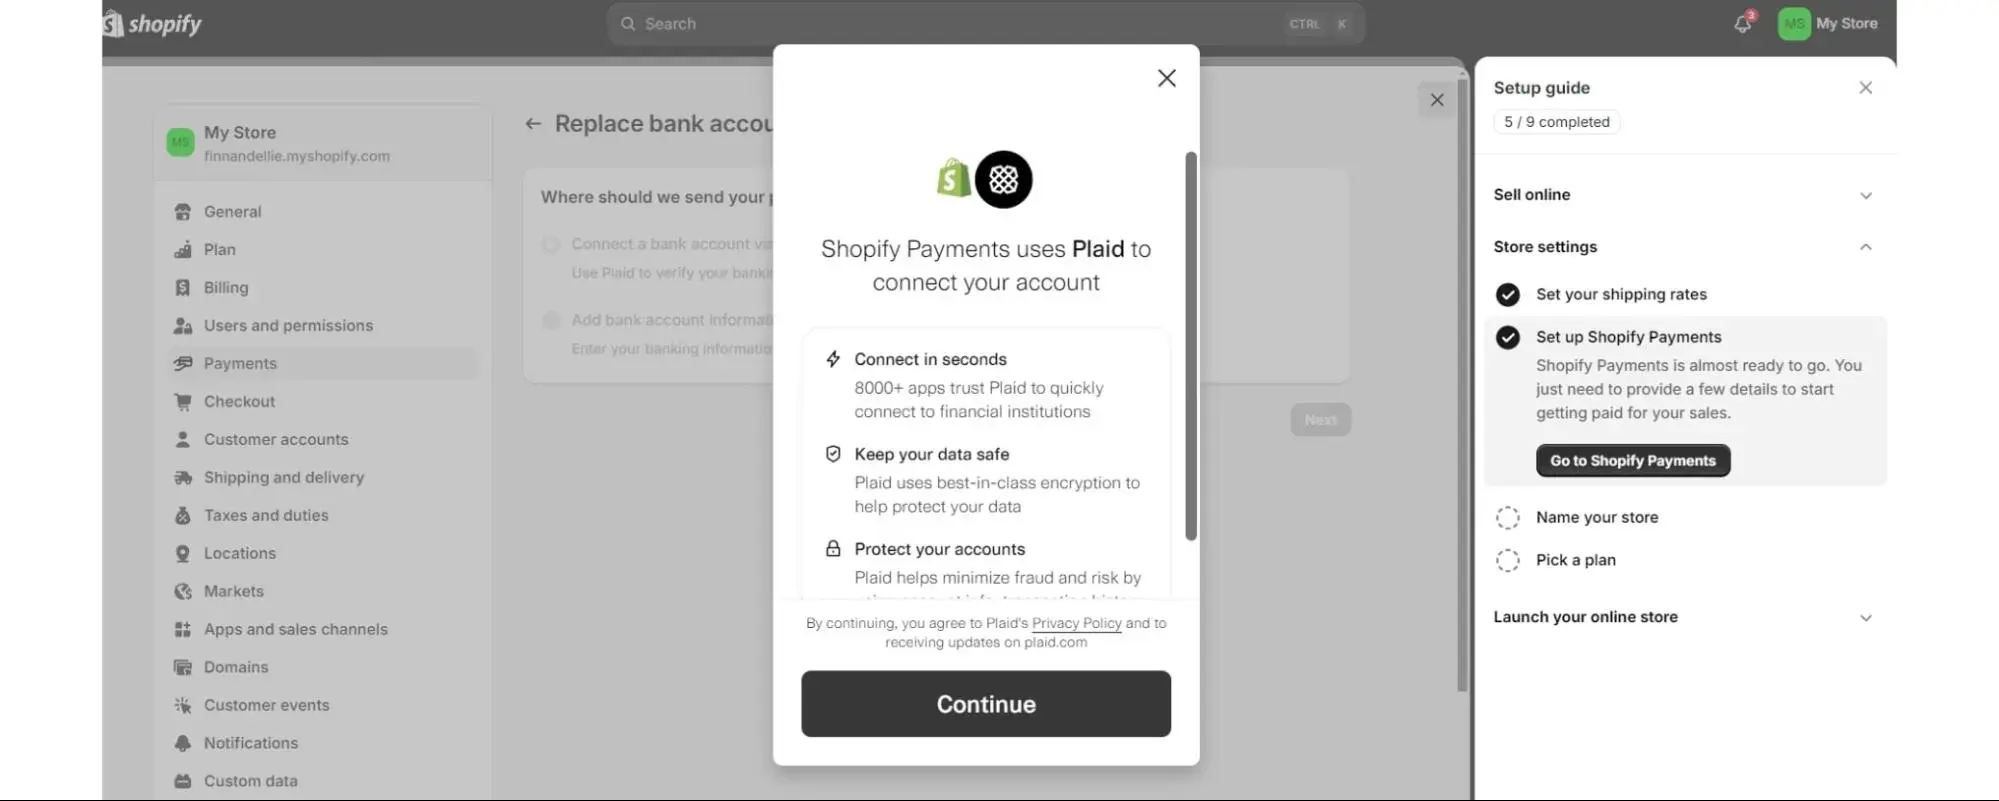
Then you’ll set up where the money you earn pays out to by connecting your bank account information via Plaid, which is a process that looks like this and requires your bank account and routing numbers.
Now you can take payments through your website and have those payments sent to your bank account. You’re ready to sell!
7. Name your website.
Pretty straightforward. When you do, it takes you to your General settings page.
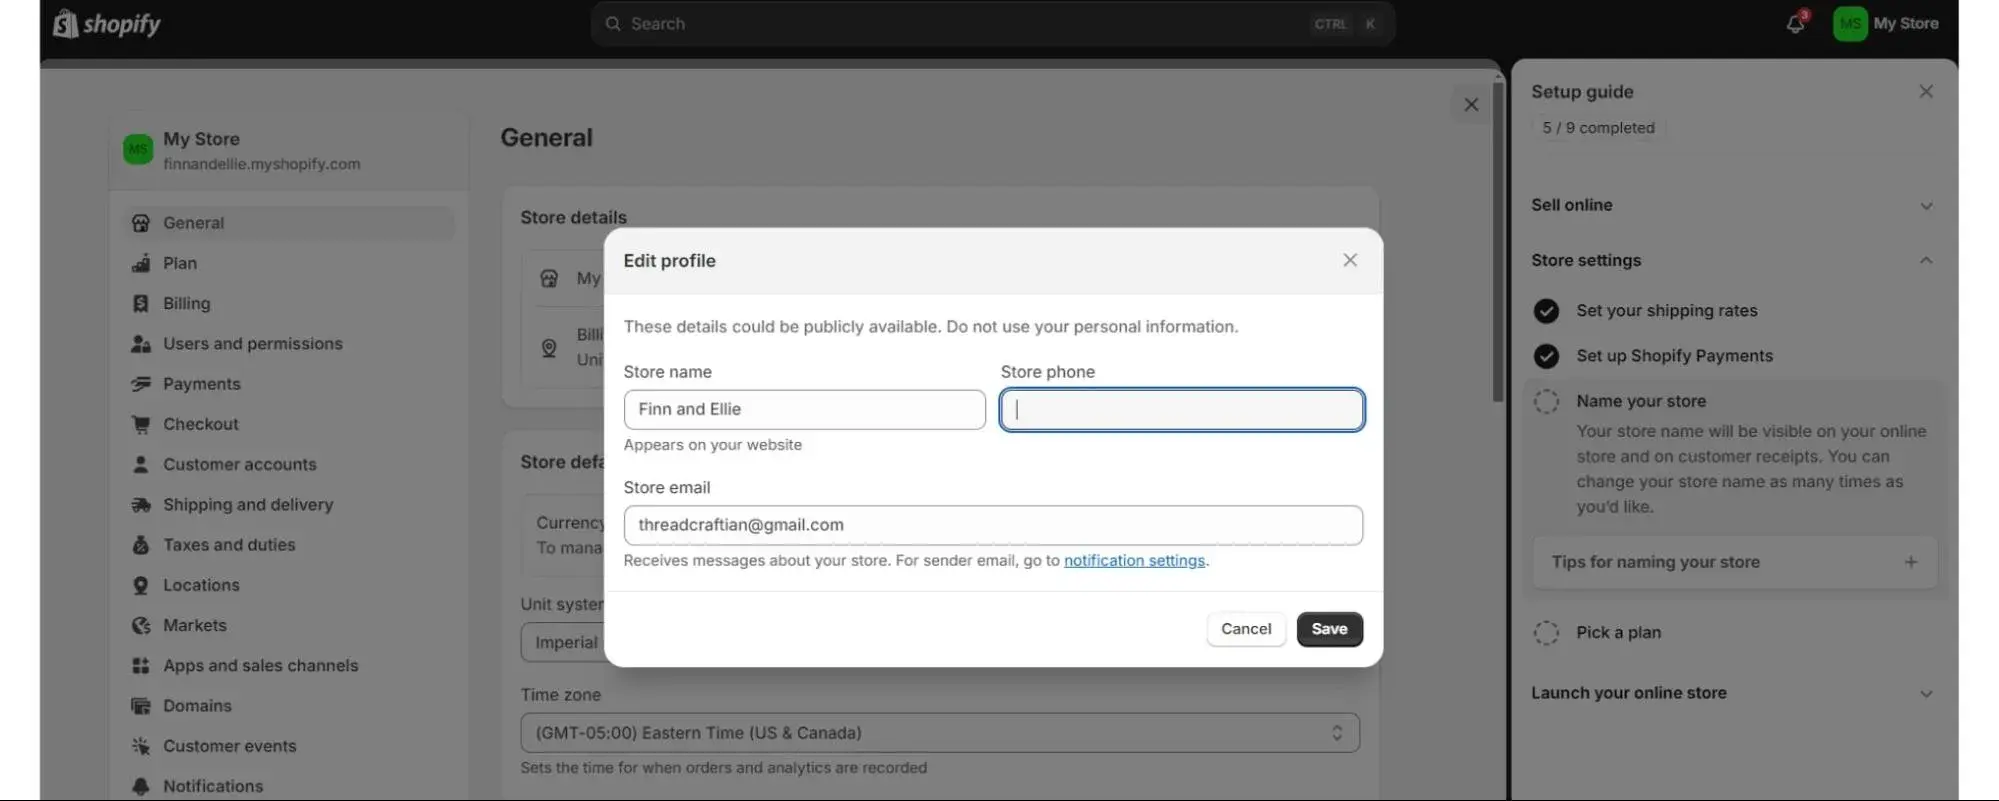
Scroll down and you can manage your brand assets like logos and images so you can use them across your channels more easily.
8. Choose your plan.
Finally, you’ll choose the right Shopify plan for your business. Click the Pick a Plan button, which leads here:
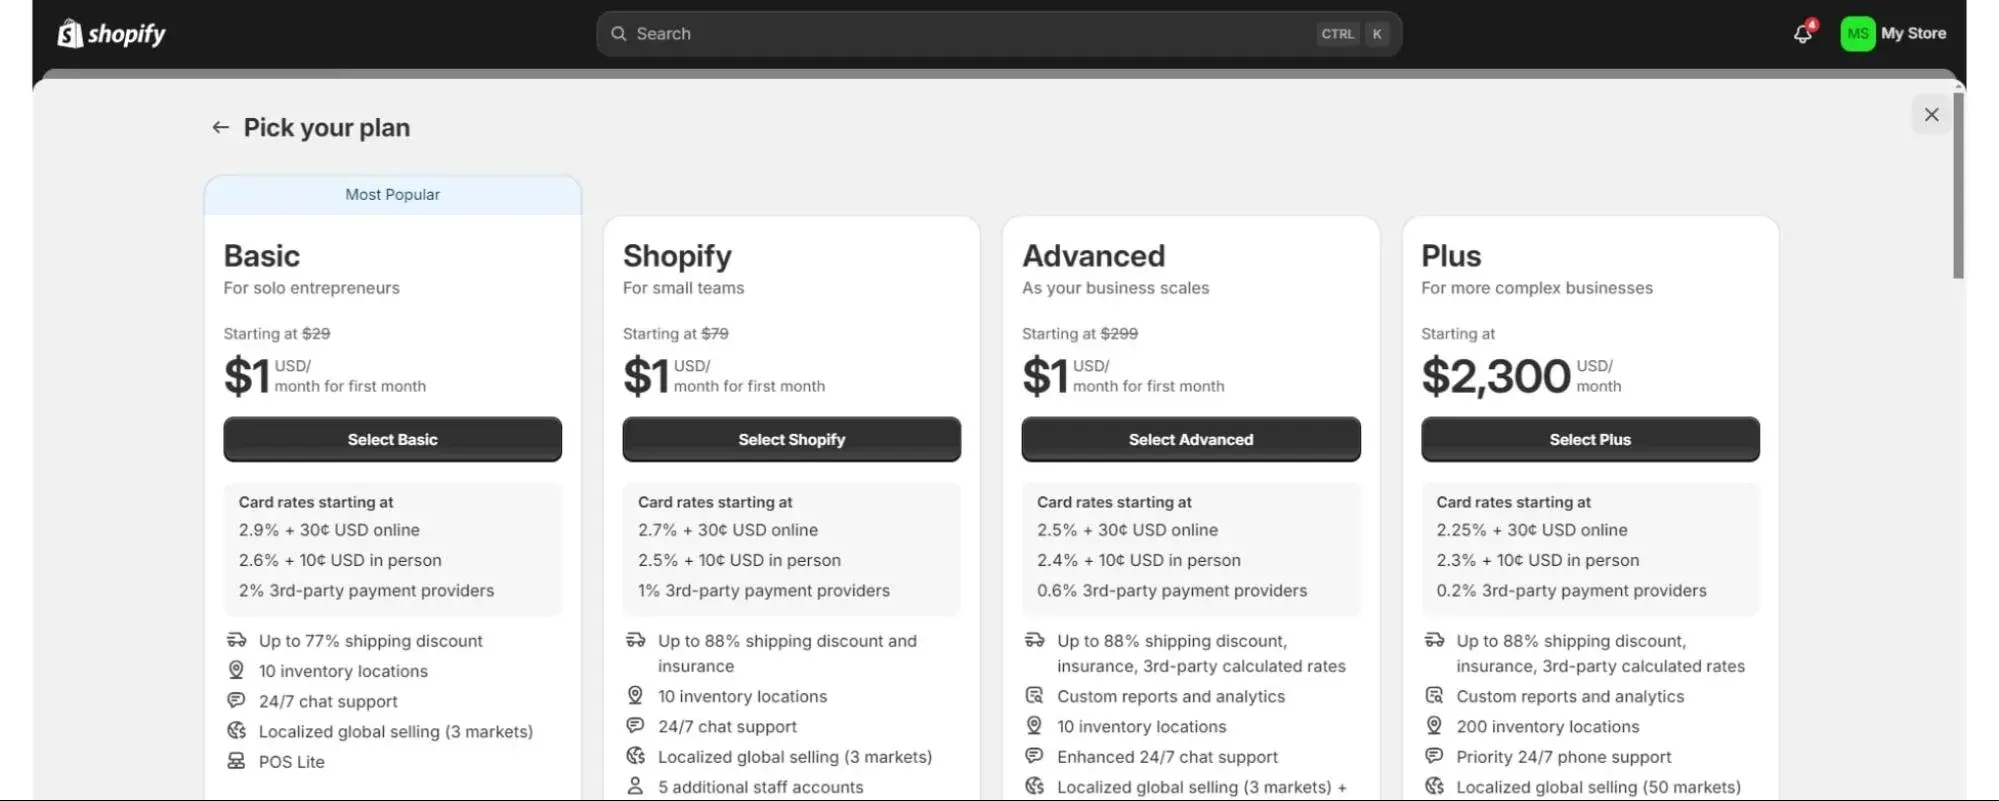
There’s currently a Start for $1 sale happening, but the crossed-out prices give you an idea about the typical monthly prices.
9. Test your payment system.
From your dashboard, go to the bottom left to click Settings. You’ll then click Payments and then scroll to the bottom to toggle on Test Mode.
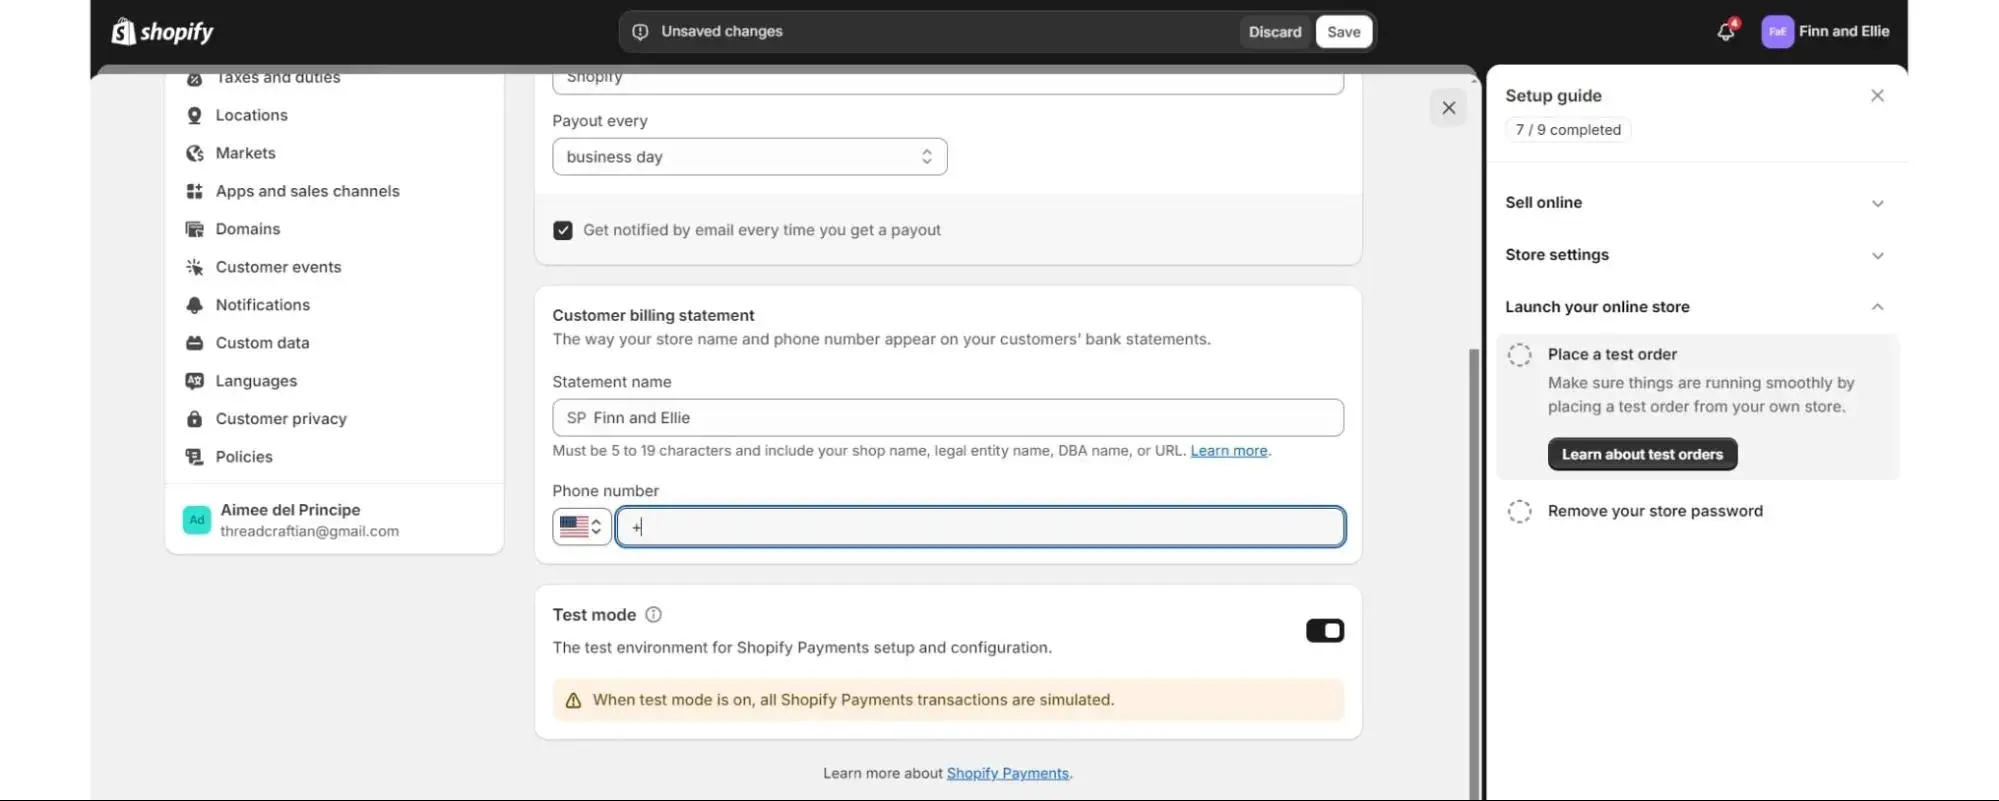
Here’s an in-depth explanation of how to test various types of transactions. When you’re done testing, go back to the Test Mode section to toggle it off again.
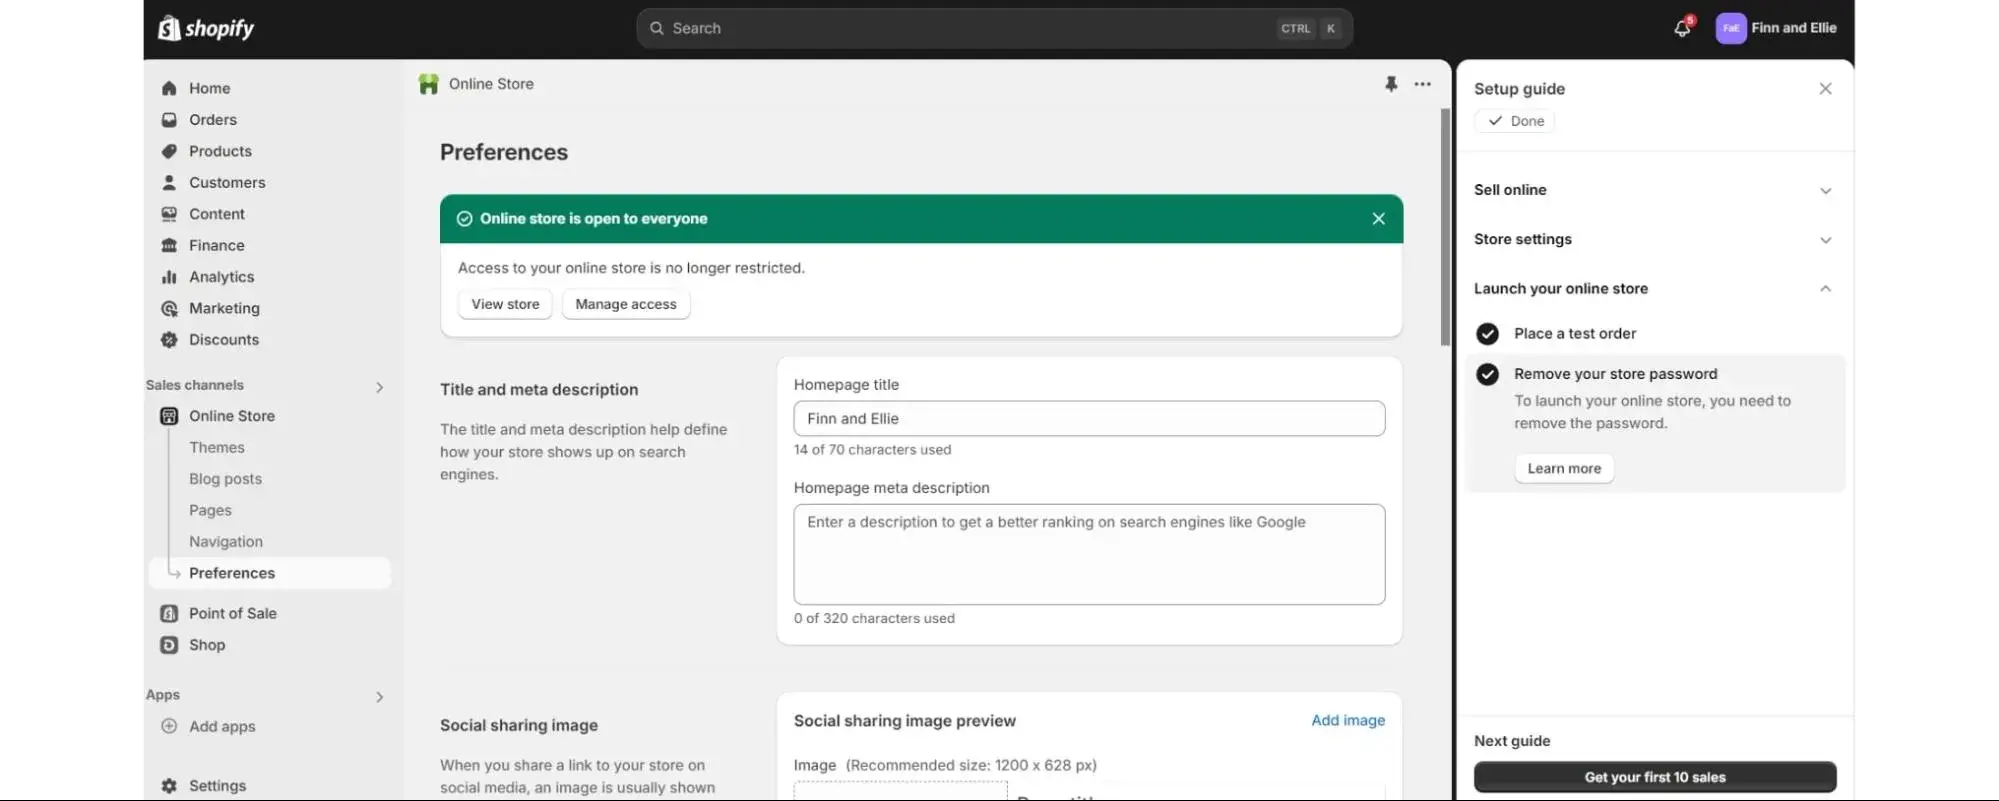
Turn off your password to go live!
When you click Remove Password on the Setup Guide, it brings you to the Preferences page.
Since you’re there, go ahead and name your homepage and add a good meta description. Come back to the Preference page to set up social sharing, Google Analytics, and Facebook Pixel if you want to set that up, too.
Unclick the box at the bottom that says Restrict access to visitors with the password and hit save. Online store is unlocked!
From your dashboard, click Online Store and Themes, then scroll down and click the Publish button next to the theme you’ve put all this hard work into:
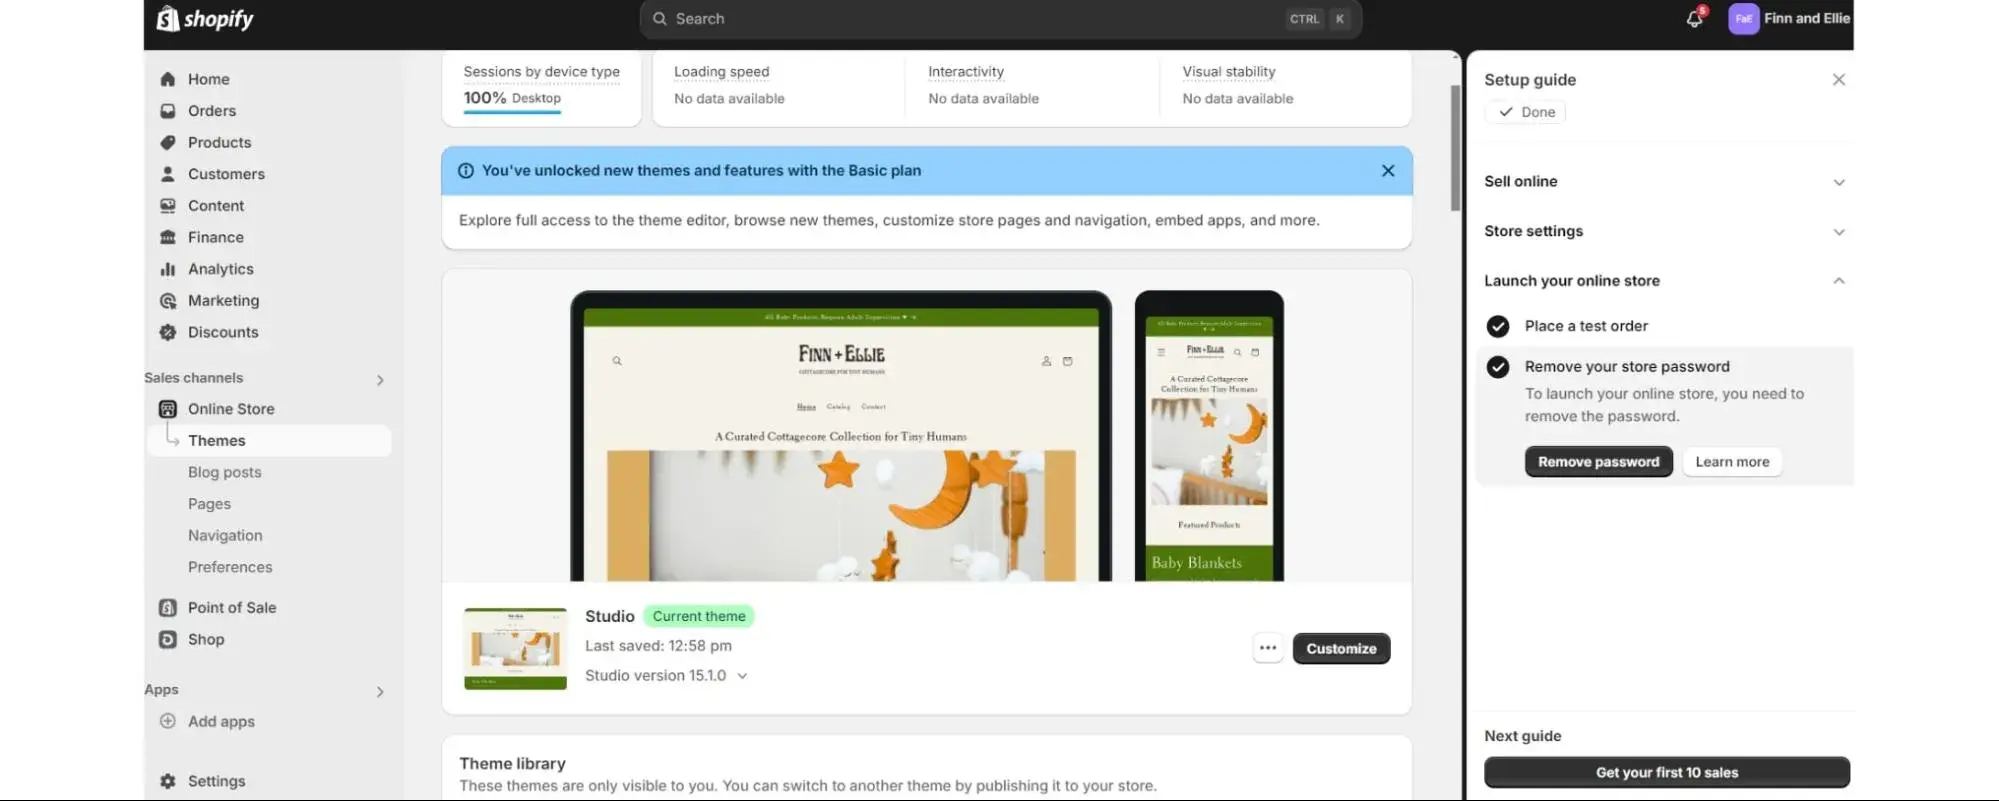
Hit Publish again:
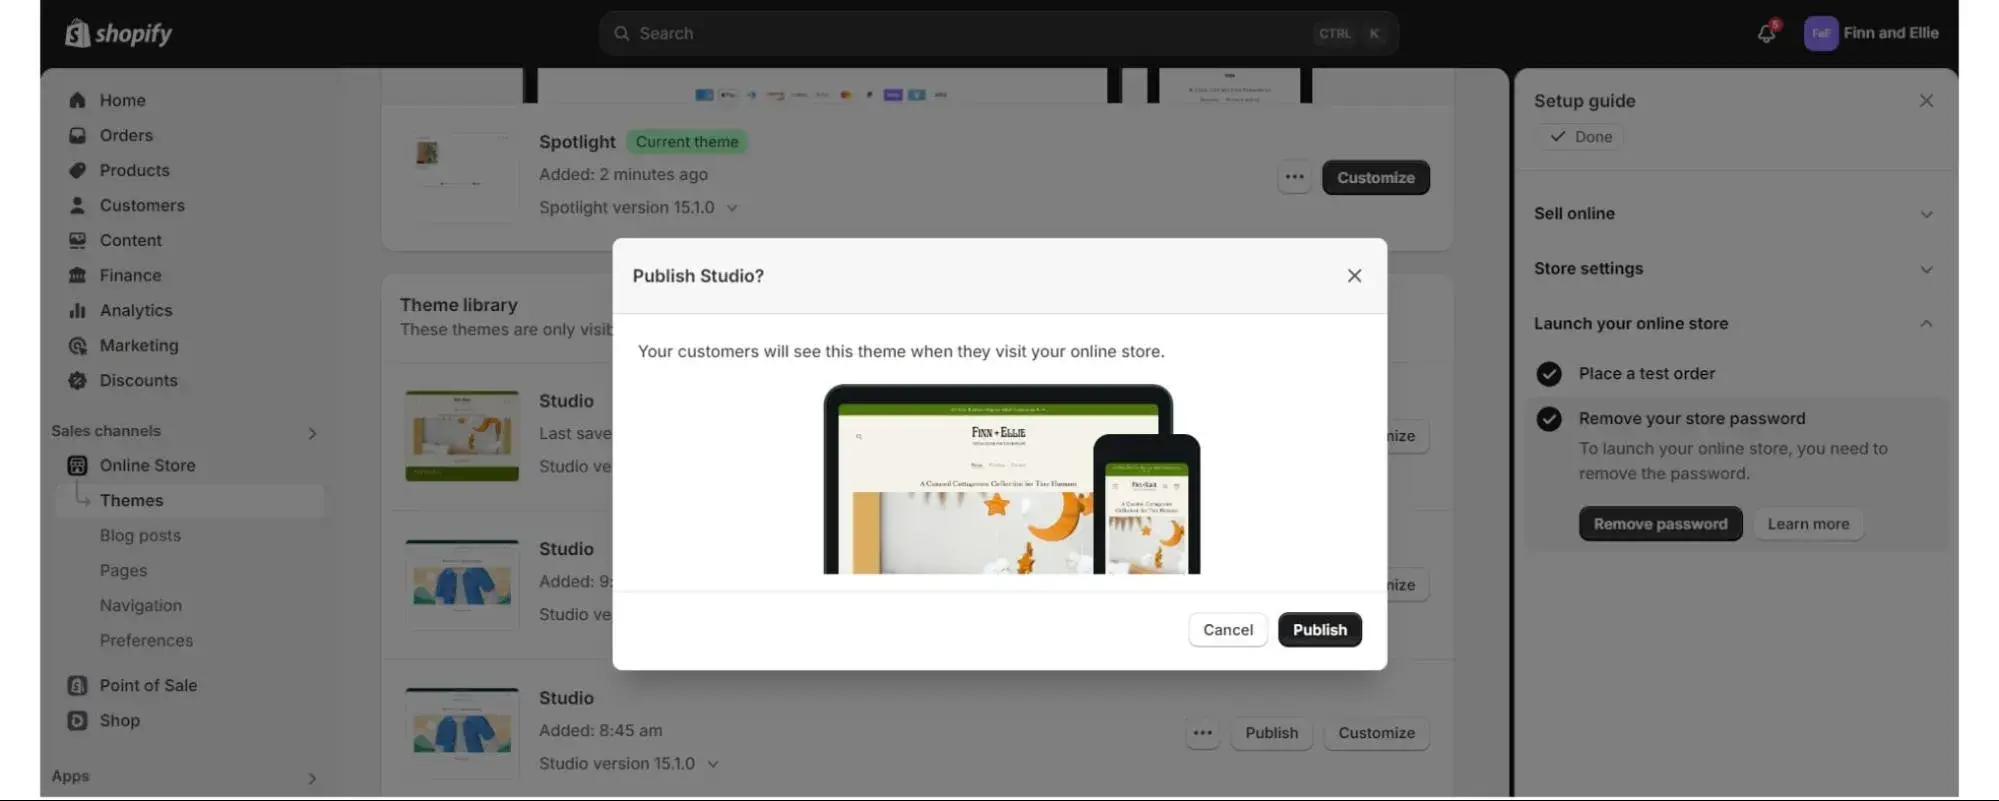
And at long last…go visit your live website in a new window. Congratulations!
From this point, you’ll want to flesh out your site. You’ll go through various steps of designing a website more deeply, layer in more detail, add products and pages, start your blog, and set up your newsletter sign up. You’d set up “Product Collections,” connect social channels, and generally add detail and diversity.
But right now you can actually sell something online born of an idea you had. Well done!
My Tips for Great Web Design
Edit, edit, edit.
It is very easy to get excited about various ideas from your own brain, coworkers, and stakeholders. Designers start thinking “I bet I can work all of these great details in.” But your site will end up cluttered at best, and at worse, so confusing for your visitors that they won’t know what to do next. So always be sure to edit and get a second pair of eyes to look over your work before publishing.
Use color theory.
When designing a website, you can easily create the right atmosphere with colors and/or matching tonality even if you don’t have graphical detail or images to work in yet. Use color theory to your advantage to create the online environment you want for your website.
Prioritize usability.
Make sure your site is accessible and usable. Keep the navigation conventions people are familiar with. Sometimes you are working for a brand that can push the envelope, but in general, you are taking chances with conversion if you skip or experiment with basic conventions of navigation. Have your menu at the top and include the pages people use to research your business: About, Contact, Product pages, and Blog.
Balance your web pages.
Make sure that your images and text balance each other. Lots of no-code builders have pre-made themes with balance in place, so if you’re not sure how to achieve visual balance, take some time to look at free themes/designs to see how they accomplish balance with text, color, and visual weight.
In fact, I can share this resource real quick for free website theme templates that you can check out to see how they achieve balance in their designs.
Start Designing Your Website Today
You can do this. When I started out, I knew practically nothing about how to build a website. But, along with millions of other people, I have designed functional websites, and you can find support online, on web builder forums, or by contacting your servicers.
Cruise competitor sites, see what website features you like and don’t, get yourself a nice logo, and start designing a website.
Free Website Design Inspiration Guide
77 Brilliant Examples of Homepages, Blogs & Landing Pages to Inspire You
- Agency Pages
- Ecommerce Pages
- Tech Company Pages
- And More!
Download Free
All fields are required.
Form not available
Website Design Process
![How to create a website to sell products: 7 steps I used [+ expert tips]](https://53.fs1.hubspotusercontent-na1.net/hubfs/53/how-to-create-a-website-to-sell-products-1-20240909-6141294.webp)
![Website design proposal: A streamlined approach to pitching [+ templates]](https://53.fs1.hubspotusercontent-na1.net/hubfs/53/%5BUse%20(1)-Oct-23-2025-03-34-31-8363-PM.webp)

.png)
-2.png)