Your landing page matters. Get it right, and you can capture visitor information, deliver great content, and get them on the path to conversion. Get it wrong, and your site may still get seen — but it won’t drive sales.
As a result, it’s worth knowing what makes a great landing page, what you should avoid as you develop your website, and what options are available if you take on this task yourself.
I’ve got you covered. Here’s a quick look at how to create a landing page in HTML and CSS that visitors actually want to land on.
Why Build an HTML Landing Page?
The goal of any landing page is to drive visitor action. Visitors enter your website and see this page first to get more information about the product or service you’re offering. Your landing page then asks visitors to provide details, including their name, email address, or phone number, in exchange for some type of offer.
What you offer is up to you — whitepapers, ebooks, and newsletters are common. But, whatever it is, you need to make it valuable enough that visitors are willing to share their contact information for it and move to the next phase of your sales process.
The offer itself is the most important aspect of your landing page, but it’s not the only important part: The design of your landing page should be based on driving conversions, too. To achieve a landing page that looks exactly how you want, it may be worth learning a bit of code.
If you’re a tech-savvy marketer, you’ve heard of HTML, short for Hypertext Markup Language. It’s the coding language that makes up web pages. With HTML and its sibling style language, CSS, you can build a landing page completely from scratch. Or, if using a website builder or CMS, you can extend your designs beyond what’s possible with drag-and-drop editing.
The idea of learning to code in order to build a simple landing page may seem intimidating but don’t be discouraged. HTML is relatively simple to learn, and with some practice, you’ll be able to craft an effective landing page yourself.

Free Landing Page Builder
Create and test beautiful landing pages that generate leads and look great on any device.
- Build landing pages.
- Turn visitors into leads.
- Optimize for SEO.
- And more!
HTML Landing Page Best Practices
Landing pages are designed to capture specific streams of traffic — a subset of your website visitors targeted by your marketing campaign. For example, if I’ve created a full-featured mobile fitness application that includes a monthly fee, my landing page might offer a free trial period for interested users.
With the right search engine optimization (SEO), my website can bring in fitness-focused visitors. Then, my landing page captures potential customers by offering a free trial code when they share their contact information.
While your specific landing page layout will vary, here are a few high-level recommendations to improve your impact:
- Make it clear, not complicated. Your unique selling position (USP) and call-to-action (CTA) should be front and center. Don’t go into depth or detail. Make it clear what you’re offering and what visitors need to provide in return.
- Make it clean, not cluttered. White space is your friend. Keep your landing page simple and clean with limited text and curated images for maximum impact.
- Test, don’t guess. As noted by Forbes, testing is critical to ensure your landing page captures leads. Design it, make it live, and then record the results. If it’s not working, make changes.
HTML Basics
You’ve got a solid USP, a design vision, and a great CTA. Now, it’s time to build your landing page. Below, I’ll leverage HTML to make the page display the exact text, images, and links I want, how I want them.
First, it’s important to note that HTML isn’t technically a programming language. It’s really a markup language that gives you control over the text, images, and links that appear on your webpage.
Every HTML element is represented by tags, which are identified by angle brackets (<>). Some elements only need one tag, while others consist of two tags, an opening and a closing tag. The closing tag contains a forward slash (/).
Let’s see an example. Say I want to create a line of text that stands by itself as a paragraph on my landing page. Here’s the line:
“This is my landing page”
Here’s what it looks like in HTML:
<p>This is my landing page</p>
I’ve used the “<p>” (paragraph) tag to create a paragraph element — the text between the opening and closing tags is paragraph text.
Other popular HTML tags include:
- <h1> — Makes the text a heading element. Sizes range from h1 to h6.
- <a> — Creates a new link within your text.
- <strong> — Makes text bold.
- <em> — Applies italics to text.
- <ul> — Creates an unordered (i.e., bulleted) list.
- <ol> — Creates an ordered (i.e., numbered) list.
- <br /> — Inserts a line break, one of the few tags that don’t need both an opening and a closing tag.
HTML works in conjunction with CSS (Cascading Style Sheets) to change the style of the elements on your landing page. With CSS, you can change specific things like background color, text color, and font type. These changes then “cascade” across all elements, allowing you to make changes that apply to your entire landing page at once.
How to Create a Landing Page in HTML
- Create the basic structure.
- Create a navigation bar.
- Stick the navbar to the top of the screen.
- Create a great background.
- Add some style.
The first thing you need to create a landing page in HTML is a text editor, as both HTML and CSS are written in plain text. If you don’t have one yet, check out our HTML and CSS editor recommendations before moving on.
If you’re using WordPress, you can also click on a specific block in the editor and click on the three dots. Then, select Edit as HTML. If you want complete control over your HTML elements, start by editing a page or post, then click on the three dots in the top-right corner of the editor and select Code Editor.
Below, I’ll go through the process of creating a landing page in HTML.
1. Create the basic structure.
To build an HTML landing page from the ground up, your best bet is to use a simple HTML framework like Material Design for Bootstrap (MDB), available in both free and professional versions.
A framework is essentially a collection of pre-written code that makes it easier to create in HTML. Rather than creating all elements from scratch, I can leverage a framework’s built-in elements to whip up landing pages more quickly.
Once I’ve downloaded and unzipped the MBD package, I’m ready to get started on my first landing page. Here, I need five key things: A basic structure, a navigation bar, a navbar class, a full-page background, and CSS styling. Additionally, I need to include some basic page elements:
- A heading using the <h1> tag at the top of my page.
- Some text using the <p> to define paragraphs and CSS styles for color and font.
- The <input> tag to create form fields where visitors can enter their name and contact information.
- Links using the <a> tag that lets visitors download or access content once they’ve provided their contact details.
I start by opening the index.html file (the HTML file for my homepage) in my project folder. This is typically where I’ve unzipped the MDB or other HTML editor package. I can then paste this code underneath the opening <body> and closing </body> tags:
This HTML provides the structure for your landing page. In it, I have:
- A <header> element for my page header and primary navigation.
- A <main> element to indicate the most important part of the page that contains its unique content (i.e., things that aren’t repeated across pages, like the header and footer).
- A <footer> element for my page footer.
These are all placed inside the <body> tags. <body> contains all things on my page that are directly visible to visitors.

Free Landing Page Builder
Create and test beautiful landing pages that generate leads and look great on any device.
- Build landing pages.
- Turn visitors into leads.
- Optimize for SEO.
- And more!
2. Create a navigation bar.
Next, I paste the following code between the opening <header> tags:
There’s a lot more code here, so let’s break down what this all means. Everything is contained by the <nav> (navigation) element, indicating that the contents inside these tags serve to guide the user through the website.
First, in the navbar, I have a place for the brand text, followed by a button to collapse the navbar from view. Inside this collapsible section of the navbar, I have a list of navigation links to Home, Features, and Pricing pages, then a template for a dropdown menu.
Lastly, this code places a search bar in my navigation, allowing users to enter queries and quickly find their desired page.
3. Stick the navbar to the top of the screen.
A sticky navbar stays visible to the user even when they scroll down the page. To make my navbar sticky, I replace the first <nav> tag (directly under “<!--Navbar-->”) with the following code:
4. Create a great background.
After my content is set, a great background will help my landing page stand out. I put this code underneath the navbar, just before the closing </header> tag:
This code adds a mask over my background, which partially obscures the background image so content in the forefront is more visible.
5. Add some style.
Finally, it’s time to spruce up your page with styling. To do that, I’ll make use of the language CSS. Like HTML, CSS isn’t a programming language, and it’s also not too difficult to wrap your head around.
How exactly you style your landing pages is, of course, up to you. In the next section, we’ll provide some basic CSS code to get you started.
CSS Landing Page
CSS can either be written in the HTML file it applies to or in a separate file called an external stylesheet. For this tutorial, I’ll use the latter method. Create an empty text file called “style.css” in the same folder as index.html, and then paste the following HTML code in between the <head> tags inside index.html:
This HTML instructs the document to reference your style.css file for styling instructions.
Next, I open style.css, paste in this CSS code, and save the file:
This will provide a placeholder background image for my landing page. Setting the height at 100% ensures that background elements cover the entire screen.
Even after this CSS, my landing page will still look pretty generic. At this point, it’s up to me to decide how to populate the page with my content and style it to match my business’ branding.
Then, I can leverage CSS to change the look of your page. Here are the key styles I focus on when adding CSS:
- Colors. With CSS, I can change the colors of my text, as well as the background colors of block elements and my entire page. See our guide to CSS colors to learn how it works.
- Fonts. Fonts are another crucial detail of a landing page. A font can make my text both professional-looking and more readable. I can choose a font family according to my branding guidelines and adjust the font size to establish hierarchy.
- Margins and padding. CSS provides ways to space out my elements with margins and padding. As mentioned, white space is my friend — it makes my pages appear clean and digestible, both essential when optimizing any landing page.
You might be surprised at how far you can get with just these alone. But, if you need some help with your design vision, we have some landing page examples you can use for inspiration.
New to this process? To get started with CSS, check out our Ultimate CSS Tutorial for Beginners.
CSS & HTML Landing Page Templates
Coding from scratch offers you the most flexibility when building a landing page. However, starting completely from square one can be time-intensive. These landing page templates have code you can customize, all while saving the time it takes to build a page.
1. One Page
At a Glance
- Free options are available
- Prices go up to $49
- Uses the latest version of Bootstrap
- SEO optimized
The OnePage landing page template is perfect for businesses of any kind, featuring a versatile design with a neutral color scheme and well-structured sections. I love the responsiveness of this template across both desktop and mobile devices. This ensures seamless viewing experiences.
Additionally, OnePage is built with user-friendliness in mind. There are easy-to-follow comments in the code. You can easily find which parts of the code can be customized, making it beginner-friendly. For businesses wanting to build a landing page fast, this template is a must.
2. Simple Conversion
At a Glance
- Includes a photo, customizable text, and a short form
- Below the fold, you can also add more information about your offering
Bloated landing pages can distract from your goal, pulling attention away from forms and CTAs for your offer. I like the simplicity of this design. You can avoid clutter and minimize the number of distractions on your page.
You can customize and add other elements to your page, including icons below the form. This template is a great option if you want to build a simple landing page fast.
3. Open Pro
At a Glance
- Built with Tailwind CSS
- One time $49 payment
- Compatible with desktop, tablets, and mobile devices
- Available in HTML, VUE, Figma, Next.js, Sketch
With Open Pro, SAAS companies can quickly build landing pages that showcase their offerings. Plus, there are multiple ways you can edit this template. You can make changes in Figma, Vue, and HTML, making customization a breeze. You can also add a banner and MP4-compatible background.
I love this template's testimonial feature. You can showcase real customers who have benefited from your offering, making your audience more likely to engage. This template serves as a great starting point, streamlining the process of building a landing page.
4. Focus
At a Glance
- Free with HubSpot
- Bright colors that are sure to catch attention
- Simple, easy-to-customize design
If you’re looking for a modern, vibrant design for your pages, Focus is the way to go. This page has a simple layout that’s quick to customize. You just need to decide your form fields, your headline, the text for your offer, and a photo. You can easily upload your assets — a task made even simpler if you’re already using HubSpot.
5. Sprocket
At a Glance
- Free with HubSpot
- Prominent CTAs for conversion
- Easy to customize
Your landing pages don’t need to be filled with graphics to be well-designed. Sometimes, you just want a prominent headline, basic information, and a CTA for people to click on. If your style is more minimalist, Sprocket may be the best choice for you.
This is one of my favorite options for a straightforward offer strategy. Your newsletter, ebook, or gated content can shine.
6. Delivery
At a Glance
- Free options are available
- Prices go up to $29
- Fully Responsive across all browsers and devices
- Built with Bootstrap 5 and HTML5
This responsive template is perfect if you’re offering special coupons or deals. Businesses can offer free delivery or free add-ons in exchange for leads. I love the fun design of this page. Subtle yet impactful animations capture my attention effectively.
Beyond that, the template's minimalist approach ensures that only relevant information is shared, avoiding overwhelming customers.
7. Applayer
At a Glance
- Free options are available
- Prices go up to $14
- Fast Loading Times
- Built with the latest Bootstrap 5 version
This trendy template is an excellent choice for new businesses looking to establish a modern digital presentation. Applayer’s landing page has attention-catching CTAs with plenty of text modules where you can describe your offerings.
I also love the explore and FAQ sections. You can easily address common questions without the need for direct contact.
8. Treact
At a Glance
- Free for personal and commercial use
- Designed with Tailwind CSS
- Customizable components
Treact is a great choice for marketers who want enhanced customization options. This template’s collection features prebuilt landing pages with an extensive library of customizable UI components. If you find a near-perfect template with one module you want to fine-tune, you can easily shift these UI components.
9. Activello
At a Glance
- Supports most free Wordpress Plugins
- Free Wordpress Template
- Includes Documentation
Activello is a free Wordpress landing page. Plus, it’s built on Bootstrap, making it fully responsive across multiple devices. Beyond that, SEO is essential, allowing customers to find their web page. Luckily, this template prides itself on being Google-friendly. No matter the type of content or business, this highly versatile template can suit your needs.
10. Click Through
At a Glance
- Free with HubSpot
- Includes modules for hero images and text
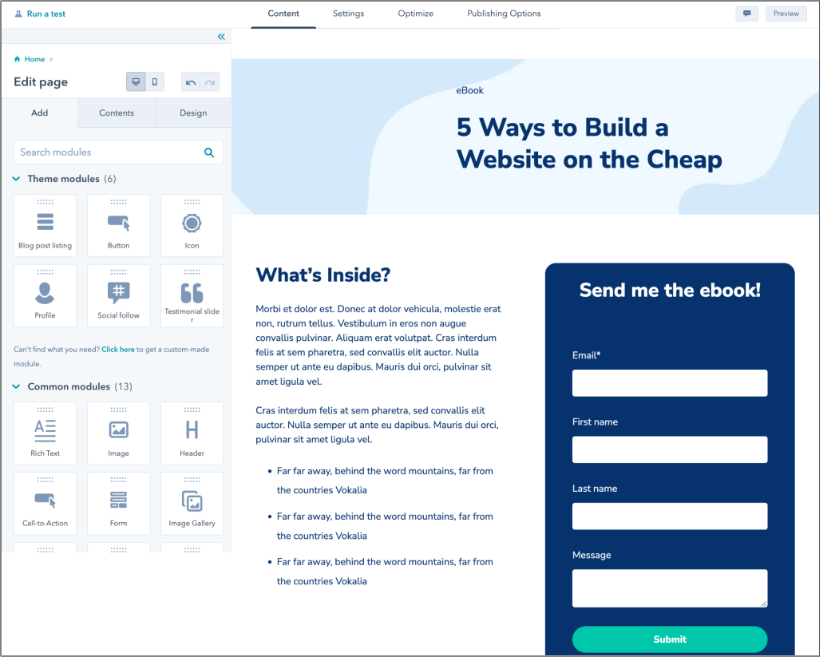
HubSpot’s Click Through landing page template offers a great way to capture blog subscribers. You can add your own hero image. Then, you can add any context visitors may need before downloading your offer. This template can also be edited with HubSpot’s drag-and-drop interface for a no-fuss experience.
11. EventGrids
At a Glance:
- Prices go up to $39
- Built with Bootstrap 5
- Multipurpose Design
The EventGrids template boasts an eye-catching design that‘s hard to miss. With its vibrant colors and tastefully integrated animations, it’s sure to captivate your visitors and draw them into your content.
Purposefully crafted for event pages, the color palette is well-suited to the theme, enticing your audience to join in on the excitement. Simply incorporate your unique content, and you'll be on your way to generating ticket sales and bookings in no time.
12. Consultant Landing Page
At a Glance
- Available with Wix
- Customizable
- CSS Animation on scroll
If you work in consulting, this landing page template makes promoting your services easy. All you need to do is fill out a chart that describes your services and share your store. I love how this template has a smooth scrolling animation, making your site feel extra professional.

Free Guide: 25 HTML & CSS Coding Hacks
Tangible tips and coding templates from experts to help you code better and faster.
- Coding to Convention
- Being Browser-Friendly
- Minimizing Bugs
- Optimizing Performance
Download Free
All fields are required.

13. Boutique
At a Glance
- Free options are available
- Prices go up to $190
- Multiple variances available
- SEO optimized
What I like the most about the Boutique template is its neutral design. As an ecommerce business, you need a distinct brand identity, comprising logos, colors, and fonts. Boutique landing pages allow you to quickly showcase your products on the web without confusing your customers with designs outside your brand vision.
With seven color variances, over 70 icons, and SEO Friendiness, the Boutique template is the perfect start.
14. App Landing Page
At a Glance
- Available with Wix
- Buttons to download for iOS and Android
If you’re promoting an app, simple is better. You want to describe how your app benefits users, showcase images of the app interface, and include buttons so visitors can download your offer. This template from Wix has everything you need, so you can create your page quickly.
15. Video
At a Glance
- Free with HubSpot
- Responsive design
Video can be an effective way to capture customers. You can describe your offer in your own words and even show a video demo. If you want to showcase video on your page, this HubSpot template makes it easy. You can include your video, images, and a description of how users will benefit.
HTML Landing Page Tools
Need some help with your landing page? Here are my favorite options that make building web pages a breeze.
- HubSpot — HubSpot offers a free landing page builder that can help you create and test beautiful landing pages that look great on any device.
- Elementor — If you’re working with WordPress, Elementor allows you to choose from 300+ professional-grade page options, rather than create one from scratch. Pricing starts at $49 for one site for one year.
- Ucraft — Ucraft offers a host of free landing page options to help drive lead generation on your site and streamline visitor data collection.
- Leadpages — You can leverage Leadpages as a WordPress plugin to manage site landing pages or upload an HTML page directly to your server. You can then decide exactly how much HTML work you’re comfortable with and how much you want to offload.
- Startup — Startup lets you create a website without code with pre-designed blocks. This Bootstrap-based tool includes a visual editor (no coding required) that will help you build a responsive website design quickly.
Build Your Perfect HTML Landing Page
Converting visitors into valued customers starts with clear, clean, content-rich landing pages. Leverage HTML and CSS basics to design and deploy the best-fit page for your business, and take full control over its functionality and visuals.
Editor's note: This post was originally published in February 2020 and has been updated for comprehensiveness.
![Download Now: 50 Code Templates [Free Snippets]](https://no-cache.hubspot.com/cta/default/53/34adf7eb-7945-49c4-acb8-f7e177b323e5.png)


![How to Create an HTML Dropdown Menu [+ Examples]](https://www.hubspot.com/hubfs/html-dropdown.jpg)
![Onchange Event in HTML: How to Use It [+Examples]](https://knowledge.hubspot.com/hubfs/onchange.webp)


