

I recently worked with a major wellness brand with over 90 pages and hundreds of images throughout their site. Luckily, we used the AEM digital asset management (DAM) to manage all their digital assets. The cool thing is that each picture was given its own URL — this made it easy for the content editors to find and share images, and we could easily reuse them without duplicating them in the DAM.
The real lifesaver here was the URL to image feature, which can save time, space, and effort. It also increased the efficiency of our project tremendously.
Today, I’ll walk you through two processes you should know for your URL and picture-related tasks: how to get a URL for an image you have on your site, and how to add a URL to an image so it redirects to a page when you click it.
Table of Contents
- Why Should You Learn How to Get a URL for an Image?
- How to Get a URL of an Image
- Why Should You Learn How to Add a URL to an Image?
- How to Add a Link to an Image
- How I Turn a Picture Into a Link Using HTML
- Best Practices for Linking Images
Why Should You Learn How to Get a URL for an Image?
Great question — and there are a couple of reasons why learning how to get a URL for an image is a good idea. I’ll walk you through them now.
It’s an easy way to share an image.
If you’re sending an image and want to make sure it’s accessible to everyone, you can consider uploading it to your content management system (CMS) and getting a URL for the image. By doing this, you can rest assured that everyone you want to share the image with can view it. (As long as they can connect to the internet, that is.)
It’s direct.
Another reason I love getting a URL for an image is because it’s direct. When someone follows the link, they can access that image — and that image alone. It doesn’t point to the website but simply the image itself.
HubSpot's Free Website Builder
Create and customize your own business website with an easy drag-and-drop website builder.
- Build a website without any coding skills.
- Pre-built themes and templates.
- Built-in marketing tools and features.
- And more!
How to Get a URL of an Image
Below is the step-by-step process I use to get an image URL. It’s only a couple of steps, and I know you’ll pick this up quickly.
Step 1: Pull up the image I want to get a URL for.
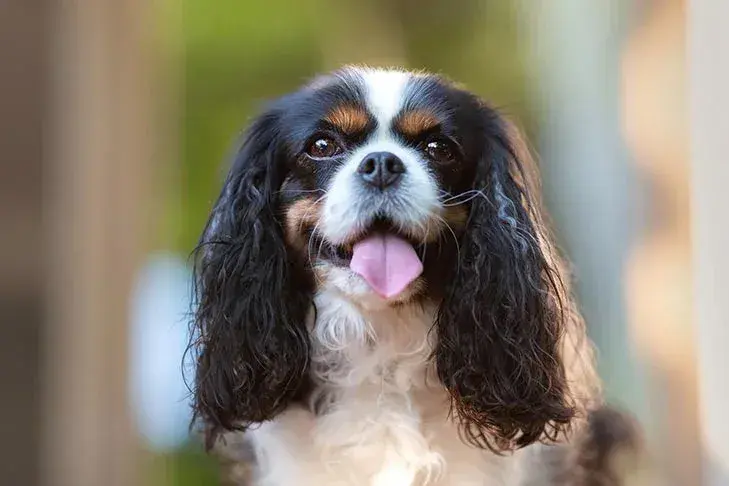
For this example, I’ll get a URL for this image of a cavalier king charles spaniel from the AKC website. Note that this isn’t my website, but you can follow the same process for your own website.
Step 2: Right-click on the image so a menu populates.
It should look like this:
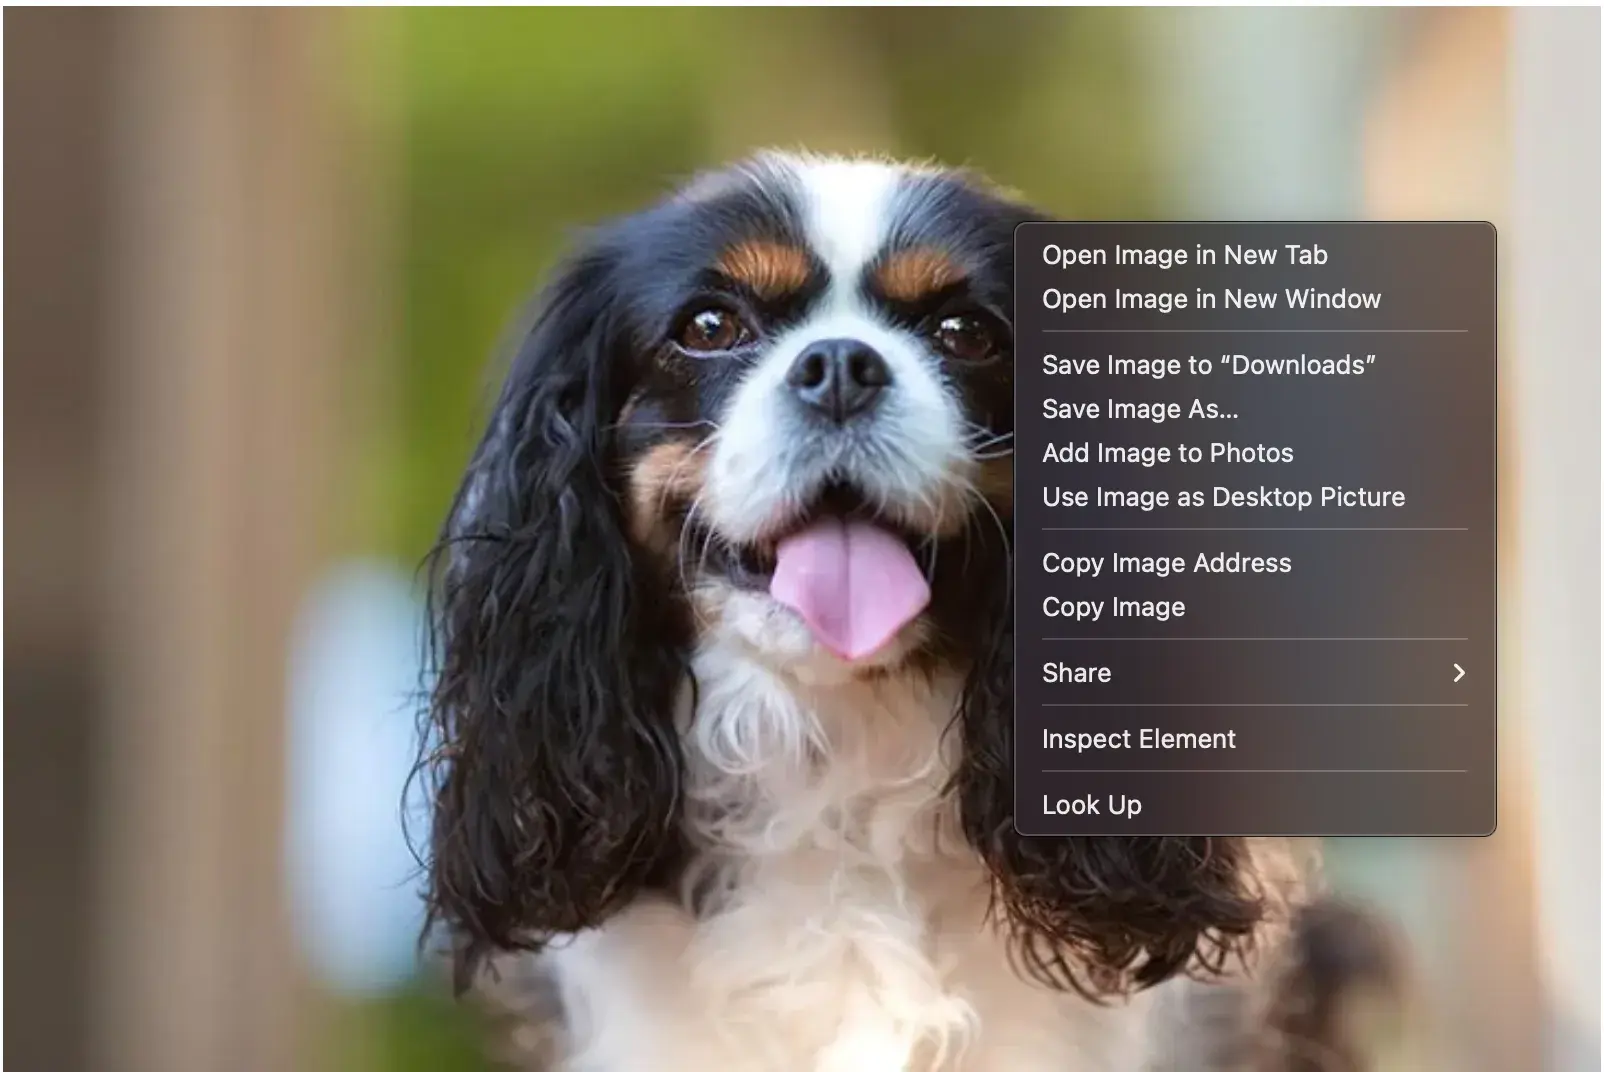
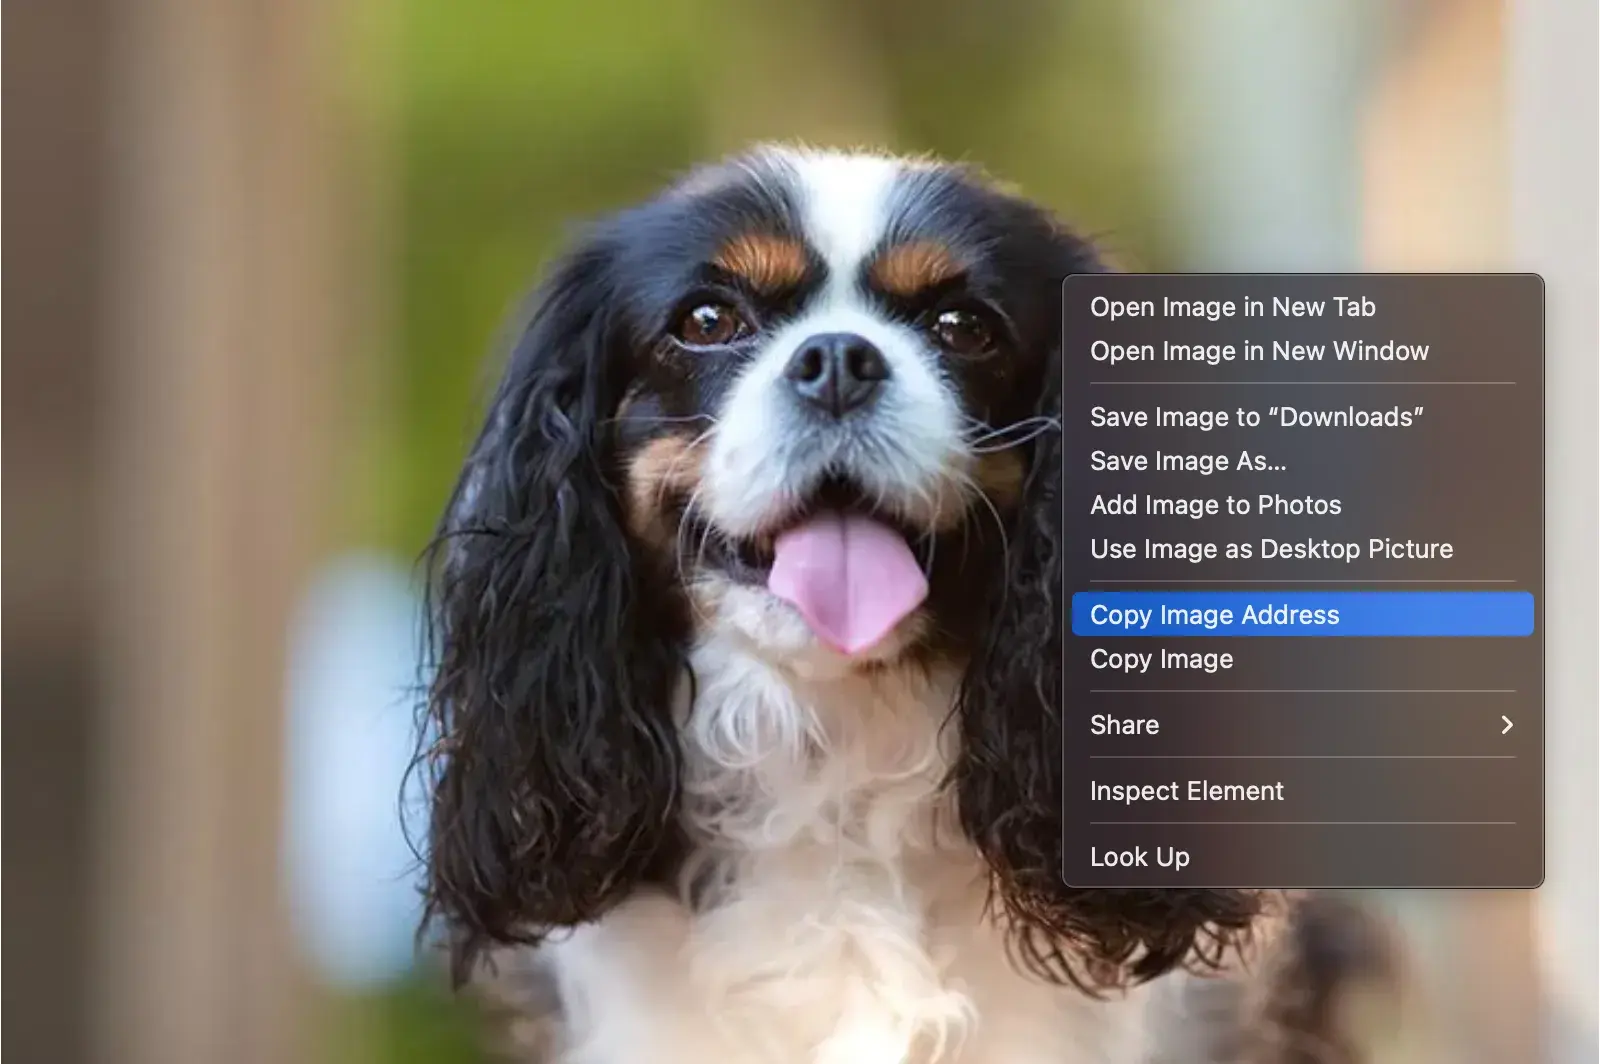
Step 3: Locate the ‘Copy Image Address’ option.
Next, I select the “copy image address” option and click it.
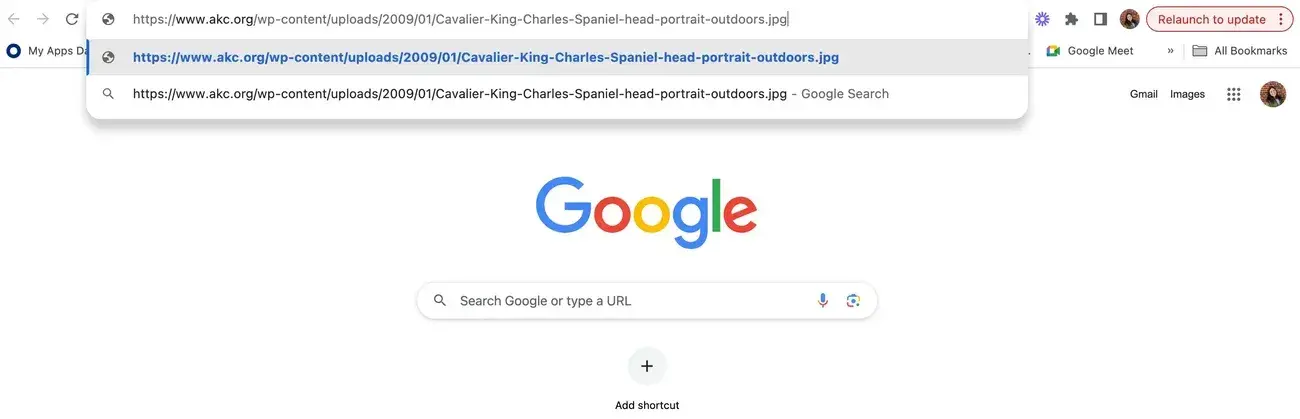
Step 4: Paste the address I copied into my search bar.
With the image address copied, I paste it into my search bar. This is what I see. I click Enter to go to the page.
Once I've clicked enter, my browser shows the following image:
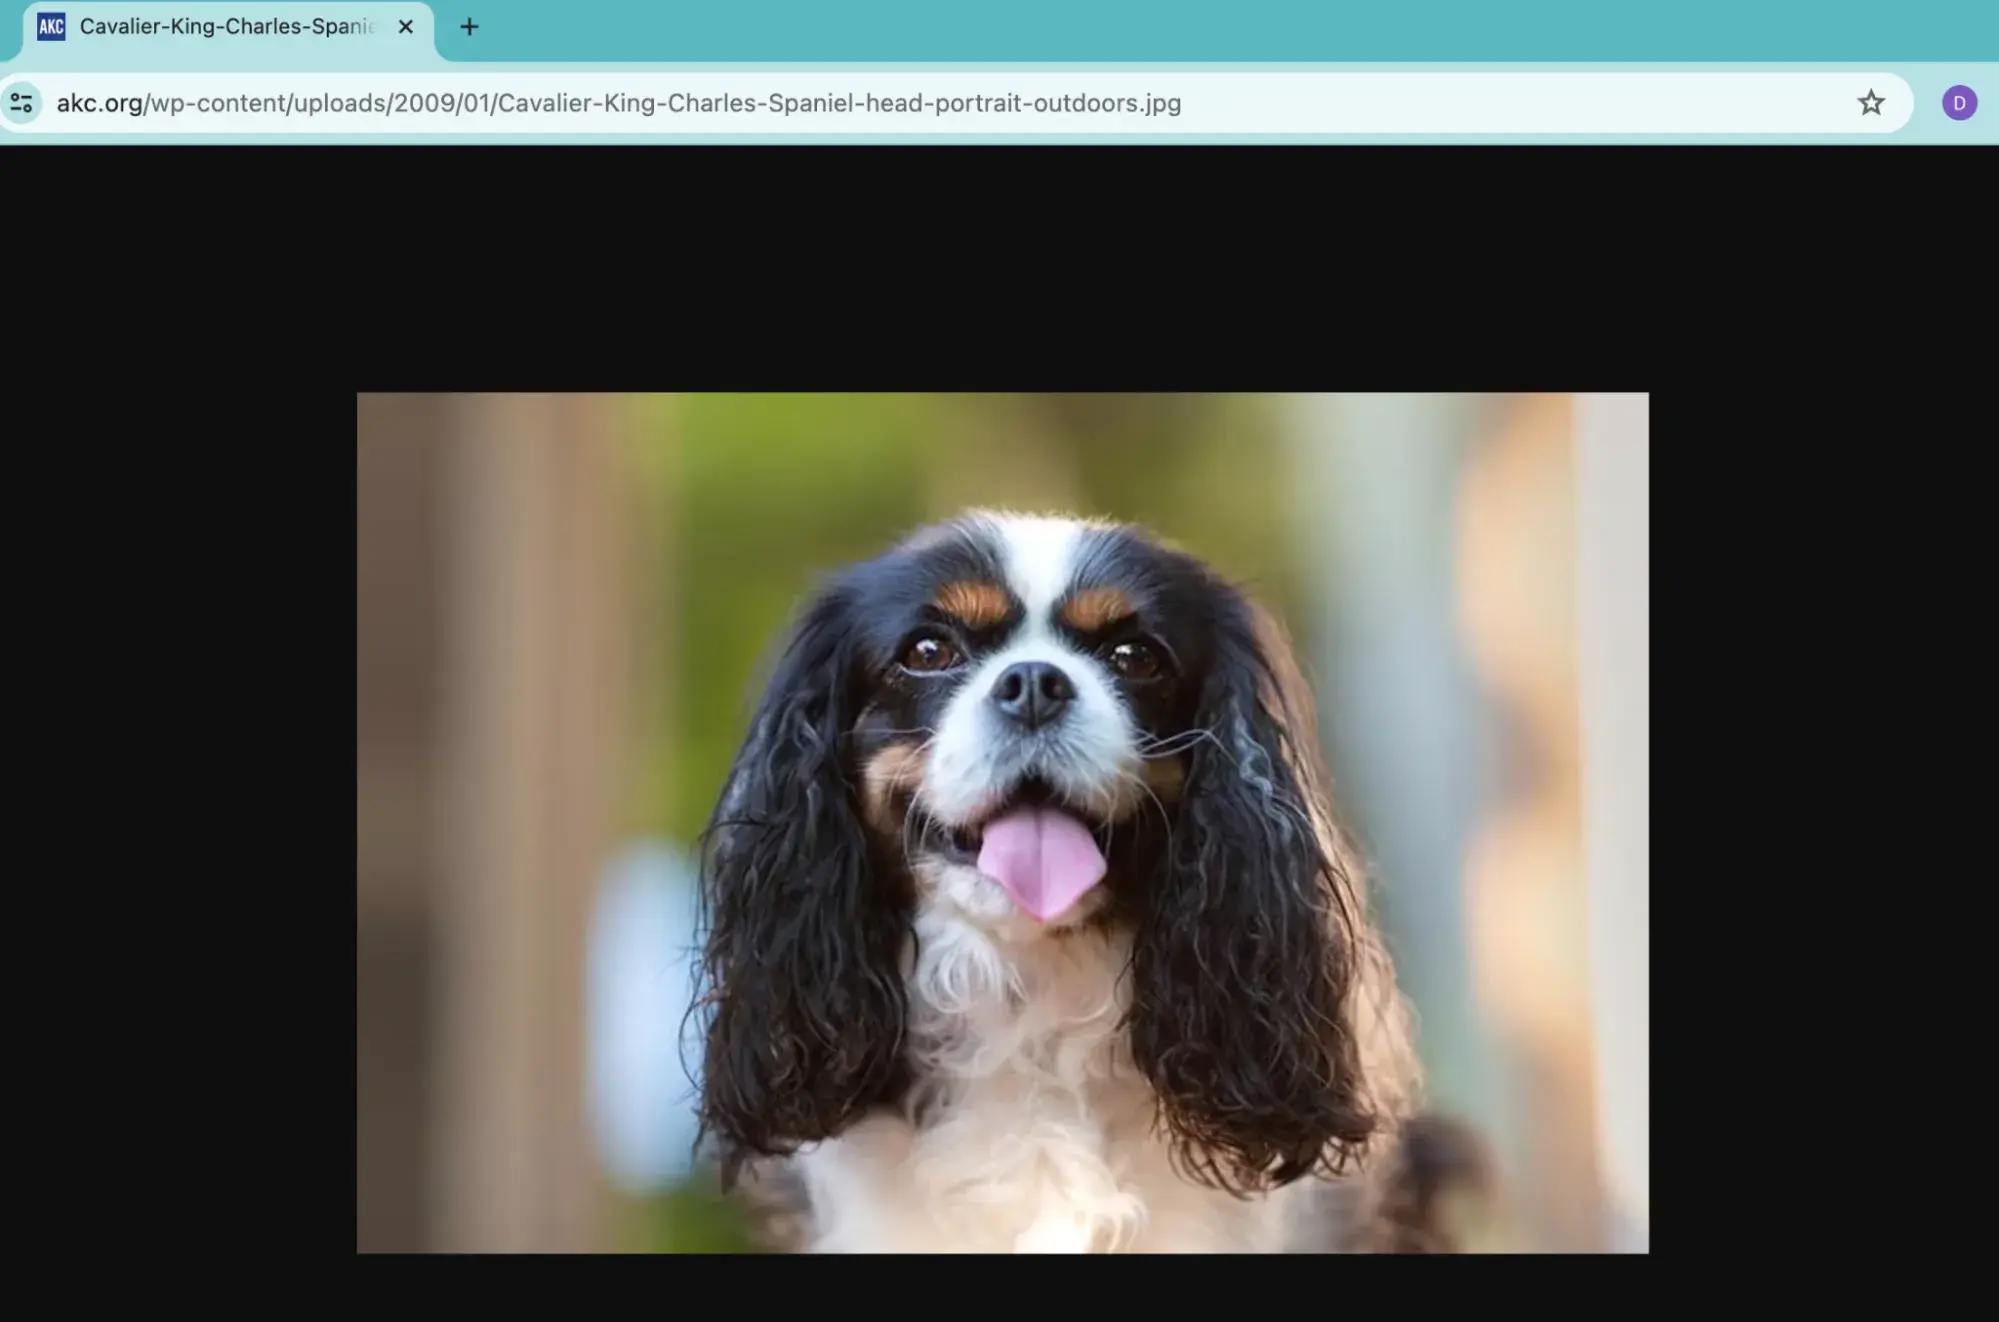
Now I can send that image URL to anyone, and they’ll just be directed to the image, not the page on which I found it.
That's it! Now that I’ve shown you how to get a URL for an image, it’s time to show you how to add a URL to an image itself. (In other words, how to make sure a URL pops up when visitors click an image.)
Why Should You Learn How to Add a URL to an Image?
There are two primary reasons why learning to add a link to an image is worthwhile: It lets you capture your users’ attention, and it lets you cast a larger net for users to click or tap. Allow me to explain.
Reason 1: Garner more attention.
Think of it this way: Would you rather read lengthy chunks of text without pictures or enjoy graphics interspersed throughout? I prefer the latter, and I’m not alone. Humans can process images in just 13 milliseconds — which is 60,000 times faster than text, according to BRG Communications.
Furthermore, 65% of people are visual learners — which again demonstrates the necessity of using imagery. Imagine a news story without a feature image or a product listing without a picture of the item. One of my journalism professors in college used to tell my class that it didn‘t matter how good the story was — if there wasn’t an image, no one would read it. Descriptions alone aren’t enough; imagery helps compel people to take action.
That doesn’t mean copy is irrelevant, however. Search engines are constantly crawling your website to make sense of your content and determine how — or if — they can share it with users. And because images are traditionally more challenging for search engines to analyze, you should make things easier for them by adding text-based meta descriptions. Also, to adhere to website accessibility best practices, you need alt text.
What does that mean for your website? You should use copy and imagery effectively to compel your users to convert or return to your website.
Reason 2: Create larger clickable areas.
Adding a clickable link to a website is an excellent idea because it helps streamline customer interaction. Have you ever landed on a website page with multiple products containing an under-image text link? If so, you know that the link text takes up a lot less space than the image does. If you only have a link accessible with the text, you’re creating friction and frustration for users.
Here’s an example of what to do instead. Clean makeup brand Tower 28 enables you to access the product’s individual page by clicking the product’s name or the image itself. This reduces friction and makes for a more seamless user experience.
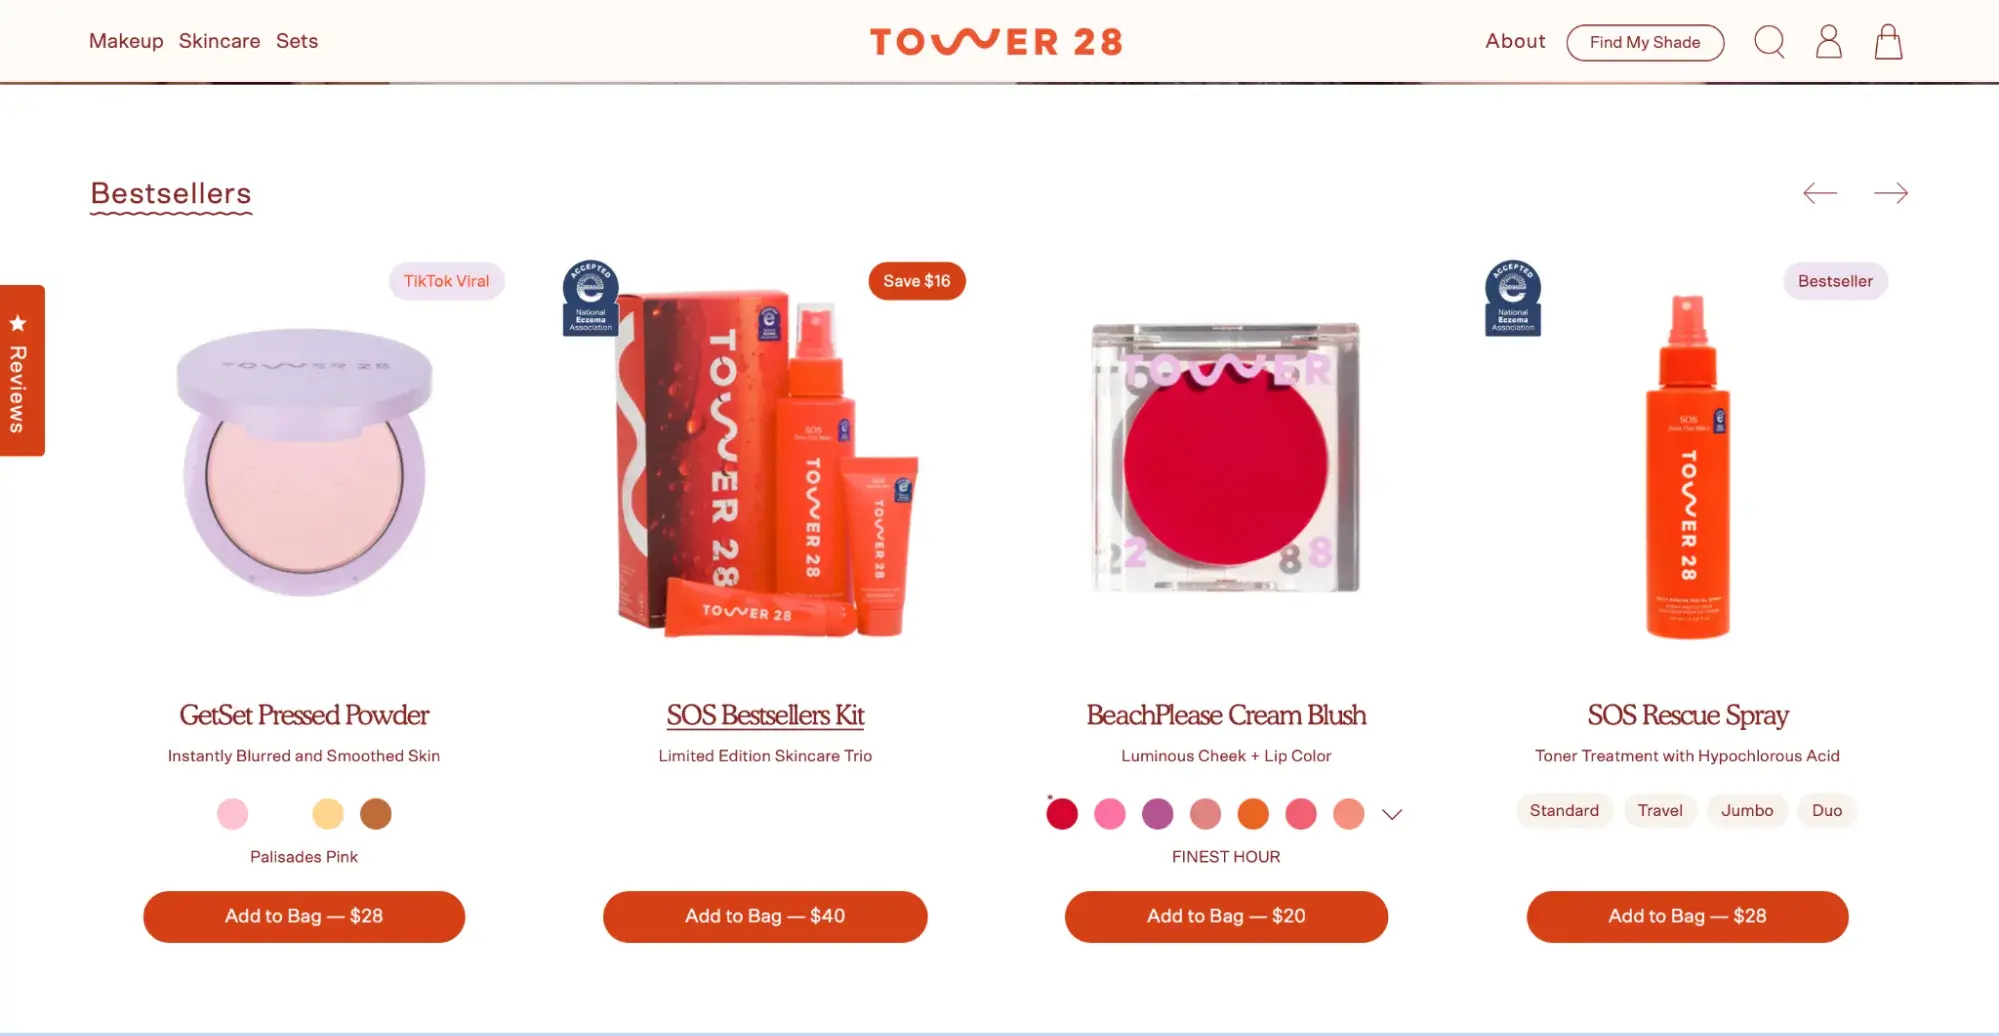
When you leverage image links, you ensure that your users are able to access crucial information via the text and the picture associated with it. This reduces the likelihood your visitors will become frustrated and ultimately abandon your website.
How to Add a Link to an Image
The first thing that you should keep in mind about this process is that it will vary slightly depending on what content management system (CMS) you are using.
For the sake of this tutorial, I’ll walk you through how I add links to my images using the CMS in HubSpot's Content Hub (which I highly recommend, especially if you’re looking to build a website).
How to Add a Link to an Image in Content Hub to a Web Page
I’m always excited to use the many features in Content Hub to build my website. Adding a link to an image is one of the features that Content Hub managed to simplify. Here’s how I do it.
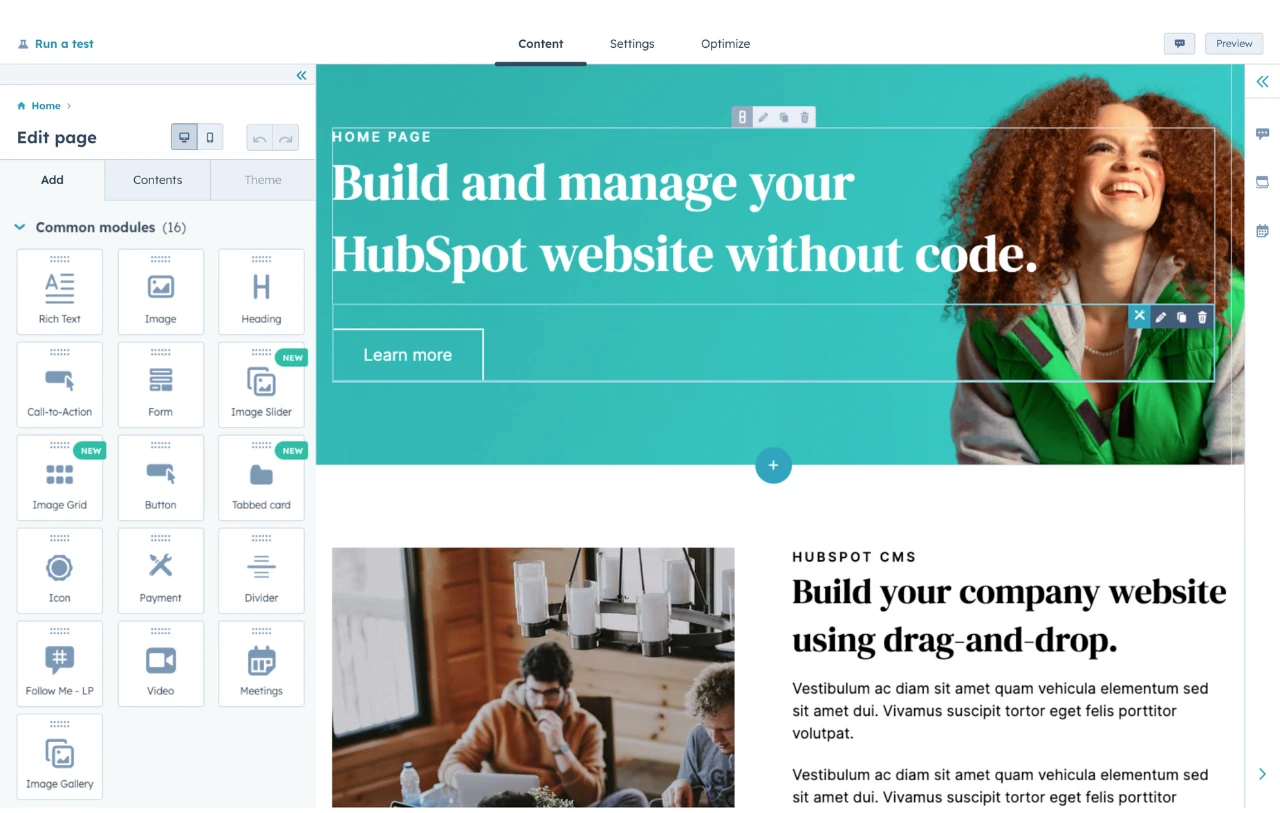
1. I open Content Hub, navigate to the Content icon, and click on Website Pages.
I navigate to my blog or website pages, depending on where I want to add the image. There are two processes I want to walk you through: adding an image to a website page and then to a blog post.
2. I navigate to the ‘Add’ tab on the left side of my screen.
I click on the + sign.
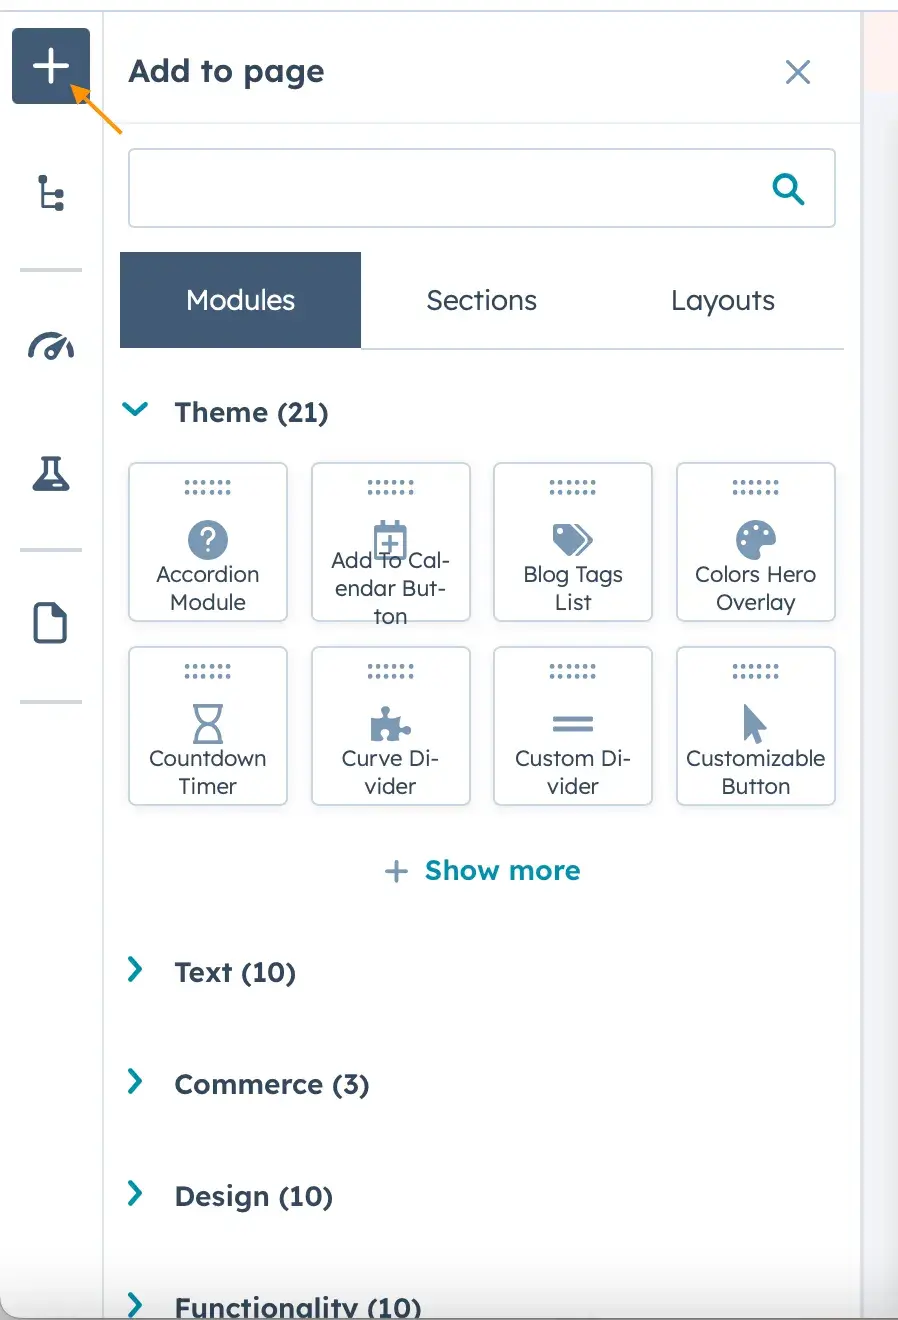
Once there, I search Image in the search bar. There are different types of image modules that pop up. For this tutorial, I’ll add a traditional image.
3. I drag the module I want to add to its correct placement on my website.
This is what it looks like on my end:
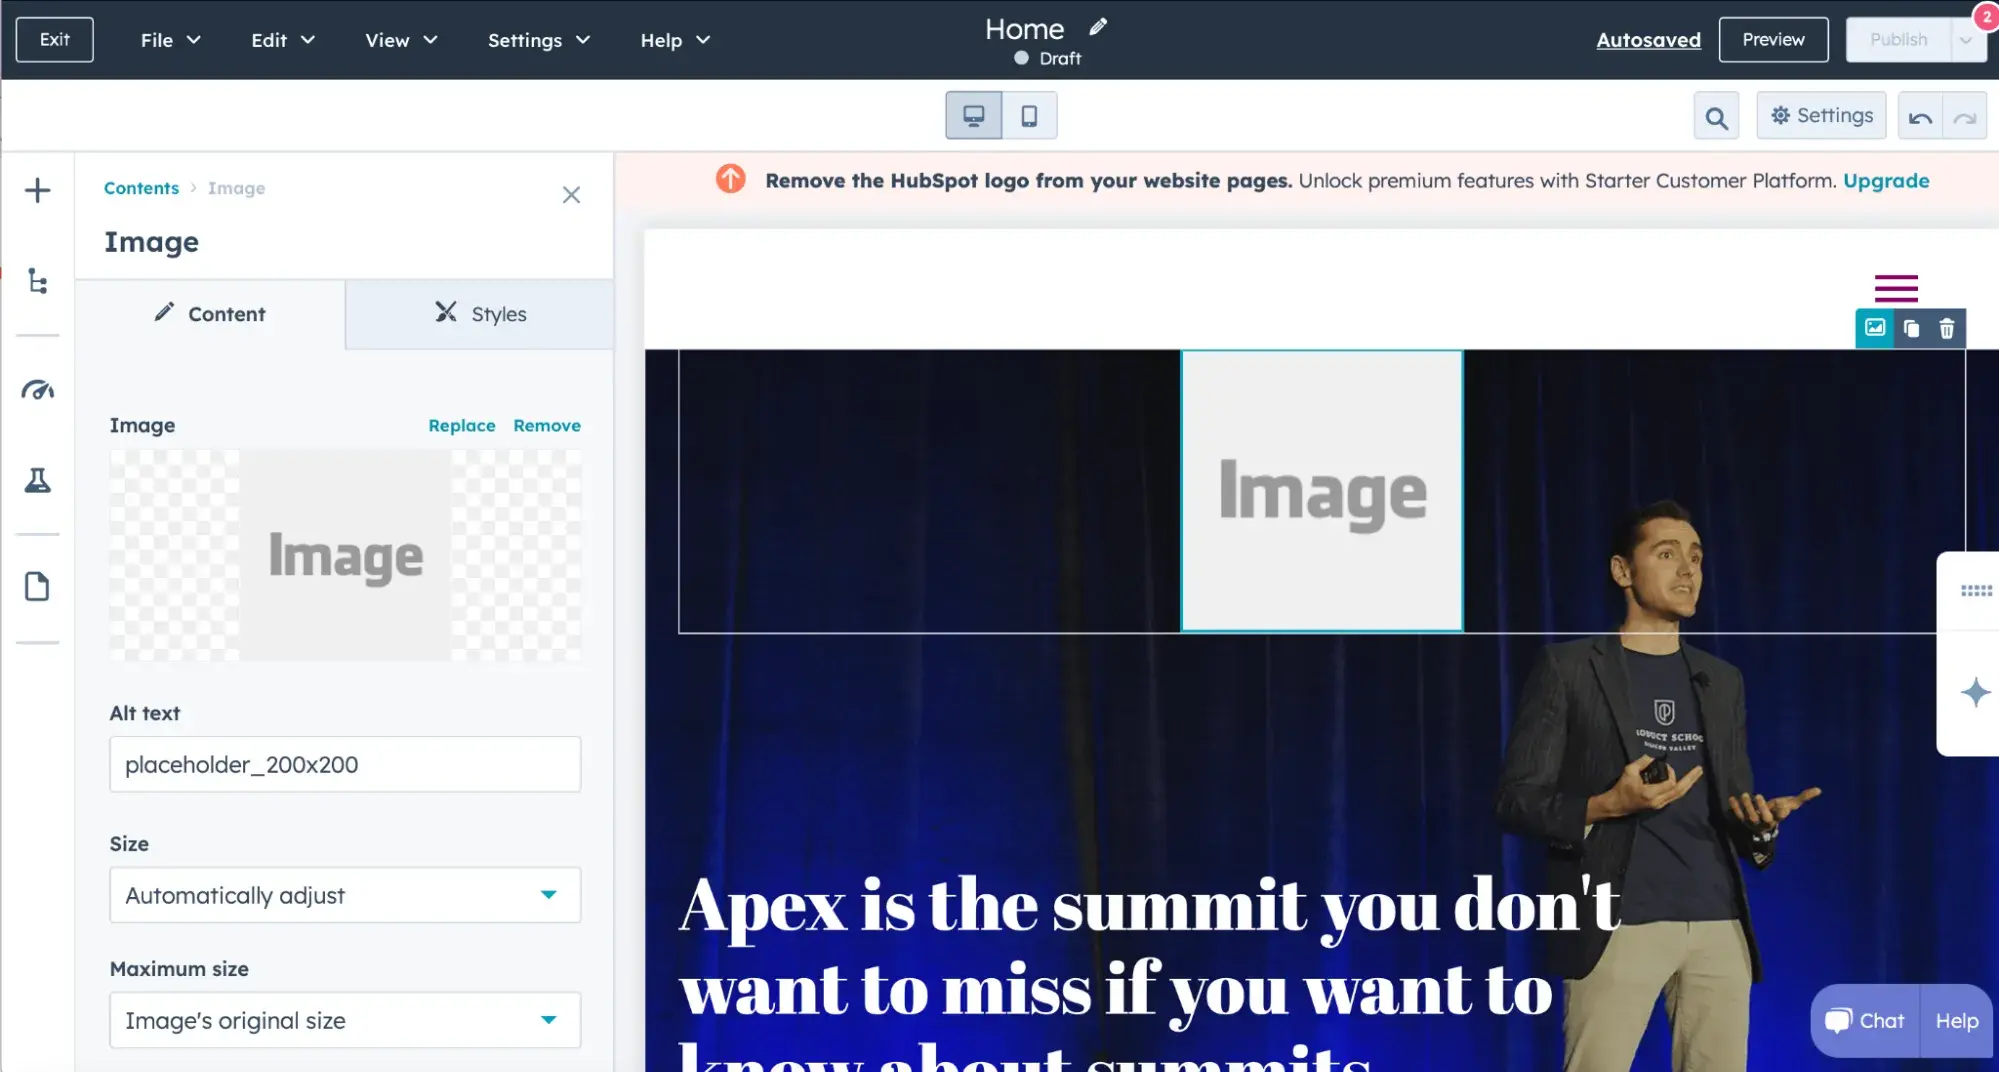
4. I replace the placeholder image, add alt text, and adjust other appearance settings.
I found all of these options on the same tab by scrolling down.

5. Scroll to the bottom to add the URL.
Now that I’ve adjusted how I want the image to look, I can add a URL.

I also have the option to open the image in a new tab or not. Here at HubSpot, we like to do that so the visitor doesn’t lose their place on their current page when clicking a link. I’d recommend checking that box, but it’s ultimately your call. This should update automatically, but I always save my page manually at this point as a safety precaution.
How to Add a Link to an Image in Content Hub to a Blog Post
What about adding a link to your image with Content Hub on a blog post? Don’t worry — I’ll show you how I do that, too.
1. I open the Content Hub, navigate to the Content icon, and click on Blog.
Then, I navigate to my blog post to add the image.
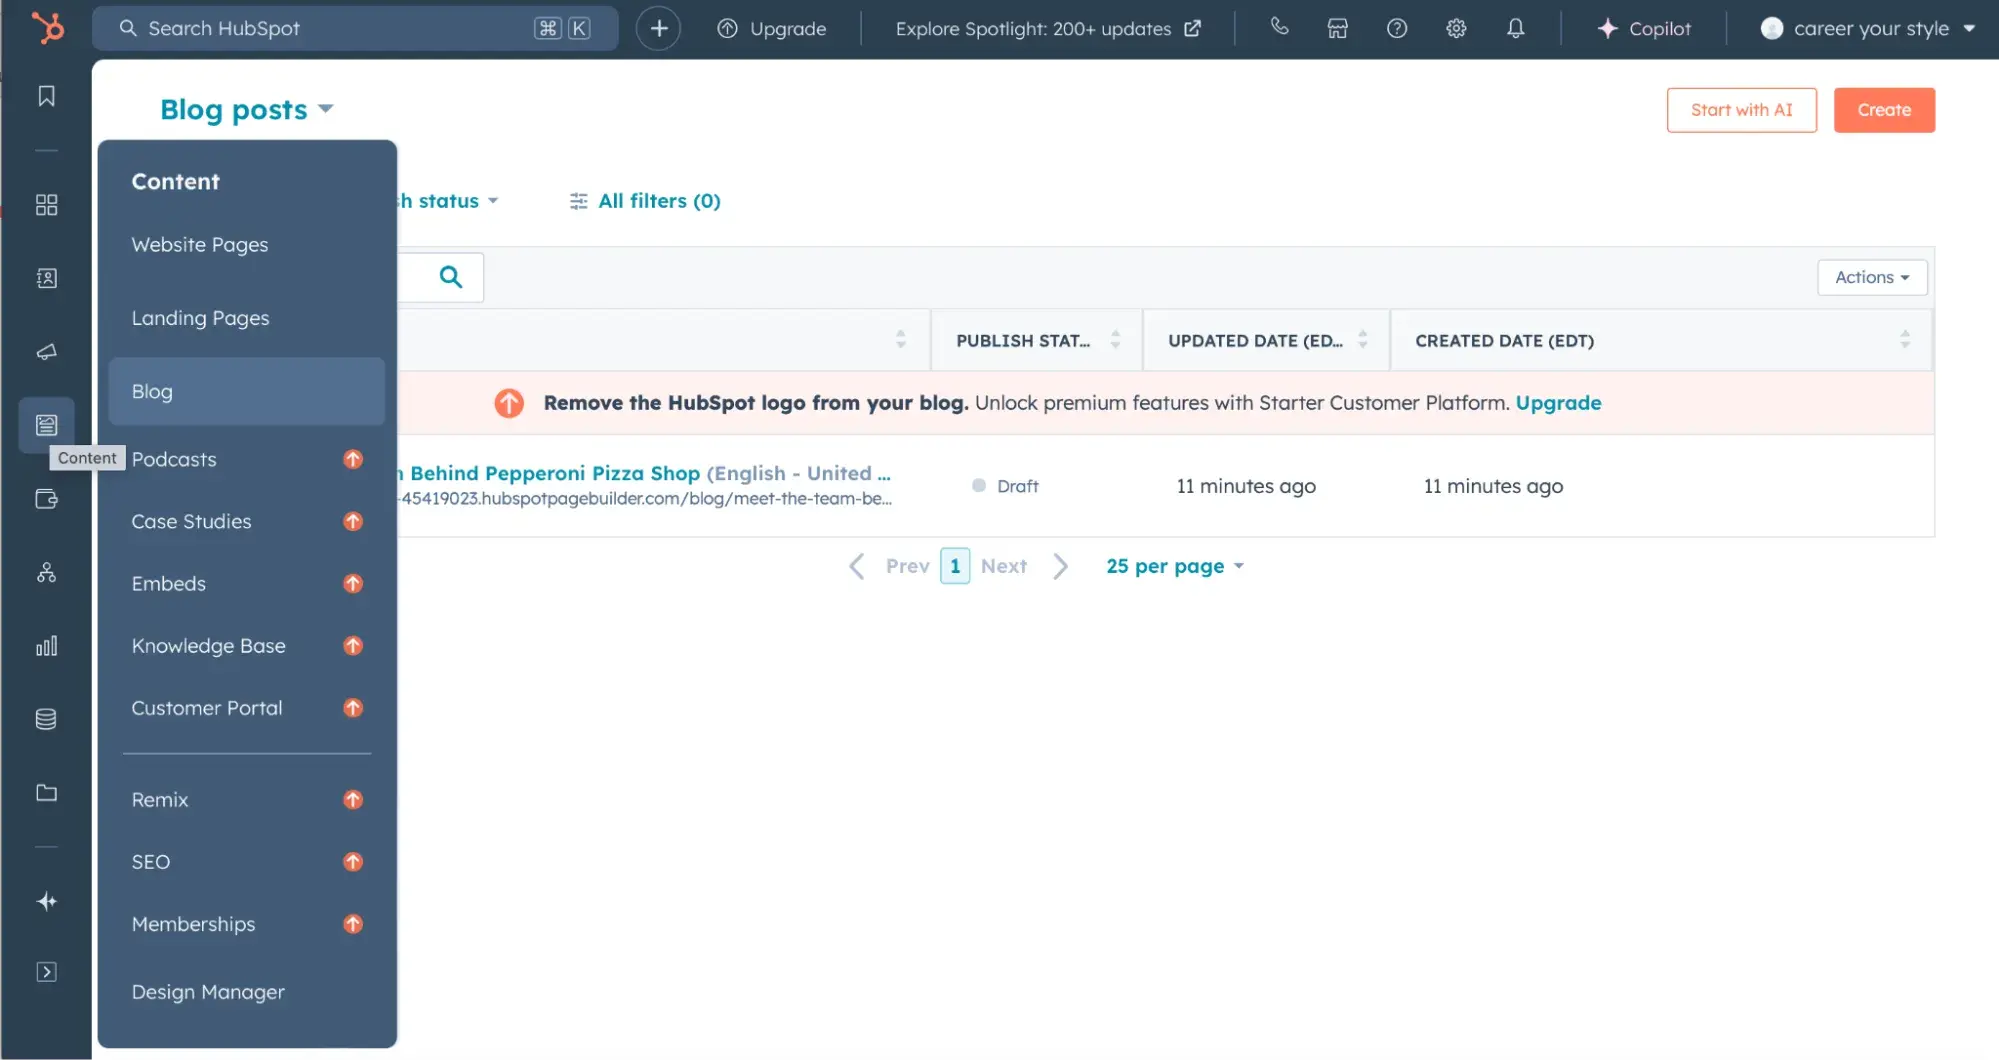
2. I can choose to create a new post or navigate to the post I want to add the image to.
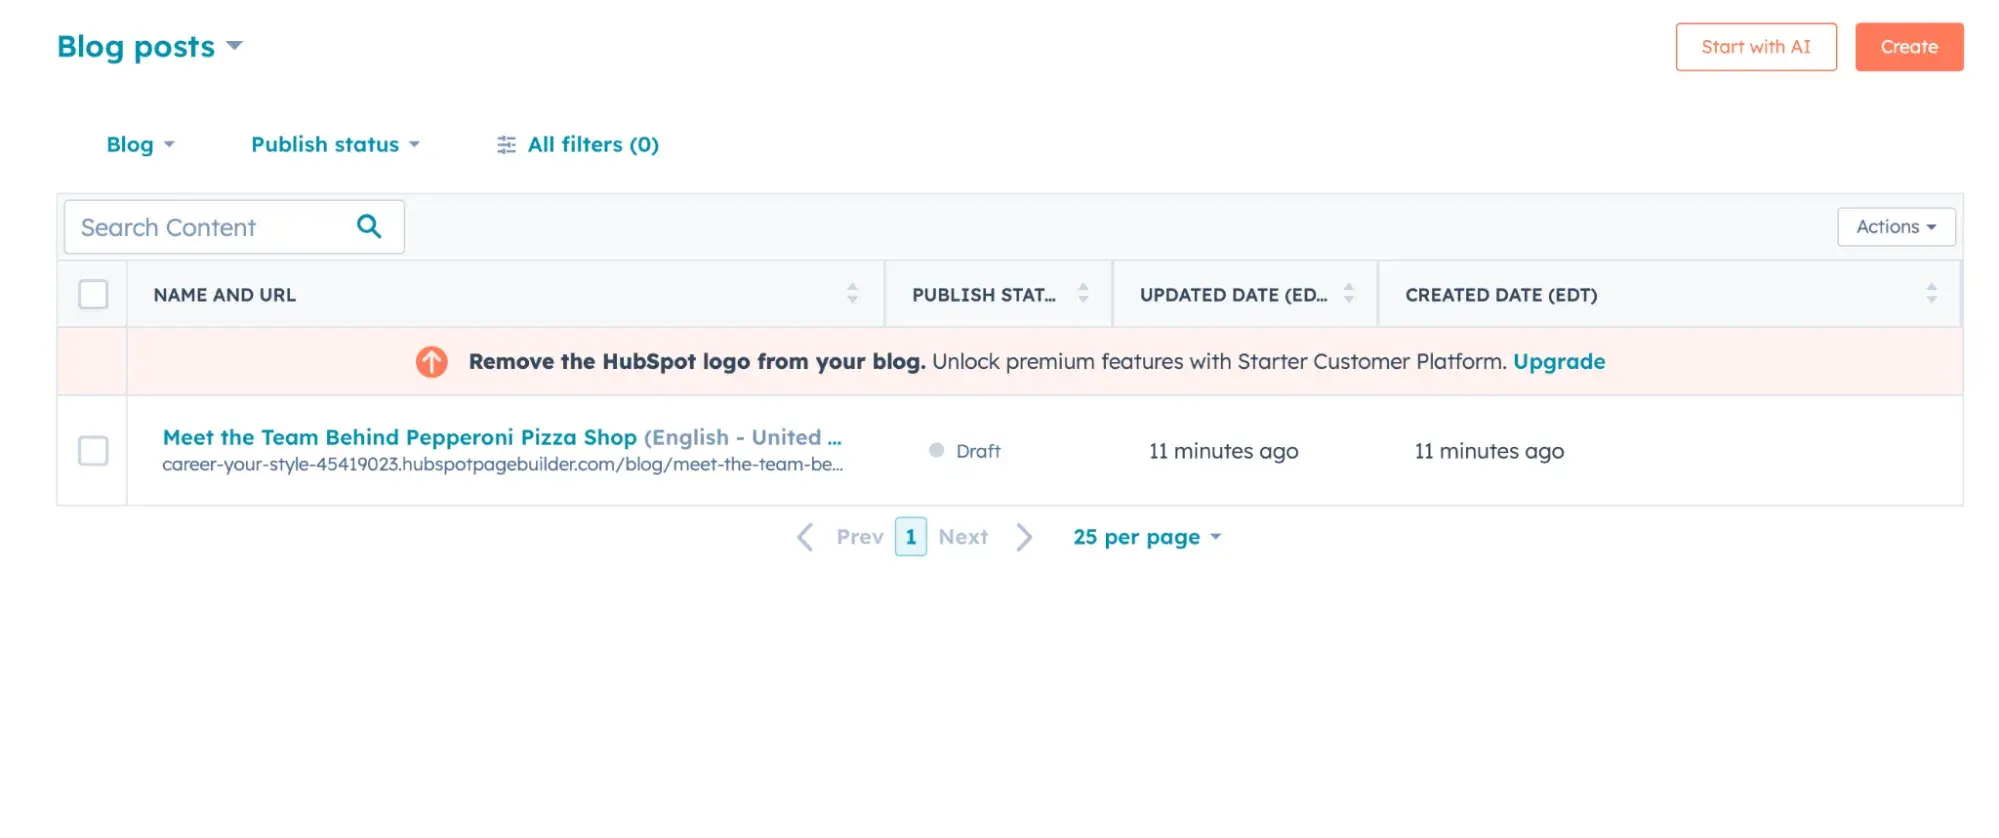
I can access the Create button in the top right corner of my screen, as shown. (If you have multiple blogs, you’ll be prompted to select the blog you want to house the post after clicking Create.)
Or, I can choose a blog that I have previously created. For this tutorial, I will use my Pizza Shop - About Me Blog.
3. I click inside the blog post where I want to add the image to access the toolbar. Then, I click the insert image icon to access the image edit pane.
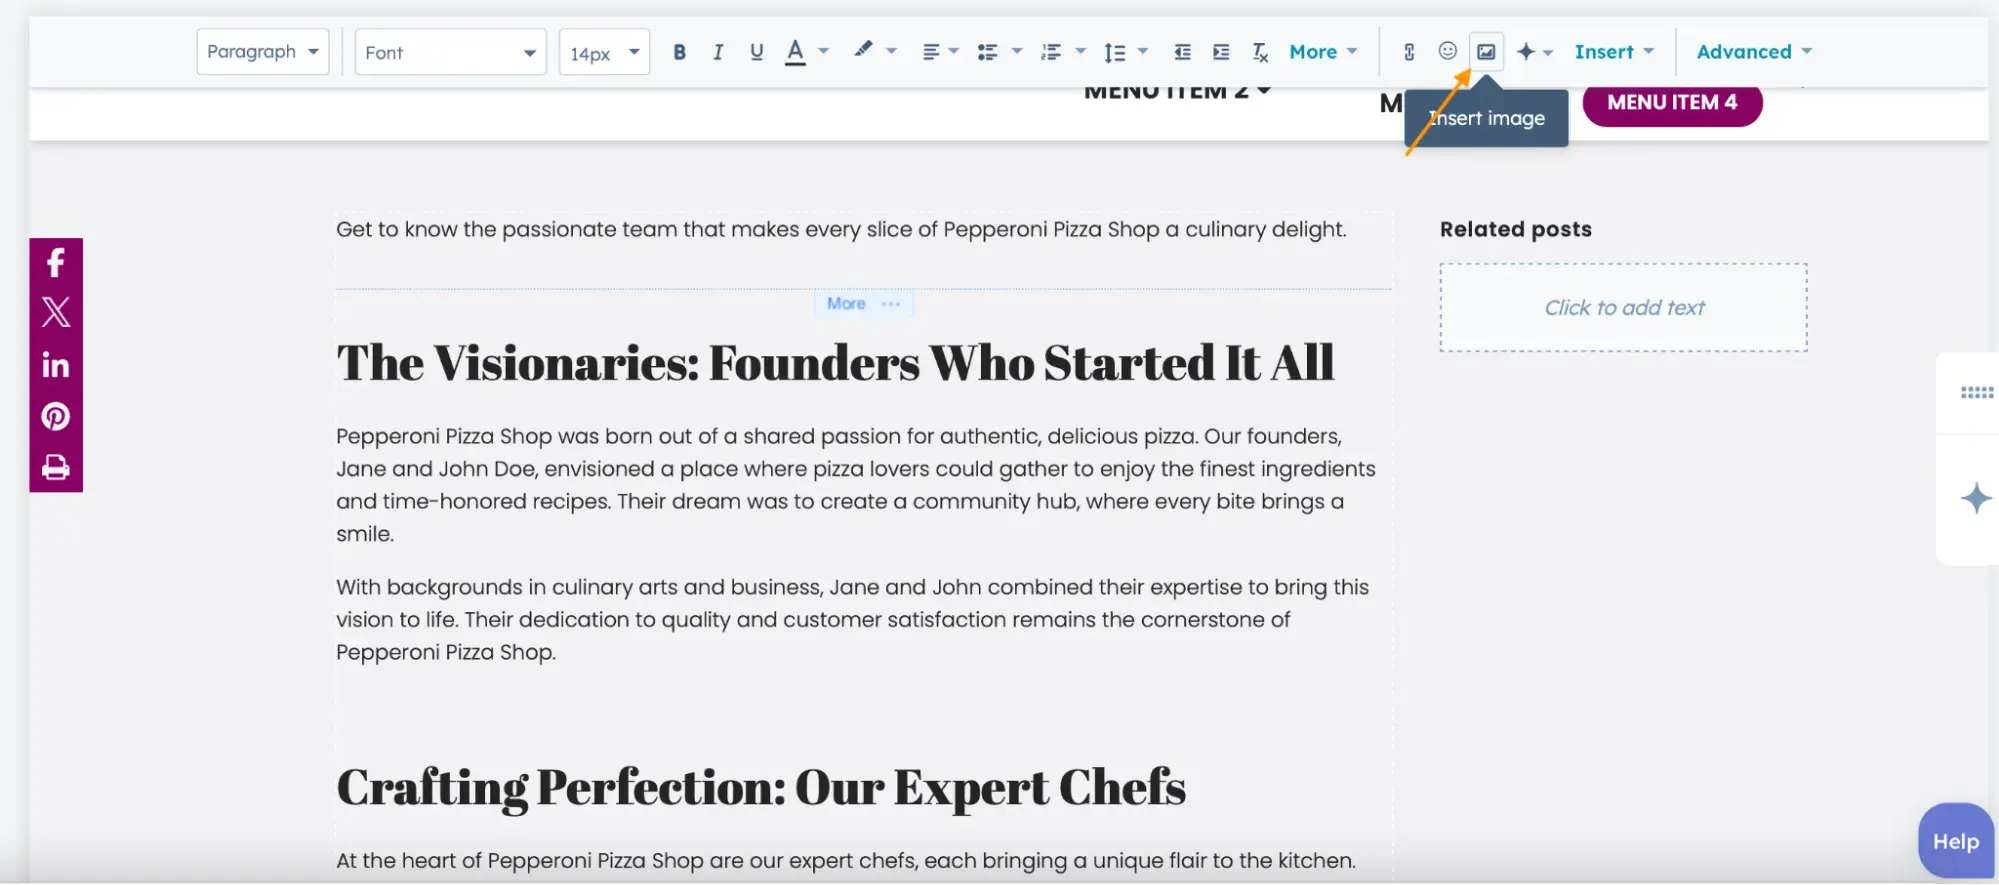
I navigate to the Insert Image icon, as highlighted, and click.
4. Upload or select a recent photo.
Then I click the graphic I want to insert and drop it in my blog post. In Content Hub, the icon looks like a little pencil.
5. Once the image is in my post, I click Edit image.

6. Pick where I want the image to link.

For this example, I’ll choose a URL. But it's good to know there are other options if I want to try something new.
7. Insert the URL.

I insert my URL in the bar that says URL. I've also decided to open the link in a new window, which, again, I highly recommend you do the same. Lastly, I can preview the link to ensure it’s the one I want. Once finished, I click Apply to save.
And there you have it! I’ve successfully shown you how I added a URL to an image in a blog post.
HubSpot's Free Website Builder
Create and customize your own business website with an easy drag-and-drop website builder.
- Build a website without any coding skills.
- Pre-built themes and templates.
- Built-in marketing tools and features.
- And more!
How to Add a Link to an Image using Image Hosting Site Imgur
Let’s say you have a ton of pictures, and you want to manage sharing your images with links from a central location. That’s where an image hosting site like Imgur comes in handy.
You can use the generated links to embed your images across multiple social sites, too. Let me show you how.
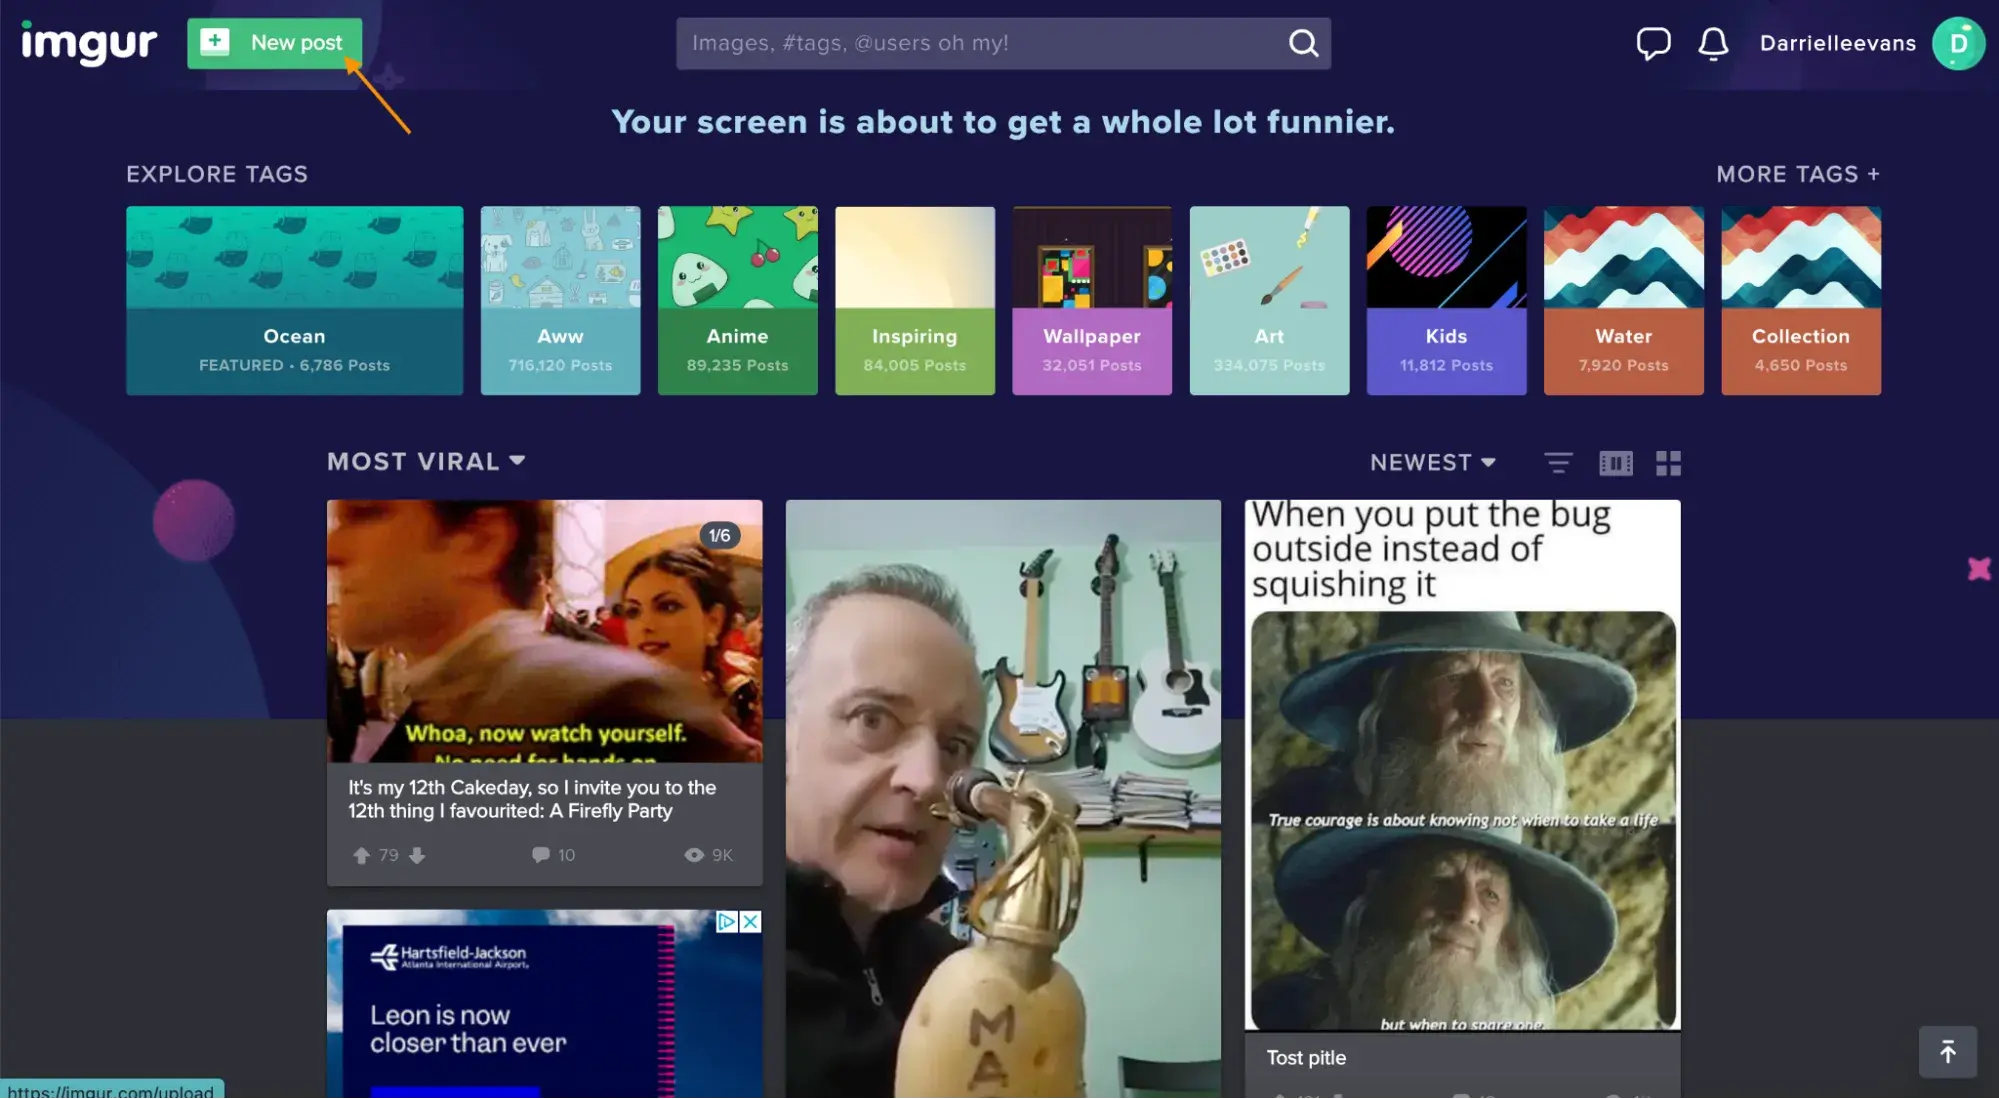
1. Sign in and navigate to the New Post button.
I click on the + button to navigate to the image upload page.
2. Here, I can upload a new image or paste an image URL.
I uploaded the Hubspot image to my Imgur library.
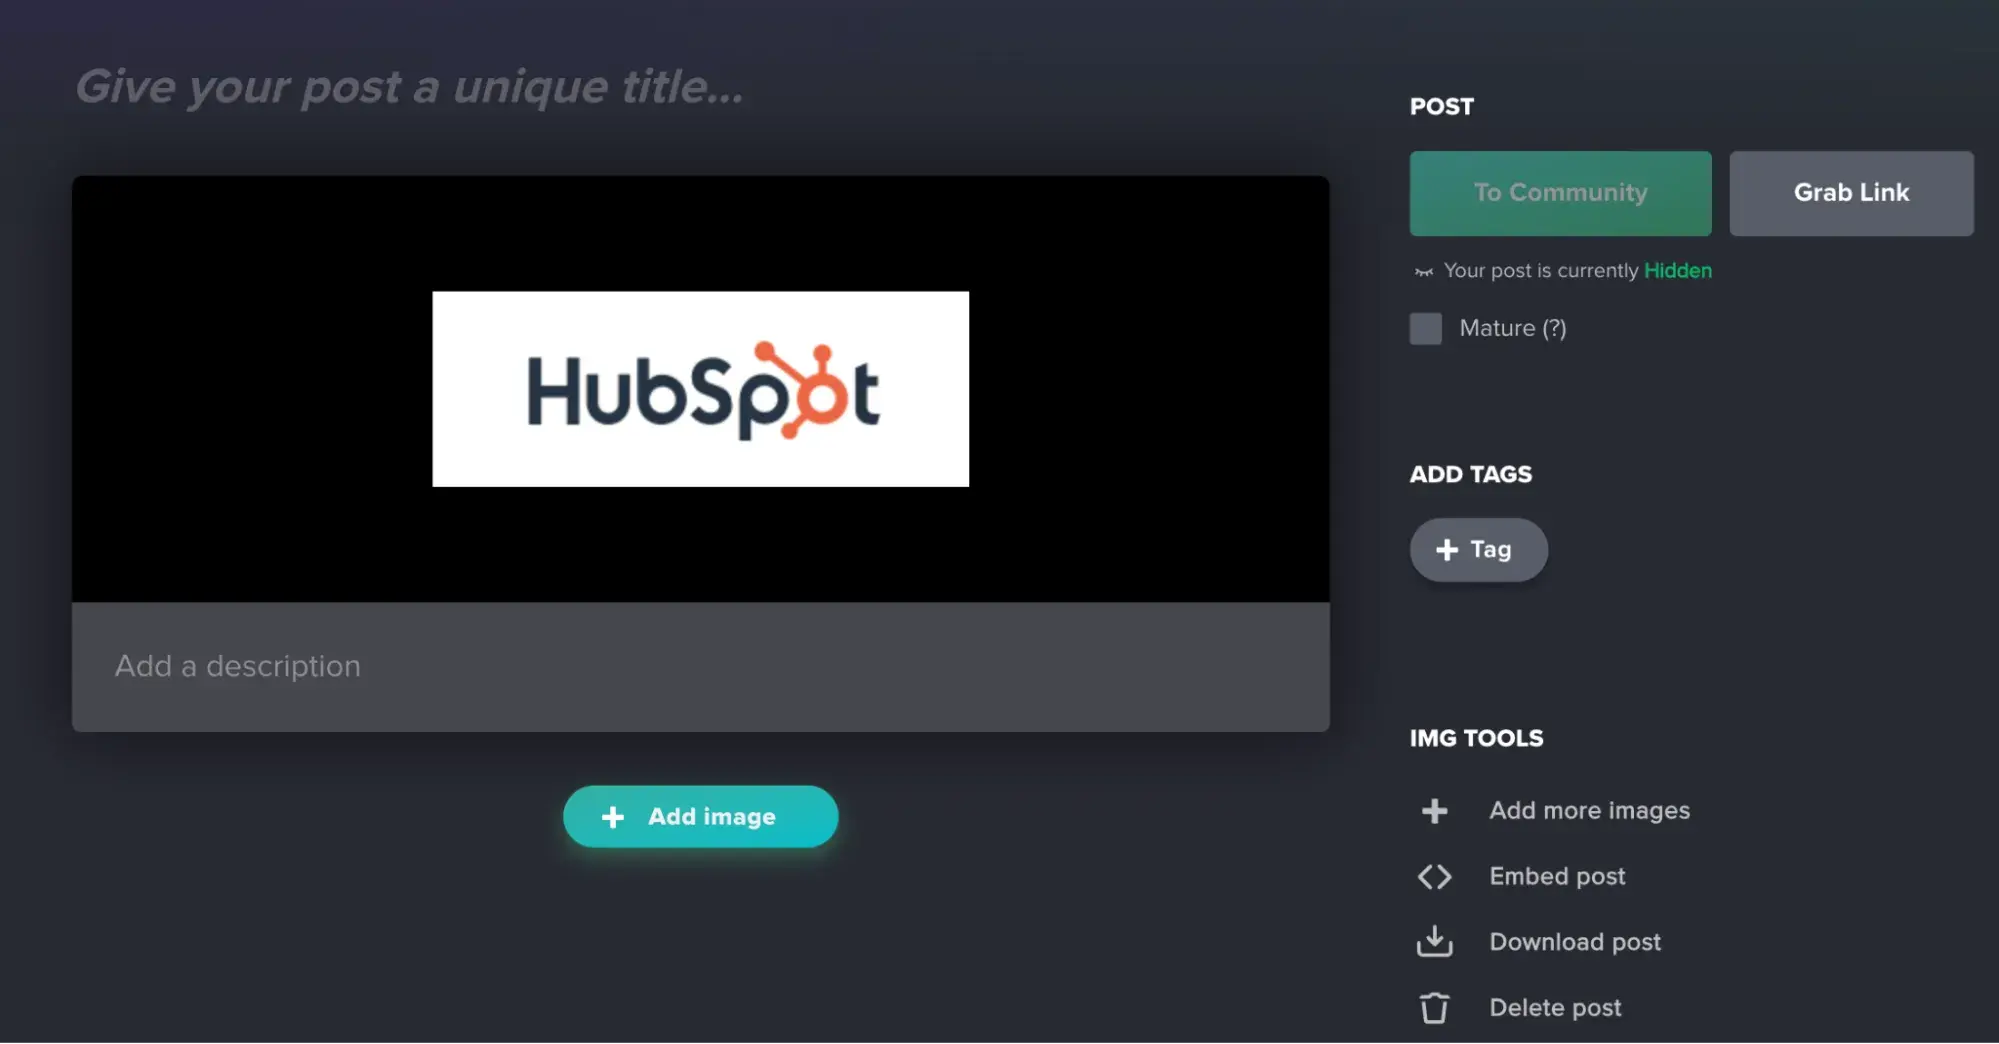
From here, I added a title and a description which helps improve visibility within search results.
3. Generate the link to my image.
I click on Grab Link to generate the link to my image.

Now I can see the image's URL and the option to share the image on different social sites.

And there you go I generated the link in less than five minutes. It’s that simple.
How I Turn a Picture Into a Link Using HTML
Phew, that was a lot of steps! Now, you might be wondering how these two processes connect, and it’s finally time for me to show you.
In this next tutorial, I’ll demonstrate how to get a link for your image using HTML — and how to add a URL for it to redirect to.
If you're a visual learner, this video tutorial will help:
https://www.youtube.com/watch?v=k0-9X8uQ7cM&t=5s
Or, if you want step-by-step directions, follow along as I walk you through these instructions.
Step 1: Select your image.
First, I find the image I want to link to. If it’s an image of a product on your website, chances are you already have several pictures. I recommend using the one that best showcases the product. If you don’t have a photo, either take and upload a high-quality photo or use an existing web image.
Pro tip: When it comes to repurposing images already on the web, however, I make sure to either pay for image rights or use a license-free stock image. Otherwise, I can get in trouble for stealing someone’s image. I recommend you keep this in mind as well.
Below is an example of an image that showcases the HubSpot flywheel. I am going to turn this into a link to a landing page on HubSpot's website.

Step 2: Optimize size and scale.
Before uploading my photo to my web hosting server, I always optimize its size and scale. I recommend that you do the same. Larger image file sizes will slow downloading times and may not scale properly. Start by looking at the size of any existing images on your site to inform your image size guidelines. Then, compress the image if necessary.
For example, my team at HubSpot loves to use Squoosh, a free compression tool from Google. After uploading my image, I can adjust the quality based on the final file size and choose the output format. Generally, the JPEG format is best for images with lots of detail (like photographs), while PNGs are better suited for icons, images of text, and graphics. At HubSpot, you may have noticed we use WebP format.
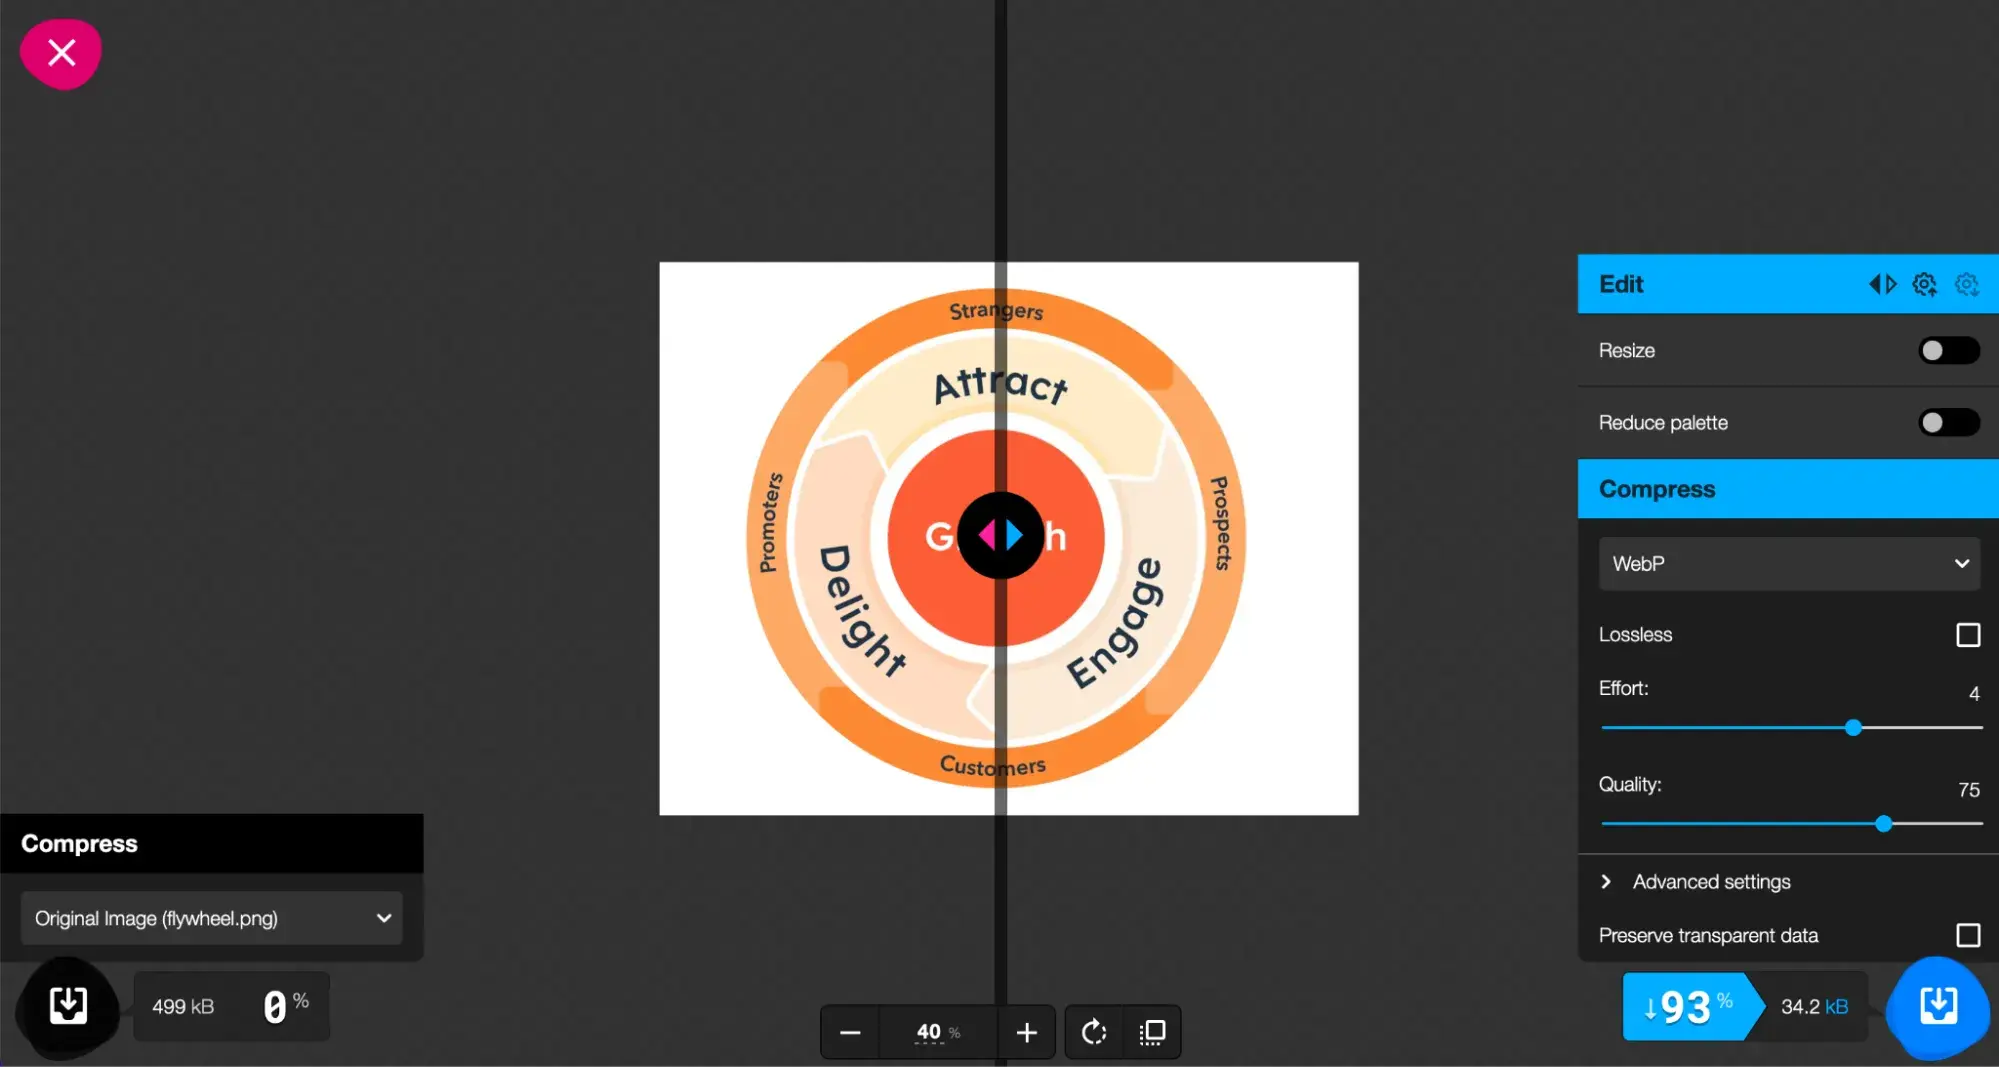
I can also directly compare the quality of your uncompressed image to the quality of my compressed image using Squoosh.
As you can see from the example above, my compressed photo may not be as crisp, but this won't be noticeable to visitors if the image link is small enough on the screen. Plus, I think visitors care more about load time than whether the image is as crisp as possible.
Ultimately, you decide how much to compress your image, but keeping the quality above 70% will typically avoid significant pixelation.
Step 3: Upload my image and get the URL.
Next, I upload my image to my web server. This may be through your website builder or content management system, like Content Hub, or through a free image hosting site like ImgBB.
Regardless of how your image is hosted, it must be uploaded to the web so you can create its location URL — the place where your HTML code will “look” for your image to display it.
Let's take the flywheel image above, for example. This was uploaded to the HubSpot server and embedded on a landing page. Let‘s say I want to embed it as a clickable link in an external blog post. That way, readers who click on the image will be driven to HubSpot’s website. In that case, I can go to that landing page, right-click the image, and select Copy Image Address.
This is the image address or location URL: https://www.hubspot.com/hs-fs/hubfs/HubSpot-English-Flywheel-Jul-27-2020-04-17-18-68-PM.png?width=1360&name=HubSpot-English-Flywheel-Jul-27-2020-04-17-18-68-PM.png
I'll use it later in my HTML.
Step 4: Specify the destination URL.
Next, I determine a destination URL, which specifies where my link will send users when they click on my image, such as a specific product or checkout page on your website.
As discussed above, I will make the destination URL https://www.hubspot.com/flywheel.
Step 5: Create your HTML.
Now it’s time to create my HTML code. Here’s the basic template:
<a href=“ProductPageURL”> <img src=“ImageURL” alt=“text describing the image”> </a>
Let's break this down:
- The <a> and </a> tags represent a link.
- The anchor element (<a>) contains an href attribute. Replace “ProductPageURL” with the URL of the page I want people to be directed to when they click on the image.
- The <img> tag represents an image.
- The image element <img> contains a source attribute. I replaced “ImageURL” with the URL of my image.
- It also contains an alt attribute. I replace the placeholder text with actual text describing the image.
It’s important to fill out the alt text description, which can be read by screen readers used by folks with visual impairments and will also display if the image cannot be loaded. Image alt text can also improve the site’s SEO. As a result, simple and accurate alt text is a critical part of HTML image links.
Here's how the HTML code snippet for the HubSpot flywheel image might look:
<a href=“https://www.hubspot.com/flywheel”> <img src=“https://www.hubspot.com/hs-fs/hubfs/HubSpot-English-Flywheel-Jul-27-2020-04-17-18-68-PM.png?width=1360&name=HubSpot-English-Flywheel-Jul-27-2020-04-17-18-68-PM.png” alt=“HubSpot flywheel”> </a>
Step 6: Paste the code as needed.
With my customized HTML code, I can now paste my linked image onto any page I have admin access to and that supports HTML.
If you’ve followed the steps correctly, the result should be a clickable image that takes users to a destination URL.
For example, here's the HubSpot flywheel image turned into a link in CodePen:
See the Pen Making a Picture into a Link by HubSpot (@hubspot) on CodePen.
Note: Clicking on the image in the CodePen module will result in an error message because it can‘t load an entire web page in the module. But if you hover over the image, you’ll see the URL appear in the bottom-left corner of your screen. You can also right-click the image and select Open Link in a New Tab. The HubSpot Flywheel landing page will successfully open in the new tab.
Best Practices for Linking Images
Humans generally prefer the path of least resistance. It’s why we want faster internet and why content algorithms are designed to give us the content we want when we want it.
These low-effort expectations also apply to websites. Sites that are aesthetically pleasing, easy to navigate, and comprehendible are most likely to capture visitor attention and convert.
That’s why I recommend these five best practices for linking graphics on your website.
Simple is best.
Links and images should be logically connected — the image should tell users where the link will take them before they click.
For example, if your image is a picture of a specific clothing item, but the link takes users to the general category, this will result in frustration. Instead, consider using an image containing several clothing items to indicate a link to a category page. Here's an example.
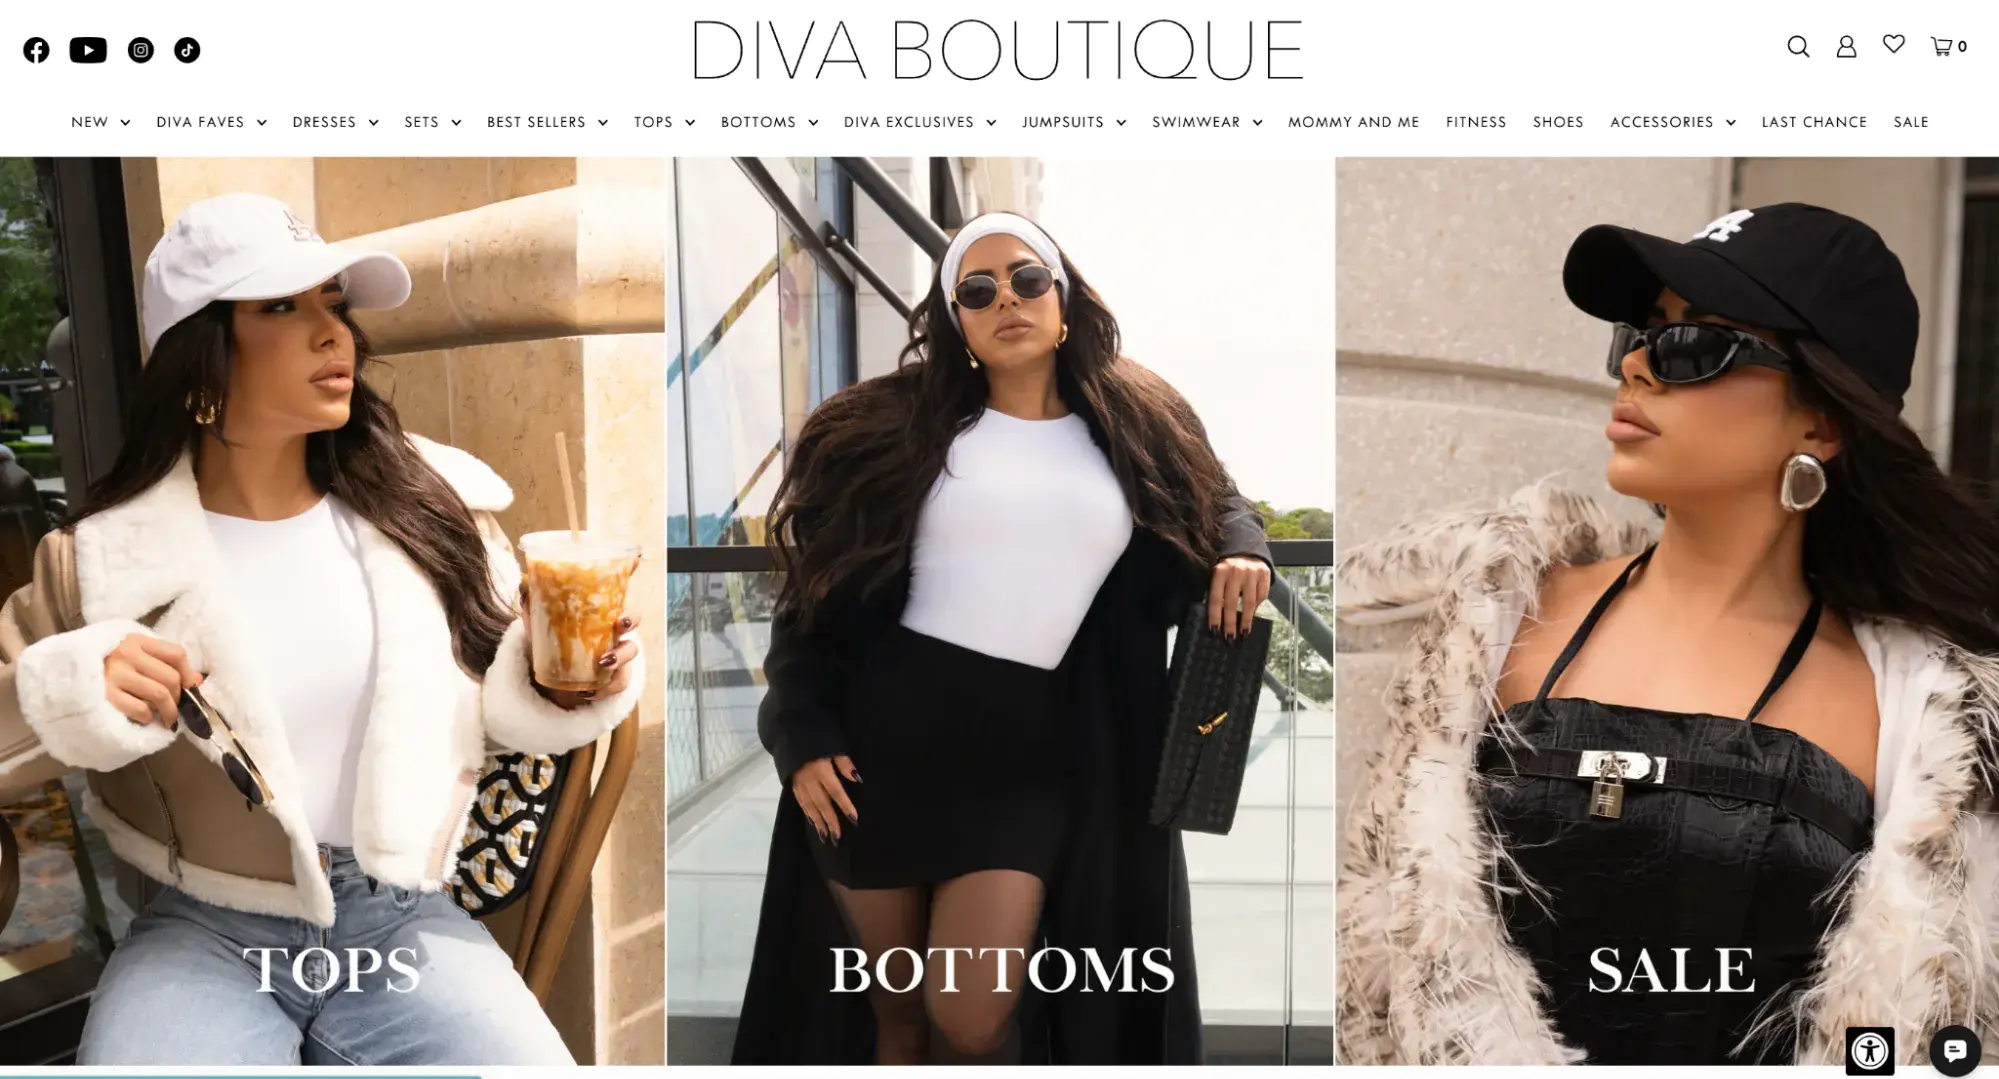
Here, the rule for links-as-pictures is simple: What you see is what you get.
Offer a backup link.
Classic text hyperlinks look somewhat outdated today, thanks to their garish blue color and underline.
But there's a catch. Despite substantive improvements in HTML and other markup languages that make more subtle links possible, many users are conditioned to recognize the traditional blue link format.
As a result, it’s worth offering a familiar, text-based backup to any image link that users will instantly understand.
Don't go overboard.
Adding too many links to a page will spell disaster, and this goes double for images. Not every picture needs its own link because not every piece of content on your site needs to link out to other pages or resources.
For example, in the blog post below, the image is not linked because the heading is linked to the page where the image is featured.
Prioritize purpose when deciding what you want to link. Before you make any image into a link, ask a simple question: Why? If there’s no compelling reason, don’t make the change.
Review your links for relevancy.
If you don't review your links regularly, you risk frustrating customers if they encounter outdated information. For example, if product lineups or prices change, old links may be out of date, sending users to pages that are no longer relevant or returning 404 errors.
This applies to all your page links, not solely image links or text links. Regular review helps ensure links are always active and applicable.
Open a new tab.
This is more of a personal or organizational preference, but I highly recommend that you set it up so that a new tab opens when a user clicks an image-as-a-link. This helps ensure they’ll come back to the page they’re on, which keeps your website’s bounce rate low. Plus, it reduces the frustration users experience when they want to continue reading the first page and can’t find it again.
Make the Most of Links on Your Site
Adding a URL to my images has been an essential way to enrich the user experience for my visitors. I can enhance the navigation on my website by adding a URL that directs the user to a specific place, which in return can help boost conversion rates. I am also simultaneously helping my SEO by giving the image more context through a URL. It's a no-brainer that giving my image a link is definitely a pro for my sites.
In my opinion, the most beneficial approach was using Content Hub. By managing my images and links (for my blog and/or website) all in one place, I‘m basically getting a three-for-one. While I do recommend that you give Content Hub a try, ultimately, the best approach depends on your site’s needs. Now that you are officially an expert in all things image and URL related, give it a try.
Editor's note: This post was originally published in December 2020 and has been updated for comprehensiveness.
HubSpot's Free Website Builder
Create and customize your own business website with an easy drag-and-drop website builder.
- Build a website without any coding skills.
- Pre-built themes and templates.
- Built-in marketing tools and features.
- And more!
Html


-2.webp)

![14 Stunning HTML Websites [+ How They Work]](https://53.fs1.hubspotusercontent-na1.net/hubfs/53/Copy%20of%20Featured%20Image%20Template%20Backgrounds-1.webp)


![How to Embed Google Map in HTML [Step-By-Step Guide]](https://53.fs1.hubspotusercontent-na1.net/hubfs/53/Google%20Drive%20Integration/How%20to%20Embed%20Google%20Map%20in%20HTML%20%5BStep-By-Step%20Guide%5D-2.jpeg)