HTML is the foundation of basically every web page. It’s how we tell browsers to structure content into paragraphs, headings, images, links, lists, forms, tables, buttons, and more. If you’re interested in building a website, web development, or just coding in general, learning HTML is a great place to start.
In this guide to HTML for beginners, we’ll learn what HTML is and what it’s used for. Then, we’ll walk through how to write some basic HTML and review some of its most important elements and attributes. We’ll end with a brief look at some resources you can use to continue learning and using HTML.
Let’s get started.
Chapters
What is HTML?
HTML, short for HyperText Markup Language, is the core language of the World Wide Web. It defines the content and basic structure of web pages and web applications.
First published by Tim Berners-Lee in 1989, HTML is now used by 94% of all websites, and probably all the ones you visit. But what is it, exactly?
First, check out this short video for a quick definition of HTML, then we'll dive deeper:
As mentioned above, HTML is an acronym for “HyperText Markup Language.” Let’s break this down to better understand what HTML actually means.
“HyperText” is text on a web page that contains references to another web page. You probably know these as hyperlinks. We use hyperlinks to jump to another section of the same page, a different page on the current website, or a completely new website. Hyperlinks can also open a PDF, email, or multimedia, like a video or audio file.
Linking information together in this way was a revolutionary step in building the web. Together, HTML and the internet make it possible for anyone to access all types of information around the world, in any order they want.
Moving on, “Markup” refers to how HTML “marks up” the page with annotations within the HTML file. These annotations are not displayed on the web page itself. Instead, they work behind-the-scenes telling the browser how to display the document to visitors. We'll learn more about this markup soon.
Finally, “Language” is the simplest part of the acronym to understand. Like any language, HTML has a unique syntax and alphabet. But what kind of language is it, exactly? Let’s tackle this question next.
.png)
Beginner's Guide to HTML & CSS
Learn the basic definitions, differences, and codes to know for your website.
- Intro to coding langauges.
- HTML vs. CSS
- Codes to Know
- And More!
Is HTML a programming language?
Whether HTML is or is not technically a “programming” language is an ongoing debate among web developers and experts. While the majority defines HTML as a “markup” language (not a programming language) some argue the two aren’t mutually exclusive.
All programming languages have some functional purpose — they need to “do” something, whether it be evaluating expressions, declaring variables, or modifying data. JavaScript is the most widely-used programming language in web development. Other popular programming languages include Python, Java, and C.
Though it’s very useful as we’ll see, HTML doesn’t really “do” anything in this sense. It simply gives browsers the content it needs to display. HTML doesn’t care how the browser goes about displaying the content, as long as it’s displayed. In other words, HTML has a structural purpose, not a functional one.
Still, some developers use this same logic to argue that HTML is a programming language — it’s just a declarative programming language. According to Professor David Brailsford from the University of Nottingham, declarative languages are more restricted than other languages, but that doesn’t make them any less of a programming language. You can see his full argument in this video.
With that in mind, let’s move on to what HTML is used for.
What is HTML used for?
HTML is primarily used for creating web pages. HTML is free to use and ensures your text, images, and other elements are displayed as intended.
With HTML, not only can you add headings, paragraphs, lists, and other elements to your page — you can also embed images, videos, audio files, and other multimedia. And, you can link to other web pages on the same website or from another site. This allows visitors to easily navigate your website and jump between websites.
Even after adding headings, images, and hyperlinks, you’d still have a very basic web page — and that’s by design. HTML is purely for the content of a page. It creates a simple base upon which you can add styling with another language called CSS (which stands for Cascading Style Sheets). With CSS, you can customize your styling and layouts, changing the color, font, and alignment of elements.
HTML is used to create things other than web pages, too. You can use it to:
- make tables for organizing data
- create forms for collecting user information, processing transactions, making reservations, or placing an order
- create emails with HTML
Whether you want to create web pages, tables, forms, or emails, you'll need to know how to write HTML. So, let’s break down the process next.
How to Write HTML
Compared to other coding languages, HTML is relatively easy to read and understand, since it’s essentially plain English text with extra symbols here and there.
The main building block of an HTML web page is an element. An HTML element is a unit of information that tells the web browser what to render for the viewer. An HTML element could be a piece of text like a paragraph, an interactive item like a button, or a section of the page like a header or footer.
Here’s what a basic element looks like written out in HTML. This element is called the <button> element, and creates a button on the screen that users can click with the mouse.
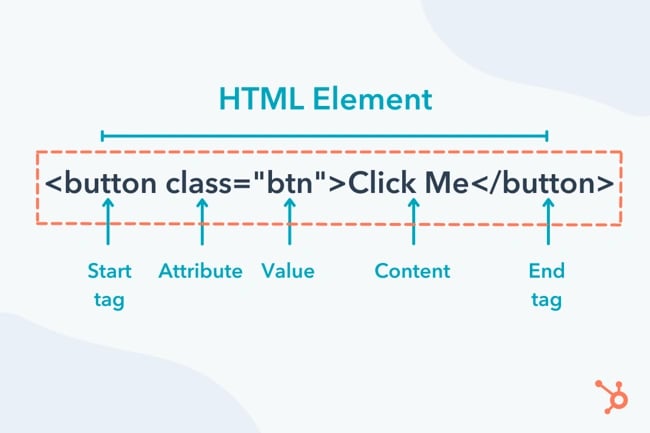
Let's take a closer look at each component of an HTML element.
HTML Tags
HTML elements are designated by tags. Most elements have an opening tag and a closing tag. Opening tags precede contain the element name enclosed by angle brackets (<>). Closing tags are identical to opening tags, save for a slash (/) that precedes the element name.
Tags contain an element’s content. Content may be text, a media item, or even other elements.
So, say you want to add a paragraph to your web page, the the paragraph contains the text “This is a paragraph.” You’ll wrap it with the HTML paragraph tags <p> and </p>. So, the HTML will look like this:
Simple as that. Together, these three things are all you need make a paragraph element in HTML.
Most HTML elements have an opening tag, a closing tag, and content in between these tags. However, some HTML elements only have an opening tag — these are called empty elements.
The line break element is a common empty element. To add a line break in HTML, you just need to write <br> (for “break”), and a line break will be added.
Also, element names are case-insensitive, meaning they can be written in uppercase or lowercase. For example, the <p> tag can also be written as <P>. However, you’ll almost always see element names written in lowercase.
HTML Attributes
While all HTML elements need tags, only some require attributes. An HTML attribute is text inside of the opening tag that provides additional information about the HTML element.
An attribute is always found in the opening tag of an HTML element. Most have the syntax name=“value”, though some attributes only require you to write the name without any assigned value.
Some elements require certain attributes. For example, an HTML image element (<img>) must always contain a source attribute (src) whose value is the image URL or file path. Otherwise, the browser will not know what image to render.
Similarly, the anchor element (<a>), which creates a hyperlink, must contain an href attribute with a value that specifies the link’s destination. Otherwise, if a visitor clicks on the anchor element, the browser won’t send them anywhere.
Other elements have attributes that aren’t essential to include, but are considered a good practice. For example, the <img> element also takes the alt attribute, which contains image alt text. The browser will still render the image if the alt attribute is not present in the <img> tag. But, readers with low vision might have trouble understanding what the image conveys without an alternative text description. So, it’s recommended that all non-decorative images have alt text and therefore use the alt attribute.
Attributes can be written in any order inside the opening tag. However, you cannot put multiple instances of the same attribute inside the same HTML tag.
Free Guide: 25 HTML & CSS Coding Hacks
Tangible tips and coding templates from experts to help you code better and faster.
- Coding to Convention
- Being Browser-Friendly
- Minimizing Bugs
- Optimizing Performance
How to Use HTML
To start using HTML, you’ll need a text editor. A text editor is a software program for writing code. Since an HTML file is in standard text format, any basic text editor will work for this tutorial.
Your first step will be to download a free text editor to use. Notepad++ is a good free text editor for Windows, and Sublime Text is a popular option for Mac. Usually, you can search the text editor online and download a zip file from the download page. Open the zip file, follow any instructions given to install the program, and open it.
When you open the text editor, you’ll likely see an editor window like the one below. This is where you’ll write your HTML code.
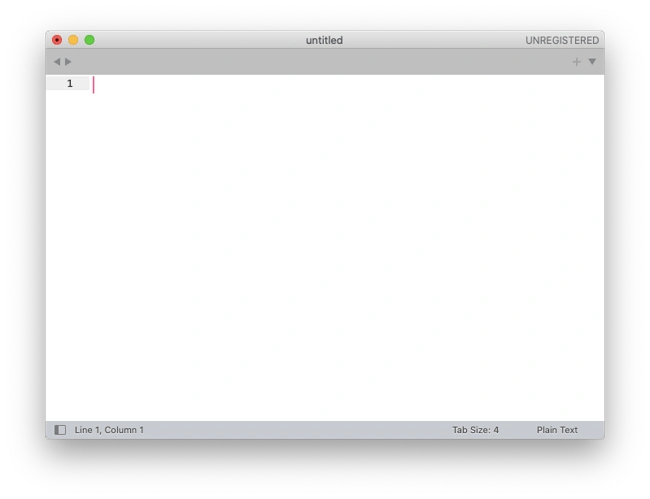
With this editor window open, copy the HTML code below and paste it into the window.
We’ll explain what each of these elements means in the following section.
Next, save the file and name it “index.html.” You can save it to your desktop or another folder.
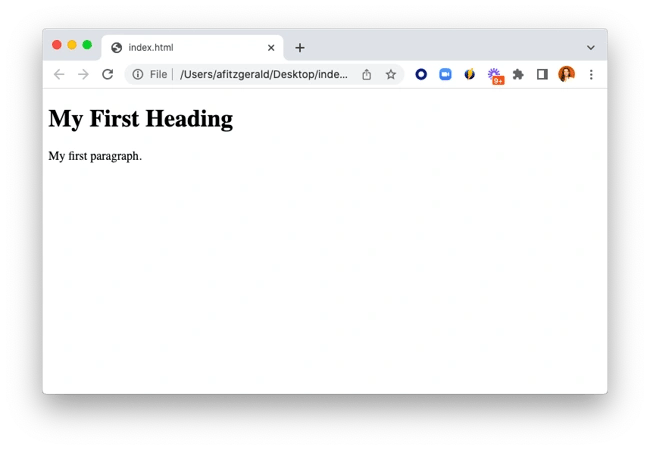
After saving the HTML file, you’ll be able to open this file in your web browser. To do this, you can double click on the file, right-click and choose Open, or drag and drop the file icon into an open browser window. It will look like this:
Now that you know how to use an HTML editor, let’s look at how to write the actual code.
How to Create an HTML File
To build a website with HTML, you need to create an HTML file first. This file will contain all the HTML for your web page and will be uploaded to your web server. That way, when a visitor searches for your website, the server will send the HTML file to the visitor's browser, and the browser will render the page accordingly.
In the last section, we made a very simple HTML file to open in your browser. In this section, we’ll walk through the process of building out a more complex one.
Step 1: Add a <!DOCTYPE> declaration.
To start, we’ll need declare the type of document as HTML. Add the special code <!DOCTYPE html> on the very first line of the file. Every HTML file starts this way.
Step 2: Add an <html> element.
Next, we’ll add the <html> element after the doctype declaration, also called the “root” element of the document because it contains all other elements in the document.
On the line below the DOCTYPE declaration, add an <html> opening tag. Below that, add a closing </html> tag.
Every other element in the document will be placed between these tags.
Step 3: Add a language attribute.
Within the opening tag of the html element, we’ll also add a lang (language) attribute. This helps screen readers determine what language the document is in, making your website more accessible.
Without a language attribute, screen readers will default to the operating system’s language, which could result in mispronunciations of the title and other content on the page.
Since we’re writing this post in English, we’ll set the file’s lang attribute value to en.
Step 4: Add a head and body section.
An HTML document consists of two parts: the head section and the body section. The head section contains meta-information about the page as well as any internal CSS. The browser does not display this information to users. The body section contains all the information that will be visible on the front end, like your paragraphs, images, and links.
To create these sections, we will add <head></head> tags and <body></body> tags inside the <html> section of the document.
You’ll also notice that the <head> and <body> tags are indented here. This visually indicates to us that these tags are placed inside, or “nested” in, the <html> tags. While indenting isn’t necessary and makes no difference in how the browser renders the document, it’s still common practice to indent your HTML for better readability.
Step 5: Add a title in the head section.
Next, in the head section, we want to name our document. Write a name (we’ll go with “My HTML Page” in this example) and then wrap it in <title></title> tags. We’ll also indent this <title> element so show that it is nested in the <head> section.
In the head section, you'll want to name your document. Write a name (we’ll go with “My HTML Page” in this example) and then wrap it in <title></title> tags.
Step 6: Add HTML elements in the body section.
In the body section, let’s now add a heading and paragraph. Write out the heading content and wrap it in <h1></h1> tags, then write out the paragraph content and wrap it in <p></p> tags.
.png)
Beginner's Guide to HTML & CSS
Learn the basic definitions, differences, and codes to know for your website.
- Intro to coding langauges.
- HTML vs. CSS
- Codes to Know
- And More!
HTML Example
We now have a basic HTML file that will load in your browser. Here’s what our completed file looks on the front end.
Below is how it would look on the front end. Note that only the heading and paragraph from the body section are rendered.
See the Pen HTML tutorial: final by HubSpot (@hubspot) on CodePen.
As you can see, this is a pretty skeletal page. To fill it, we need to learn some more page elements. Page elements are elements that are actually rendered on the front end. We’ve already used two of them, <h1> and <p>. Let’s take a closer look at these page elements and others next.
If you'd prefer to watch how a more complex HTML file is built out with images, links, forms, and other elements, check out this video:
Common HTML Elements
The first version of HTML consisted of just 18 elements. Since then, more versions have been released with dozens of tags added in each one. In the most recent version of HTML, HTML5, there are 110 HTML tags.
Don’t worry, though — there are only a handful that you’ll use the most often. Below we’ll review the most common elements and their tags.
Below we’ll review the most common elements and their tags.
Paragraph (<p>)
The HTML paragraph element represents a paragraph. By placing <p></p> tags around text, you’ll make that text start on a new line.
See the Pen p example by Christina Perricone (@hubspot) on CodePen.
Image (<img>)
The HTML image element embeds an image into the document. It requires a src (source) attribute to render properly. An alt attribute should also be included in case the image doesn’t load properly or the reader has a visual impairment.
Here’s an example of an image with a source and alt attribute:
See the Pen img example by Christina Perricone (@hubspot) on CodePen.
Headings (<h1>-<h6>)
The HTML heading elements represent different levels of section headings. <h1> is the highest section level and the most prominent, whereas <h6> is the lowest and therefore least prominent.
See the Pen headings example by Christina Perricone (@hubspot) on CodePen.
Division (<div>)
The HTML content division (div) element is a generic block-level container. Div elements help organize the code into clearly marked sections. They also add line breaks before and after their content. Otherwise, they do not affect the content or layout of the page unless styled with CSS.
Here’s an example of div wrapped around an image:
See the Pen div example 1 by Christina Perricone (@hubspot) on CodePen.
Here, the image looks the same as it did without the div wrapper element. That’s because no style information was given to this div element. To change the appearance of the container and therefore the image inside that container, you’d need to add style information.
Say, for example, you wanted to center the image. Then you could use the following code to horizontally center the image on the page:
See the Pen div example 2 by Christina Perricone (@hubspot) on CodePen.
Span (<span>)
The HTML span element is a generic inline container. Span tags do not inherently represent anything, but they are used to group phrasing content for two reasons.
The first is to apply styling to a piece of text. For example, if you’re creating drop caps, you can wrap the first letter of the opening paragraphs of each section of your article in span tags.
See the Pen span example by Christina Perricone (@hubspot) on CodePen.
The second reason to use span tags is to group elements that already share attribute values. For example, maybe you have a website for English speakers learning French. The default language is set to English but on several pages, you might have a table with French terms in the first column and their English translations in the second column. In that case, you can wrap the French terms in span tags with the language attribute set to “fr.”
Anchor (<a>)
The HTML anchor element creates a hyperlink. The anchor element requires an href attribute, which species the destination of the link. The destination can be another section on the same web page or another web page on the same site, or external websites, files, and email addresses.
Here’s an example of a link nested in a paragraph:
See the Pen anchor example by Christina Perricone (@hubspot) on CodePen.
Line Break (<br>)
The line break element creates a line break where it’s placed. That means you can add it wherever you want the text to end on the current line and resume on the next. This element can be used to display poems, song lyrics, or other forms of content in which the division of lines is significant.
Below is an example of an address rendered in two ways: one using line break elements and one using paragraph elements.
See the Pen Paragraph vs Line Break Element by HubSpot (@hubspot) on CodePen.
Unordered List (<ul>)
The HTML unordered list element is used for grouping items when the order doesn't matter. Shopping lists, for example, don’t need to follow a particular order. List items are defined by the <li> tag and wrapped in the <ul> element.
Here’s an example of an unordered list. Try adding some list items yourself and see how the list changes.
See the Pen ul example by Christina Perricone (@hubspot) on CodePen.
Ordered List (<ol>)
The HTML ordered list element is used for grouping items when the order matters. Recipes, for example, should follow a particular order. The steps must be defined by the <li> tag and then wrapped in the <ol> element.
An ordered list will start at the number 1 by default. If you’d like to start at another number, add a start attribute and set the value to the number you want.
Here’s an example of an ordered list that starts at 1. Try adding steps at different parts of the list:
See the Pen ol example by Christina Perricone (@hubspot) on CodePen.
Emphasis (<em>)
The HTML emphasis element signals that the text inside it should be emphasized. Browsers typically render text inside <em> tags in italics.
Here’s an example of the emphasis wrapped around a paragraph and nested within a paragraph:
See the Pen em example by Christina Perricone (@hubspot) on CodePen.
Strong (<strong>)
The HTML strong element indicates that the text it contains is of particular importance or urgency. Browsers typically render the text in bold.
See the Pen strong example by Christina Perricone (@hubspot) on CodePen.
Table (<table>)
The <table> element creates a table for organizing content. It requires three other HTML elements:
- <tr> defines a table row.
- <th> defines the table header
- <td> defines the table data (i.e., the content of the table’s cells).
Here's an example of a table:
See the Pen Untitled by HubSpot (@hubspot) on CodePen.
Horizontal Rule (<hr>)
The horizontal rule element defines a horizontal line across a web page. It can be used to mark any thematic change, like the next scene in a play, a new section of an essay, or the conclusion of an article.
See the Pen Horizontal Rule element by HubSpot (@hubspot) on CodePen.
Select
The select element defines a dropdown list of options, from which a user can select one option (or multiple if allowed). The select element is usually used in HTML forms for gathering user submissions. It’s best for selecting one option out of many while maximizing space on the web page.
See the Pen HTML-only Dropdown by HubSpot (@hubspot) on CodePen.
Common HTML Attributes
Attributes modify HTML elements in different ways. They can change the appearance of the element, apply unique identifiers so the elements can be targeted by CSS, or provide necessary information to readers or screen readers.
Attributes usually appear lowercase and as name/value pairs, with their values in quotes.
Below we’ll take a look at the most common attributes.
Style Attribute
The style attribute contains inline CSS. This CSS will override any styles set in the head section of the document or in an external stylesheet. It will only be applied to the HTML element that has the style attribute in its opening tag.
Here’s an example of the attribute in HTML:
ID Attribute
The ID attribute is used to identify a single element in an HTML file. That means the value of an ID attribute should not be repeated inside the same file. Using this unique value, you can target a single element with internal or external CSS.
Here’s an example of the attribute in HTML:
Class Attribute
The class attribute is used to identify a group of elements under the same name and customize that group, effectively creating a new group of elements.
Bootstrap buttons, for example, are all labeled with the .btn class so they have the same basic style: 14px font, medium size, rounded edges, etc.
Here’s an example of the attribute in HTML:
Language Attribute
As mentioned, the language attribute signals to screen readers what the primary language of the web page is and when they need to switch to another language. This is a small detail that can make your content more accessible to all readers, no matter what region they’re from or the language they speak.

Free Guide: 25 HTML & CSS Coding Hacks
Tangible tips and coding templates from experts to help you code better and faster.
- Coding to Convention
- Being Browser-Friendly
- Minimizing Bugs
- Optimizing Performance
While this attribute is most commonly embedded in the HTML element, it can also be used with paragraph, div, span, and other elements.
Here’s an example of the attribute in HTML:
Href Attribute
An href attribute contains the destination of a link. This attribute must always be included with an anchor element.
Here’s an example of the href attribute in HTML:
Source Attribute
Just like an anchor element needs an href attribute, an image needs a source attribute. This contains the path to the image file or its URL.
Here are two examples of the attribute in HTML:
Alt Attribute
The alt attribute provides descriptive information about the HTML element. This is important for readers with visual impairments and for all readers in case the element doesn’t load. In that case, readers will still be able to glean what the element was meant to convey. Like the source attribute, you’ll most often find the alt attribute with the image element.
Here’s an example of the attribute in HTML:
Data-* Attribute
The data-* attribute is used to store custom data that is private to the page or application. You can use this stored data in the document’s JavaScript to create a more dynamic experience for the user.
The asterisk in the data-* attribute can be any value.
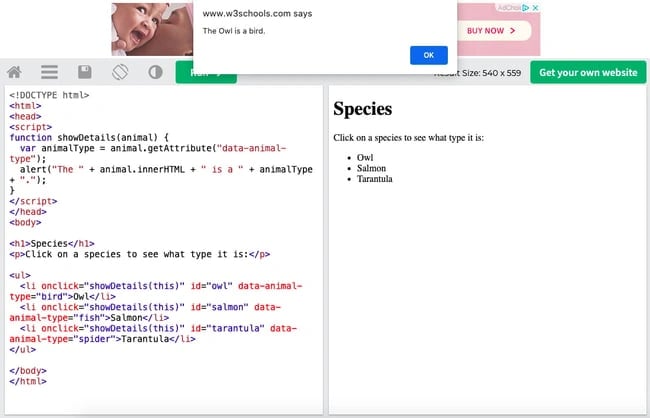
Here’s an example of the attribute in HTML from W3Schools:
I could then use this data in the JavaScript to trigger a pop-up message providing more information about each list item. Say, for example, a visitor clicked on the word “Owl.” Then a pop-up box would appear saying “The owl is a bird," as shown in the screenshot below.
Now that we’ve covered the most common elements and attributes in HTML, let’s explore where you can practice writing this language and continue learning more about it.
How to Learn HTML
There are hundreds of resources available to learn HTML for beginners or more advanced developers. Depending on your learning style, you may prefer to read blog posts, watch video tutorials, take online courses, download an ebook, or use a combination of all of these resources.
Below we’ll walk through at least one example of each of these content types. That way, no matter what type of learner you are, you can find a resource that will help you learn this language.
1. The Beginner's Guide to HTML and CSS for Marketers
If you're just starting to learn to code, this free e-book is designed to teach HTML for beginners. It will explain what HTML and CSS are, how they’re different, and how to get started if you're brand new to web development. As the title suggests, this guide is specifically designed for marketers who need to be able to make quick fixes to their websites, blogs, and landing pages.
.png)
Beginner's Guide to HTML & CSS
Learn the basic definitions, differences, and codes to know for your website.
- Intro to coding langauges.
- HTML vs. CSS
- Codes to Know
- And More!
2. LinkedIn Learning
If you’re a visual learner, check out the online tutorials available at LinkedIn Learning (formerly known as Lynda.com). LinkedIn Learning offers 42 courses and over 5,000 video tutorials that cover virtually every HTML topic, from forms to semantic data to everything in between. These lessons are organized into three levels — beginner, intermediate, and advanced — so you can develop your skills over time. To get access to all content on the site, you can sign up for a monthly or annual subscription.
The video below is an excerpt from one course called “HTML Essential Training” by Jen Simmons:
3. Codecademy
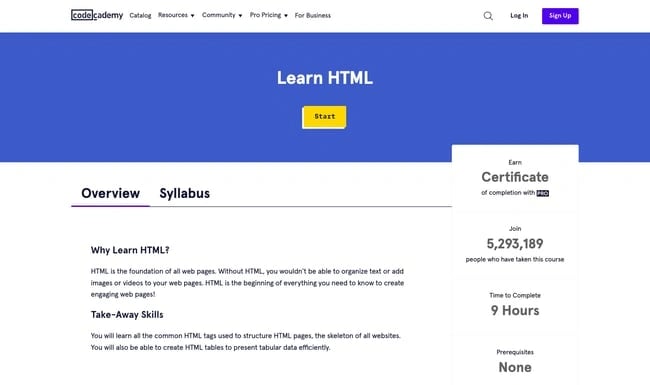
If you’re overwhelmed by the sheer quantity of videos available on LinkedIn Learning, try Codeacdemy’s Learn HTML class. This online course will start with the basic structure and elements of HTML. You can then put your knowledge to the test by building out more complex elements and projects, including HTML tables and forms, from scratch.
While you can complete most of the course for free, there are pro features like quizzes and projects that you’ll have to pay to unlock.
4. HTML 4.01 Tutorial by W3C
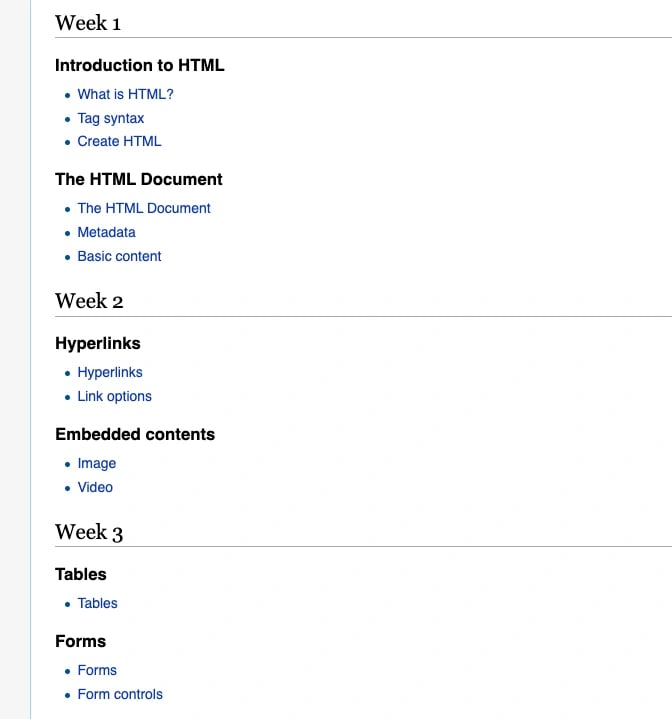
W3C offers a range of training materials for HTML and CSS. While these tutorials aren't interactive, they're jammed-packed with information relevant to both beginner-level and advanced developers.
Don't worry about the interactivity of the courses, as W3C provides a reference page that breaks down the material week by week. In week one you're learning the basics of HTML and its syntax then by week four you're off creating stylesheets and building full sections for your web page.
5. Learn HTML
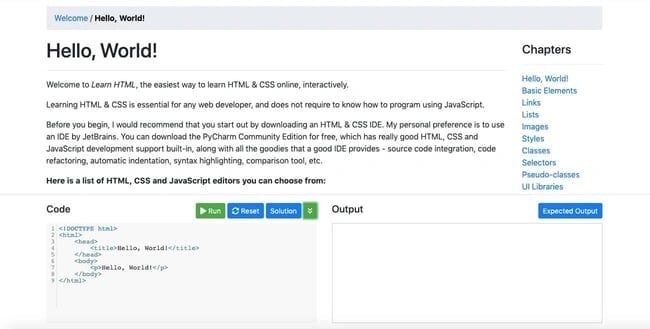
Learn HTML is a free interactive tutorial. However, rather than try to be the most comprehensive resource on HTML, Learn HTML offers a short step-by-step guide for building out a web page. At every step, you can test whether you understood the lesson by completing an exercise in the online code editor. If your code matches the expected output, then you’ll get a success message and be invited to move onto the next lesson.
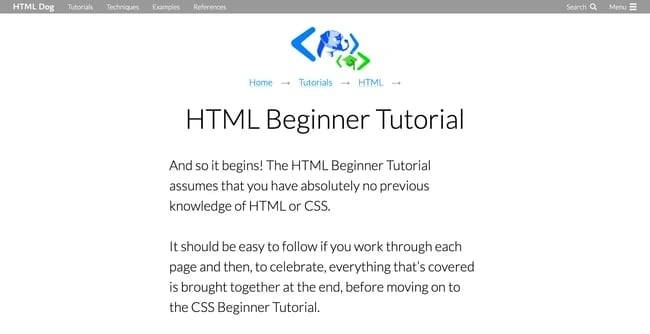
6. HTML Beginner Tutorial by HTML Dog
HTML Dog created an HTML Beginner Tutorial for those who have absolutely no previous knowledge of HTML or CSS. It starts with a general overview of what HTML is and what it’s made of (tags, elements, and attributes). Then it walks through how to build out an HTML file with titles, paragraphs, headings, and other elements. By the end, you’ll have walked though how to create a complete HTML file.
This is similar to W3Schools and Learn HTML — but it invites you to build out the HTML file in your editor of choice, instead of a built-in one. It specifically recommends Notepad.
 7. HTML Specification by W3C
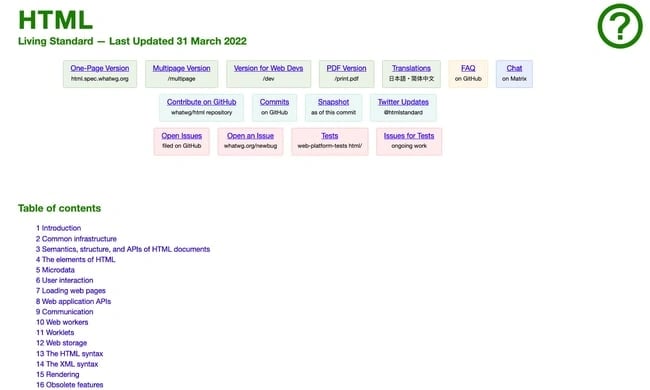
The HTML spec by W3C is the living standard for HTML. While it’s not the easiest introduction to the topic, it is the most comprehensive. That’s why we recommend checking it out once you’ve gone through some courses or tutorials and have established some familiarity with web technologies.
Now you’re ready to code.
HTML is the language we use to talk to computers. It is how browsers display text, images, paragraphs, and other elements on a web page.
As such, HTML is the predominant language of the World Wide Web. That makes the language important not only to people trying to become programmers, but to marketers like yourself. Knowing the basics of this markup language will allow you to make changes to your website without needing to rely on a developer, saving you and your business time and money.
Editor's note: This post was originally published in August 2020 and has been updated for comprehensiveness.


![Download Now: 25 HTML & CSS Hacks [Free Guide]](https://no-cache.hubspot.com/cta/default/53/bda442e5-294c-47ef-afde-339bbadd95e1.png)

![Onchange Event in HTML: How to Use It [+Examples]](https://blog.hubspot.com/hubfs/onchange.webp)


![How to Embed Google Map in HTML [Step-By-Step Guide]](https://blog.hubspot.com/hubfs/Google%20Drive%20Integration/How%20to%20Embed%20Google%20Map%20in%20HTML%20%5BStep-By-Step%20Guide%5D-2.jpeg)
![How to Create an HTML Tooltip [+ Code Templates]](https://blog.hubspot.com/hubfs/Google%20Drive%20Integration/How%20to%20Create%20an%20HTML%20Tooltip%20%5B+%20Code%20Templates%5D.jpeg)
![How to Make an HTML Text Box [Examples]](https://blog.hubspot.com/hubfs/html%20text%20box.jpg)