-1.png)
Setting Things Up
First, I configured the blog’s settings in my CMS. As you might expect, I’m using HubSpot's Content Hub for my provider. It comes equipped with a blogging tool that I’ll use throughout the rest of this post.
If you’re working with something different, you probably have similar settings in your system, but they might not look exactly the same as what you’re seeing below.
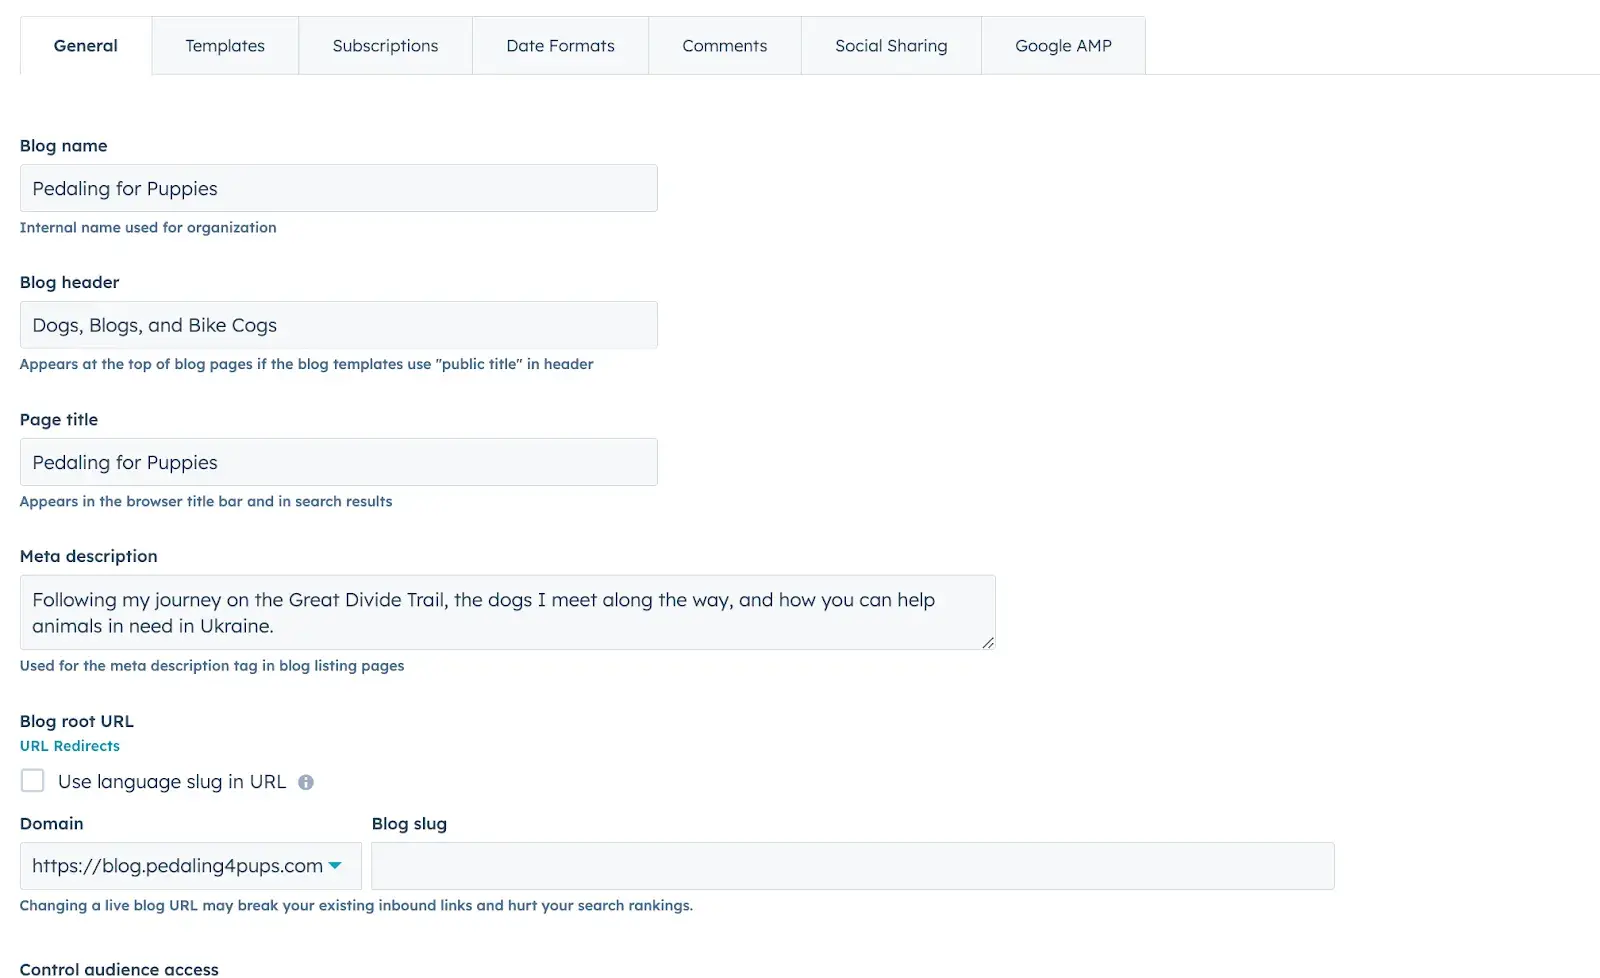
Here we can set up my blog’s name, its header (text that appears at the top of the listing page), and its meta description. The meta description is used for the blog listing page and not the individual posts.
Next, I chose my blog’s listing template.
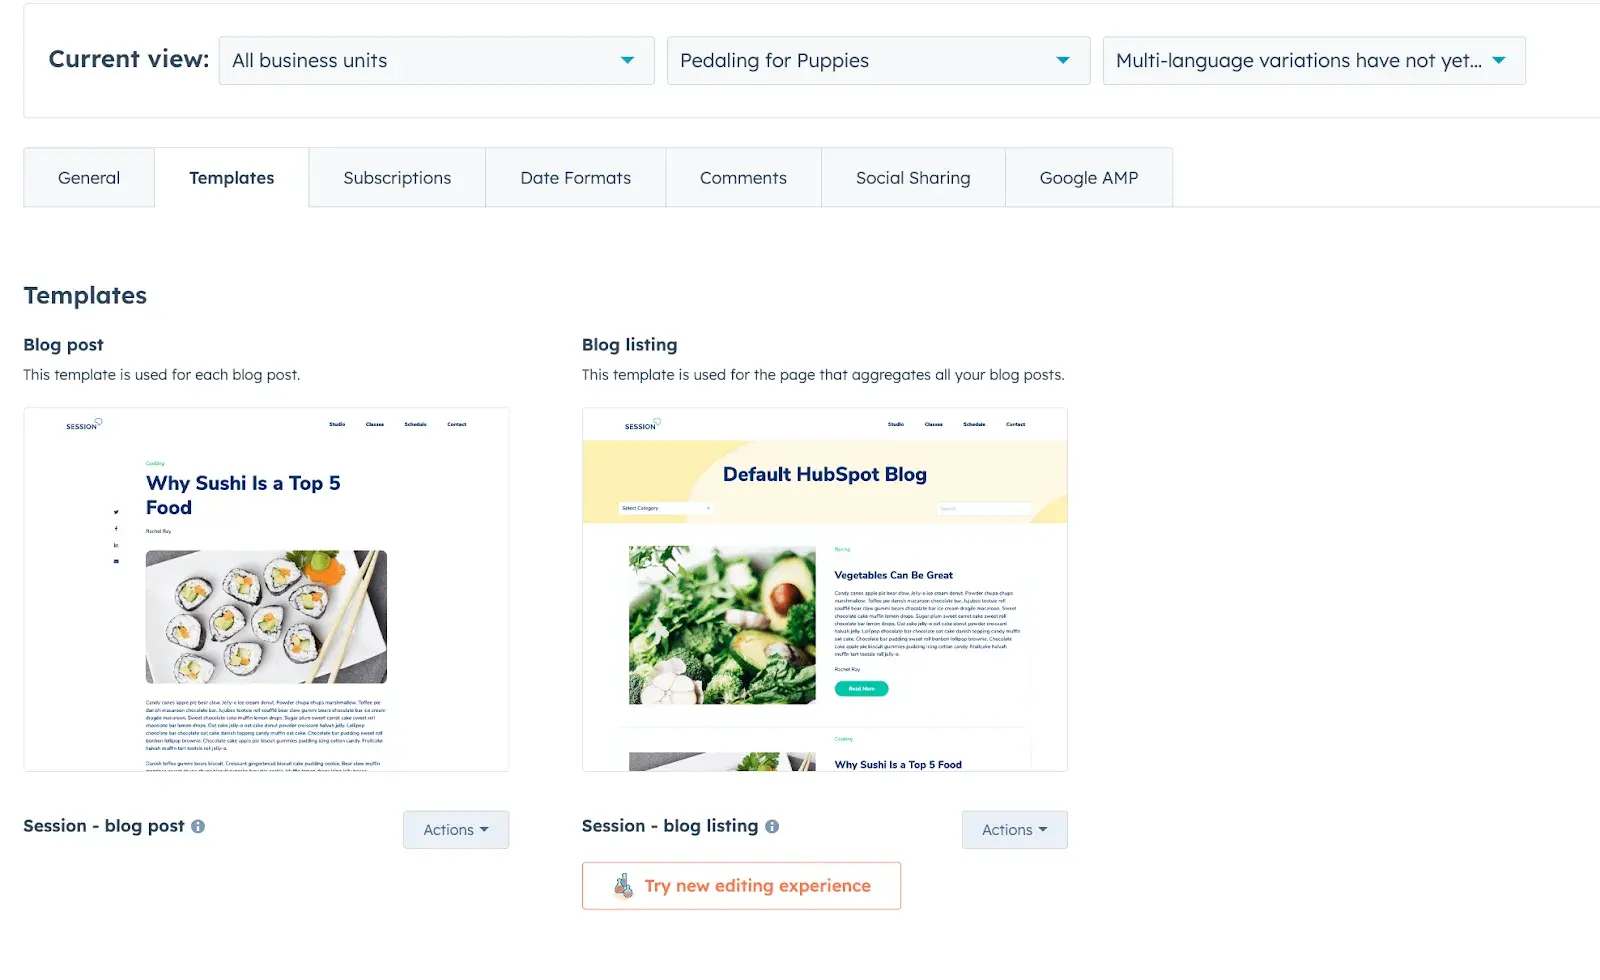
HubSpot, like many providers, offers a marketplace of free and paid templates. I mostly chose “Session” because it was free, but it also matched the look and feel of the rest of my site. It’s a simple design with tons of whitespace and since I was featuring a lot of colorful, detailed images, the white background made colors more vibrant, and images looked like popped off the page.
I also chose the matching Session template for my blog posts. It seemed fitting to stick with a consistent theme for both the listing page and post template. The post template had plenty of cool features that I took advantage of, but let’s start with the listing page since that took less time.
Sit Back and Relax
In HubSpot’s CMS, the blog tool is very automated. When it comes to your listing page, you mostly select a template, configure its settings, and then let the CMS take care of the rest. You can edit the template’s code, but you’ll need to know your way around HTML, CSS, JavaScript, and HubL.
If you want to stick to your comfort zone – like me – I tinkered with the theme settings below:

Hurray for laziness – I mean, efficiency!
Jokes aside, if you want to customize more than what your template currently offers, here are a few guides I’d recommend checking out:
- How to Center Text & Headers With CSS
- Aligning Images With HTML & CSS
- How to Remove Underlines From Links With CSS
- CSS Margin vs. Padding
Now, let’s move on to the individual post template.
Choosing a Blog Post Template
Here are a few page elements that I specifically wanted for my blog:
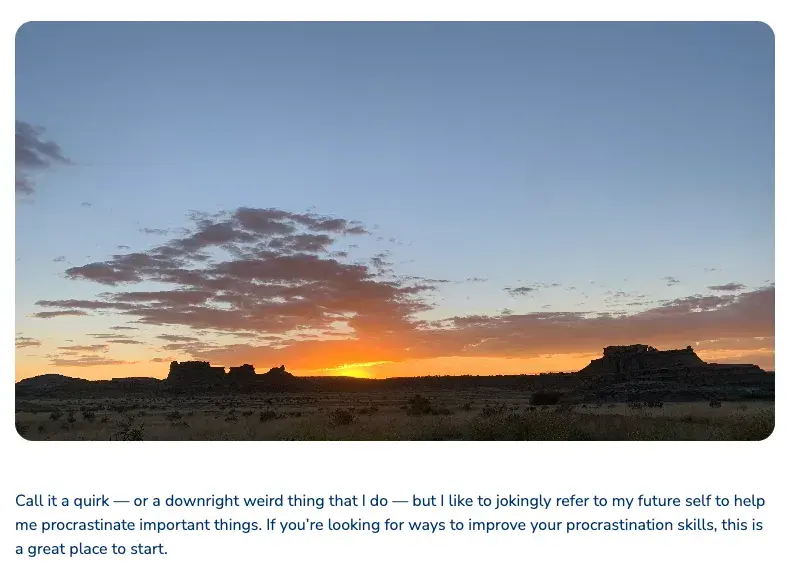
Big Featured Image
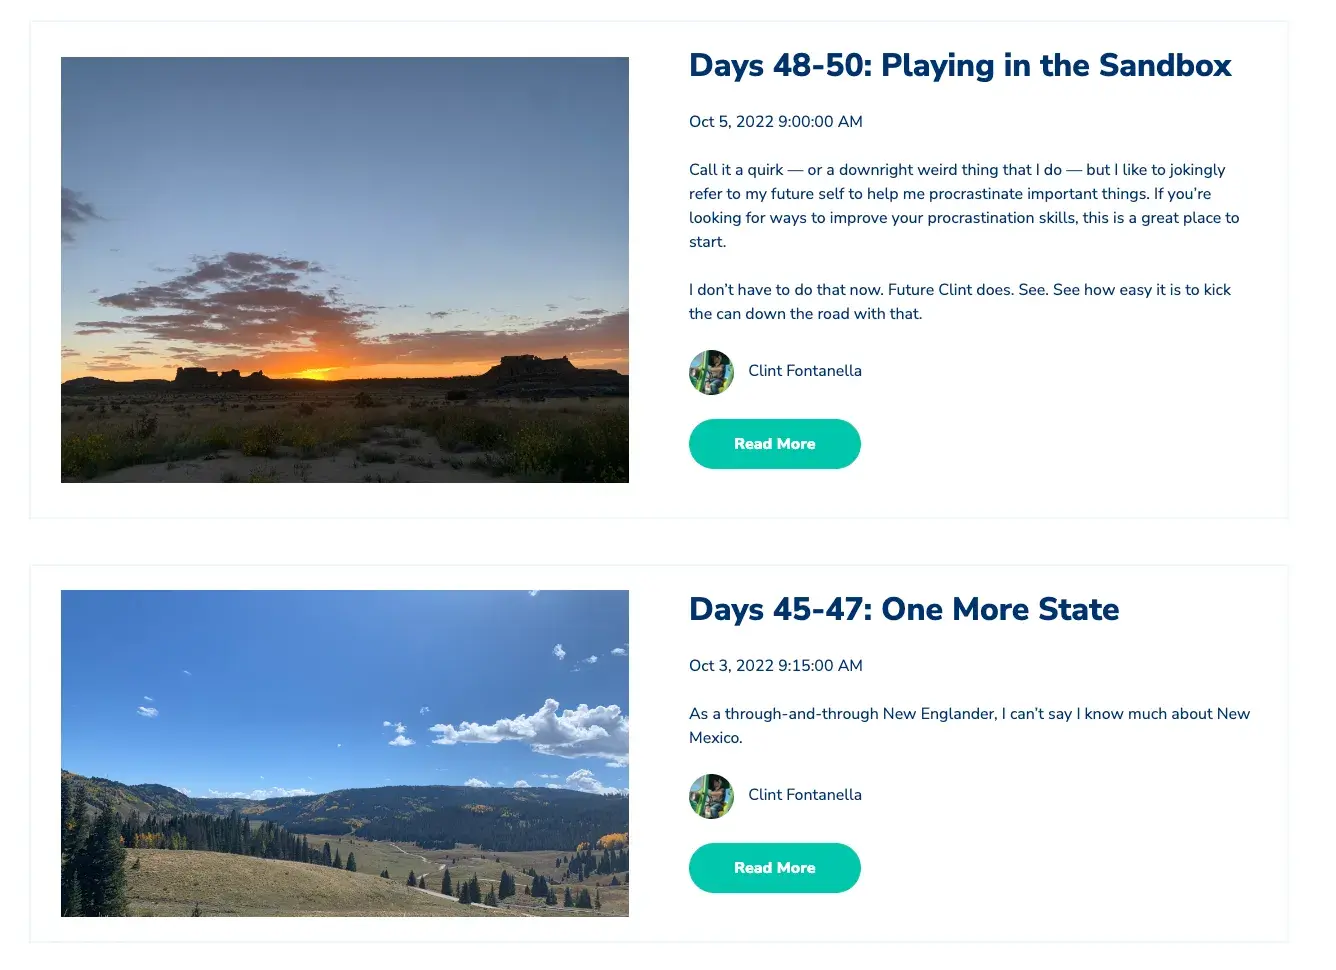
As I mentioned earlier, this blog was a journal that captured different stages of a multi-month adventure. I had a lot of pictures to share – so I wanted a blog template that drew attention to the images on each page.
The template I selected had a very large featured image. This is the first image that the reader sees on the page. It’s also the image that’s associated with the post when it appears on the blog listing page. It’s a crucial element that influences the visitor’s first impression of the post.
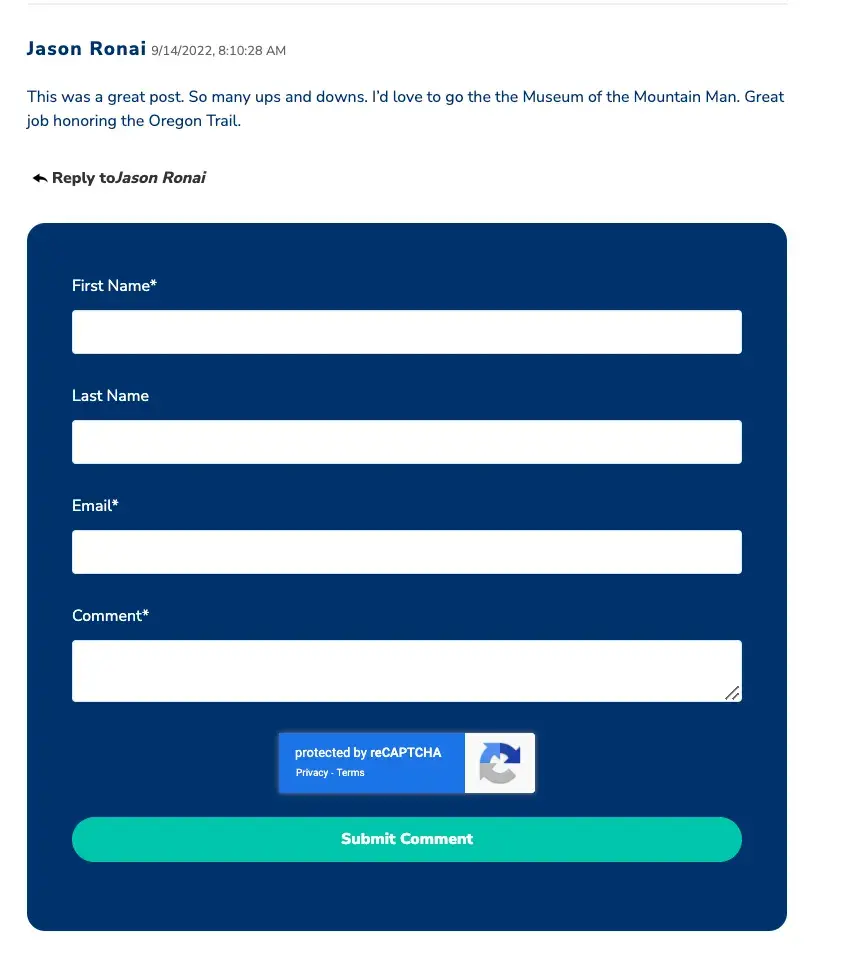
Comments Section
Another feature that I wanted was a comments section. I wanted readers to chime in with their thoughts and opinions on each post.
This template came with a built-in module that produced a form at the bottom of the page. Readers would submit their name, email, and comment which would then be automatically added to the page. As far as quality control goes, it was up to yours truly to moderate each thread.
Fortunately, my readers took it easy on me, but I’ve heard some horror stories from bloggers who opened their work to comments. Whether you do it or not, keep in mind that your comments section should be monitored for negative or inappropriate remarks.
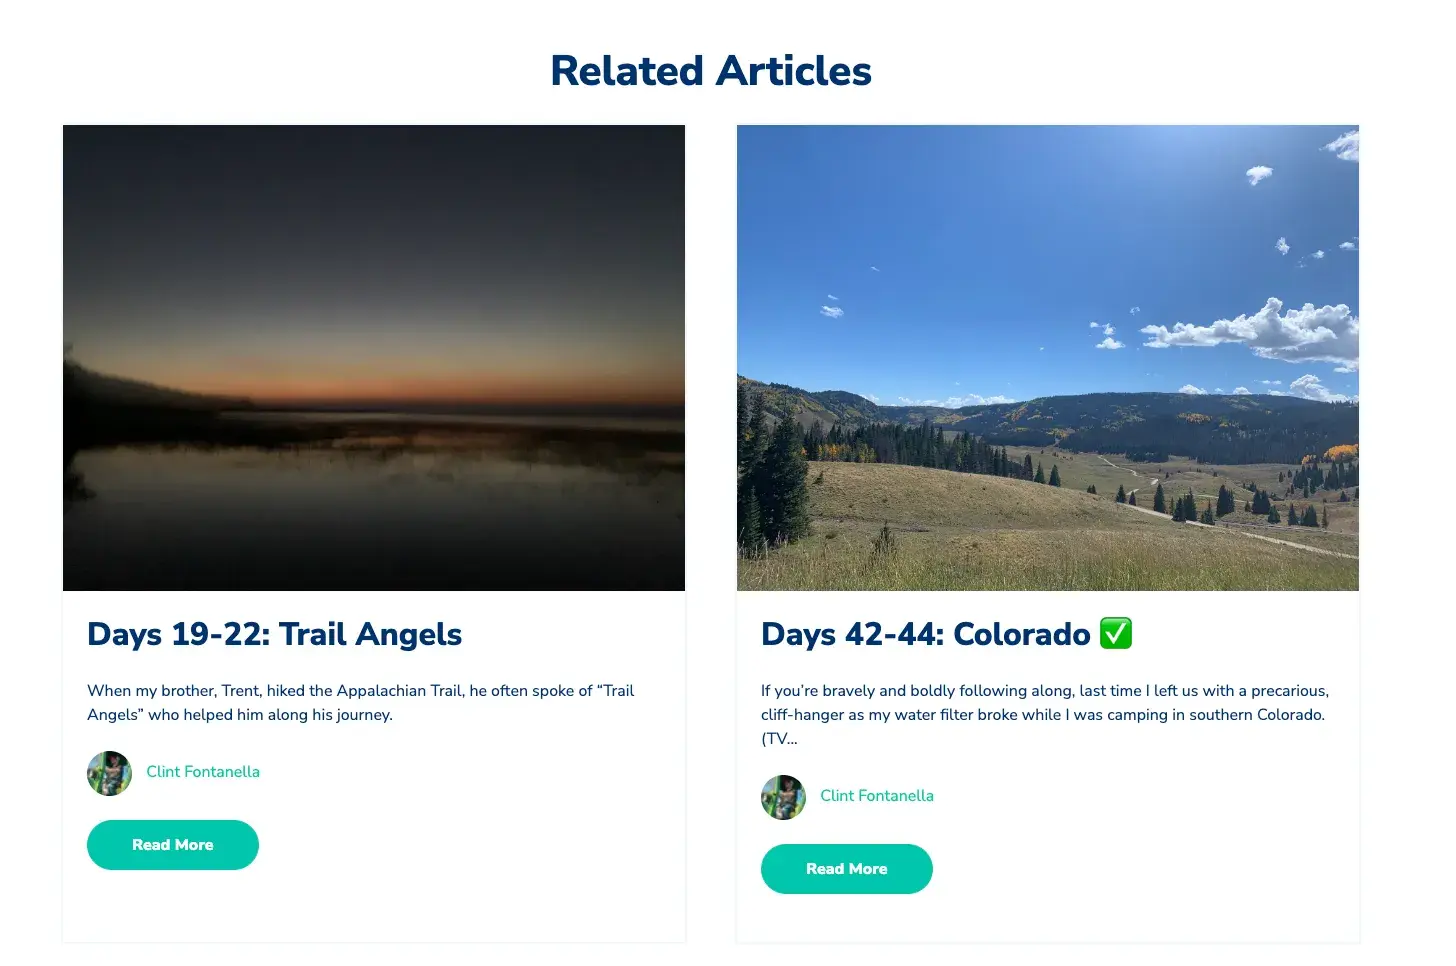
Related Articles
Finally, I didn’t expect folks to follow along with each post – a special thanks to those who did.
I expected readers to sign up for my email newsletter and then check in every now and then to make sure I was still alive. They’d probably read a few posts at a time so it’d be nice if there was a way to jump between pieces after you read each one.
The related articles section did exactly that. It provided a brief snapshot of the next post that readers could move on to. My only qualm was that it didn’t show the most recent post. It seemed like it chose a post at random and I would rather it showed posts in chronological order. There was probably a way to edit this within the source code, but it wasn’t something I was interested in doing at the time.
Once I landed on a template that had all of these features, I was pretty much ready to get started. The hard part from here was actually creating the blog’s content.
If you need help there, we have a pretty nifty marketing blog for that. Instead, below are some tips to help you get started with designing your first company or personal blog.
Tips for Designing Your First Blog
1. Try a blog template.
If you’re like me and you’re looking for a quick and easy way to start a blog, use a pre-built template. Most are easy to work with and there are probably plenty of free ones available in your content management system. You’ll save time, and headaches, and create a site that’s pretty much what you were hoping for.
But, for some of us, “pretty much” isn’t good enough. There might be some details that you just can’t compromise on. In these cases, most templates will let you edit their source code. However, sometimes that’s easier said than done as some templates will be much more complicated than others and developers might not use semantic markup to make their code clear.
Even if you’re proficient in HTML, CSS, and JavaScript, I would still recommend starting with a pre-built template. So long as you can edit its source code, this should save you a bit of time and provide you with a good baseline to start from.
2. Create a list of page elements.
Before I chose a blog template, I put together an informal list of page elements that I wanted to have on my site. For example, I wanted readers to see bright, eye-catching images as soon as they landed on the page. I also wanted people to have the option to comment on individual blog posts and to share my content with their friends.
Building out this list made it easier to pick a template that was best suited for my needs. For instance, since I was going to feature a lot of images, I looked for templates that had plenty of whitespace. I narrowed my search to these specific features that I knew would make my page elements even more effective.
I would advise creating a list of page elements for your blog so you don’t have to code in a new module or spend hours looking for features that don’t exist. The last thing you want is to have to start from scratch with a new template because the one you’ve been working with doesn’t have the options you were hoping for.
3. Maintain a uniform design.
There’s a reason why you only choose one template for your blog: consistency. Your blog should look the same each time a visitor returns to read a new post.
Why?
According to web designer, Lewis Wake, “consistency is the biggest factor that separates a negative experience from a positive one.”
Wake gives the example of navigating a kitchen. When you’re at home, you know where everything is – or at least where it’s supposed to be. It doesn’t take you hours to find a mixing bowl or that cheese that you swore you bought last week.
That’s what consistency does for your audience. They know exactly what to expect and where to find things on your site.
Your blog’s design is not the time to keep people on their toes. Instead, it should be a familiar face that readers can rely on for consistency.
Getting Ready to Publish
What surprised me most about blog design was that you can make it as simple or as complex as you want it to be. If you want to spend hours customizing every detail of your posts, have at it. If you want everything to be set up for you, there’s a predesigned template ready to go.
Both approaches work, it just depends on your level of experience and the amount of time you want to spend building your site. Either way, hopefully, these tips enhance your blog’s design and get you one step closer to launching your first site.

Website Design