
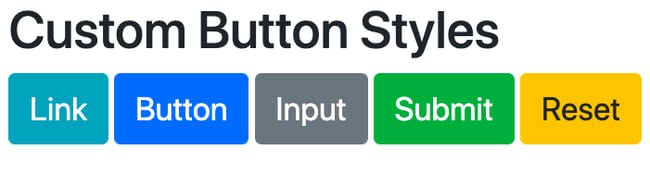
For example, you may want to add a custom color rather than use the 10 color utility classes that Bootstrap provides. Or you may want to change the breakpoints of the Bootstrap grid layout. Or you may want to add custom classes like a .btn-custom class to create completely unique buttons.

Free Guide: 25 HTML & CSS Coding Hacks
Tangible tips and coding templates from experts to help you code better and faster.
- Coding to Convention
- Being Browser-Friendly
- Minimizing Bugs
- Optimizing Performance
Download Free
All fields are required.
Form not available
In this post, we’ll walk through how to customize Bootstrap CSS — and how not to. More specifically, we'll show you how to customize Bootstrap buttons, colors, navbars, and carousels. Click on any of the jump links below to skip to that section.
- How to Override Bootstrap Using CSS
- How to Override Bootstrap Using Sass
- How to Customize Bootstrap Navbar
- How to Customize Bootstrap Carousel
How to Edit Bootstrap CSS
You can edit Bootstrap’s core files directly to make changes to your site — but it’s not recommended.
Making changes directly to the default Bootstrap stylesheet will quickly become difficult to maintain. Not only is it harder to keep track of the changes you made, but it also makes upgrading to a newer version of Bootstrap a lot more painful. When upgrading, you’ll have to replace the core files, so all of your customizations will be lost.
The good news is there’s a way to make changes without editing the Bootstrap source code. Let’s take a closer look at this process below.
Can you override Bootstrap CSS?
If you want to customize your Bootstrap site, leave the source code as-is and simply add custom code in an external stylesheet. The code in this external stylesheet will override the existing styles, as long as it’s set up properly. This set-up process differs slightly depending on how you load Bootstrap on your site.
There are a few different ways to get started with Bootstrap. You can use BootstrapCDN to deliver a cached version of Bootstrap’s compiled CSS and JS to your project, or you can download the precompiled or source code version of Bootstrap.
Below, we’ll walk through the process for customizing each of these Bootstrap versions.
How to Override Bootstrap CSS
You can override the default styles of Bootstrap elements using two possible methods. The first way — using CSS overrides— applies to sites using BootstrapCDN or the pre-compiled versions of Bootstrap. The second — using Sass variables — applies to sites using the source code version of Bootstrap.
Each method is ideal for different use cases. While using CSS overrides is simpler, it is also more time-consuming and difficult to scale. Using Sass variables, on the other hand, is ideal for making more extensive changes across your site — but it’s designed for more advanced users. Let’s take a closer look at both approaches below
How to Override Bootstrap Using CSS Overrides
Whether you’re using BootstrapCDN or the pre-compiled version, you’ll start with a basic HTML5 doctype that looks something like this:
This will be your index.html file. The next step is loading Bootstrap onto your site.
If you’re going with BootstrapCDN, there’s no need to download any files. Simply add the following line of code into the <head> section of your index.html file:
This will load Bootstrap CSS on your site. Note that if you want to load Bootstrap Javascript, then you’ll have to add some code into the <body> section. Since that’s not necessary for this override method, we’ll skip this step.
If you’re going with the compiled version of Bootstrap, then you’ll have to download the compiled CSS files and save them in the same folder as your index.html file. Then add the following line of code into the <head> section of your index.html file:
Once you’ve completed this step, you’ll have successfully linked to Bootstrap’s default stylesheet. Now it’s time to create your own stylesheet.
To do so, simply create another file in the same folder as your index.html file. You can call this file “custom.css" as this is where you’ll put your custom CSS.
But before you start adding to this file, go back to your index.html file and add the following line of code directly under the link to the default stylesheet.
The reference to the custom.css must come after the bootstrap.css for this CSS override customization method to work. Why? Because of the rule of CSS specificity. If HTML elements are targeted by multiple CSS selectors of the same specificity, the last one will override the others and only its style properties will apply. By linking to your custom stylesheet after the default stylesheet, you give it a higher level of specificity.
With this addition, here is what your index.html file will look like if you’re using BootstrapCDN.
And here is what your index.html file will look like if you’re using pre-compiled Bootstrap.
Now you can add any necessary changes to your custom.css file.
Free Guide: 25 HTML & CSS Coding Hacks
Tangible tips and coding templates from experts to help you code better and faster.
- Coding to Convention
- Being Browser-Friendly
- Minimizing Bugs
- Optimizing Performance
Download Free
All fields are required.
Form not available
How to Customize Bootstrap Buttons Using CSS Overrides
Let’s say you want to make the font size of button text bigger on your site. In Bootstrap, the default font size for the .btn class is 16px, as shown below.
 You can change it to, say, 20px by using the CSS font-size property in your stylesheet. Using a class selector, you can change the font size of all elements under the .btn class to 20px using the following code.
Here’s the result:
 Following the same process, you can make as many changes as needed to transform your Bootstrap site. Just make sure to use CSS selectors that are as specific as — or more specific than — those in the bootstrap.css file.
Once you’re done making changes, save the custom.css file. At any time, you can edit or remove any of your custom CSS to revert to Bootstrap’s default styles or redesign your site. You can also easily switch to another version of Bootstrap (as long as it’s a minor release, like 4.4) by replacing the reference to the previous stylesheet in your index.html file.
Now that we understand this customization option and its benefits, let’s look at the other customization option that applies to site owners using the source code version of Bootstrap.
How to Override Bootstrap Using Sass
Downloading the source code version of Bootstrap is the most difficult method for loading Bootstrap on your site because it requires additional tools to set up the source files, like Bootstrap’s official compiled versions. That’s because the latest major release of Bootstrap — Bootstrap 5 — is written in Sass, a CSS extension language that must be compiled for browsers to understand and render it correctly.
You’ll need a Sass compiler and autoprefixer to do this. but, once you invest the time in setting up this version of Bootstrap, you’ll have complete control over your code and Bootstrap’s code. That’s why this method appeals to more advanced users.
Let’s say you choose to download the Bootstrap source code using a package manager like npm, then you’ll unzip the folder and see the following structure.
your-project/
└── scss
│ └── custom.scss
└── node_modules/
└── bootstrap
└── js
└── scss
Notice that the folder labeled “custom.scss” — which will act as your own stylesheet — is separate from the bootstrap/scss folder — which is the default stylesheet. It’s important to note that if you’re not using a package manager, you’ll just want to manually set up a similar file structure that keeps Bootstrap’s source files separate from your own.
As with the other customization method, you still avoid modifying Bootstrap’s core files. What’s different for Sass is that in your own stylesheet, you’ll import Bootstrap Sass files so you can modify them.
Go to your custom.scss file. You can import all Bootstrap’s source Sass by including the following line of code.
Or, you can just pick and choose the files you need. The following code imports the files required for customization.
The code below is for importing optional files. You can always add this or other code in later as you begin customizing.
Once this is set up, you can begin to make changes. There’s no need to add a reference to the stylesheet in your index.html file, so you’ll stay in your custom.scss file.
Instead of adding custom CSS like in the other method, you’ll modify any of the 500 Sass variables and maps in Bootstrap. The complete list can be found in your scss/_variables.scss file, but let’s focus on two specific examples used in Bootstrap’s documentation. Each example demonstrates how to customize Bootstrap colors using either Sass variables or maps.
Free Guide: 25 HTML & CSS Coding Hacks
Tangible tips and coding templates from experts to help you code better and faster.
- Coding to Convention
- Being Browser-Friendly
- Minimizing Bugs
- Optimizing Performance
Download Free
All fields are required.
Form not available
How to Customize Bootstrap Colors Using Sass Variables
By default, the Sass variables for the <body> element in Bootstrap are:
This means that the background color is white and the color is gray. Let’s say you want to change these colors.
See how both variables have a !default flag? That allows you to override the variable’s default value in your own Sass without modifying Bootstrap’s source code. You simply have to copy and paste the variables in your custom.scss file, change their values, and delete the !default flag.
So if I want to change the background-color and color of the <body> element to black and dark gray, respectively, I’d add the following to my custom.scss file.
To successfully make this override across Sass files, I have to finalize the import of Bootstrap’s Sass files by adding the following code after the variables:
This is similar to how you have to include both references to your stylesheets in the <head> of your index.html file in the previous method.
Putting this all together, here’s what your custom.scss file would look like if you imported all the Bootstrap files:
How to Customize Bootstrap Colors Using Sass Maps
Bootstrap also includes Sass maps, which are basically related groups of Sass variables. For example, there are Sass maps for colors and grid breakpoints in Bootstrap. Like Sass variables, Sass maps include the !default flag so they can be overridden without modifying Bootstrap’s source code.
For example, the Sass map for colors in Bootstrap is:
With Sass maps, you have two options — you can modify the map, or you can add to it.
Let’s say you want to change an existing color in the $theme-colors map. You simply have to copy and paste the map key and include only the variables you want to change in your custom.scss file. Then, change their values and delete the !default flag.
So if you wanted to change the primary color to cyan-blue, you’d add the following to your custom Sass file:
This would change the primary theme color across the CSS, so .alert-primary, .text-primary, .bg-primary, and more would all be affected.
And if you wanted to add a new color to the $theme-colors map, then you’d add a new key, use the variable “custom-color”, and assign it a value. The following would add a crimson red to the map.
Now that we understand the two different customization options that Bootstrap users have, let's look at how to customize a Bootstrap navbar and carousel using either CSS or Sass. That way, you can customize these elements no matter what version of Bootstrap you're using.
How to Customize Bootstrap Navbar
Let’s say I create a standard Bootstrap navbar with links to a homepage, features page, and pricing page that collapses its content behind a hamburger button at the small breakpoint (576px). Here’s how it looks when expanded.

Now let’s look at how to customize it using CSS overrides or Sass variables.
Using CSS
Let’s say I want to change the navbar-brand, which typically designates a company, product, or project name. By default, the navbar-brand has a font color of black and a font size of 20px.
You can change it to a shade of purple and 24px by using the CSS color and font-size properties in your stylesheet respectively. You’ll use two class selectors: the class name of the nav element and anchor element that is the navbar-brand. Below is the code.
Here’s the result:

Note: In the HTML, I replaced “Navbar” in between the <a></a> tags with “MyCompany” name as well.
The challenge of using CSS overrides is that you have to understand CSS specificity and know what selectors are used in the default Bootstrap stylesheet (bootstrap.css) so you can use more specific ones.
And, even if you can do that, you’re still limited in your customization options. Using CSS overrides makes one-off changes to individual elements or groups of elements. And it doesn’t change the appearance of elements in pseudo-states like ":hover", ":active", and “disabled”.
If you’d like to make more extensive changes to your stylesheet, then you’d need to use Sass.
Using Sass
Let’s say I want to change the font color of the navbar items and use a different color for when they are active and when a user hovers over them. Here are the default Sass variables for a navbar-light element in Bootstrap:
That means by default, the font color of the items in a light navbar is black. Let’s change these colors.
Remember that the !default flag means you can override the variable’s default value in your own Sass without modifying Bootstrap’s source code. Just copy and paste the variables in your custom.scss file, change their values, and delete the !default flag.
Free Guide: 25 HTML & CSS Coding Hacks
Tangible tips and coding templates from experts to help you code better and faster.
- Coding to Convention
- Being Browser-Friendly
- Minimizing Bugs
- Optimizing Performance
Download Free
All fields are required.
Form not available
So if I want to change the color of the navbar items to the equivalent of the Sass variable $gray-900, I’d use the hex code #212529. And if I wanted to change the color of the navbar items when active or when a user hovering over them to the Sass variable $indigo, then I’d use the hex code #6610f2. Here’s the total code I’d add to my custom.scss file.
Here’s the result:

How to Customize Bootstrap Carousel
Let’s say I create a standard Bootstrap carousel with images of puppies. Here’s how it looks.

Now let’s look at how to customize it using CSS overrides or Sass variables or maps.
Using CSS
Let’s say I want to change the height of the images in the carousel slider. I can do so using the type selector img. Below is the code.
Here’s the result:

Using Sass
Let’s say I want to change the style of the three indicators at the bottom. Here are the default Sass variables for the width and height of the carousel indicators:
That means by default, the width of the indicators is 30px and the height is 3px.
Let’s say I want to increase both the width and height to make these indicators stand out more. I’d copy and paste the variables in my custom.scss file, change their values, and delete the !default flag. Here’s the code:
Here’s the result:

Creating and Customizing a Bootstrap Site
Whether you’re using CSS overrides or Sass variables, you can unlock hundreds of customization options in Bootstrap. This way, you can not only build a responsive site — you can also design it to suit your brand. You’ll just need to be comfortable with HTML and CSS to do so.
Editor's note: This post was originally published in June 2020 and has been updated for comprehensiveness.

CSS


![How to Create Scrolling Text With CSS [+ Code Examples]](https://53.fs1.hubspotusercontent-na1.net/hubfs/53/Google%20Drive%20Integration/scrolling%20text%20css.jpeg)